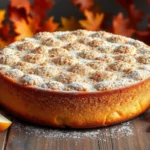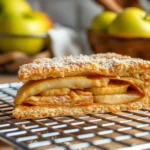
We’ve all been there – craving something sweet and delicate that’ll impress guests without requiring hours in the kitchen. Butterfly cakes are the perfect solution! These charming little treats transform ordinary cupcakes into elegant, wing-shaped delights that look far more complicated than they actually are.
Originally a British teatime favorite, butterfly cakes get their whimsical name from the way their tops are cut and arranged to resemble delicate butterfly wings. We love how these miniature masterpieces combine the comfort of a classic sponge cake with the visual appeal of fancy pastry shop treats.
Ingredients
Creating these delightful butterfly cakes requires basic baking ingredients that most home bakers already have in their pantries. We’ve organized our ingredient list into three simple categories to make your preparation effortless.
For the Sponge Cakes
- 1 cup (125g) all-purpose flour, sifted
- 1 teaspoon baking powder
- 1/4 teaspoon salt
- 1/2 cup (115g) unsalted butter, softened at room temperature
- 3/4 cup (150g) granulated sugar
- 2 large eggs, at room temperature
- 1 teaspoon vanilla extract
- 1/2 cup (120ml) whole milk, at room temperature
For the Buttercream Filling
- 1/2 cup (115g) unsalted butter, softened
- 2 cups (240g) powdered sugar, sifted
- 2 tablespoons heavy cream or whole milk
- 1 teaspoon vanilla extract
- Pinch of salt
- Food coloring (optional)
For Decoration
- 2 tablespoons strawberry jam or raspberry jam
- Powdered sugar for dusting
- Fresh berries (optional)
- Edible flowers or sprinkles (optional)
Equipment Needed

We’ve organized the essential tools you’ll need to create these delightful butterfly cakes. The equipment list is straightforward and most items are likely already in your kitchen.
Baking Essentials
12-hole muffin tin serves as the foundation for our butterfly cakes. This standard size ensures even baking and creates the perfect portion for each delicate treat.
Paper cupcake cases protect the cakes during baking while making removal effortless. We recommend using standard size cases that fit snugly in your muffin tin.
Mixing and Measuring Tools
Mixing bowl allows us to combine all ingredients thoroughly. A medium to large bowl provides adequate space for proper mixing without spillage.
Kitchen scales ensure precise measurements for consistent results every time. Accurate ingredient ratios are crucial for achieving the perfect sponge texture.
Wooden spoon or electric mixer helps create smooth batter efficiently. While a wooden spoon works perfectly well an electric mixer saves time and effort.
Specialized Tools
Sharp knife or teaspoon becomes essential for creating the signature butterfly effect. We use this tool to carefully remove the top portion of each cooled cake.
Piping bag or spoon helps apply buttercream filling neatly. A piping bag creates professional looking results while a spoon offers a simpler approach for beginners.
| Equipment Category | Essential Items | Optional Upgrades |
|---|---|---|
| Baking | 12-hole muffin tin, paper cases | Silicone muffin cups |
| Mixing | Bowl, scales, wooden spoon | Electric mixer, measuring cups |
| Finishing | Sharp knife, spoon | Piping bag, offset spatula |
Instructions

Transform your kitchen into a delightful bakery with these straightforward steps that create beautiful butterfly cakes. We’ll guide you through each stage to ensure perfect results every time.
Prep the Baking Tins
Heat your oven to 180°C (350°F) or 160°C (325°F) for fan-assisted ovens. Line a cupcake tin with 10 paper cases to ensure easy removal and prevent sticking. Position the lined tin on the middle rack of your oven for even heat distribution.
Make the Sponge Batter
Combine butter, sugar, eggs, vanilla, flour, baking powder, and milk in a large mixing bowl. Beat the mixture until smooth and well combined using either an electric mixer on medium speed for 2 minutes or a wooden spoon with vigorous stirring. The batter should appear creamy and lump-free when properly mixed.
Bake the Cupcakes
Divide the batter evenly between the prepared cases using a spoon or ice cream scoop. Fill each case about two-thirds full to allow room for rising. Bake for approximately 15 minutes or until the tops turn golden brown and spring back when lightly touched. Remove from oven and cool completely on a wire rack before proceeding.
Prepare the Buttercream
Beat icing sugar, butter, and vanilla together in a clean bowl until the mixture becomes pale and fluffy. Add extra milk gradually if needed to achieve a smooth, pipeable consistency. The buttercream should hold its shape when lifted with a spoon yet spread easily.
Create the Butterfly Wings
Slice off the top of each cooled cupcake using a sharp knife, cutting horizontally about 5mm from the surface. Cut each removed top in half to create two semi-circular pieces. These halves will serve as your butterfly wings, so handle them gently to maintain their shape.
Assemble the Butterfly Cakes
Pipe or spread a generous amount of buttercream onto the flat surface of each cupcake base. Position the two semi-circular wing pieces at slight angles on the buttercream to resemble butterfly wings. Add a small blob of jam between the wings and finish with colorful sprinkles for extra visual appeal.
Decorating Tips

Creating stunning butterfly cakes requires attention to decorative details that transform simple cupcakes into elegant treats. We’ll guide you through professional techniques that elevate your cakes from basic to bakery-quality.
Piping Techniques
Buttercream Details form the foundation of beautiful butterfly cake decoration. We recommend using piping bags with small tips to create intricate details like the butterfly’s body or delicate antennae. Position your piping bag at a 45-degree angle for optimal control when adding these fine features.
Swirl Patterns add texture and visual interest to your cake’s surface. We use an offset spatula to create elegant swirly patterns that mimic the natural flow of butterfly wings. Start from the center and work outward in smooth circular motions to achieve professional-looking results.
| Piping Technique | Tool Required | Best Application |
|---|---|---|
| Fine Details | Small-tip piping bags | Butterfly body and antennae |
| Swirl Patterns | Offset spatula | Wing surface texturing |
| Buttercream Base | Turntable access | Even surface coverage |
Wing Placement
Cake Structure requires strategic arrangement for authentic butterfly appearance. We position two cakes in a wing shape with buttercream frosting acting as the adhesive to hold them together securely. The remaining two cakes sit on top to complete the distinctive butterfly body formation.
Fondant Coverage creates smooth professional surfaces perfect for detailed decoration. We roll out fondant to even thickness and carefully drape it over the arranged cakes. This technique provides the ideal canvas for applying additional decorative elements and ensures clean lines throughout your design.
Final Touches
Butterfly Body serves as the centerpiece that ties your design together. We create the body using rolled-out fondant shaped into an elongated oval and attach it securely to the cake structure with a toothpick. This central element anchors the entire butterfly design.
Gold Accents provide luxurious finishing touches that catch the light beautifully. We paint gold outlines on the butterfly’s wings or body using edible gold paint for an upscale bakery appearance. These metallic details transform simple cupcakes into special occasion centerpieces.
Fondant Leaves in various colors add natural elements to complement the butterfly theme. We attach these decorative leaves to the wings using corn syrup as an edible adhesive. Different leaf colors create depth and visual interest while maintaining the garden-inspired aesthetic.
Storage Instructions

Proper storage keeps our beautiful butterfly cakes fresh and delicious for several days after assembly. We recommend placing the finished cakes in an airtight container immediately after decorating to preserve their texture and flavor.
Refrigeration Guidelines
Due to the dairy content in buttercream and cream fillings, we must store butterfly cakes in the refrigerator at all times. The cold temperature prevents spoilage and maintains food safety standards. We can expect our cakes to stay fresh for 2 to 3 days when properly refrigerated.
For gluten-free versions with buttercream filling, storage extends up to 3 to 4 days in the refrigerator when well-covered. This longer storage time applies specifically to well-sealed containers that prevent air exposure.
Serving Temperature Tips
We should remove butterfly cakes from the refrigerator about 1 hour before serving. This timing allows the cakes to reach room temperature, which enhances both flavor and texture. Cold buttercream can taste muted and feel dense, while room temperature filling provides the ideal creamy consistency.
Freezing Options
Plain cupcakes without cream or jam fillings freeze exceptionally well for future use. We can prepare the sponge bases ahead of time and defrost them as needed for assembly. This method works perfectly for meal planning or batch preparation.
But, we cannot freeze assembled butterfly cakes with dairy fillings, as the cream and buttercream will separate upon thawing.
Storage Conditions
| Storage Method | Duration | Temperature Requirements |
|---|---|---|
| Refrigerated (assembled) | 2-3 days | Keep consistently cold |
| Refrigerated (gluten-free) | 3-4 days | Well-covered container |
| Frozen (plain cakes only) | Up to 3 months | 0°F or below |
| Room temperature serving | 1 hour maximum | Remove before serving |
Warm or humid environments require extra attention to refrigeration. We must never leave assembled butterfly cakes at room temperature for extended periods, as the dairy components can spoil quickly in these conditions.
Make-Ahead Tips

Preparing butterfly cakes ahead of time transforms a delightful baking project into a stress-free experience. We recommend several strategic approaches that allow you to enjoy fresh butterfly cakes without last-minute rushing.
Cake Batter Preparation
Preparing the batter a day in advance streamlines your baking schedule significantly. We suggest mixing butter, sugar, eggs, flour, and vanilla extract according to our recipe instructions. Store the prepared batter in the refrigerator until you’re ready to bake. This method ensures fresh-baked cupcakes while reducing active preparation time on serving day.
Component Preparation Strategy
Making buttercream and selecting jam ahead of time simplifies the decorating process considerably. We find that buttercream can be prepared up to three days in advance and stored in the refrigerator. Allow the buttercream to return to room temperature before use for optimal piping consistency. Your chosen jam can be portioned into small bowls for easy access during assembly.
Cupcake Base Timeline
Baking the plain cupcakes up to two days before assembly maintains optimal texture and freshness. We store cooled cupcakes in airtight containers at room temperature to preserve moisture. Cover them securely to prevent staleness while maintaining the ideal crumb structure for cutting butterfly wings.
Assembly Scheduling
Creating the butterfly effect works best when completed within 24 hours of serving. We slice the cupcake tops and cut them into wing shapes the day before your event. Store the prepared wings in sealed containers to maintain their shape and prevent drying out.
Final Assembly Timeline
| Task | Timing | Storage Method |
|---|---|---|
| Batter preparation | 1 day ahead | Refrigerated |
| Buttercream making | 3 days ahead | Refrigerated |
| Cupcake baking | 2 days ahead | Room temperature, covered |
| Wing cutting | 1 day ahead | Airtight container |
| Final assembly | Same day | Refrigerated until serving |
Assembling the complete butterfly cakes on the morning of your event ensures peak freshness and visual appeal. We pipe the buttercream, position the wings, add jam dollops, and apply final decorations just hours before serving. This timing guarantees that your butterfly cakes maintain their elegant appearance and delicious taste when guests arrive.
Conclusion
We’ve shown you how butterfly cakes can transform your ordinary baking routine into something truly magical. With basic ingredients and simple techniques you’ll create desserts that look like they came straight from a professional bakery.
The beauty of these charming treats lies in their versatility – whether you’re hosting a tea party or celebrating a special occasion they’re guaranteed to impress your guests. Plus with our make-ahead tips and storage guidance you can enjoy stress-free baking that fits your schedule.
Now it’s time to grab your apron and start creating these delightful butterfly cakes. Your kitchen will smell amazing and your family will be asking for these elegant treats again and again!
Frequently Asked Questions
What are butterfly cakes?
Butterfly cakes are charming British teatime treats made by cutting cupcake tops and arranging them to resemble butterfly wings. They combine classic sponge cake with elegant presentation, featuring buttercream filling between the “wings” and decorative toppings. These delightful desserts offer bakery-quality appearance with simple home preparation.
What ingredients do I need to make butterfly cakes?
You’ll need basic sponge cake ingredients: flour, sugar, eggs, butter, milk, baking powder, and vanilla extract. For buttercream filling, gather butter, powdered sugar, and vanilla. Decoration options include jam, powdered sugar, fresh berries, edible flowers, and colorful sprinkles for visual appeal.
What equipment is essential for making butterfly cakes?
Essential equipment includes a 12-hole muffin tin, paper cupcake cases, mixing bowl, kitchen scales, and wooden spoon or electric mixer. You’ll also need a sharp knife or teaspoon for creating wings and a piping bag or spoon for buttercream application. These basic tools ensure successful butterfly cake creation.
How do I create the butterfly wing effect?
After cupcakes cool completely, slice off the rounded tops using a sharp knife. Cut each top in half to create two wing pieces. Pipe or spoon buttercream into the hollow center, then gently position the wing halves at angles to resemble butterfly wings spreading outward.
How should I store butterfly cakes?
Store butterfly cakes in an airtight container in the refrigerator due to dairy content in buttercream. They’ll stay fresh for 2-3 days when properly refrigerated. Remove from fridge one hour before serving for optimal flavor and texture. Avoid freezing assembled cakes with dairy fillings.
Can I make butterfly cakes ahead of time?
Yes! Prepare cake batter up to one day ahead and refrigerate. Buttercream can be made three days in advance. Bake cupcakes up to two days prior and store at room temperature. Cut wing shapes the day before, but complete final assembly on serving day for best results.
What decorating techniques make butterfly cakes look professional?
Use piping techniques to create butterfly bodies and antennae with buttercream. Add swirl patterns for texture and secure wings properly for authentic butterfly appearance. Consider fondant techniques for smooth finishes, gold accents, and fondant leaves to transform simple cupcakes into stunning centerpieces.
How long do butterfly cakes last?
Properly stored butterfly cakes last 2-3 days in the refrigerator, while gluten-free versions can extend to 3-4 days. Plain unfrosted cupcakes can be frozen for up to three months. Always maintain proper storage conditions, especially in warm or humid environments, to ensure food safety.