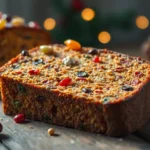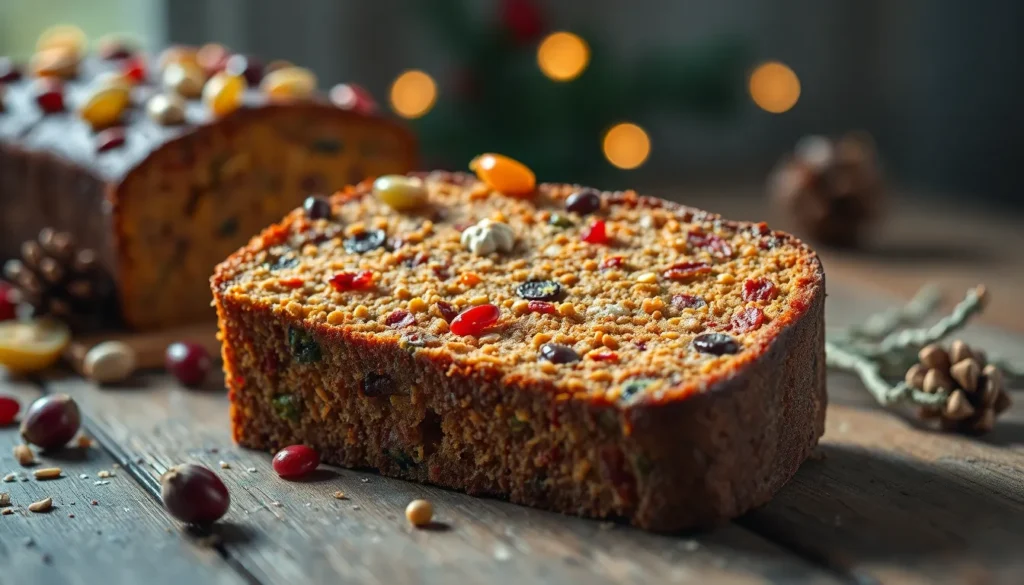
We’ve all heard the jokes about fruitcake being passed around for decades, but we’re here to change that narrative with our easy fruit cake recipe. This isn’t your great-aunt’s dense doorstop – it’s a moist, flavorful cake that’ll actually disappear from your holiday table.
Our simplified approach takes the intimidation out of traditional fruitcake making. We’ve streamlined the process without sacrificing the rich, festive flavors that make this cake a holiday classic. Instead of soaking fruits for weeks, we use a quick technique that infuses every bite with incredible taste.
What makes this recipe truly special is how it transforms simple pantry ingredients into something extraordinary. The combination of dried fruits, warm spices, and our secret ingredient creates a cake that’s both nostalgic and surprisingly modern. Whether you’re a fruitcake skeptic or a longtime fan, this easy fruit cake will become your go-to recipe for the holidays.
Ingredients
This easy fruit cake recipe requires simple pantry staples and dried fruits that come together beautifully without any complicated preparation. We’ve organized the ingredients into two main categories to streamline your baking process.
For the Fruit Mixture
- 2 cups mixed dried fruit (raisins, cranberries, chopped apricots, and dates)
- 1/2 cup chopped walnuts or pecans
- 1/4 cup brandy or orange juice
- 2 tablespoons all-purpose flour
- 1 teaspoon vanilla extract
- 1/2 teaspoon ground cinnamon
- 1/4 teaspoon ground nutmeg
For the Cake Batter
- 2 1/2 cups all-purpose flour
- 1 teaspoon baking powder
- 1/2 teaspoon salt
- 1/2 cup unsalted butter, softened
- 3/4 cup brown sugar, packed
- 3 large eggs, room temperature
- 1 cup whole milk
- 1/4 cup honey
- 1 teaspoon vanilla extract
- 1/2 teaspoon almond extract
- Zest of 1 orange
- Zest of 1 lemon
Equipment Needed
 2")
Making our easy fruit cake requires just a few basic tools that most home bakers already have in their kitchen. We’ll walk you through each piece of equipment to ensure your baking experience goes smoothly from start to finish.
Two 9×5 inch loaf pans form the foundation of our equipment list. These standard sized pans create the perfect shape for our fruit cake and ensure even baking throughout. We recommend using metal pans for the best heat distribution during the extended baking time.
Parchment paper becomes essential for lining those loaf pans. This simple step prevents our precious cake from sticking to the pan bottom and sides. We always cut pieces that extend slightly over the pan edges to create easy lifting tabs.
Multiple mixing bowls help us organize the baking process efficiently. We need at least two bowls – one for combining our dry ingredients and another for the wet ingredients. Having a third bowl available for the fruit mixture keeps everything well organized.
An electric mixer makes quick work of creaming butter and sugar together. Whether we use a hand mixer or stand mixer depends on personal preference. Both options achieve the light and fluffy texture we need for our cake batter.
A wire cooling rack provides proper air circulation once our cakes finish baking. This prevents soggy bottoms and ensures our fruit cake cools evenly. We place the rack on a clean kitchen towel to catch any drips during the cooling process.
These essential tools work together to create the perfect environment for baking our show stopping fruit cake without any unnecessary complications.
Instructions
 4")
Our easy fruit cake method transforms simple ingredients into a spectacular dessert through three straightforward steps. We’ll guide you through preparing the fruit mixture, creating the perfect batter, and combining everything for optimal results.
Prep the Fruit
We start by combining our 2 cups of mixed dried fruit with 1/2 cup of chopped nuts in a medium saucepan. Add 1/4 cup of brandy or orange juice to the mixture and bring it to a gentle simmer over medium heat. Cook the fruit mixture for 3-5 minutes until it thickens slightly and the liquid reduces.
Remove the saucepan from heat and stir in 1 teaspoon of vanilla extract along with our spice blend. Let this aromatic mixture cool completely while we prepare the cake batter. The fruit will absorb the flavors and become beautifully plump during this cooling period.
Make the Cake Batter
We begin by whisking together 2 cups of all-purpose flour, 1 teaspoon of baking powder, and 1/2 teaspoon of salt in a large mixing bowl. Set this dry mixture aside for later use.
Using our electric mixer, we cream the softened butter with 1 cup of brown sugar until the mixture becomes light and fluffy. This process takes approximately 3-4 minutes on medium speed. Beat in the eggs one at a time, ensuring each egg incorporates fully before adding the next.
Mix in 1/4 cup of honey, 1/2 cup of whole milk, and our citrus zests until the wet ingredients combine smoothly. The batter should have a rich golden color and creamy consistency at this stage.
Combine and Bake
We fold the cooled fruit mixture into our prepared dry ingredients, coating each piece thoroughly with flour. This coating prevents the fruit from sinking during baking.
Gradually add the wet ingredients to the fruit and flour mixture, stirring gently until everything just combines. Avoid overmixing to maintain our cake’s tender texture.
Divide the batter evenly between our two prepared loaf pans lined with parchment paper. Preheat the oven to 275°F and place the pans on the center rack. Bake for approximately 2 hours or until a cake tester inserted into the center comes out clean.
Cool the cakes in their pans for 10 minutes before transferring to wire racks. Complete cooling takes about 1 hour and ensures our fruit cakes maintain their perfect moisture and structure.
Directions for Cooling and Storage
 6")
Proper cooling ensures our easy fruit cake maintains its perfect texture and prevents condensation from forming inside the storage container. We begin by leaving the freshly baked cakes in their pans for 15 minutes after removing them from the oven. This initial cooling period allows the structure to set while the residual heat continues to cook the interior gently.
After the initial pan cooling we carefully turn the cakes out onto wire racks. Complete cooling takes approximately 2 to 3 hours at room temperature. The wire racks provide essential air circulation around the entire cake preventing moisture buildup on the bottom surface.
Once our fruit cakes reach room temperature we have several storage options depending on our timeline. For immediate consumption within 3 to 4 days we wrap each cake tightly in plastic wrap or aluminum foil. Room temperature storage works perfectly for this short duration while maintaining the cake’s moisture and flavor.
Long term storage requires a different approach for optimal results. We double wrap each cooled cake first in plastic wrap then in aluminum foil before placing in freezer safe containers. Properly wrapped fruit cakes maintain their quality in the freezer for up to 6 months.
| Storage Method | Duration | Temperature | Wrapping Required |
|---|---|---|---|
| Room temperature | 3-4 days | 68-72°F | Single wrap plastic/foil |
| Refrigerator | 1-2 weeks | 35-40°F | Double wrap recommended |
| Freezer | 6 months | 0°F or below | Double wrap plus container |
Enhanced flavor development occurs when we allow the cakes to rest for 24 hours before serving. This resting period lets the spices meld with the fruit flavors creating a more complex taste profile. For those who prefer traditional methods we can brush the cooled cakes with additional brandy or orange juice before wrapping to intensify the flavors further.
Thawing frozen fruit cakes requires patience for best results. We transfer the wrapped cake from freezer to refrigerator 8 hours before serving. This gradual thawing process preserves the cake’s texture and prevents condensation from affecting the surface.
Make-Ahead Tips
 8")
Planning ahead transforms fruitcake preparation from a rushed holiday task into a relaxed baking experience. We recommend starting our fruit mixture preparation up to three days before baking day. The dried fruits can be soaked in brandy or orange juice and stored in the refrigerator, allowing them to absorb maximum flavor while we handle other holiday preparations.
Our cake batter components can also be prepped in advance. We measure and sift all dry ingredients into labeled containers up to one week before baking. Room temperature ingredients cream together more effectively, so we remove butter and eggs from the refrigerator 2 to 3 hours before mixing begins.
Baked fruitcakes actually improve with time, making them ideal candidates for advance preparation. We store our finished cakes at room temperature for up to two weeks when wrapped tightly in plastic wrap and aluminum foil. Refrigerated storage extends their life to one full month, while proper freezing techniques preserve quality for up to six months.
| Storage Method | Duration | Storage Requirements |
|---|---|---|
| Room Temperature | 2 weeks | Tightly wrapped in plastic and foil |
| Refrigerated | 1 month | Double wrapped in airtight container |
| Frozen | 6 months | Freezer-safe container with tight seal |
Aging enhances our fruitcake’s flavor profile significantly. We wrap cooled cakes in cheesecloth that has been lightly soaked in rum or brandy for traditional aging. This process allows flavors to meld and intensify over several weeks, creating the complex taste profile that distinguishes exceptional fruitcakes from ordinary ones.
Microwave soaking offers a quick alternative when time constraints prevent overnight fruit preparation. We combine our dried fruits with apple juice or brandy in microwave-safe bowls, heating in 30-second intervals followed by 10-minute resting periods. This method reduces soaking time from overnight to just one hour while still achieving excellent fruit hydration.
Serving Suggestions
 10")
Our easy fruit cake shines in many serving scenarios that showcase its versatility and rich flavor profile. The beauty of this recipe lies in its adaptability to different preferences and occasions.
Temperature preferences play a crucial role in the serving experience. We recommend serving the cake at room temperature to fully appreciate its complex flavors and moist texture. Some prefer their slice slightly warmed, which intensifies the aromatic spices and creates a more pronounced fruit flavor. Others enjoy it chilled from the refrigerator, particularly during warmer months when a cooler dessert feels more refreshing.
Fresh presentation offers the most immediate gratification after our careful preparation process. Slice the cake into generous portions using a sharp knife, ensuring clean cuts that showcase the beautiful distribution of fruits and nuts throughout. Each slice reveals the marbled appearance of dried fruits nestled within the golden crumb structure.
Enhanced serving options elevate this traditional cake to restaurant quality presentations. A light dusting of powdered sugar adds visual appeal and a subtle sweetness contrast. Drizzle warm honey over individual slices to complement the existing honey notes in our recipe. Fresh whipped cream or vanilla ice cream provides a cool, creamy counterpoint to the dense, fruit laden texture.
Garnish possibilities extend the visual and flavor appeal significantly. Toasted nuts sprinkled on top echo the chopped nuts within the cake while adding textural contrast. Orange or lemon zest curls create an elegant finish that reinforces the citrus notes we incorporated during baking. Candied fruit pieces arranged artfully on each plate mirror the internal fruit components.
Beverage pairings complete the serving experience with complementary flavors. Strong coffee or espresso cuts through the richness while highlighting the spice notes. Black tea, particularly Earl Grey, provides aromatic enhancement. For special occasions, dessert wines like port or sherry echo traditional fruit cake serving customs. Non alcoholic options include spiced cider or orange juice, which reinforce the fruit flavors without competing with the cake’s complexity.
Special occasion adaptations transform our easy fruit cake into centerpiece worthy presentations. During holidays, arrange slices on festive platters with seasonal garnishes. For afternoon tea service, cut smaller, elegant portions and serve alongside other traditional treats. Birthday celebrations benefit from a light glaze or simple frosting application to create a more cake like appearance while maintaining the fruit cake’s distinctive character.
Storage Instructions
 12")
Proper storage transforms your freshly baked fruitcake into a dessert that improves with time. We recommend following exact guidelines based on how long you plan to keep your cake.
Short-Term Storage (Up to 4 Weeks)
Room temperature storage works perfectly for cakes we plan to enjoy within a month. We place our fruitcake in an airtight container and store it at room temperature. Regular inspection ensures the cake maintains its quality without developing mold or unwanted odors.
| Storage Method | Duration | Container Type | Temperature |
|---|---|---|---|
| Airtight container | Up to 4 weeks | Sealed plastic or glass | Room temperature |
| Plastic wrap | 3-4 days | Individual wrapping | Room temperature |
Medium-Term Storage (Up to 4 Months)
Refrigeration extends our fruitcake’s freshness significantly when we need longer storage periods. We wrap the cake thoroughly in plastic wrap or aluminum foil before placing it in an airtight container. This double protection method keeps the cake fresh in the refrigerator for approximately two months.
Long-Term Storage (Up to 12 Months)
Freezing preserves our fruitcake for extended periods without compromising flavor or texture. We wrap the cake tightly with aluminum foil or plastic wrap first. Then we place it in a freezer-safe container or bag before storing it in the freezer. Frozen fruitcakes maintain their quality for up to a year when properly wrapped.
Essential Storage Tips
Moisture retention becomes crucial for maintaining our fruitcake’s tender texture. We use plastic wrap or aluminum foil to create a protective barrier that prevents the cake from drying out. Regular monitoring helps us catch any signs of spoilage early regardless of our chosen storage method.
Temperature consistency plays a vital role in preservation success. We avoid storing our fruitcake in areas with fluctuating temperatures or high humidity. Consistent cool temperatures help maintain the cake’s structure and prevent condensation buildup that could lead to spoilage.
Conclusion
We’ve shown you that fruitcake doesn’t have to be the holiday dessert everyone avoids. This easy recipe proves that with the right approach and simple techniques you can create a moist flavorful cake that’ll change minds and become a new tradition.
The beauty of this recipe lies in its flexibility and forgiving nature. Whether you’re making it weeks ahead for the holidays or whipping it up for unexpected guests this fruitcake delivers consistent delicious results every time.
Now it’s time to gather your ingredients preheat that oven and discover why fruitcake deserves a place at your table. Your family and friends will be asking for the recipe before they finish their first slice.
Frequently Asked Questions
What makes this fruitcake recipe different from traditional ones?
This recipe eliminates the lengthy fruit soaking process while still delivering rich, festive flavors. It uses a simplified approach with basic pantry ingredients, creating a lighter and more approachable fruitcake that appeals to both skeptics and fans. The result is far from the dense, heavy versions people typically associate with fruitcake.
What equipment do I need to make this fruitcake?
You’ll need two 9×5 inch metal loaf pans, parchment paper, multiple mixing bowls, an electric mixer, and a wire cooling rack. The metal pans ensure even baking, while the electric mixer helps achieve the proper butter and sugar texture. These basic tools create a smooth baking experience.
How long does it take to bake the fruitcake?
The fruitcake bakes at 275°F for approximately 2 hours. After baking, allow the cakes to cool in their pans for 15 minutes, then transfer to wire racks for 2-3 hours at room temperature. The low temperature ensures even cooking throughout the dense cake.
Can I make the fruitcake ahead of time?
Yes! You can prepare the fruit mixture up to 3 days in advance and store it refrigerated. Dry ingredients can be pre-measured and stored for up to a week. Baked fruitcakes actually improve with time and can be stored for weeks or even months using proper wrapping techniques.
How should I store the finished fruitcake?
For short-term storage (3-4 days), wrap tightly in plastic wrap at room temperature. For longer storage, double-wrap and refrigerate for up to 4 months or freeze for up to 12 months. Always ensure airtight wrapping to maintain moisture and prevent spoilage.
What’s the best way to serve fruitcake?
Serve at room temperature to fully appreciate the complex flavors. Slice to showcase the fruit and nut distribution, then dust with powdered sugar or drizzle with honey. Pair with strong coffee, black tea, or dessert wines. Some prefer it slightly warmed or chilled.
How can I enhance the fruitcake’s flavor?
Let the cake rest for 24 hours before serving to allow flavors to develop. Brush with additional brandy or orange juice for a traditional touch. For extended aging, wrap in cheesecloth soaked in rum or brandy, which significantly enhances the flavor profile over time.
Can I speed up the fruit preparation process?
Yes! If you’re short on time, use the microwave soaking method. This allows for quick hydration of dried fruits in just one hour, compared to the traditional lengthy soaking process, while still achieving great flavor absorption.