We’ve all experienced that moment when you bite into a piece of perfectly smooth white chocolate fudge – the way it melts on your tongue and delivers that rich, creamy sweetness that’s impossible to resist. White chocolate fudge holds a special place in the confectionery industry, offering a more delicate and vanilla-forward flavor profile compared to its darker chocolate cousins.
What makes white chocolate fudge truly irresistible is its luxurious texture and the way it balances sweetness with subtle vanilla notes. Unlike traditional chocolate fudge, white chocolate creates a canvas that pairs beautifully with everything from crushed cookies to dried fruits and nuts.
We’re about to share our foolproof recipe that delivers silky-smooth results every single time. This isn’t just any fudge recipe – it’s the one that’ll have your friends and family begging for the secret. Whether you’re planning holiday gifts or simply satisfying your sweet tooth, this white chocolate fudge will become your go-to treat.
Ingredients
Our foolproof white chocolate fudge recipe requires just a handful of premium ingredients that work together to create that signature silky texture we all crave. We’ve organized these ingredients in the exact order you’ll use them to ensure your cooking process flows smoothly from start to finish.
For the Fudge Base:
- 3 cups white chocolate chips (high quality brands like Ghirardelli or Lindt work best)
- 1 can (14 oz) sweetened condensed milk
- 4 tablespoons unsalted butter
- 1 teaspoon pure vanilla extract
- 1/4 teaspoon fine sea salt
Optional Mix-ins (choose one or combine):
- 1/2 cup chopped macadamia nuts
- 1/3 cup dried cranberries
- 1/2 cup crushed vanilla wafers
- 1/4 cup mini white chocolate chips for extra texture
For Preparation:
- Cooking spray or butter for greasing
- Parchment paper for lining
We recommend using white chocolate chips rather than white chocolate bars because chips contain stabilizers that help prevent the fudge from becoming grainy. The sweetened condensed milk serves as our binding agent while the butter adds richness and helps achieve that perfect creamy consistency. Pure vanilla extract enhances the natural vanilla notes already present in white chocolate while a pinch of sea salt balances the sweetness beautifully.
Equipment Needed

Having the right tools makes creating perfect white chocolate fudge much easier and ensures consistent results every time. We recommend gathering these essential items before starting our recipe.
Double Boiler serves as our most important tool for melting white chocolate gently without burning. This equipment prevents the chocolate from seizing by providing controlled indirect heat. When you don’t have a double boiler available, we suggest creating one using a heatproof metal bowl placed over a pot of simmering water.
Measuring Cups and Spoons guarantee accurate ingredient proportions for our fudge recipe. Precision matters significantly when working with white chocolate since even small variations can affect the final texture and taste.
Wooden Spoon or Whisk helps us mix and beat the fudge mixture thoroughly. We prefer wooden spoons because they don’t conduct heat and won’t scratch our equipment during the stirring process.
Heavy Bottomed Pan becomes necessary if we choose to make fudge without using a double boiler method. This type of pan distributes heat evenly and prevents hot spots that could cause our mixture to burn.
Candy Thermometer assists us in achieving the correct temperature for proper fudge setting. Temperature accuracy determines whether our fudge will have the ideal firm yet creamy consistency we desire.
Marble or Granite Surface provides the best cooling environment for setting our fudge. These natural stone surfaces help prevent crystallization and ensure smooth texture development as the fudge cools.
Cutting Tools including a sharp knife or cookie cutter allow us to shape our finished fudge into perfect squares or decorative forms. Clean cuts create professional looking pieces that make excellent gifts or presentations.
| Equipment Type | Purpose | Alternative Options |
|---|---|---|
| Double Boiler | Gentle chocolate melting | Heatproof bowl over simmering water |
| Heavy Bottomed Pan | Even heat distribution | Standard saucepan with careful monitoring |
| Marble Surface | Optimal cooling | Clean countertop or large cutting board |
| Candy Thermometer | Temperature accuracy | Visual cues and timing |
For those interested in commercial fudge making, specialized fudge kettles offer durability and efficiency for larger batches. Companies like Calico Cottage provide commercial equipment and supplies, while Gold Medal Products Co. offers easy to use fudge mixes ideal for candy shops and tourist attractions.
Instructions

Now that we have our premium ingredients measured and equipment ready, let’s walk through the simple steps to create perfectly smooth white chocolate fudge. Our foolproof method ensures consistent results every time.
Prep the Pan
We start by preparing our workspace for easy removal and clean cuts. Line an 8×8-inch baking pan with aluminum foil or parchment paper, leaving some overhang for easy lifting. Lightly grease the lining with butter to prevent any sticking. Set the prepared pan aside while we work with the chocolate mixture.
Melt the White Chocolate
We recommend using the gentle double boiler method for the smoothest results. Fill the bottom pan of our double boiler with about 2 inches of water and bring it to a gentle simmer over medium heat. Place 3 cups of white chocolate chips in the top pan along with the entire 14-ounce can of sweetened condensed milk and 2 tablespoons of unsalted butter. Stir continuously with our wooden spoon as the mixture heats, watching for complete melting without any lumps.
For those using the microwave method, combine the white chocolate chips in a microwave-safe bowl and heat in 30-second intervals at 50% power. Stir thoroughly between each interval to prevent overheating. Once melted, gradually add the sweetened condensed milk and butter, mixing until the combination becomes perfectly smooth.
Combine Ingredients
With our chocolate mixture beautifully melted, we add 1 teaspoon of pure vanilla extract and a pinch of fine sea salt. Stir these flavor enhancers gently but thoroughly to distribute them evenly throughout the fudge base. If we’re adding optional mix-ins like macadamia nuts or dried cranberries, fold them in now using our wooden spoon. The mixture should maintain its glossy appearance and smooth consistency.
Pour and Set
We pour our finished fudge mixture into the prepared pan, using an offset spatula to spread it evenly into all corners. Smooth the surface gently to create uniform thickness throughout. Place the pan in the refrigerator and allow the fudge to set completely for 2 to 3 hours. Once firm, we lift the fudge out using the foil overhang and cut it into perfect squares with a sharp knife. Store our finished white chocolate fudge in an airtight container at room temperature for up to one week.
Directions for Perfect Texture

Achieving the perfect white chocolate fudge texture requires precise temperature control and proper mixing techniques. We’ll share our proven methods to ensure your fudge sets beautifully every time.
Temperature Tips
We recommend maintaining medium heat when cooking your white chocolate fudge mixture. Continuous stirring prevents the chocolate chips from burning while they melt completely into the condensed milk base.
Setting your fudge requires proper refrigeration at approximately 40°F for at least 3 hours. This low temperature ensures the mixture firms up to achieve that perfect sliceable consistency we’re after.
| Temperature Stage | Recommended Setting | Duration |
|---|---|---|
| Cooking | Medium heat | Until chips melt |
| Setting | 40°F refrigeration | 3+ hours |
Our experience shows that rushing the cooling process leads to inconsistent texture. We always allow the full refrigeration time for optimal results.
Mixing Techniques
Constant stirring becomes crucial while melting the chocolate chips to prevent sticking or burning to the pan. We use a wooden spoon or heat-resistant spatula for best control during this process.
When using the microwave method we stir the mixture thoroughly after heating. This technique ensures smoothness and prevents dangerous overheating that can seize the chocolate.
We combine ingredients in the proper sequence for optimal mixing. First we melt the white chocolate chips with sweetened condensed milk then incorporate butter and flavorings once the base mixture achieves complete smoothness.
High-quality white chocolate makes a important difference in both flavor and texture outcomes. We avoid overheating the mixture since excessive heat creates grainy or seized results that cannot be salvaged.
Storage Instructions

Proper storage keeps our white chocolate fudge fresh and maintains its creamy texture for maximum enjoyment. We can use several storage methods depending on how long we plan to keep our fudge and the conditions in our kitchen.
Room Temperature Storage
We store white chocolate fudge in an airtight container at room temperature for up to one week. Our fudge stays perfectly soft and ready to enjoy when stored this way. Direct sunlight should be avoided as it causes the fudge to become mushy and lose its ideal consistency.
Refrigeration Method
Refrigerated storage extends our fudge’s freshness for 2 to 3 weeks or up to a month when placed in an airtight container. This method works especially well in warm or humid conditions where room temperature storage might compromise the fudge quality. We notice that refrigerated fudge becomes firmer but returns to its creamy texture once it reaches room temperature.
Freezer Storage
Long term storage requires wrapping our fudge in wax paper or parchment paper first. We then cover it with plastic wrap or aluminum foil before placing it in an airtight container or freezer bag. Frozen fudge lasts for several months and can maintain quality for up to a year. We recommend consuming frozen fudge within six months for optimal taste and texture.
| Storage Method | Duration | Container Type | Special Notes |
|---|---|---|---|
| Room Temperature | Up to 1 week | Airtight container | Avoid direct sunlight |
| Refrigerated | 2-3 weeks to 1 month | Airtight container | Becomes firmer when cold |
| Frozen | Up to 1 year (best within 6 months) | Wrapped + airtight container | Wrap in paper first |
Storage Best Practices
Clean utensils must always be used when handling our fudge to prevent contamination and extend shelf life. We check for signs of spoilage such as unusual odors, mold, or texture changes before consuming stored fudge. These simple precautions ensure our white chocolate fudge remains safe and delicious throughout its storage period.
Variations and Add-Ins

Once you’ve mastered our basic white chocolate fudge recipe, we can explore exciting variations that transform this classic treat into new flavor experiences. These adaptations use the same foundational technique while incorporating different ingredients to create unique taste profiles.
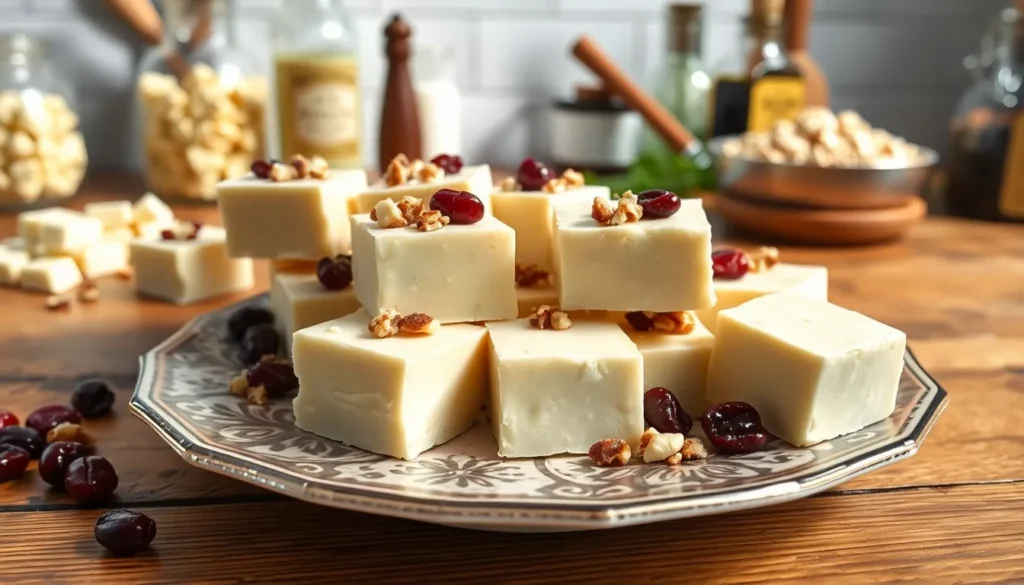
Cranberry White Chocolate Fudge
We love adding dried cranberries to our white chocolate fudge base for a sweet and tangy twist that’s perfect for holiday celebrations. The tart cranberries provide a delightful contrast to the rich white chocolate, creating a balanced flavor profile that guests always appreciate.
To make this variation, we fold in 1/2 cup of dried cranberries during the final mixing stage, just before pouring the fudge into our prepared pan. The cranberries distribute evenly throughout the mixture, ensuring every bite contains the perfect balance of creamy sweetness and fruity tartness.
Nutty White Chocolate Fudge
Nuts add wonderful texture and depth to white chocolate fudge, with pecans being our favorite choice for creating an indulgent treat. We particularly enjoy making White Chocolate Caramel Pecan Fudge, which combines multiple textures and flavors in each piece.
For this nutty variation, we incorporate 3/4 cup of chopped pecans and 2 tablespoons of caramel sauce into our basic recipe. The pecans provide a satisfying crunch, while the caramel sauce adds an extra layer of sweetness that complements the white chocolate beautifully. We add the nuts and caramel during the mixing stage, ensuring they’re evenly distributed throughout the fudge.
Flavored White Chocolate Fudge
Extracts and flavorings open up endless possibilities for customizing white chocolate fudge to suit different preferences and occasions. We can create sophisticated variations using orange extract, peppermint extract, espresso powder, or coconut flavoring.
Our Orange White Chocolate Fudge features 1/2 teaspoon of orange extract and 1 tablespoon of finely grated orange zest, creating a bright citrus note that pairs wonderfully with the vanilla undertones of white chocolate. For Mint White Chocolate Fudge, we use 1/4 teaspoon of peppermint extract, which provides a refreshing coolness without overwhelming the delicate white chocolate flavor.
Additional creative options include folding in crushed Oreo cookies for a cookies and cream theme, swirling in strawberry preserves for a fruity twist, or adding toasted almonds for an Almond Joy inspired variation. Each of these additions should be incorporated during the final mixing stage to maintain the fudge’s smooth consistency.
Troubleshooting Common Issues

Even experienced bakers encounter challenges when making white chocolate fudge. We’ve compiled the most common problems and their answers to help you achieve perfect results every time.
Seizing or Becoming Grainy
White chocolate seizes when melted too quickly or at excessively high temperatures causing the milk powder to burn and become thick. We recommend melting white chocolate slowly on low heat while stirring constantly to prevent this issue. If your chocolate does seize it can still be used though it may not produce ideal fudge texture.
| Temperature Guidelines | Recommended Method |
|---|---|
| Low heat setting | Double boiler or stovetop |
| Constant stirring | Prevents overheating |
| Gradual melting | Maintains smooth texture |
Incorrect Ingredient Ratios
Incorrect proportions of white chocolate condensed milk and other ingredients lead to fudge that doesn’t set properly. We always double check our recipe measurements and ensure correct ratios are maintained throughout the process. A standard ratio uses 200g white chocolate to 400g condensed milk for optimal consistency.
Setting Problems
White chocolate fudge may refuse to set if the mixture isn’t cooled properly or if ingredients aren’t heated sufficiently during preparation. We allow our fudge mixture to cool and set overnight in the refrigerator to ensure proper firmness. Avoid overheating the mixture as this transforms it into a caramel-like consistency instead of traditional fudge texture.
Adding Color Issues
Adding coloring too late in the melting process can shock the chocolate leading to seizing and grainy texture. We add any food coloring at the beginning before melting the white chocolate to prevent shocking the delicate mixture. This timing ensures smooth incorporation without compromising the final texture.
By addressing these common issues you can ensure your white chocolate fudge turns out smooth and creamy every time. We’ve found that patience and proper temperature control are the keys to consistent success with this delicate confection.
Serving Suggestions

Our white chocolate fudge transforms any occasion into something special with the right presentation. We love creating elegant dessert displays that showcase this creamy confection alongside complementary treats and garnishes.
Festive Dessert Platters
We arrange our fudge pieces on beautiful serving platters alongside colorful fresh fruits and edible flowers for stunning visual appeal. Strawberries and raspberries provide vibrant color contrast while their natural tartness balances the rich sweetness of our white chocolate creation. Fresh mint leaves and delicate pansies or violets add an elegant finishing touch that makes any gathering feel more sophisticated.
Ice Cream Sundae Enhancement
Our fudge elevates simple ice cream into an indulgent dessert experience. We place a generous square of room temperature fudge atop vanilla or chocolate ice cream and drizzle with warm caramel or chocolate sauce. The temperature contrast between the cold ice cream and soft fudge creates an irresistible texture combination that guests absolutely adore.
Cookie Pairing Combinations
We create delightful dessert spreads by pairing our white chocolate fudge with complementary cookies. Sugar cookies and butter cookies work exceptionally well because their buttery flavors enhance rather than compete with the fudge’s creamy richness. We arrange these treats on tiered stands or wooden boards for an inviting presentation that encourages guests to sample different combinations.
Holiday Entertaining Ideas
Our holiday trays feature white chocolate fudge as the centerpiece alongside seasonal favorites. We incorporate variations like our caramel pecan fudge or peppermint fudge to offer different flavor profiles that suit various preferences. These holiday presentations work beautifully for cookie exchanges, family gatherings, or as thoughtful gifts for neighbors and friends.
Temperature Considerations
Room temperature serving provides the optimal texture for our white chocolate fudge. We remove pieces from refrigerated storage about 15 to 20 minutes before serving to allow them to soften slightly. This temperature allows the fudge to yield perfectly to the bite while maintaining its shape and creamy consistency that makes each piece so satisfying.
Make-Ahead Tips

Planning ahead transforms white chocolate fudge from a last-minute dessert into a stress-free treat for any occasion. We recommend preparing your fudge several days before you need it to allow flavors to fully develop and achieve the perfect texture.
Storage Timeline for Optimal Results
| Storage Method | Duration | Temperature | Container Type |
|---|---|---|---|
| Room Temperature | Up to 1 week | 68-72°F | Airtight container |
| Refrigerated | 2-3 weeks | 40°F | Sealed container |
| Frozen | Up to 6 months | 0°F | Freezer-safe container |
Refrigeration Guidelines
Allow your freshly made fudge to chill in the refrigerator for at least 2 hours before attempting to cut it into squares. We find that 3 hours provides the ideal firmness for clean slicing without cracking. The fudge reaches its optimal texture when stored at approximately 40°F throughout the cooling process.
Remove the fudge from refrigeration 15-20 minutes before serving to achieve the perfect creamy consistency. This brief warming period allows the texture to soften slightly while maintaining its structural integrity.
Freezing for Extended Storage
Freezing extends your fudge’s lifespan significantly while preserving its rich flavor profile. Wrap individual pieces in wax paper before placing them in freezer-safe containers to prevent freezer burn and maintain quality.
Thaw frozen fudge completely at room temperature before serving. We suggest transferring frozen portions to the refrigerator overnight for gradual thawing that preserves the smooth texture.
Quality Preservation Techniques
Use high-quality white chocolate during preparation to ensure your make-ahead fudge maintains its premium taste over time. Melt chocolate carefully using low heat or gentle microwave intervals to prevent graininess that can develop during storage.
Cut your fudge with a sharp knife to create clean edges that resist chipping during storage. Clean cuts also help maintain the professional appearance of your make-ahead treats when serving time arrives.
Conclusion
We’ve shared everything you need to master the art of white chocolate fudge making. From selecting premium ingredients to perfecting your technique this sweet treat will become a staple in your dessert repertoire.
The beauty of this recipe lies in its versatility and forgiving nature. Whether you’re creating gifts for loved ones or treating yourself to something special our foolproof method ensures success every time.
Remember that patience is key when working with white chocolate. Take your time with the melting process maintain proper temperatures and don’t rush the setting phase. These simple steps will reward you with perfectly smooth creamy fudge that rivals any confectionery shop.
Now it’s time to get creative in your kitchen. Start with our basic recipe then experiment with your favorite add-ins to make it uniquely yours.
Frequently Asked Questions
What makes white chocolate fudge different from regular chocolate fudge?
White chocolate fudge has a smooth, creamy texture with rich sweetness and subtle vanilla notes, unlike the deeper, more intense flavors of dark chocolate fudge. The white chocolate creates a milder, sweeter taste profile that pairs beautifully with various mix-ins like nuts, dried fruits, and cookies.
What ingredients do I need to make white chocolate fudge?
You’ll need high-quality white chocolate chips, sweetened condensed milk, unsalted butter, pure vanilla extract, and fine sea salt. Optional mix-ins include macadamia nuts, dried cranberries, crushed vanilla wafers, or mini white chocolate chips. Using white chocolate chips is important because they contain stabilizers that prevent graininess.
What equipment is essential for making white chocolate fudge?
Essential equipment includes a double boiler for gentle melting, measuring cups and spoons, a wooden spoon or whisk, and a candy thermometer. You’ll also need an 8×8-inch baking pan, aluminum foil or parchment paper, and a sharp knife for cutting. A marble or granite surface is ideal for cooling.
How long does it take for white chocolate fudge to set?
White chocolate fudge needs to be refrigerated for 2 to 3 hours to set properly. The fudge should be chilled at approximately 40°F until it reaches a firm, sliceable consistency. Allow at least 3 hours for best results before cutting into squares.
How should I store white chocolate fudge?
Store white chocolate fudge at room temperature in an airtight container for up to one week, refrigerated for 2-3 weeks, or frozen for up to six months. Always use clean utensils to prevent contamination and check for signs of spoilage before consuming stored fudge.
What are some popular variations for white chocolate fudge?
Popular variations include adding dried cranberries for sweetness and tang, chopped pecans with caramel sauce, or different extracts like orange or peppermint. Creative options include crushed Oreo cookies, strawberry preserves, or toasted almonds. Each variation maintains the basic technique while offering unique flavors.
Why did my white chocolate fudge turn grainy or seize?
Graininess or seizing typically occurs from overheating the chocolate or incorrect ingredient ratios. Always melt chocolate slowly on low heat, maintain proper proportions, and stir continuously. Use a double boiler or microwave in short intervals to prevent overheating and ensure smooth, creamy texture.
When is the best time to serve white chocolate fudge?
Serve white chocolate fudge at room temperature for optimal texture and flavor. Remove it from refrigeration about 15-30 minutes before serving to achieve the perfect creamy consistency. This allows the fudge to soften slightly for the best eating experience.
Can I make white chocolate fudge ahead of time?
Yes, white chocolate fudge can be made several days in advance, which actually allows flavors to develop and texture to improve. Store it properly according to your timeline needs, and follow the storage guidelines for room temperature, refrigerated, or frozen options depending on when you plan to serve it.
How do I cut white chocolate fudge cleanly?
Use a sharp knife to cut the fudge into clean squares. For best results, ensure the fudge is properly set and chilled, then cut with smooth, confident strokes. Clean the knife between cuts if needed to maintain neat edges and professional appearance.