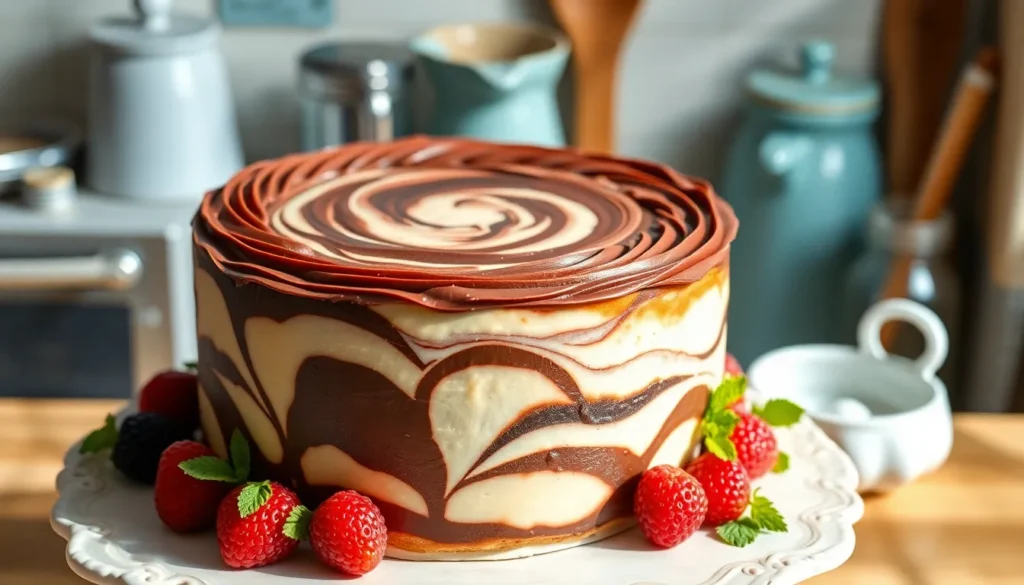
We’ve all admired those stunning marble cakes with their mesmerizing swirled patterns and rich chocolate frosting. This classic dessert combines the best of both worlds – vanilla and chocolate batters twisted together to create an eye-catching masterpiece that’s as delicious as it is beautiful.
The marble cake originated in 19th-century Germany and quickly became a beloved treat across America. What makes this cake truly special isn’t just its striking appearance but the perfect balance of flavors. Each slice reveals unique swirl patterns that make every piece a work of art.
Our foolproof marble cake recipe delivers moist tender crumb with deep chocolate swirls throughout. Topped with our silky chocolate frosting this dessert transforms any ordinary day into a celebration. Whether you’re baking for a birthday party or simply treating yourself this marble cake will become your new go-to showstopper.
Ingredients
We’ve carefully selected each ingredient to create the perfect balance of flavors and textures in our marble cake. These pantry staples work together to produce a tender crumb and rich chocolate swirls that make this dessert irresistible.
For the Marble Cake
- 2¾ cups all-purpose flour
- 2½ teaspoons baking powder
- ½ teaspoon salt
- ¾ cup unsalted butter, softened to room temperature
- 1¾ cups granulated sugar
- 4 large eggs, room temperature
- 2 teaspoons vanilla extract
- 1¼ cups whole milk, room temperature
- ⅓ cup unsweetened cocoa powder
- 3 tablespoons hot water
- 1 tablespoon vegetable oil
For the Chocolate Frosting
- ½ cup unsalted butter, softened to room temperature
- ⅔ cup unsweetened cocoa powder
- 3 cups powdered sugar, sifted
- ⅓ cup whole milk
- 1 teaspoon vanilla extract
- Pinch of salt
Equipment Needed
 2")
Success with our marble cake relies heavily on having the right tools at your disposal. We recommend gathering all equipment before beginning to ensure a smooth baking process.
Essential Mixing Equipment
A stand mixer makes the job significantly easier when creaming butter and sugar to the perfect consistency. The paddle attachment works best for incorporating ingredients without overworking the batter. If you don’t own a stand mixer, a large mixing bowl set paired with an electric hand mixer will work beautifully.
Specialized Baking Tools
Our recipe requires either an 8-inch round cake pan or a 9×13-inch rectangular pan depending on your preferred serving style. A rubber spatula becomes indispensable for folding ingredients and scraping bowl sides clean. We also rely on a whisk set for combining dry ingredients and ensuring even distribution.
Chocolate Preparation Essentials
A medium saucepan plays a crucial role in creating the chocolate paste that forms our signature swirls. This vessel allows us to properly dissolve cocoa powder with hot water for the smoothest integration into our batter.
Finishing Tools
An offset spatula transforms frosting application from messy to professional. This angled tool helps us spread chocolate frosting evenly across the cake surface while creating beautiful decorative swirls. The offset design keeps our hands away from the frosting surface for cleaner results.
Having these tools ready before we begin mixing ensures our marble cake develops properly without interruption. Each piece of equipment serves a exact purpose in creating the perfect texture and appearance that makes this dessert so memorable.
Instructions
 4")
We’ll walk you through each step to create this stunning marble cake with chocolate frosting. Our systematic approach ensures perfect results every time.
Prep the Cake Batter
We start by preheating our oven to 350°F (177°C) and greasing our 8-inch round cake pans or 9×13-inch pan thoroughly. In our stand mixer bowl, we cream the softened butter with granulated sugar and brown sugar until the mixture becomes light and fluffy, about 3-4 minutes. We add eggs one at a time, followed by the egg yolk and vanilla extract, mixing well after each addition.
In a separate bowl, we whisk together the cake flour, baking powder, and salt. We alternate adding these dry ingredients with the buttermilk to our creamed mixture, beginning and ending with the flour mixture. Our goal is to mix just until the ingredients are combined, avoiding overmixing which can lead to a tough cake.
Create the Marble Effect
We divide our prepared batter evenly into two separate bowls. To one portion, we add the cocoa powder and mix until fully incorporated, creating our rich chocolate batter. The remaining portion stays as our vanilla base.
Using alternating spoonfuls, we drop both batters into our prepared pans, creating a checkerboard pattern. We take a knife or skewer and gently swirl through the batter in figure-eight motions to create beautiful marbling. We avoid overmixing at this stage to maintain distinct chocolate and vanilla swirls.
Bake the Cake
We bake our round cake layers for 35-40 minutes, or our 9×13-inch cake for 24-30 minutes. The cake is ready when a toothpick inserted in the center comes out clean or with just a few moist crumbs. We let the cakes cool in their pans for 10 minutes before turning them out onto wire racks to cool completely.
Make the Chocolate Frosting
While our cake cools, we prepare the frosting by beating softened butter in our mixer until smooth and creamy. We gradually add powdered sugar and cocoa powder, alternating with small amounts of milk or heavy cream. We continue beating until our frosting reaches a smooth, spreadable consistency, adding vanilla extract and a pinch of salt for enhanced flavor.
Assemble and Frost
We level our cooled cake layers using a serrated knife to ensure even stacking. Placing the first layer on our cake stand, we spread a generous amount of chocolate frosting on top. We add the second layer and apply frosting to the top and sides, using our offset spatula to create smooth, professional-looking coverage. We can add decorative touches with sprinkles or additional swirls as desired.
Pro Tips for Perfect Marble Cake
 6")
Creating a stunning marble cake requires attention to detail and technique. We’ve gathered expert tips that transform a good marble cake into an exceptional one.
Use high-quality chocolate or cocoa powder for the most intense flavor impact. Premium cocoa powder delivers deeper chocolate notes that create a more pronounced contrast with the vanilla portions. We recommend Dutch-processed cocoa for its rich color and smooth taste.
Beat butter and sugar thoroughly for at least five minutes to achieve optimal texture. This extended creaming process incorporates air into the mixture and creates the fluffy base essential for a tender crumb. The mixture should appear light and pale when properly creamed.
Maintain room temperature ingredients throughout the mixing process. Eggs, butter, and buttermilk at room temperature blend more evenly and prevent lumps from forming in the batter. Cold ingredients can cause the mixture to curdle or create an uneven texture.
Swirl gently to preserve the marble pattern. Over-mixing causes the chocolate and vanilla batters to blend completely and eliminates the distinctive marbled appearance. We use a skewer or knife to create figure-eight motions through the batter, making only 2-3 passes for perfect swirls.
Let cakes cool completely before applying frosting to prevent melting. Warm cake causes buttercream to slide off and creates a messy appearance. We allow our cakes to cool for at least 2 hours at room temperature before frosting.
Test doneness with a toothpick inserted into the center of the cake. The toothpick should come out clean or with just a few moist crumbs attached. Overbaked marble cake becomes dry and loses its tender texture.
Experiment with different frosting variations to customize your dessert. While chocolate buttercream is classic, vanilla buttercream or Nutella frosting offer delicious alternatives that complement the marble cake’s dual flavors.
Storage Instructions
 8")
Once you’ve created your beautiful marble cake masterpiece, proper storage ensures it maintains its delicious flavor and moist texture for days to come. We’ve compiled essential storage guidelines to help you preserve both frosted and unfrosted versions of your cake.
Room Temperature Storage
Your frosted marble cake stays fresh at room temperature for a few hours up to a couple of days, depending on the type of chocolate frosting you’ve prepared. We recommend using a cake carrier to maintain optimal moisture levels and protect the frosting from drying out.
Unfrosted marble cake layers offer more flexibility for room temperature storage. These can last up to 3 days when stored properly in an airtight container, making them perfect for advance preparation.
Refrigeration Guidelines
Refrigerated storage extends the life of your frosted marble cake significantly. We can safely store frosted cakes in the refrigerator for 4 to 7 days while maintaining their quality and taste.
| Storage Method | Frosted Cake Duration | Unfrosted Cake Duration |
|---|---|---|
| Room Temperature | Few hours to 2 days | Up to 3 days |
| Refrigeration | 4 to 7 days | Up to 5 days |
| Freezing | 1 to 2 months | 2 to 3 months |
Pro tip: If you’ve already cut into your frosted cake, cover the exposed cake section with additional frosting to seal in moisture and prevent the cake from drying out.
Unfrosted cake layers benefit from refrigeration as well, staying fresh for up to 5 days when wrapped properly.
Freezing for Long Term Storage
Freezing offers the longest storage option for your marble cake. Frosted cakes can be stored airtight in the freezer for 1 to 2 months without compromising taste or texture. When you’re ready to serve, thaw the cake overnight in the refrigerator and bring it to room temperature before presentation.
Unfrosted cake layers freeze exceptionally well for 2 to 3 months. We recommend wrapping each layer individually in plastic wrap, then covering with aluminum foil to prevent freezer burn and maintain the cake’s moisture.
Make Ahead Tips
Your chocolate frosting can be prepared in advance and stored independently. Refrigerated frosting stays fresh for up to one week, while frozen frosting maintains quality for up to one month. This advance preparation strategy allows you to assemble your cake quickly when needed.
Always store cakes in airtight containers regardless of your chosen storage method. This simple step maintains freshness and prevents the cake from absorbing unwanted flavors or odors from surrounding foods.
Serving Suggestions
 10")
Our marble cake with chocolate frosting becomes the centerpiece of any gathering when we present it with thoughtful serving suggestions. This stunning dessert pairs beautifully with various accompaniments that enhance both its visual appeal and flavor profile.
We recommend serving our marble cake at room temperature to allow the chocolate frosting to soften slightly and the cake’s flavors to fully develop. Fresh berries such as strawberries, raspberries, or blackberries provide a bright contrast to the rich chocolate and create an elegant presentation. The natural acidity of these fruits balances the sweetness perfectly.
For special occasions like birthdays and celebrations, we can elevate the presentation by adding decorative elements to the chocolate frosting. Creating texture patterns with an offset spatula or fork adds visual interest and professional appeal. Chocolate shavings, cocoa powder dusting, or even edible flowers transform our marble cake into a show-stopping centerpiece.
Warm beverages complement this dessert exceptionally well. We suggest pairing our marble cake with freshly brewed coffee, hot chocolate, or black tea to enhance the chocolate notes. Cold milk also makes an excellent companion, especially for younger guests who appreciate the classic combination.
During warmer months, we can serve our marble cake alongside vanilla ice cream or whipped cream for a delightful temperature contrast. The cool, creamy textures provide a refreshing balance to the rich cake and create a more indulgent dessert experience.
For dinner parties, we recommend cutting the cake into neat squares or triangles and plating individually with a small dollop of whipped cream and a mint sprig. This presentation method allows guests to appreciate the beautiful marbled pattern while maintaining portion control.
When serving large groups, our marble cake works wonderfully as part of a dessert buffet. The chocolate fudge frosting holds up well at room temperature, making it practical for extended serving periods without compromising quality or appearance.
Conclusion
We’ve walked you through everything you need to create a stunning marble cake with chocolate frosting that’ll impress your family and friends. This timeless dessert combines the best of both worlds with its elegant swirled appearance and rich flavor profile.
The beauty of this recipe lies in its versatility and approachability. Whether you’re baking for a special celebration or simply treating yourself to something sweet we’re confident this marble cake will become a staple in your dessert repertoire.
Remember that baking is both an art and a science. Take your time with each step follow our expert tips and don’t be afraid to make this recipe your own. Your kitchen will smell amazing and the results will speak for themselves.
Frequently Asked Questions
What makes marble cake different from regular cake?
Marble cake combines vanilla and chocolate batters swirled together to create beautiful patterns throughout the cake. This technique creates a visual contrast and offers both vanilla and chocolate flavors in every bite, making it more complex than single-flavor cakes.
Can I use a different pan size for marble cake?
Yes, you can use either an 8-inch round cake pan or a 9×13-inch rectangular pan. The baking time will vary depending on the pan size, with rectangular pans typically requiring slightly different timing than round pans.
How do I create the perfect marble swirl pattern?
Alternate spoonfuls of chocolate and vanilla batter in your prepared pan, then gently swirl with a knife or toothpick. Don’t overmix – just 2-3 gentle swirls will create beautiful marbled patterns without completely combining the batters.
How long can I store marble cake?
Frosted marble cake stays fresh at room temperature for 2 days, or refrigerated for 4-7 days. Unfrosted layers last 3 days at room temperature or 5 days refrigerated. For longer storage, freeze for 1-3 months in airtight containers.
What ingredients are essential for marble cake?
Key ingredients include all-purpose flour, baking powder, unsalted butter, granulated sugar, eggs, vanilla extract, whole milk, cocoa powder, and vegetable oil. These pantry staples create the tender crumb and rich chocolate swirls that define marble cake.
Can I make different frosting variations?
Absolutely! While chocolate frosting is traditional, you can experiment with vanilla buttercream, Nutella frosting, or cream cheese frosting. Each variation offers a unique flavor profile that complements the marble cake’s vanilla-chocolate combination.
What’s the best way to serve marble cake?
Serve at room temperature for optimal flavor and texture. Pair with fresh berries, vanilla ice cream, or whipped cream. For special occasions, garnish with decorative frosting elements and serve alongside coffee or tea for the perfect dessert experience.