Nothing beats the light airy texture of a perfectly baked sponge cake. This classic dessert has been delighting families for centuries with its simple yet elegant appeal. We’ve perfected this traditional recipe to help you create a sponge that’s incredibly fluffy and absolutely delicious every time.
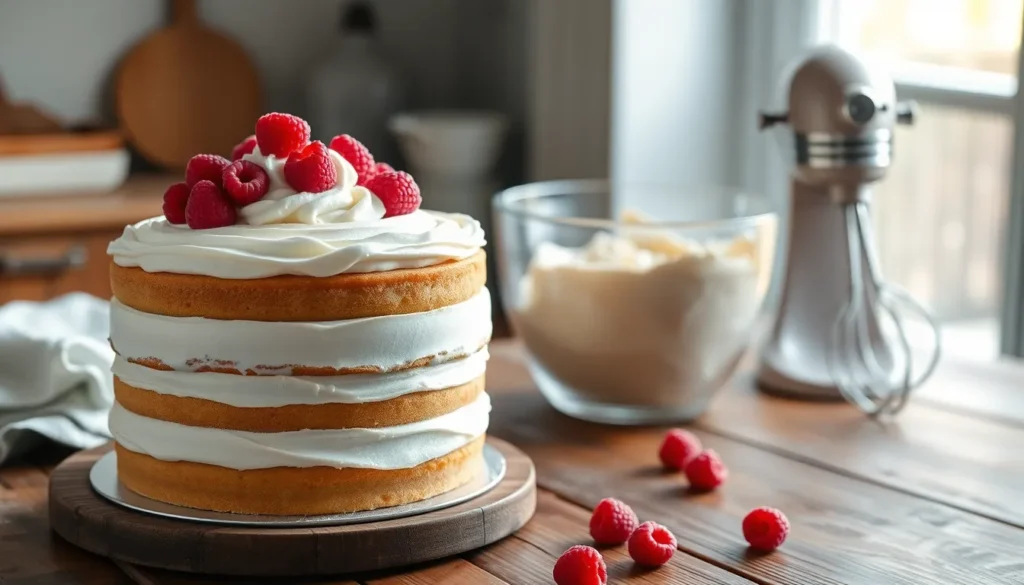
What makes our sponge cake special is its versatility. You can serve it plain with a dusting of powdered sugar or dress it up with fresh berries and whipped cream. It’s also the perfect base for layered cakes and trifles. The secret lies in properly incorporating air into the batter while keeping the ingredients at the right temperature.
We’ll guide you through each step to ensure your sponge rises beautifully and has that coveted tender crumb. With just a few pantry staples and our foolproof technique you’ll have a bakery-quality sponge cake that’ll impress everyone at your table.
Equipment Needed
Creating the perfect sponge cake requires the right tools to achieve that signature light and airy texture we’re aiming for. We’ve streamlined our equipment list to include only the essentials that make the biggest difference in your baking success.
Large mixing bowl serves as our primary workspace for combining ingredients and building volume in the batter. We recommend glass or stainless steel bowls that provide stability during vigorous mixing.
Electric hand mixer or stand mixer becomes crucial for incorporating the air that gives sponge cake its characteristic lightness. Hand mixers work perfectly for this recipe while stand mixers offer hands-free convenience during longer mixing periods.
9-inch round cake pan provides the ideal size and shape for even baking. We prefer pans with straight sides that help the cake rise uniformly and create clean layers.
Wire cooling rack ensures proper air circulation around the cake as it cools. This prevents soggy bottoms and maintains the delicate texture we’ve worked to create.
Fine-mesh sieve helps us achieve smooth batter by removing lumps from flour and other dry ingredients. This simple step prevents dense spots in our finished cake.
Rubber spatula allows gentle folding motions that preserve the air bubbles we’ve incorporated during mixing. We avoid metal spoons that can deflate the batter.
Measuring cups and spoons guarantee accuracy in our ingredient ratios. Precise measurements become especially important in sponge cakes where balance affects the final rise and texture.
Parchment paper lines our cake pan and prevents sticking without adding extra grease that might weigh down the delicate batter. We cut circles to fit the bottom of our pan perfectly.
Ingredients

Creating this light and airy sponge cake requires simple pantry staples that work together to achieve that perfect tender crumb. We’ve organized our ingredient list into essential cake components and optional finishing touches.
For the Sponge Cake
- 4-6 large eggs (room temperature for best results)
- 1-2 cups granulated sugar
- 1-2 cups all-purpose flour (cake flour can be substituted for extra tenderness)
- 1/2-1 teaspoon baking powder
- 1/4-1/2 teaspoon salt
- Milk or warm water (as needed for moisture)
- Vanilla extract (optional, for enhanced flavor)
For the Filling and Topping (Optional)
- Raspberry or strawberry jam (for a classic sweet filling)
- Whipped cream (creates an elegant light topping)
- Fresh strawberries or raspberries (adds natural sweetness and vibrant color)
- Buttercream or chocolate ganache (for those preferring richer toppings)
Instructions

Creating the perfect sponge cake requires precise timing and gentle handling techniques. We’ll guide you through each essential step to achieve that signature light and airy texture.
Prep
We start by preheating our oven to 350°F (175°C) and lining a 9-inch round cake pan with parchment paper. Room temperature ingredients are crucial for optimal mixing, so we remove eggs from the refrigerator 30 minutes before beginning. We whisk together the flour, baking powder, and salt in a separate bowl, then sift the mixture to eliminate lumps and ensure smooth incorporation. Setting up our stand mixer with the whisk attachment prepares us for the critical egg beating process.
Making the Sponge Batter
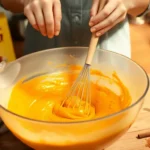
We place our eggs in the stand mixer bowl and beat them until they become thick and lemon-colored, which takes approximately 3-5 minutes on medium-high speed. Gradually adding sugar while continuing to beat creates the foundation for our sponge’s structure, requiring 8-10 minutes until the mixture becomes thick and fluffy. The batter should fall in ribbons when we lift the whisk, indicating proper air incorporation. Using a rubber spatula, we fold the sifted dry ingredients into the egg mixture in three separate additions, gently cutting through the center and folding over to preserve the delicate air bubbles we’ve created.
Baking the Cake
We pour the prepared batter into our lined cake pan, gently spreading it to ensure even distribution without deflating the mixture. The cake bakes for 23-28 minutes in our preheated 350°F oven until the top develops a golden brown color and springs back lightly when touched. We avoid opening the oven door during the first 20 minutes to prevent temperature fluctuations that could cause the cake to collapse. A toothpick inserted in the center should come out clean or with just a few moist crumbs attached.
Cooling and Unmolding
We remove the cake from the oven and allow it to cool in the pan for 5 minutes to prevent breaking. Running a thin spatula around the edges releases any stuck portions before we carefully turn the cake onto a wire rack. Complete cooling takes approximately 30 minutes and prevents condensation from forming if we plan to add fillings or frostings. We handle the delicate sponge gently during this process to maintain its airy structure for the best final presentation.
Directions for Assembly

Once our beautifully baked sponge cake has cooled completely, we can transform it into an elegant layered dessert. The assembly process requires patience and gentle handling to preserve the delicate texture we’ve worked so hard to achieve.
Adding Filling
We always start by ensuring our sponge layers are completely cool before adding any filling. Warm cake will cause buttercream to melt and jams to become runny, compromising our final result.
First, we brush the tops and sides of each sponge layer with simple syrup to keep them moist and enhance flavor. This step prevents our cake from drying out and adds an extra layer of taste that complements our chosen filling.
Next, we place a generous amount of our selected filling on top of the bottom layer. Whether we’re using raspberry jam, whipped cream, or rich buttercream, we spread it evenly across the surface while leaving a small border around the edges. This border prevents the filling from oozing out when we add the next layer.
We carefully position the second cake layer on top of the filling and gently press down to secure it. The key here is applying just enough pressure to create stability without squashing the delicate sponge structure.
For taller cakes with multiple layers, we can insert cake dowels between layers to provide additional structural support and prevent shifting during transport or serving.
Final Touches
Our assembled cake deserves a beautiful exterior that matches its delicious interior. We apply an outer layer of frosting or whipped cream to cover the entire cake, creating a smooth canvas for decoration.
We can achieve a professional finish by using an offset spatula to smooth the frosting or create decorative swirls and peaks. The choice depends on the style we’re aiming for and the occasion we’re celebrating.
Fresh fruits make stunning natural decorations that complement the light flavor of sponge cake. We arrange berries, sliced kiwi, or mandarin segments on top for a colorful and appetizing presentation.
For special occasions, we might add a dusting of powdered sugar, a drizzle of chocolate ganache, or carefully piped buttercream flowers. These finishing touches transform our simple sponge cake into an impressive centerpiece worthy of any celebration.
We always ensure our cake is completely assembled and chilled before serving to allow the flavors to meld and the structure to set properly.
Make-Ahead Instructions

Planning ahead makes serving our perfect sponge cake effortless for any occasion. We can bake the cake layers 2-3 days in advance and store them properly to maintain their delicate texture and fresh flavor.
Baking and Storage Timeline
Our sponge cake layers stay fresh when wrapped tightly and stored in airtight containers at room temperature for up to three days. We recommend wrapping each cooled layer individually in plastic wrap before placing them in containers to prevent moisture loss.
| Storage Method | Timeframe | Best Practices |
|---|---|---|
| Room Temperature | 2-3 days | Wrap tightly, store in airtight container |
| Refrigerated | Up to 1 week | Individual wrapping recommended |
| Frozen | Up to 3 months | Wrap well, thaw in refrigerator |
Freezing Guidelines
We can freeze our baked sponge cake layers for longer storage periods. Wrap each completely cooled layer in plastic wrap followed by aluminum foil to prevent freezer burn. When ready to use frozen layers we should transfer them to the refrigerator overnight for gradual thawing.
Special attention is needed for rolled sponge cakes like those used in Yule logs. We must roll these cakes while they remain warm from the oven since freezing makes the cake structure fragile and prone to cracking during assembly.
Component Preparation
Preparing individual components ahead streamlines our final assembly process. We can make Chantilly cream several hours in advance and refrigerate it in a covered container. But we should use prepared whipped cream within the same day to prevent separation.
Simple syrup for brushing layers can be prepared up to one week ahead and stored in the refrigerator. Fruit fillings and jams also keep well when made in advance and properly stored.
Assembly Timing
We achieve the best results by assembling and decorating our sponge cake on the same day of serving. This timing prevents buttercream from developing a skin and ensures frosting adheres properly to the cake layers.
Our assembled cake can be stored in the refrigerator overnight in an airtight container if needed. This brief storage actually helps flavors meld together while maintaining the cake’s structural integrity.
For frozen assembled cakes we should thaw them gradually in the refrigerator to preserve both texture and appearance. Rush thawing at room temperature can cause condensation and compromise the cake’s delicate structure.
Storage Tips

Proper storage makes all the difference in maintaining our sponge cake’s delicate texture and flavor. We’ve discovered that following exact storage guidelines ensures our homemade creation stays fresh and delicious for days.
Room Temperature Storage
We recommend storing our sponge cake at room temperature for optimal results. An airtight container keeps the cake fresh and moist for up to three days. This storage method preserves the cake’s tender crumb while preventing it from drying out.
| Storage Method | Duration | Container Type |
|---|---|---|
| Room Temperature | 3 days | Airtight container |
| Freezer | 3 months | Airtight container |
Avoiding Common Storage Mistakes
Refrigeration poses the biggest threat to our sponge cake’s quality. We never store our cakes in the refrigerator because cold temperatures cause the delicate structure to dry out and become crumbly. The moisture loss transforms our light and airy creation into a disappointing dessert.
Moisture Protection Techniques
Wrapping our sponge cake tightly in cling film prevents moisture loss effectively. This technique becomes especially important when we’ve cut the cake and exposed fresh surfaces to air. We make sure to cover every exposed area to maintain the cake’s original texture.
Completely covering our sponge with frosting creates an additional moisture barrier. The frosting acts as a protective layer that seals in the cake’s natural moisture while adding flavor and visual appeal.
Long Term Storage Answers
Freezing extends our sponge cake’s life significantly when we need longer storage. We place the cake in an airtight container before freezing to prevent freezer burn. When we’re ready to serve the cake we thaw it slowly at room temperature to preserve its delicate structure.
Recipe Based Storage Considerations
Oil based sponge recipes offer superior storage longevity compared to butter based versions. These recipes naturally retain moisture longer making them ideal when we need to prepare our cake in advance. We keep this factor in mind when planning our baking timeline.
Environmental Protection
Heat sources and direct sunlight accelerate moisture loss in our stored cakes. We position our storage containers away from windows stoves and other heat generating appliances. This simple precaution maintains our cake’s freshness throughout the storage period.
Serving Suggestions

Our perfectly baked sponge cake transforms into countless delicious presentations with the right serving approach. We recommend starting with the classic tradition of dusting the cake with powdered sugar for an elegant and simple finish that highlights the cake’s natural beauty.
Fresh fruit elevates our sponge cake into a spectacular dessert that balances sweetness with natural tartness. We love pairing strawberries, raspberries, or blueberries with the light texture of the cake. The Victoria sponge cake demonstrates this perfectly by layering raspberry or strawberry jam with whipped cream between cake layers.
Cream fillings add richness and moisture that complement the airy structure beautifully. We suggest using whipped cream, Chantilly cream, or lemon curd as either fillings or toppings. These creamy additions create a luxurious contrast to the delicate crumb while maintaining the cake’s light character.
Chocolate lovers can transform our basic sponge into an indulgent treat using chocolate ganache or chocolate buttercream. We spread these rich toppings over the cake surface for added depth and flavor complexity that satisfies more decadent cravings.
Alcohol soaked variants offer sophisticated flavor profiles for adult gatherings. We recommend the Tipsy Cake approach by soaking the sponge in sherry, brandy, or other spirits before layering with cream and fresh fruit. This technique infuses the cake with complex flavors while maintaining its signature texture.
Layered presentations work exceptionally well for special occasions and celebrations. We assemble multiple cake layers with alternating fillings such as jam and cream to create impressive height and visual appeal. This method allows us to showcase different flavors and textures in each bite.
Presentation Enhancement Tips
| Serving Method | Best Temperature | Visual Appeal |
|---|---|---|
| Fresh with fruit | Room temperature | Dust with powdered sugar |
| Layered dessert | Chilled | Garnish with fresh berries |
| Cream filled | Slightly chilled | Light sugar dusting |
| Chocolate topped | Room temperature | Drizzled ganache pattern |
We achieve the best results when serving our sponge cake fresh or properly chilled depending on the chosen presentation style. Garnishing with additional fresh fruit or a light dusting of powdered sugar enhances visual appeal significantly. Slicing the cake into layers, filling them, and reassembling creates a more impressive dessert that showcases our baking skills while accommodating both simple and elaborate presentation preferences.
Troubleshooting Common Issues

Even experienced bakers encounter challenges when making sponge cake. Understanding these common problems and their answers helps us achieve consistently perfect results every time.
Cake Didn’t Rise Properly
When our sponge cake fails to rise adequately we need to examine several key factors. Insufficient leavening agents often cause this disappointing outcome. We must ensure all ingredients including baking powder are properly measured and added to the batter.
Incorrect oven temperature presents another culprit behind poor rising. We recommend using an oven thermometer to verify our oven reaches the proper temperature before baking. Temperature fluctuations prevent the cake from developing its characteristic light structure.
Mixing technique significantly impacts the cake’s ability to rise properly. Undermixing prevents adequate air incorporation while overmixing deflates the delicate bubbles we worked to create. We should check our mixing time and technique to achieve the perfect balance.
Cake Turned Out Dense
Dense sponge cake results from imbalanced ingredient ratios or incorrect baking procedures. Too much flour creates a heavy texture that lacks the desired lightness. We need to measure flour accurately using the spoon and level method rather than scooping directly from the container.
Inadequate liquid content also produces density issues in our finished cake. The wet to dry ingredient ratio requires careful attention to achieve proper texture. We should adjust these proportions when our cake consistently turns out heavy.
Incorrect baking time contributes to density problems as well. Overbaking removes moisture and creates a compact crumb structure. We recommend using a kitchen timer and testing for doneness with a toothpick to avoid this common mistake.
Cake Cracked on Top
Surface cracking occurs when our cake experiences thermal stress during baking. An oven that runs too hot causes rapid surface cooking while the interior remains underdone. We should use an oven thermometer to maintain consistent temperature throughout the baking process.
Improper pan size forces the batter to rise unevenly creating stress cracks on the surface. We must ensure our pan matches the recipe specifications for optimal results. Using a pan that’s too small concentrates the batter and increases cracking likelihood.
Sudden temperature changes shock the delicate cake structure causing surface fissures. We should avoid opening the oven door until the cake nears completion. If cracking does occur we can mask imperfections with icing or carefully trim the affected areas before serving.
Variations

Our versatile sponge cake base transforms beautifully with different flavor additions and creative presentations. We can explore several classic variations that showcase the adaptability of this beloved dessert.
Chocolate Sponge Cake
Chocolate sponge cake elevates our basic recipe by incorporating cocoa powder or melted chocolate directly into the batter. We achieve a rich chocolatey flavor while maintaining the signature light and airy texture that makes sponge cakes so appealing. The cocoa powder replaces a portion of the flour in our original recipe creating depth without compromising the cake’s delicate structure.
We often pair this variation with raspberry jam for a classic flavor combination that balances the chocolate’s richness with bright fruit notes. The moist crumb works exceptionally well for layering with whipped cream or various frostings making it perfect for elegant desserts. When we prepare chocolate sponge we recommend sifting the cocoa powder with the flour to ensure even distribution and prevent any bitter pockets from forming.
Lemon Sponge Cake
Lemon sponge cake brings brightness to our traditional recipe through the addition of fresh lemon zest and juice. We incorporate these citrus elements into the batter maintaining our careful folding technique to preserve the airy texture. The lemon zest provides aromatic oils while the juice adds tangy flavor notes that complement the cake’s sweetness perfectly.
We find this variation particularly refreshing during warmer months and it pairs beautifully with lemon curd or vanilla buttercream. The citrus oils in the zest enhance the cake’s moisture retention while creating an irresistible fragrance during baking. When we make lemon sponge we ensure the citrus additions don’t alter the batter’s consistency by adjusting liquid ratios accordingly.
Victoria Sponge
Victoria sponge represents the quintessential British teatime cake consisting of two round sponge layers sandwiched with jam and often buttercream. We prepare this classic using our basic sponge recipe without additional flavorings allowing the quality of the jam and cream to shine through. The traditional filling combines raspberry or strawberry jam with a layer of fresh buttercream.
Unlike our flavored variations Victoria sponge celebrates simplicity and relies on perfect technique rather than complex ingredients. We divide our batter evenly between two pans ensuring consistent layers that stack beautifully. The finished cake showcases the pure vanilla flavor of our sponge while the jam provides sweetness and the buttercream adds richness creating a perfectly balanced dessert that has remained popular for generations.
Conclusion
Mastering the art of sponge cake opens up endless possibilities for creating memorable desserts. With the right techniques and attention to detail we’ve shared you’ll consistently achieve that perfect light airy texture that makes this classic cake so beloved.
Whether you choose the traditional vanilla base or explore chocolate and lemon variations your homemade sponge cake will serve as the foundation for countless delicious creations. From simple afternoon tea treats to elegant layered celebrations this versatile cake adapts beautifully to any occasion.
Remember that practice makes perfect and each attempt brings you closer to sponge cake mastery. Armed with our comprehensive guide you’re now ready to create bakery-quality results in your own kitchen and impress family and friends with your newfound skills.
Frequently Asked Questions
What makes a sponge cake light and airy?
The key to a light and airy sponge cake is properly incorporating air into the batter. This is achieved by beating eggs thoroughly with sugar until they reach a pale, fluffy consistency, and then gently folding in the dry ingredients to preserve those air bubbles. Using room temperature ingredients and avoiding overmixing are also crucial for maintaining the cake’s delicate texture.
What equipment do I need to make a perfect sponge cake?
Essential equipment includes a large mixing bowl (glass or stainless steel), an electric hand mixer or stand mixer, a 9-inch round cake pan, wire cooling rack, fine-mesh sieve, rubber spatula, accurate measuring cups and spoons, and parchment paper for lining the pan. These tools ensure proper mixing, even baking, and successful cake removal.
Can I make sponge cake layers ahead of time?
Yes, you can make sponge cake layers in advance. Store them at room temperature in an airtight container for up to 3 days, refrigerate for up to a week, or freeze for up to 3 months. Wrap layers tightly in plastic wrap to maintain moisture. However, assemble and decorate the cake on the same day of serving for best results.
Why did my sponge cake turn out dense instead of light?
Dense sponge cake usually results from overmixing the batter after adding flour, which deflates air bubbles. Other causes include using cold ingredients, insufficient beating of eggs and sugar, incorrect ingredient ratios, or opening the oven door too early during baking. Always fold ingredients gently and ensure eggs are at room temperature.
How should I store a finished sponge cake?
Store unfilled sponge cake at room temperature in an airtight container for up to 3 days. Avoid refrigeration as it can dry out the cake. For filled cakes with cream or perishable fillings, refrigerate and consume within 2-3 days. For longer storage, freeze unfilled layers wrapped tightly in plastic wrap for up to 3 months.
What are some popular sponge cake variations?
Popular variations include chocolate sponge cake (made with cocoa powder or melted chocolate), lemon sponge cake (with fresh lemon zest and juice), and Victoria sponge (a traditional British cake filled with jam and buttercream). Each variation maintains the light, airy texture while adding unique flavors to suit different preferences and occasions.
How do I prevent my sponge cake from cracking on top?
Prevent surface cracking by using the correct oven temperature (350°F/175°C), avoiding temperature fluctuations, and using the proper pan size. Don’t open the oven door during the first 25 minutes of baking. Ensure your batter isn’t overmixed and that your oven isn’t running too hot, as thermal stress is the primary cause of cracking.
What’s the best way to fill and assemble a layered sponge cake?
Allow cake layers to cool completely before assembly. Brush layers with simple syrup for moisture, then spread filling (jam, whipped cream, or buttercream) on the bottom layer, leaving a border to prevent overflow. Gently place the second layer on top and chill the assembled cake before serving to allow flavors to meld and structure to set.