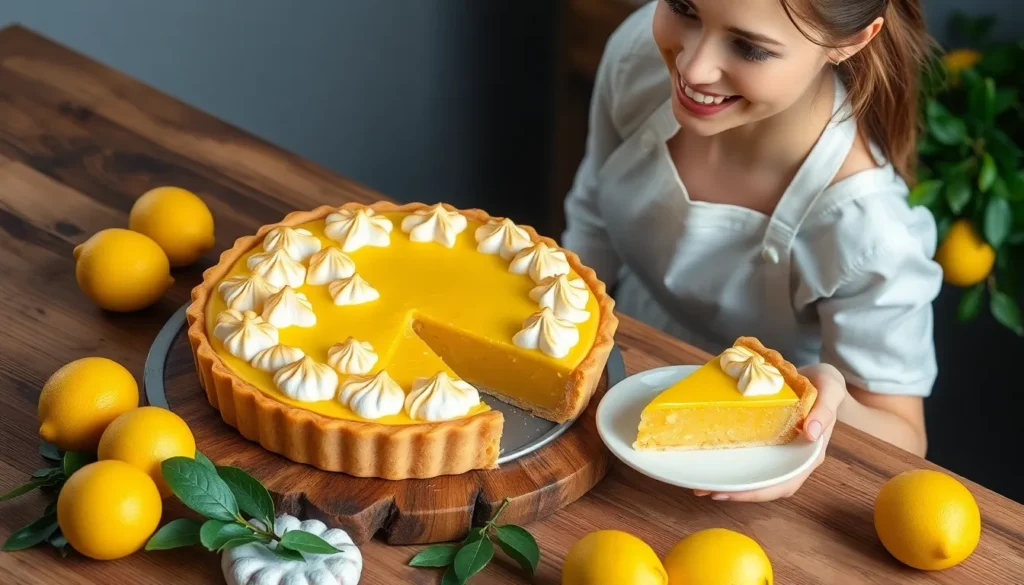
Nothing beats the perfect balance of tart and sweet that a classic lemon pie delivers. This timeless dessert has been gracing American tables since the 19th century and remains one of our most beloved comfort foods. The combination of silky lemon curd filling and buttery pastry crust creates a dessert that’s both elegant enough for special occasions and comforting enough for weeknight treats.
We’ve perfected this lemon pie recipe to give you that ideal tangy bite followed by creamy sweetness that melts on your tongue. The bright citrus flavor cuts through rich meals beautifully while the smooth texture satisfies every dessert craving you’ve got.
What makes our version special is the foolproof technique that prevents curdling and ensures a perfectly set filling every time. You’ll discover how simple ingredients like fresh lemons, eggs, and sugar transform into something absolutely magical. This isn’t just another lemon pie – it’s the lemon pie that’ll become your go-to recipe for years to come.
Ingredients
Our classic lemon pie relies on simple pantry staples that transform into an extraordinary dessert. We’ve organized the ingredients by component to make preparation seamless and efficient.
For the Pie Crust
- 1¼ cups all-purpose flour
- ½ teaspoon salt
- ⅓ cup cold unsalted butter, cubed
- 3 to 4 tablespoons ice water
- 1 tablespoon granulated sugar
For the Lemon Filling
- 1 cup granulated sugar
- ⅓ cup cornstarch
- ¼ teaspoon salt
- 1⅓ cups water
- 3 large egg yolks, lightly beaten
- 2 tablespoons unsalted butter
- ⅓ cup fresh lemon juice (about 2 large lemons)
- 1 tablespoon lemon zest, finely grated
- 2 drops yellow food coloring (optional)
For the Meringue Topping
- 3 large egg whites, at room temperature
- ¼ teaspoon cream of tartar
- 6 tablespoons granulated sugar
- ½ teaspoon vanilla extract
Equipment Needed

Creating our perfect lemon pie requires exact tools that ensure success from start to finish. We recommend gathering all equipment before beginning to streamline the baking process.
Essential Baking Equipment:
- 9-inch pie plate for proper sizing and even baking
- Medium non-reactive saucepan or pot for preparing the lemon filling without metallic taste
- Stand mixer with whisk attachment or electric hand mixer for achieving perfect meringue peaks
Preparation Tools:
- Citrus juicer for extracting maximum lemon juice efficiently
- Microplane grater or zester for obtaining fine lemon zest
- Measuring cups and spoons for precise ingredient ratios
- Multiple mixing bowls for separating different components
Mixing and Serving Implements:
- Wire whisk for smooth filling consistency
- Silicone spatula or wooden spoon for gentle stirring and easy pouring
- Offset spatula (optional but helpful) for spreading and sealing meringue edges
We find that using the right equipment makes the difference between a good lemon pie and an exceptional one. Quality tools prevent common issues like curdled filling or deflated meringue. Our non-reactive saucepan ensures the lemon filling maintains its bright flavor without any metallic interference. The stand mixer creates the stable meringue peaks that crown our pie beautifully.
Having these tools ready before starting prevents interruptions during critical cooking moments. We always emphasize preparation because timing matters when working with temperature-sensitive components like egg-based fillings and meringue toppings.
Instructions

We’ll guide you through each step to create this spectacular lemon pie that balances tangy citrus with sweet meringue. Follow these detailed instructions for professional results every time.
Prep the Pie Crust
Combine 1¼ cups all-purpose flour, 1 tablespoon granulated sugar, and ½ teaspoon salt in a large mixing bowl. Cut the cold butter into small cubes and add to the flour mixture. Using a pastry cutter or two knives, work the butter into the flour until the mixture resembles coarse crumbs with some pea-sized pieces remaining.
Sprinkle 1 tablespoon of ice water over the mixture and gently toss with a fork. Continue adding water one tablespoon at a time until the dough just begins to hold together when pressed. The dough should not be sticky or wet.
Turn the dough onto a lightly floured surface and gently knead 2-3 times until it forms a cohesive ball. Shape into a disc, wrap tightly in plastic wrap, and refrigerate for at least 1 hour.
Roll the chilled dough on a floured surface into a 12-inch circle. Transfer to your 9-inch pie plate and trim excess dough, leaving a 1-inch overhang. Fold the edges under and crimp decoratively. Prick the bottom with a fork and refrigerate for 30 minutes.
Preheat your oven to 425°F. Line the crust with parchment paper and fill with pie weights. Bake for 12 minutes, remove weights and parchment, then bake 8-10 minutes more until golden brown. Cool completely on a wire rack.
Make the Lemon Filling
Whisk together ¾ cup granulated sugar, ⅓ cup cornstarch, and ¼ teaspoon salt in your medium non-reactive saucepan. Gradually whisk in 1½ cups water until completely smooth with no lumps remaining.
Place the saucepan over medium heat and cook, stirring constantly with a whisk, until the mixture thickens and begins to bubble. Continue cooking for 2-3 minutes until it reaches a pudding-like consistency.
Beat the 4 egg yolks in a separate bowl. Slowly pour about ¼ cup of the hot mixture into the yolks while whisking constantly to temper them. Add another ¼ cup of hot mixture, whisking continuously to prevent curdling.
Pour the tempered egg mixture back into the saucepan and return to medium heat. Cook for 2-3 minutes, stirring constantly, until the filling is thick enough to coat the back of a spoon.
Remove from heat and immediately stir in 4 tablespoons butter, ⅓ cup fresh lemon juice, and 2 tablespoons lemon zest until completely incorporated. Add yellow food coloring if desired for a brighter appearance.
Prepare the Meringue
Ensure your mixing bowl and whisk attachment are completely clean and free of any grease. Separate the 4 egg whites and let them come to room temperature for about 30 minutes.
Beat the egg whites and ¼ teaspoon cream of tartar on medium speed until soft peaks form. The peaks should bend over when you lift the beaters.
Gradually add ½ cup granulated sugar, one tablespoon at a time, while continuing to beat. Increase speed to high and beat until stiff, glossy peaks form. Add 1 teaspoon vanilla extract and beat for 30 seconds more.
The meringue is ready when it holds its shape and appears smooth and shiny. Peaks should stand straight up without drooping.
Assemble the Pie
Pour the hot lemon filling directly into the cooled pie crust, spreading it evenly with a spatula. The filling should still be warm when you add the meringue.
Immediately dollop the meringue over the hot filling, starting at the edges and working toward the center. Use the back of a spoon to spread the meringue, ensuring it touches the crust all around to create a seal.
Create decorative peaks and swirls with your spoon for an attractive presentation. Preheat your oven to 350°F and bake for 12-15 minutes until the meringue is golden brown.
Cool the pie on a wire rack for 1 hour at room temperature, then refrigerate for at least 3 hours before serving. This allows the filling to set completely for clean slicing.
Baking Directions

Now we move to the crucial baking phase where our prepared components transform into the perfect lemon pie. Each step requires precise timing and temperature control to achieve that ideal balance of textures.
Blind Bake the Crust
We begin by preheating our oven to 350°F (180°C) while we prepare the crust base. Mix the crushed graham cracker crumbs with granulated sugar and melted butter in a bowl until the mixture resembles wet sand. Press this mixture firmly and evenly into our 9-inch pie dish, creating a compact foundation that will hold our filling.
| Baking Stage | Temperature | Duration | Visual Cue |
|---|---|---|---|
| Blind Baking | 350°F (180°C) | 8-10 minutes | Lightly golden brown |
| Cooling Period | Room temperature | 5-10 minutes | Cool to touch |
Place the crust in the preheated oven and bake for 8 to 10 minutes until it achieves a lightly golden brown color. Remove from the oven and allow it to cool for 5 to 10 minutes before adding our lemon filling. This cooling period prevents the hot crust from cooking the filling too quickly.
Add Filling and Bake
We combine our prepared lemon juice, sweetened condensed milk, and egg yolks in a bowl, whisking until the mixture becomes completely smooth and unified. Pour this silky filling into our cooled crust, ensuring even distribution across the surface.
| Filling Stage | Temperature | Duration | Doneness Test |
|---|---|---|---|
| Main Bake | 350°F (180°C) | 18-22 minutes | Set but slightly jiggly center |
Return the pie to the 350°F (180°C) oven and bake for 18 to 22 minutes. We know the filling is perfectly set when the edges appear firm but the center still has a slight jiggle when gently shaken. This ensures our lemon filling will have that perfect creamy consistency once cooled.
Add Meringue and Final Bake
For those creating a lemon meringue pie, we prepare our meringue topping using the egg whites and sugar from our ingredient list. Spread the fluffy meringue evenly over the filled pie, creating decorative peaks and swirls with a spatula.
| Meringue Stage | Temperature | Duration | Appearance |
|---|---|---|---|
| Final Bake | 325°F (165°C) | 10-15 minutes | Golden brown peaks |
We reduce our oven temperature to 325°F (165°C) and bake for 10 to 15 minutes until the meringue peaks turn a beautiful golden brown. Remove the finished pie from the oven and allow it to cool completely at room temperature. Refrigerate the pie for at least 5 to 6 hours or overnight before serving to ensure the filling sets properly for clean slicing.
Make-Ahead Instructions

Planning ahead makes lemon pie preparation much more manageable and stress-free. We can prepare various components of our lemon pie in advance to save time and ensure perfect results when we’re ready to serve.
Preparing Components in Advance
Pie Crust Preparation
Our homemade pie crust can be prepared up to 5 days ahead and stored in the refrigerator. We simply wrap the dough tightly in plastic wrap or store the pre-baked crust covered at room temperature. For longer storage, we can freeze the unbaked dough for up to 3 months or the baked crust for up to 1 month.
Lemon Filling Timeline
The lemon filling requires at least 2 hours of chilling time in the refrigerator to set properly. We can prepare the filling component earlier in the day and let it chill while we handle other tasks. This extended chilling time actually improves the texture and makes slicing cleaner.
Storage Guidelines by Pie Type
| Pie Type | Make-Ahead Window | Storage Method |
|---|---|---|
| Simple Lemon Pie | Up to 3 days | Refrigerated, covered |
| Lemon Meringue Pie | 1-2 days maximum | Refrigerated, loosely covered |
| No-Bake Lemon Icebox Pie | Up to 2 days | Refrigerated, covered |
Assembly and Storage Tips
Complete Pie Storage
Our assembled lemon pie stores best in the refrigerator and should be consumed within the timeframes listed above. We recommend covering the pie loosely with aluminum foil or plastic wrap to prevent absorption of refrigerator odors while allowing air circulation.
Meringue Considerations
Lemon meringue pie requires special attention when storing ahead. The meringue may begin to weep after a day or two, so we suggest making this version closer to serving time. We can prepare the crust and filling ahead, then add fresh meringue just before the final baking step.
Serving Preparation
When we’re ready to serve our make-ahead lemon pie, we remove it from the refrigerator about 15 minutes before slicing. This brief tempering period makes cutting cleaner and enhances the flavor profile of our perfectly prepared dessert.
Storage Tips

We understand that proper storage can make the difference between a perfect lemon pie and a disappointing dessert. Our experience shows that meringue-topped pies require special attention since the delicate topping can become sticky and weep when exposed to cold environments.
Immediate Storage Recommendations
We always recommend consuming meringue-topped lemon pies within 24 hours of assembly for the best texture and appearance. The meringue performs best when served shortly after preparation, maintaining its light and airy structure without becoming soggy.
Refrigeration Guidelines
We store cream-filled lemon pies in the refrigerator due to their dairy content. But, we exercise caution with meringue-topped versions since moisture absorption can compromise the topping’s quality. When refrigeration becomes necessary, we cover the pie with a cake dome or plastic wrap after allowing it to cool completely.
Component Storage Strategy
We often prepare lemon pie components separately for optimal results. Our lemon filling stores beautifully in an airtight container in the refrigerator for up to one day. We also bake pie crusts ahead of time, storing them in airtight containers for up to two days at room temperature.
| Storage Component | Method | Duration |
|---|---|---|
| Lemon Filling | Refrigerated, airtight container | Up to 1 day |
| Baked Pie Crust | Room temperature, airtight container | Up to 2 days |
| Assembled Meringue Pie | Refrigerated, covered | Same day consumption recommended |
Make-Ahead Assembly Tips
We recommend preparing the crust and filling in advance when planning ahead. Store these components separately in their respective containers, then assemble the complete pie with fresh meringue just before serving. This approach prevents the meringue from becoming compromised while ensuring all flavors remain vibrant.
Meringue Handling Best Practices
We apply meringue to our lemon pies immediately before serving whenever possible. This technique prevents weeping and maintains the signature texture that makes lemon meringue pie so appealing. When storage becomes unavoidable, we avoid refrigeration to minimize moisture-related issues with the delicate topping.
Serving Suggestions

We recommend serving our lemon pie chilled to fully appreciate the contrast between the tangy filling and buttery crust. The cold temperature enhances the creamy texture of the lemon curd while maintaining the structural integrity of each slice.
Our preferred approach involves removing the pie from the refrigerator 15 minutes before serving to allow the flavors to develop at room temperature. This brief warming period creates the perfect balance between maintaining the pie’s set consistency and releasing the bright citrus aromas that make each bite more enjoyable.
Topping combinations elevate the classic lemon pie experience significantly. We love adding a generous dollop of freshly whipped cream to complement the tart lemon filling with its rich and airy texture. Fresh berries work beautifully as both garnish and flavor enhancement – we particularly enjoy using blueberries or strawberries arranged artfully on top or alongside each slice.
For those seeking variety we suggest creating a lime pie variation using the same technique but substituting fresh lime juice and zest for the lemon components. This tropical twist offers a different citrus profile while maintaining the beloved creamy consistency our readers expect.
Beverage pairings complete the dessert experience perfectly. We find that a cup of freshly brewed coffee creates an ideal contrast to the sweet and tart flavors while a delicate black tea or chamomile infusion provides a more subtle accompaniment that allows the lemon flavors to shine.
Consider serving individual slices on chilled dessert plates to maintain the optimal temperature throughout the dining experience. A thin fruit glaze brushed over the surface adds visual appeal and an extra layer of flavor that guests will appreciate.
Conclusion
We’ve shared everything you need to create the perfect lemon pie that’ll become a treasured recipe in your kitchen. From mastering the buttery crust to achieving that silky smooth filling this dessert combines simple ingredients with proven techniques for spectacular results.
The key to success lies in proper preparation timing and temperature control. Whether you’re making this classic treat for a special celebration or a casual family dinner our step-by-step approach ensures consistent delicious outcomes every time.
Remember that patience during the cooling and chilling phases makes all the difference in achieving clean slices and the perfect texture. With these techniques mastered you’ll have a go-to dessert that never fails to impress guests and satisfy that craving for something bright and refreshing.
Frequently Asked Questions
How long should I refrigerate lemon pie before serving?
Refrigerate your lemon pie for at least 5 to 6 hours or overnight before serving. This ensures the filling sets properly for clean slicing. Remove the pie from the refrigerator 15 minutes before serving to enhance flavor and make cutting easier.
Can I make lemon pie crust ahead of time?
Yes, you can make the pie crust up to 5 days in advance and store it in the refrigerator. For longer storage, freeze the crust for several weeks. The lemon filling can also be prepared earlier in the day and chilled for at least 2 hours.
Why does meringue weep on lemon pie?
Meringue weeps due to moisture and temperature changes. To prevent this, make meringue-topped pies closer to serving time and consume within 24 hours. Avoid refrigeration unless necessary, and cover with a cake dome or plastic wrap after cooling completely.
What temperature should I bake lemon pie at?
Blind bake the crust at 350°F (180°C) for 8-10 minutes. Bake the filled pie at 350°F for 18-22 minutes until set but slightly jiggly. For meringue topping, reduce temperature to 325°F (165°C) and bake for 10-15 minutes until golden brown.
How do I prevent lemon curd from curdling?
Use a foolproof technique by whisking dry ingredients first, then gradually adding liquid while cooking over medium heat. Constantly whisk the mixture and temper the egg yolks by adding hot mixture slowly to prevent curdling and ensure a smooth, silky filling.
What equipment do I need to make lemon pie?
Essential equipment includes a 9-inch pie plate, medium non-reactive saucepan, stand mixer with whisk attachment, citrus juicer, microplane grater, and measuring cups. Having the right tools ready prevents interruptions during critical cooking moments and ensures success.
How long does lemon pie last in the refrigerator?
Plain lemon pie lasts 3-4 days in the refrigerator when properly covered. Lemon meringue pie should be consumed within 24 hours for optimal texture. Store baked pie crusts at room temperature for up to two days, and lemon filling in an airtight container for one day.
Can I make lime pie using this recipe?
Yes, you can easily substitute fresh lime juice and zest for lemon to create a delicious lime pie variation. Follow the same preparation method and baking instructions. The tangy lime flavor pairs beautifully with the buttery crust and creates an equally refreshing dessert.