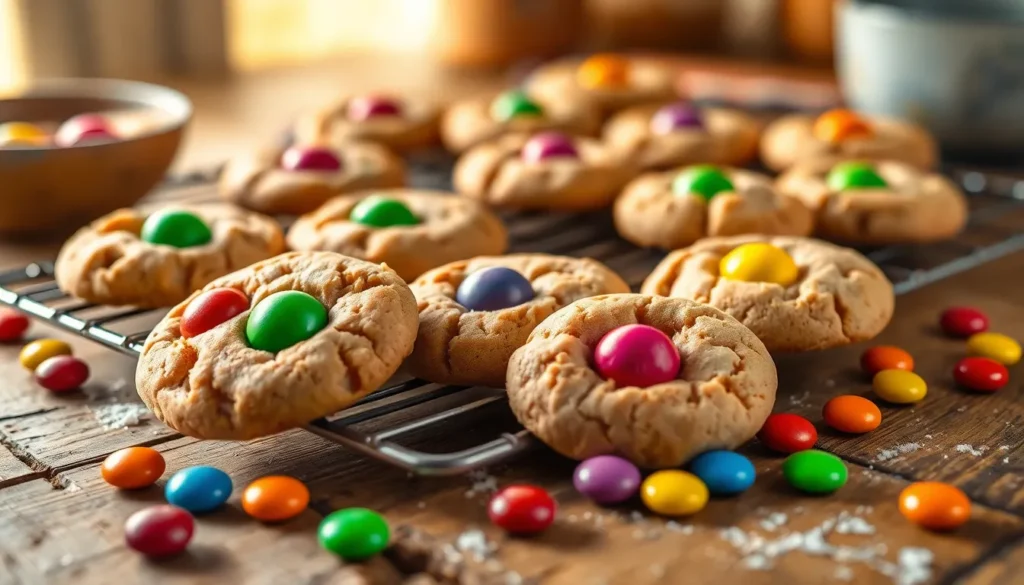
We’ve all experienced that moment when we crave something sweet and colorful that brings out our inner child. Smartie cookies deliver exactly that experience – combining the nostalgic crunch of everyone’s favorite candy-coated chocolates with soft, chewy cookie perfection.
These vibrant treats transform ordinary sugar cookies into extraordinary rainbow delights that’ll brighten any dessert table. The beauty of smartie cookies lies in their simplicity and visual appeal. Each bite delivers a satisfying contrast between the tender cookie base and those delightful candy bursts that add both texture and sweetness.
Ingredients
We carefully selected each ingredient to create the perfect balance of tender cookie texture and vibrant candy crunch. Our ingredient list focuses on pantry staples that work together to produce consistently delicious results.
Cookie Dough Ingredients
- 2¼ cups all-purpose flour
- 1 teaspoon baking soda
- 1 teaspoon salt
- 1 cup unsalted butter, softened to room temperature
- ¾ cup granulated sugar
- ¾ cup packed light brown sugar
- 2 large eggs, room temperature
- 2 teaspoons vanilla extract
- ¼ cup whole milk
Smarties Candy
- 2 cups Smarties candies, unwrapped
- Additional ½ cup Smarties candies for pressing on top before baking
Equipment Needed

Creating perfect smartie cookies requires the right tools to ensure consistent results and optimal texture. We recommend gathering these essential items before starting your baking process.
Large mixing bowls serve as the foundation for combining all our ingredients effectively. We suggest using at least two bowls to keep wet and dry ingredients separate initially.
Electric mixer becomes crucial for achieving the proper butter and sugar consistency. This tool helps us create that smooth, creamy base that makes smartie cookies irresistibly tender.
Measuring cups and spoons ensure accuracy in our recipe proportions. Precise measurements directly impact the final texture and taste of our cookies.
Whisk allows us to properly combine dry ingredients without overmixing. We use this tool to evenly distribute baking soda and salt throughout the flour.
Rubber spatula provides gentle mixing action when incorporating smarties into our dough. This prevents the candies from breaking while ensuring even distribution.
Baking sheets form the cooking surface for our cookies. We recommend having multiple sheets available for efficient batch baking.
Parchment paper or silicone baking mats prevent sticking and promote even browning. These surfaces make cookie removal effortless while maintaining shape integrity.
Cookie scoop offers consistent sizing for uniform baking results. While optional, this tool helps create professional looking cookies with identical dimensions.
| Equipment Category | Essential Items | Optional Items |
|---|---|---|
| Mixing Tools | Large bowls, Electric mixer, Whisk, Rubber spatula | Stand mixer |
| Measuring Tools | Measuring cups and spoons | Digital scale |
| Baking Tools | Baking sheets, Parchment paper | Cookie scoop, Silicone mats |
Having all equipment ready before beginning ensures smooth workflow and prevents interruptions during the mixing and baking process.
Instructions

Follow these step-by-step instructions to create perfectly textured smartie cookies with vibrant color and irresistible flavor. Each stage builds upon the previous one to ensure our cookies maintain their shape and deliver the ideal balance of soft cookie dough and crunchy candy coating.
Prep the Dough
Begin by creaming together 115-150 grams of softened unsalted butter with 80-175 grams of light brown sugar in a large mixing bowl. Beat the mixture with an electric mixer on medium speed for 2-3 minutes until the texture becomes smooth and pale. Add one egg and vanilla extract to the creamed mixture and continue beating until fully incorporated. The dough should appear light and fluffy at this stage.
Gradually add the dry ingredients to the wet mixture while mixing on low speed. Stop mixing as soon as the flour disappears to prevent tough cookies. The final dough will feel slightly sticky but should hold together when pressed.
Chill the Dough
Transfer the prepared dough to the refrigerator for at least one hour to firm up properly. For quicker results we can place the dough in the freezer for 30 minutes instead. This chilling step prevents excessive spreading during baking and helps our cookies maintain their intended shape.
Well-chilled dough will feel firm to the touch and won’t stick to our hands when we shape it. The temperature difference also helps create better texture contrast between the soft interior and slightly crisp edges.
Shape the Cookies
Scoop the chilled dough into portions weighing 20-40 grams each using a cookie scoop or tablespoon. Roll each portion between our palms to form smooth balls. Place the dough balls on parchment-lined baking sheets with at least 2 inches of space between each cookie to allow for spreading.
For larger cookies we can use up to 120 grams per ball and divide the dough into eight generous portions. Press each ball slightly to flatten the bottom and ensure even baking.
Add the Smarties
Fold three-quarters of the Smarties directly into the dough before shaping for even distribution throughout each cookie. Reserve the remaining Smarties to press gently onto the tops of the shaped cookies before baking. This technique ensures vibrant color on both the surface and interior of our finished cookies.
Press the top Smarties just deep enough to secure them without pushing them completely into the dough. The candies should remain visible for maximum visual appeal.
Bake the Cookies
Preheat the oven to 180°C-200°C with fan setting (350°F-400°F conventional). Bake the cookies for 10-13 minutes until the edges appear lightly golden but the centers still look slightly underbaked. The cookies will continue cooking on the hot baking sheet after removal from the oven.
Allow the cookies to cool on the baking sheets for 30 minutes before transferring to a wire rack. This cooling period lets the cookies set properly and prevents them from breaking apart when moved.
Directions for Perfect Results

Achieving bakery-quality smartie cookies requires attention to key temperature and timing details that make the difference between good and exceptional results. We’ve perfected these techniques through extensive testing to ensure your cookies turn out perfectly every time.
Temperature Tips
We recommend preheating your oven to 375°F (190°C) for consistently baked cookies with tender centers and lightly golden edges. For those who prefer more golden cookies with slightly crispier textures, increase the temperature to 400°F (200°C) and monitor closely to prevent overbaking.
Room temperature butter creates the ideal cookie texture we’re aiming for in our smartie cookies. We ensure our butter sits out for approximately 30 to 45 minutes before mixing, allowing it to soften enough that we can easily press a finger into it without resistance. This temperature allows the butter to cream properly with our sugars, creating the light and fluffy base that gives our cookies their perfect texture.
| Temperature Element | Recommended Setting | Purpose |
|---|---|---|
| Oven Temperature | 375°F (190°C) | Standard baking |
| Oven Temperature (Golden) | 400°F (200°C) | Crispier texture |
| Butter Temperature | Room temperature | Proper creaming |
Timing Guidelines
We chill our cookie dough for at least 30 minutes to one hour before baking, especially when making larger cookies. This chilling period prevents excessive spreading and helps maintain the cookies’ shape while ensuring the Smarties stay positioned where we place them.
Our baking times vary based on cookie size to achieve optimal results. We bake larger cookies for 11 to 13 minutes, watching for edges that turn golden while centers remain slightly soft. Smaller cookies require approximately 12 minutes of baking time for the perfect balance of chewy centers and crisp edges.
After removing cookies from the oven, we let them cool on the baking tray for at least 30 minutes before transferring to a wire rack. This cooling period allows the cookies to set properly and prevents breaking during the transfer process.
| Cookie Size | Chilling Time | Baking Time | Cooling Time |
|---|---|---|---|
| Large cookies | 30-60 minutes | 11-13 minutes | 30+ minutes |
| Small cookies | 30-60 minutes | 12 minutes | 30+ minutes |
Storage Instructions

We know that properly storing our freshly baked smartie cookies ensures they maintain their delightful texture and vibrant flavor for as long as possible. Room temperature storage works best for these colorful treats, allowing us to enjoy them at their peak quality.
Room Temperature Storage
Our smartie cookies stay fresh when stored in an airtight container at room temperature for up to one week. This storage method preserves the tender cookie texture while keeping the Smarties candy pieces from becoming sticky or losing their crunch. We recommend placing parchment paper between cookie layers to prevent them from sticking together.
Freezing Options
Freezing provides us with excellent long-term storage answers for both baked cookies and unbaked dough. We can freeze completely cooled cookies in airtight containers or freezer bags for up to three months without compromising their quality.
| Storage Method | Duration | Special Instructions |
|---|---|---|
| Room Temperature | Up to 1 week | Use airtight container |
| Frozen Baked Cookies | Up to 3 months | Cool completely before freezing |
| Frozen Unbaked Dough | Up to 3 months | Thaw at room temperature before baking |
For unbaked dough, we freeze the shaped cookie dough balls on a baking sheet before transferring them to freezer bags. When we’re ready to bake frozen cookies, we add an extra one to two minutes to the standard baking time. Frozen dough balls should thaw at room temperature before baking to ensure even cooking.
Storage Tips for Best Results
We avoid refrigerating our smartie cookies since cold temperatures can make them lose their appealing texture. Instead, we ensure our storage containers are completely dry and clean before adding the cookies. Silica gel packets can help absorb excess moisture if we live in particularly humid climates, though this step isn’t necessary for most storage situations.
Make-Ahead Tips

Planning ahead transforms your baking experience into a stress-free try. We recommend preparing smartie cookie dough in advance to save time during busy periods or special occasions.
Freezing Cookie Dough
Freezing unbaked dough offers maximum flexibility for fresh cookies anytime. Scoop the prepared dough into individual portions using a cookie scoop or spoon. Roll each portion into balls and arrange them on a parchment-lined baking sheet. Place the sheet in the freezer for 2 hours until the dough balls solidify completely.
Transfer the frozen dough balls to an airtight container or freezer bag for long-term storage. Label the container with the date and baking instructions for future reference. Frozen dough maintains quality for up to 3 months when stored properly.
Baking from frozen requires minimal adjustments to our standard process. Remove the desired number of dough balls from the freezer and place them directly on prepared baking sheets. Add 1 to 2 extra minutes to the original baking time to account for the frozen state. No thawing is necessary though you can let them sit at room temperature for 10 minutes if preferred.
Refrigerating Dough
Short-term make-ahead storage works perfectly in the refrigerator. Wrap the prepared dough tightly in plastic wrap to prevent drying and absorbing other flavors. Refrigerated dough stays fresh for up to 4 days and actually improves in flavor as the ingredients meld together.
Remove the chilled dough from the refrigerator 15 minutes before shaping to make handling easier. The slightly softened dough shapes more easily while maintaining its structure during baking.
Make-Ahead Storage Timeline
| Storage Method | Duration | Temperature |
|---|---|---|
| Refrigerated Dough | 4 days | 35-40°F |
| Frozen Dough Balls | 3 months | 0°F |
| Room Temperature Preparation | Same day | 68-72°F |
These make-ahead strategies ensure you always have delicious smartie cookies ready to bake whenever the craving strikes or guests arrive unexpectedly.
Serving Suggestions

Our smartie cookies transform any moment into a special occasion with their vibrant colors and delightful sweetness. We recommend pairing these treats with a cold glass of milk for the classic afternoon snack experience that brings out the best in both the cookies and the creamy beverage.
Perfect Tea Time Companions: We love serving these colorful cookies alongside a steaming cup of tea during afternoon breaks. The gentle sweetness of the cookies complements both black teas and herbal blends beautifully.
Ice Cream Sandwich Innovation: Transform our smartie cookies into an impressive dessert by creating ice cream sandwiches. We suggest using honeycomb ice cream between two cookies for a quick yet sophisticated treat that guests will remember.
Warm Cookie Indulgence: Serving these cookies warm takes the experience to another level of comfort. We recommend heating individual cookies for 10 to 15 seconds in the microwave before topping with vanilla ice cream or freshly whipped cream for an extra indulgent dessert.
Party Presentation Ideas: These naturally colorful cookies work wonderfully as standalone treats at celebrations. We arrange them on tiered serving stands to showcase their vibrant Smarties and create an eye-catching dessert display.
Lunchbox Favorites: Pack our smartie cookies in lunch containers for a midday energy boost. Their sturdy texture travels well and the colorful candies provide that perfect sweet surprise during busy days.
Coffee Shop Style: We enjoy serving these cookies with hot coffee or espresso drinks. The sweetness balances the bitter notes in coffee while the chewy texture creates a satisfying contrast to hot beverages.
Conclusion
We’ve shared everything you need to create these delightful treats that bring together childhood nostalgia and homemade goodness. These colorful cookies aren’t just about great taste – they’re about creating moments of joy and connection with family and friends.
The beauty of smartie cookies lies in their versatility and forgiving nature. Whether you’re baking for a special occasion or simply craving something sweet our recipe ensures consistent results every time.
Now it’s time to gather your ingredients and start baking. Your kitchen will soon be filled with the irresistible aroma of freshly baked cookies and those vibrant Smarties waiting to deliver their satisfying crunch. Happy baking!
Frequently Asked Questions
What are smartie cookies?
Smartie cookies are delightful treats that combine the nostalgic flavors of candy-coated chocolates with soft, chewy sugar cookies. These vibrant desserts feature colorful Smarties candies mixed into the cookie dough and pressed on top, creating an eye-catching treat that elevates ordinary cookies into something special.
What ingredients do I need to make smartie cookies?
You’ll need pantry staples including all-purpose flour, baking soda, salt, unsalted butter, granulated sugar, light brown sugar, eggs, vanilla extract, and whole milk. The star ingredient is Smarties candies, which provide the colorful crunch and burst of sweetness that makes these cookies unique.
What equipment is essential for baking smartie cookies?
Essential equipment includes large mixing bowls, an electric mixer, measuring cups and spoons, a whisk, rubber spatula, baking sheets, and parchment paper or silicone baking mats. A cookie scoop is optional but helpful for consistent sizing. Having all equipment ready ensures smooth workflow and optimal results.
What temperature should I bake smartie cookies at?
Preheat your oven to 375°F (190°C) for standard baking or 400°F (200°C) for crispier texture. Baking times vary by cookie size: larger cookies need 11-13 minutes while smaller ones require about 12 minutes. Bake until edges are golden and centers appear slightly underbaked.
How should I store smartie cookies?
Store smartie cookies at room temperature in an airtight container for up to one week, using parchment paper between layers to prevent sticking. For long-term storage, freeze baked cookies or unbaked dough for up to three months. Avoid refrigerating as cold temperatures negatively affect texture.
Can I make smartie cookie dough ahead of time?
Yes! You can prepare smartie cookie dough in advance for stress-free baking. Refrigerate dough for up to four days or freeze portioned dough for up to three months. When baking from frozen, add a couple extra minutes to the baking time for best results.
How should I serve smartie cookies?
Smartie cookies are versatile treats perfect for various occasions. Serve with cold milk for a classic snack, pair with tea for afternoon breaks, or create ice cream sandwiches. They’re also great warmed before serving, displayed on tiered stands for parties, or packed in lunchboxes.
Why should I chill the cookie dough?
Chilling smartie cookie dough for 30-60 minutes prevents excessive spreading during baking and helps maintain the cookies’ shape. This step ensures your cookies retain their intended size and thickness while achieving the perfect texture with tender centers and slightly crispy edges.