There’s something magical about homemade custard that store-bought versions simply can’t match. The silky texture and rich vanilla flavor create a dessert experience that’ll transport you straight to childhood memories of family gatherings and special occasions.
We’ve perfected this classic custard recipe to deliver that perfect balance of creamy indulgence without the intimidation factor. With just a few simple ingredients – eggs, milk, sugar, and vanilla – you’ll create a versatile dessert base that works beautifully on its own or as a complement to pies, tarts, and fresh fruit.
What makes our approach different is the foolproof technique that prevents curdling and ensures smooth results every time. Whether you’re a beginner baker or seasoned home cook, this easy custard recipe will become your go-to for impressive desserts that taste like they came from a French patisserie.
What You’ll Need
Making homemade custard requires just a handful of simple ingredients and basic kitchen tools. We’ll walk you through everything needed to create this silky dessert that rivals any bakery version.
Essential Ingredients
Our foolproof custard recipe calls for these quality ingredients:
- 6 large egg yolks (room temperature preferred)
- 1/3 cup granulated sugar
- 2 cups whole milk
- 1/4 cup heavy cream
- 2 teaspoons pure vanilla extract
- 1/8 teaspoon fine sea salt
The egg yolks provide richness and act as the natural thickening agent. Whole milk creates the perfect base while heavy cream adds luxurious texture. Pure vanilla extract delivers authentic flavor that imitation simply cannot match. We recommend using room temperature eggs as they incorporate more smoothly into the warm milk mixture.
Equipment and Tools
These essential tools ensure smooth custard preparation:
- Medium heavy-bottomed saucepan
- Fine-mesh strainer or sieve
- Large mixing bowl
- Wire whisk
- Wooden spoon or silicone spatula
- Instant-read thermometer
- Measuring cups and spoons
- Small bowl for tempering eggs
A heavy-bottomed saucepan distributes heat evenly and prevents scorching. The fine-mesh strainer removes any lumps for perfectly smooth results. An instant-read thermometer takes the guesswork out of achieving the ideal temperature. We find that a wooden spoon helps you feel the custard’s consistency as it thickens on the stovetop.
Ingredients
 2")
We need just six simple ingredients to create our perfect homemade custard. Each component plays a crucial role in achieving that silky smooth texture and rich flavor we’re after.
6 large egg yolks form the foundation of our custard. These golden gems provide natural thickening power and create the luxurious richness that makes homemade custard so special. Room temperature eggs blend more smoothly into our mixture.
1/3 cup granulated sugar sweetens our custard to perfection. This amount creates the ideal balance without overpowering the delicate vanilla notes.
2 cups whole milk gives our custard its creamy base. The fat content in whole milk contributes significantly to the final texture and mouthfeel.
1/4 cup heavy cream elevates our custard from good to extraordinary. This addition creates an even more luxurious consistency that coats the spoon beautifully.
2 teaspoons pure vanilla extract infuses our custard with that classic flavor we all love. Pure vanilla extract delivers superior taste compared to artificial alternatives.
1/8 teaspoon fine sea salt enhances all the other flavors in our custard. This small amount brightens the sweetness and adds depth to the overall taste profile.
| Ingredient | Amount | Purpose |
|---|---|---|
| Large egg yolks | 6 | Natural thickening and richness |
| Granulated sugar | 1/3 cup | Sweetening |
| Whole milk | 2 cups | Creamy base |
| Heavy cream | 1/4 cup | Luxurious texture |
| Pure vanilla extract | 2 teaspoons | Classic flavor |
| Fine sea salt | 1/8 teaspoon | Flavor enhancement |
Instructions
 4")
Creating perfect homemade custard requires patience and attention to detail. We’ll guide you through each step to ensure silky smooth results every time.
Prep the Ingredients
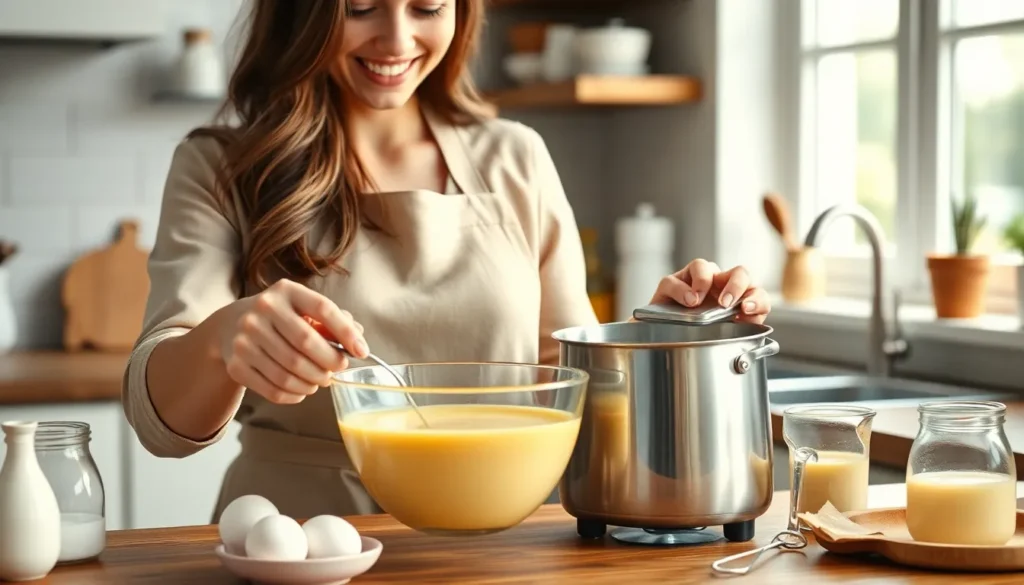
Before we begin cooking, let’s measure all our ingredients for consistency and accuracy. We’ll separate our 6 egg yolks from the whites and place them in a large mixing bowl along with the granulated sugar. The room temperature eggs will incorporate more smoothly into our mixture. Next, we’ll set aside our vanilla extract and salt for easy access during cooking. Having everything measured and ready prevents any rushed moments that could affect our custard’s texture.
Heat the Milk
We start by combining the whole milk and heavy cream in our medium heavy-bottomed saucepan. The heavy bottom ensures even heat distribution and prevents scorching. Place the pan over medium-low heat and warm the mixture gently until small bubbles form around the edges. Steam will begin to rise from the surface when the mixture reaches the proper temperature. We must avoid letting it come to a full boil as this can create a skin on top or scorch the milk.
Temper the Eggs
Now comes the crucial step that prevents curdling. We’ll whisk the egg yolks and sugar together until they’re pale and slightly thickened. While whisking continuously, we slowly pour about 1/2 cup of the hot milk mixture into the egg bowl in a thin stream. This gradual process raises the temperature of the eggs without cooking them. Once we’ve added the first portion, we can add the remaining hot milk more quickly while still whisking constantly. The mixture should be smooth and well combined.
Cook the Custard
We return the entire mixture to our saucepan and place it back over medium-low heat. Stirring constantly with our wooden spoon or silicone spatula, we cook the custard until it thickens enough to coat the back of the spoon. Our instant-read thermometer should register between 170°F and 175°F when the custard is properly thickened. The mixture will transform from thin and milky to rich and creamy during this process. We must keep stirring to prevent the bottom from scorching and maintain that silky texture we’re after.
Strain and Cool
Once our custard reaches the perfect consistency, we immediately remove it from heat and stir in the vanilla extract and salt. We’ll strain the warm custard through our fine-mesh strainer into a clean bowl to remove any small lumps or cooked egg particles. Press the custard gently through the strainer with the back of a spoon if needed. To prevent a skin from forming, we place plastic wrap directly on the surface of the custard before refrigerating. The custard will continue to thicken as it cools and should be chilled for at least 2 hours before serving.
Directions for Serving
 6")
Our homemade custard transforms into a versatile dessert that adapts beautifully to different serving preferences. We recommend allowing the custard to cool completely in the refrigerator for optimal texture before deciding how to present this silky creation.
Serving Warm Custard
Fresh from the stovetop, our warm custard creates an indulgent sauce that elevates countless desserts. We love drizzling it over warm apple pies where the custard seeps into every crevice. Pour it generously over fruit crisps to create a restaurant-quality finish that impresses dinner guests. Warm custard also transforms simple pound cake into an elegant dessert when spooned over individual slices.
The key to serving warm custard lies in timing. We suggest preparing other dessert components first, then making the custard just before serving to maintain that perfect temperature.
Serving Chilled Custard
Chilled custard offers a completely different but equally delightful experience. We transfer our cooled custard to individual glasses or ramekins for an elegant presentation. The chilling process requires 3 to 4 hours minimum, though overnight chilling develops the richest flavor and smoothest texture.
Fresh berries make the perfect topping for our chilled custard. We arrange strawberries, blueberries, or raspberries on top just before serving to maintain their vibrant appearance. Other fruit options include sliced peaches, diced pears, or seasonal favorites that complement the vanilla notes.
Preventing Surface Issues
Plastic wrap becomes our best friend when storing chilled custard. We press it directly onto the custard surface to prevent that unwanted skin from forming during refrigeration. This technique maintains the silky texture we worked so carefully to achieve during the cooking process.
Our properly stored custard keeps fresh in the refrigerator for up to three days, making it an excellent make-ahead dessert option for entertaining.
Storage Instructions
 8")
Proper storage keeps our homemade custard fresh and maintains its silky texture for days. We always cool the custard completely before transferring it to storage containers to prevent condensation and bacterial growth.
Immediate Storage Steps
We transfer our cooled custard to an airtight container to maintain freshness and prevent the absorption of refrigerator odors. Before sealing the container, we cover the custard surface directly with plastic wrap or wax paper to prevent a skin from forming. This simple step keeps the texture smooth and creamy throughout storage.
We label each container with the preparation date to track freshness accurately. Our properly stored homemade custard stays fresh in the refrigerator for 2 to 4 days depending on the storage method and recipe variations.
Refrigerator Storage Guidelines
| Storage Method | Duration | Container Type |
|---|---|---|
| Airtight container with surface wrap | 2-4 days | Glass or plastic container |
| Standard refrigeration | 2-3 days | Any airtight container |
Before serving refrigerated custard, we stir it gently to restore its original consistency if it has thickened during storage.
Reheating Instructions
We reheat custard using a double boiler or stovetop for gentle warming that preserves the smooth texture. Microwaving is not our preferred method as it may cause curdling, though careful reheating in short intervals with frequent stirring can work when necessary.
Freezer Storage Option
Custard can be frozen for 2 to 3 months, though we note that texture changes may occur. We use freezer-safe airtight containers and portion the custard for easy defrosting. When thawing, we move the custard to the refrigerator and allow it to thaw slowly. If separation occurs during the freezing and thawing process, we whisk or blend the custard briefly to restore its original consistency.
Tips for Perfect Homemade Custard
 10")
Mastering homemade custard requires understanding a few key techniques that separate success from disappointment. These proven methods will help you create silky smooth custard every single time.
Preventing Curdling
Tempering the eggs stands as the most critical step in preventing curdled custard. We slowly pour a small amount of warm milk into our egg mixture while whisking continuously to gradually raise the temperature without shocking the eggs. This technique creates a smooth bridge between cold eggs and hot milk.
Continuous stirring becomes essential when adding hot milk to the egg mixture. We maintain constant movement with our whisk to distribute heat evenly and prevent the eggs from scrambling. The key lies in keeping those eggs moving so they don’t have time to cook in one spot.
Temperature control makes all the difference in achieving smooth results. We ensure our dairy mixture reaches the perfect hot temperature without boiling before adding it to the eggs. This prevents sudden temperature changes that cause the proteins in eggs to seize up and create lumps.
Achieving the Right Consistency
Starch and sugar work together as our secret weapon for perfect texture. We mix cornstarch with sugar before adding it to our mixture because sugar granules help break up the starch and prevent clumping. This simple combination ensures our custard develops a smooth consistency from the start.
Medium heat cooking gives us complete control over the thickening process. We cook our custard while stirring constantly until it thickens enough to coat the back of a spoon. This visual cue tells us we’ve reached the ideal consistency without overcooking.
Whisking technique becomes crucial as the custard thickens on the stovetop. We use steady circular motions to maintain smooth texture throughout the cooking process. When our custard becomes too thick we add small amounts of cream to adjust the consistency back to our desired texture.
Proper cooling and storage prevent skin formation and maintain our perfect consistency. We cover the finished custard with plastic wrap pressed directly onto its surface before refrigerating for at least 3 to 4 hours. This direct contact method stops air from creating an unwanted film on top of our silky custard.
Flavor Variations
 12")
Now that we’ve mastered the basic custard technique, we can explore exciting flavor variations that transform our classic recipe into unique dessert experiences. These variations build on our foundation while introducing new taste profiles that elevate the custard experience.
Vanilla Bean Custard
We elevate our basic custard by incorporating real vanilla beans for an intensely aromatic and visually stunning dessert. Split one vanilla bean pod lengthwise and scrape the tiny black seeds into our milk mixture before heating. The pod itself should be added to the warming milk to extract maximum flavor depth. This technique infuses our custard with thousands of vanilla specks that create both visual appeal and concentrated vanilla taste. We remove the pod before straining but keep those precious seeds that give our custard its signature appearance. The vanilla bean method produces a more complex flavor profile compared to extract alone.
Chocolate Custard
Rich chocolate custard transforms our base recipe into a decadent treat that satisfies the deepest chocolate cravings. We incorporate 3 tablespoons of unsweetened cocoa powder by whisking it directly with our sugar and egg yolk mixture to prevent lumps. For an even richer variation, we can melt 3 ounces of high quality dark chocolate and whisk it into our warm custard after straining. The cocoa powder method creates a smooth chocolate flavor throughout, while melted chocolate produces intense richness and depth. Both techniques require careful temperature control to prevent the chocolate from seizing or creating grainy texture.
Citrus Custard
Bright citrus custard brings refreshing tartness that balances our custard’s natural richness perfectly. We add the zest of one large lemon or orange to our warming milk, allowing the oils to infuse during the heating process. Fresh citrus juice should be stirred in after cooking and straining to preserve its bright flavor. This combination creates a custard with aromatic citrus notes and a vibrant taste that cuts through the cream’s richness. The zest provides essential oils while the juice adds the perfect amount of acidity to brighten our dessert. Citrus custard works exceptionally well as a filling for tarts or as a light finish to heavy meals.
Troubleshooting Common Issues
 14")
Even experienced home cooks encounter challenges when making custard from scratch. We’ve identified the most common problems and their proven answers to help you achieve perfect results every time.
Preventing Burning
Uneven heating poses the biggest threat to smooth custard texture. We recommend using constant stirring with a flat whisk to maintain even heat distribution throughout the cooking process. This technique allows you to reach all areas of the pan and prevents hot spots from forming at the bottom.
Avoiding Shrinking and Cracking
Overcooking causes custard to shrink and develop unsightly cracks as it cools. We solve this issue by using a water bath during baking to maintain consistent temperature control. This gentle cooking method prevents excessive heat exposure that leads to structural damage in your custard.
Eliminating Curdling Problems
Overcooking eggs creates the dreaded curdled texture that ruins custard’s silky appeal. We add starch thickeners like cornstarch to slow protein coagulation and provide more leeway before curdling occurs. This safety net allows you to cook with confidence while achieving the perfect consistency.
Fixing Watery Texture Issues
Multiple factors contribute to watery custard that lacks the desired richness. We address this problem through several targeted answers:
| Issue | Solution |
|---|---|
| High heat cooking | Cook gently over low to medium heat |
| Undercooking | Ensure proper cooking time for eggs to set |
| Missing thickening agents | Add cornstarch or flour as needed |
| Improper cooling | Allow custard to cool and set completely |
Achieving Proper Mixing Balance
Overmixing introduces unwanted air bubbles while undermixing creates uneven texture throughout your custard. We recommend mixing ingredients just until combined to avoid both extremes. This balanced approach prevents air incorporation while ensuring all ingredients blend smoothly together.
These troubleshooting techniques transform common custard failures into consistent successes. Each solution targets exact problems that can derail your custard making efforts and provides clear steps for prevention.
Make-Ahead Instructions
 16")
Our homemade custard recipe works beautifully as a make-ahead dessert that simplifies entertaining and meal planning. We recommend preparing the custard up to 3 to 4 days in advance for optimal freshness and flavor development.
Start by making the custard according to our recipe instructions and allow it to cool completely at room temperature before refrigerating. This cooling period prevents condensation from forming inside the storage container and maintains the custard’s silky texture.
Cover the custard with plastic wrap pressed directly onto its surface to prevent a skin from forming during storage. This technique creates an airtight seal that preserves the smooth consistency we worked so hard to achieve. Place the covered custard in the refrigerator and chill for at least 4 hours or overnight to allow it to set properly.
| Storage Timeline | Temperature | Storage Method |
|---|---|---|
| 3-4 days | Refrigerated | Airtight container with plastic wrap |
| 4+ hours minimum | 35-40°F | Direct surface coverage |
| Overnight preferred | Consistent cold | Individual serving containers |
We find that overnight chilling produces the best results as it allows the flavors to meld and the texture to reach its ideal consistency. For individual servings transfer the chilled custard into glasses or ramekins before your event to save time during dessert service.
When ready to serve remove the plastic wrap and give the custard a gentle stir if needed to restore its smooth texture. Our make-ahead custard pairs wonderfully with fresh fruits or whipped cream that can also be prepared in advance for effortless entertaining.
Conclusion
Making homemade custard transforms your kitchen into a bakery and fills your home with the irresistible aroma of vanilla and cream. We’ve shared everything you need to create this timeless dessert – from mastering the tempering technique to exploring delicious flavor variations.
The beauty of this recipe lies in its simplicity and versatility. Whether you’re serving it warm over fresh fruit or chilled in elegant glasses we know you’ll appreciate the rich creamy texture that only homemade custard can deliver.
With proper storage techniques and our troubleshooting tips you’re equipped to create perfect custard every time. This classic dessert will quickly become a staple in your recipe collection bringing comfort and elegance to any occasion.
Frequently Asked Questions
What ingredients do I need to make homemade custard?
You’ll need 6 large egg yolks, 1/3 cup granulated sugar, 2 cups whole milk, 1/4 cup heavy cream, 2 teaspoons pure vanilla extract, and 1/8 teaspoon fine sea salt. These simple ingredients create a rich, silky custard with perfect texture and flavor.
How do I prevent my custard from curdling?
The key is tempering your eggs properly. Gradually add warm milk to the egg mixture while whisking continuously. Never add hot milk all at once, and keep stirring constantly during cooking over medium-low heat to prevent the eggs from scrambling.
Can I make custard ahead of time?
Yes! Homemade custard can be made 3-4 days in advance. Cool it completely before refrigerating and cover with plastic wrap pressed directly onto the surface to prevent skin formation. Overnight chilling produces the best texture and flavor.
How long does homemade custard last in the refrigerator?
Properly stored homemade custard stays fresh for 2-4 days in the refrigerator. Store it in airtight containers and cover the surface with plastic wrap to maintain quality and prevent bacterial growth.
What equipment do I need to make custard?
Essential tools include a heavy-bottomed saucepan, fine-mesh strainer, large mixing bowl, wire whisk, wooden spoon or silicone spatula, instant-read thermometer, and measuring cups. These tools ensure smooth, perfectly cooked custard every time.
Can I serve custard warm or does it need to be chilled?
Custard can be enjoyed both ways! Serve it warm drizzled over desserts like apple pie, or chill it for 3-4 hours for a classic cold dessert. Both serving methods offer delicious results with different textures.
What are some popular custard flavor variations?
Popular variations include Vanilla Bean Custard (using scraped vanilla bean pods), Chocolate Custard (adding cocoa powder or melted chocolate), and Citrus Custard (incorporating lemon or orange zest). Each variation transforms the classic recipe into a unique dessert experience.
How do I fix watery or thin custard?
If your custard is too thin, return it to low heat and cook while stirring until it thickens to coat the back of a spoon. If it’s already cooled, you can gently reheat using a double boiler method to achieve proper consistency.