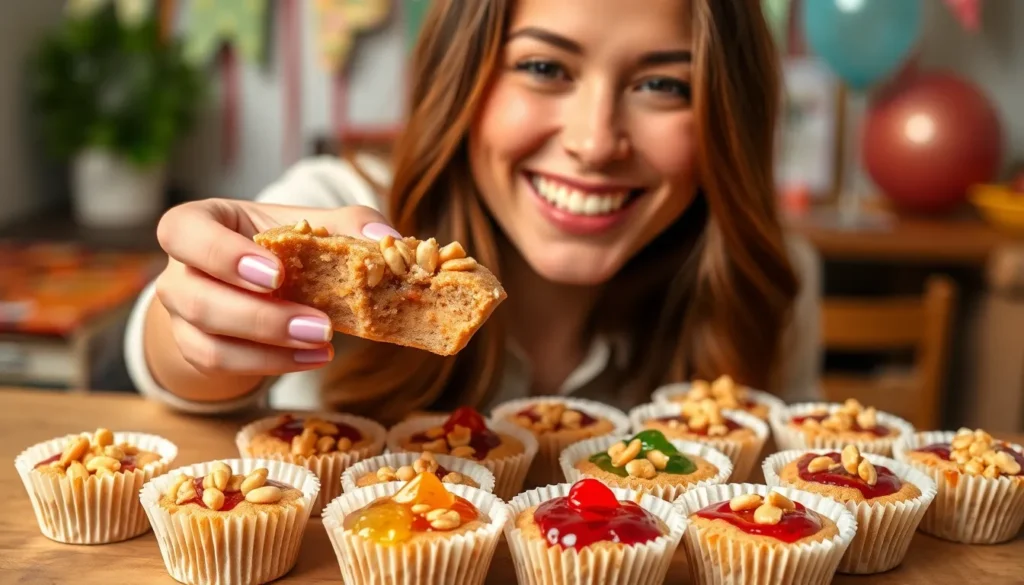
We’ve all experienced that moment when nostalgia hits and we’re craving the perfect combination of creamy peanut butter and sweet jelly. These peanut butter and jelly cups transform the classic sandwich into an irresistible bite-sized treat that’ll transport you straight back to childhood.
What makes these cups absolutely brilliant is how they capture every flavor we love about PB&J while creating something entirely new. The rich peanut butter base perfectly complements the burst of fruity jelly on top, all nestled in a convenient cup shape that’s impossible to resist.
Whether you’re planning a kids’ party, need a quick dessert for potlucks, or simply want to satisfy that PB&J craving in the most delicious way possible, these cups deliver every single time. They’re surprisingly easy to make and even easier to devour – we guarantee you’ll be making them on repeat once you try this recipe.
Ingredients
Creating these irresistible peanut butter and jelly cups requires simple pantry staples that come together to form layers of nostalgic flavor. We’ve organized the ingredients by component to streamline your prep process.
For the Peanut Butter Layer
- 1 cup creamy peanut butter
- 1/4 cup unsalted butter, softened
- 1/2 cup powdered sugar
- 1/2 teaspoon vanilla extract
- 1/4 teaspoon salt
For the Jelly Layer
- 1/2 cup grape jelly or strawberry jam
- 1 tablespoon cornstarch
- 1 tablespoon water
For the Chocolate Shell (Optional)
- 8 ounces semi-sweet chocolate chips
- 2 tablespoons coconut oil or vegetable shortening
- Mini muffin paper liners
Equipment Needed

Creating perfect peanut butter and jelly cups requires the right tools to ensure smooth preparation and professional results. We recommend gathering these essential items before starting your recipe to streamline the entire process.
Mini Muffin Tin serves as our primary vessel for shaping these delightful treats. The standard 12-cup mini muffin tin provides the ideal portion size and ensures uniform cups every time.
Mini Muffin Paper Liners make removal effortless while adding a professional presentation touch. These liners prevent sticking and create clean edges that showcase the layered filling beautifully.
Medium Mixing Bowl accommodates our peanut butter mixture preparation. Choose one large enough to allow thorough mixing without spillage during the creaming process.
Electric Hand Mixer or Stand Mixer transforms our ingredients into the perfect creamy consistency. This equipment ensures the peanut butter layer achieves the smooth texture that makes these cups irresistible.
Small Saucepan handles our jelly preparation with precision. We use this for heating and thickening the jelly mixture to the proper consistency for layering.
Small Whisk helps us achieve a lump-free jelly mixture. This tool ensures the cornstarch dissolves completely for a smooth final product.
Measuring Cups and Spoons guarantee accuracy in our ingredient ratios. Precise measurements create consistent results batch after batch.
Rubber Spatula assists with folding and scraping bowl contents efficiently. This tool ensures we incorporate every bit of our carefully prepared mixture.
Small Spoon or Cookie Scoop provides portion control for filling our cups. Using this equipment creates uniform layers and prevents overfilling.
Refrigerator Space accommodates the chilling process essential for proper setting. We need adequate room for our mini muffin tin to remain undisturbed during the firming stage.
Instructions

Now that we have gathered our ingredients and equipment, let’s walk through the simple process of creating these delectable peanut butter and jelly cups. Each step builds upon the previous one to create perfectly layered treats.
Prep the Muffin Tin
Line our mini muffin tin with cupcake liners or arrange silicone liners on a baking sheet. This step ensures our cups can be easily removed once they set completely. We recommend using mini muffin paper liners for the best presentation and easiest serving.
Make the Peanut Butter Layer
Melt the coconut oil in a small bowl until completely liquid. In our medium mixing bowl, we whisk together 1 cup natural peanut butter and ¼ cup melted refined coconut oil until the mixture becomes smooth and well combined. If we prefer additional sweetness, we whisk in honey at this stage. Pour approximately 1 tablespoon of this peanut butter mixture into each lined muffin cup, creating our foundational layer.
| Ingredient | Amount |
|---|---|
| Natural peanut butter | 1 cup |
| Refined coconut oil | ¼ cup |
| Honey (optional) | To taste |
Add the Jelly Layer
Spoon about ½ tablespoon of our chosen jelly or jam directly on top of the peanut butter layer in each cup. We gently spread the jelly to cover the peanut butter surface without mixing the layers together. If our jelly appears too runny, we return the cups to the freezer for a few minutes to help set this layer before proceeding.
Create the Top Layer
Using our remaining peanut butter mixture, we spoon it over the jelly layer to completely cover and seal in the fruity center. For added texture, we can fold Rice Krispie cereal into the peanut butter mixture before this final step. Each cup should have a smooth, even top that completely encases the jelly filling.
Chill and Set
Place our filled muffin tin in the freezer for 10 to 15 minutes for quick setting, or refrigerate for 1 hour if we prefer a gentler chilling process. The cups are ready when they hold their shape and can be easily removed from the liners without losing their form.
Directions for Storage

Proper storage ensures our peanut butter and jelly cups maintain their delicious flavor and perfect texture for weeks to come. We recommend using airtight containers to prevent the cups from absorbing unwanted odors and to preserve their freshness.
Refrigerator Storage
We place our finished cups in an airtight container before refrigerating them for optimal preservation. Our peanut butter and jelly cups stay fresh in the refrigerator for up to 1 month when stored properly. Some recipes suggest a shorter timeframe of about 1 week for peak quality.
Room temperature storage is not advisable since the chocolate and fillings may soften or melt in warmer environments. We always keep our cups chilled to maintain their structural integrity.
Freezer Storage
For extended storage we transfer the cups to an airtight container suitable for freezer use. We separate each layer with parchment paper to prevent the cups from sticking together during the freezing process.
Our frozen peanut butter and jelly cups maintain their quality for up to 3 months in the freezer. We allow them to defrost at room temperature for about one hour before serving to achieve the perfect texture.
Storage Best Practices
| Storage Method | Duration | Container Type | Special Instructions |
|---|---|---|---|
| Refrigerator | 1 week to 1 month | Airtight container | Keep away from strong odors |
| Freezer | Up to 3 months | Airtight freezer container | Layer with parchment paper |
| Room Temperature | Not recommended | N/A | May cause melting |
We keep our stored cups away from direct light heat and strong odors as these elements can negatively affect both flavor and texture. Freezer storage proves to be our most practical option for extending shelf life while preserving the original taste and texture of our homemade treats.
Make-Ahead Tips

We love preparing these peanut butter and jelly cups ahead of time because they freeze beautifully and thaw quickly when needed. Planning ahead makes serving these treats effortless for any occasion.
Batch Preparation Strategy
Double or triple our recipe when making these cups since they store so well. We recommend preparing large batches during weekend cooking sessions to have treats ready throughout the month. The prep time remains nearly the same whether making one dozen or three dozen cups.
Freezer Storage Method
Our cups maintain their quality in the freezer for up to three months when stored properly. We place completely cooled cups in airtight containers or freezer bags to prevent freezer burn. Layering parchment paper between cups prevents them from sticking together during frozen storage.
Thawing Guidelines
| Thawing Method | Time Required | Best For |
|---|---|---|
| Room Temperature | 10-15 minutes | Individual servings |
| Refrigerator | 30-45 minutes | Multiple cups |
| Counter Thaw | 5-8 minutes | Quick serving |
Assembly Line Approach
We suggest setting up an assembly line when making multiple batches. Prepare all peanut butter mixtures first, then add jelly layers to all cups, and finish with the final peanut butter layer. This method ensures consistent results and saves important time.
Portion Control Planning
Making these cups ahead allows us to control portions better since frozen treats are less tempting to overindulge. We often portion them into weekly serving containers immediately after preparation. This approach helps with meal planning and ensures treats are available when cravings strike.
Gift Preparation Strategy
These cups make excellent homemade gifts when prepared in advance. We package them in decorative containers or gift boxes after they have completely set. The three month freezer life means we can prepare holiday gifts weeks ahead of time without compromising quality.
Serving Suggestions

We recommend serving these peanut butter and jelly cups chilled directly from the refrigerator for the best texture and flavor experience. The cold temperature helps maintain the perfect consistency while preventing any melting that might occur at room temperature.
Perfect Party Treats
These bite-sized desserts shine brightest at gatherings and kids’ parties where their convenient size makes them ideal finger foods. We love arranging them on colorful platters alongside other sweet treats for maximum visual impact. Birthday celebrations become extra special when we include these familiar yet surprising flavors that both children and adults instantly recognize and appreciate.
Everyday Snacking
Our peanut butter and jelly cups work wonderfully as after-school snacks or quick energy boosts throughout the day. We often pack them in lunch boxes where they stay fresh and provide a satisfying alternative to traditional sandwiches. The portable nature makes them perfect for picnics and outdoor adventures where mess-free eating is essential.
Elevated Presentations
We enhance the visual appeal by adding optional toppings just before serving. Crushed peanuts sprinkled on top provide extra crunch and reinforce the peanut butter flavor profile. Chia seeds or hemp hearts offer nutritional benefits while adding interesting texture contrasts that make each bite more captivating.
Flavor Customization
Different jam varieties transform these cups into unique taste experiences for various occasions. We substitute strawberry jam with raspberry preserves for a more sophisticated flavor or use mixed berry combinations to create colorful presentations. Blueberry jam provides antioxidant benefits while maintaining the classic appeal that makes these treats universally loved.
Gift Giving Opportunities
These homemade cups make thoughtful presents when arranged in decorative boxes or containers. We prepare them weeks in advance during holiday seasons, knowing their excellent storage capabilities ensure fresh taste when gift-giving time arrives. The personal touch of homemade treats always impresses recipients more than store-bought alternatives.
Recipe Variations

We love how easily customizable these peanut butter and jelly cups are to suit different tastes and dietary needs. Each variation maintains the classic appeal while offering unique flavor profiles and textures.
Different Jelly Flavors
Any flavor of jelly, jam, or fruit preserves works beautifully in these cups. Popular choices include raspberry, strawberry, blueberry, or triple berry jam that add vibrant colors and distinct flavor notes. We recommend using about half to one teaspoon per cup for the perfect filling balance. Berry varieties create stunning visual appeal while citrus preserves like orange marmalade offer a tangy twist. Grape jelly delivers that nostalgic childhood flavor that many people crave. Seasonal fruit preserves like peach or apricot bring summer sunshine to these treats year round.
Nut-Free Options
For individuals with peanut allergies, we substitute sunflower seed butter or another seed butter to maintain the creamy texture while ensuring a safe alternative. These seed butters provide similar richness and binding properties as traditional peanut butter. Always check labels carefully for cross contamination warnings if severe allergies are a concern. Tahini offers another excellent nut free option with its distinctive sesame flavor. We find that these alternatives work seamlessly in the recipe without requiring any measurement adjustments.
Dark Chocolate Version
Dark chocolate transforms these cups into an even more indulgent treat with rich, sophisticated flavors. We melt dark chocolate and coat the cups before assembling the peanut butter and jelly layers for a luxurious shell. Alternatively, dark chocolate can be incorporated directly into the peanut butter mixture for a Reese’s inspired twist. Drizzling melted dark chocolate on top creates an elegant finishing touch that impresses guests. Some recipes benefit from using dark chocolate as the base layer before adding the peanut butter filling. The bitter notes of quality dark chocolate balance perfectly with the sweet jelly center.
Conclusion
These peanut butter and jelly cups prove that sometimes the best innovations come from reimagining childhood classics. We’ve shown you how simple ingredients can transform into an impressive treat that’s both nostalgic and sophisticated.
Whether you’re planning your next gathering or looking for the perfect make-ahead snack we’re confident these cups will exceed your expectations. The endless customization options mean you’ll never run out of ways to surprise your family and friends.
We encourage you to experiment with different flavor combinations and make this recipe your own. Once you master the basic technique you’ll find yourself reaching for this go-to treat time and time again. Your kitchen adventures await!
Frequently Asked Questions
What are peanut butter and jelly cups?
Peanut butter and jelly cups are bite-sized treats that reinvent the classic PB&J sandwich into a convenient, portable dessert. They feature layers of creamy peanut butter mixture and your favorite jelly or jam, often with an optional chocolate shell, all formed in mini muffin cups for easy serving.
How long do peanut butter and jelly cups last?
When stored in airtight containers in the refrigerator, PB&J cups stay fresh for up to one month, with peak quality within the first week. For longer storage, they can be frozen for up to three months when properly wrapped and separated with parchment paper.
Can I make these cups ahead of time?
Yes! These cups are perfect for make-ahead preparation. You can batch-make them during weekend cooking sessions and store them in the freezer. They’re excellent for preparing weeks in advance for parties, gifts, or everyday snacking without compromising quality.
What equipment do I need to make PB&J cups?
Essential equipment includes a mini muffin tin, paper liners, mixing bowls, an electric mixer, a small saucepan, measuring tools, and a rubber spatula. You’ll also need refrigerator space for chilling and optionally a cookie scoop for portion control.
Can I customize the flavors?
Absolutely! You can use different jelly flavors like raspberry, blueberry, or seasonal preserves. For nut-free versions, substitute sunflower seed butter or tahini. You can also create a dark chocolate version by adding melted dark chocolate to the mixture or as a coating.
How should I serve peanut butter and jelly cups?
Serve the cups chilled for optimal texture and flavor. They’re perfect for parties, kids’ gatherings, lunch boxes, and outdoor activities. For added appeal, top with crushed peanuts, chia seeds, or package them in decorative containers as thoughtful homemade gifts.