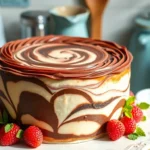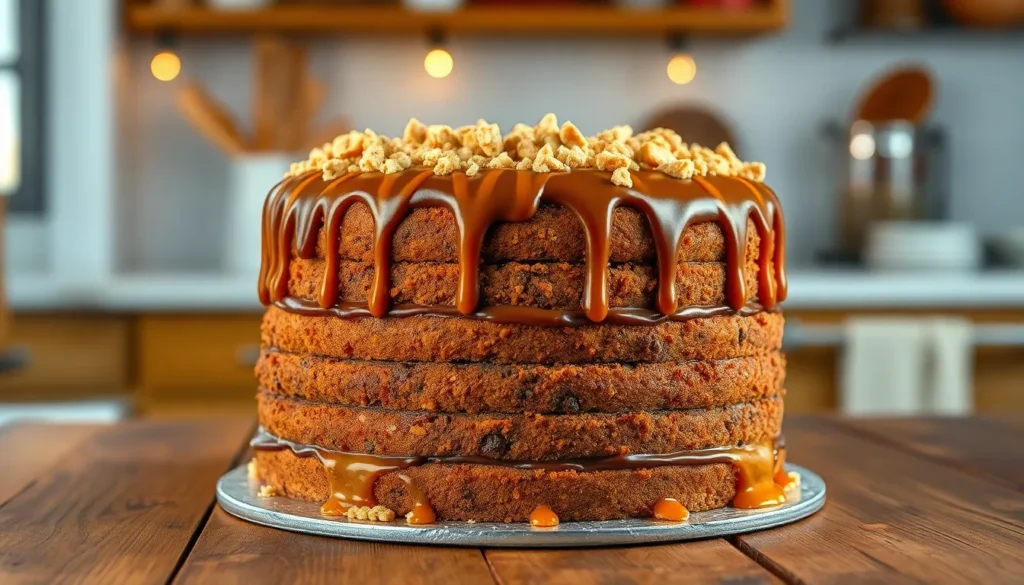
We’ve taken the beloved Twix candy bar and transformed it into the ultimate dessert experience. This Twix cake combines everything we love about the iconic treat – rich caramel, crunchy shortbread cookies, and smooth chocolate – into one show-stopping layer cake that’ll have everyone asking for seconds.
What makes this cake absolutely irresistible is how it captures that perfect Twix flavor profile in every single bite. We’re talking layers of moist chocolate cake, gooey salted caramel filling, and a chocolate ganache that’s pure heaven. The addition of crushed shortbread cookies gives it that signature Twix crunch we all crave.
Whether you’re celebrating a birthday or just want to impress your family with an extraordinary homemade dessert, this Twix cake delivers bakery-quality results right from your own kitchen. It’s easier to make than you’d think and guaranteed to become your new go-to show-stopper dessert.
Ingredients
Our Twix cake requires three main components plus a finishing touch that brings everything together. Each layer contributes to the final masterpiece that captures the essence of your favorite candy bar.
For the Cake
- 1¾ cups all-purpose flour
- 2 cups granulated sugar
- ¾ cup unsweetened cocoa powder
- 2 teaspoons baking soda
- 1 teaspoon baking powder
- 1 teaspoon salt
- 2 large eggs, room temperature
- 1 cup buttermilk, room temperature
- 1 cup strong black coffee, cooled
- ½ cup vegetable oil
- 1 teaspoon vanilla extract
For the Caramel Layer
- 1 cup granulated sugar
- ¼ cup water
- 6 tablespoons unsalted butter, cubed
- ½ cup heavy cream, room temperature
- 1 teaspoon vanilla extract
- 1 teaspoon sea salt
For the Chocolate Ganache
- 8 ounces dark chocolate, finely chopped
- 1 cup heavy cream
- 2 tablespoons unsalted butter, room temperature
- 1 tablespoon corn syrup
- Pinch of salt
For the Twix Topping
- 6 Twix candy bars, roughly chopped
- ½ cup shortbread cookies, crushed
- Extra caramel sauce for drizzling
- Flaky sea salt for sprinkling
Equipment Needed

Creating this show-stopping Twix cake requires exact tools that will help us achieve professional-looking results. We’ve carefully selected essential equipment that makes the baking and assembly process smooth and efficient.
Mixing bowls serve as our foundation for preparing multiple components. We recommend having at least three different sizes since we’ll be working with cake batter, caramel filling, and chocolate ganache simultaneously. Stainless steel or glass bowls work best for temperature control.
Cake pans are crucial for creating even layers. We need two 9-inch round cake pans with straight sides to ensure our layers bake uniformly. Non-stick or well-greased pans prevent sticking and help maintain the cake’s structure during removal.
An offset spatula becomes our best friend during assembly and frosting application. This angled tool allows us to spread ganache smoothly and create clean edges around the cake’s exterior. The flexibility helps us navigate curves and corners with precision.
A bench scraper elevates our cake’s appearance by creating perfectly smooth sides. We use this rectangular tool to remove excess frosting and achieve that bakery-quality finish that makes our Twix cake look professionally made.
Piping bags enable us to add decorative touches with leftover caramel and ganache. These tools help us create elegant drizzles and controlled placement of our toppings. Disposable bags work well for this recipe since we’re using sticky caramel.
An icing comb adds an optional but impressive textured finish to the cake’s sides. This serrated tool creates beautiful ridged patterns that enhance the visual appeal and give our cake a sophisticated appearance.
Instructions

Follow these step-by-step instructions to create your stunning Twix cake masterpiece. We’ll walk you through each component to ensure perfect results every time.
Prep Work
Preheat your oven to 350°F (175°C). Grease two 9-inch round cake pans with butter and dust with cocoa powder for easy removal. Line the bottoms with parchment paper circles for added insurance.
Gather all ingredients at room temperature for optimal mixing. Measure cake flour, unsalted butter, sweetened condensed milk, light brown sugar, and unsweetened cocoa powder according to your recipe quantities. Set up your mixing station with bowls organized by recipe component.
Prepare your workspace by clearing counter space for assembly later. Have your offset spatula and bench scraper ready for the final decorating steps.
Making the Cake
Whisk together cake flour, baking powder, baking soda, and salt in a medium bowl. Set this dry mixture aside for later incorporation.
Cream unsalted butter and granulated sugar in a large mixing bowl until light and fluffy, approximately 3-4 minutes. Beat in eggs one at a time, ensuring each is fully incorporated before adding the next.
Mix in sour cream and vanilla extract until smooth. Alternate adding the dry ingredients and milk, beginning and ending with the flour mixture. Beat just until combined to avoid overmixing.
Divide batter evenly between prepared pans. Bake for 25-30 minutes or until a toothpick inserted in the center comes out clean. Cool in pans for 10 minutes before turning out onto wire racks.
Preparing the Caramel Layer
Combine unsalted butter, light brown sugar, corn syrup, and sweetened condensed milk in a heavy-bottomed saucepan. Heat over medium heat, stirring constantly to prevent burning.
Continue cooking while stirring until the mixture begins to bubble vigorously. Add heavy cream gradually while whisking to maintain smooth consistency.
Monitor the temperature carefully until the caramel reaches 225°F (110°C) on a candy thermometer. Remove from heat immediately and stir in vanilla extract and salt.
Allow the caramel to cool completely before using. The mixture will thicken as it cools to the perfect spreading consistency.
Creating the Chocolate Ganache
Heat heavy cream in a small saucepan until it just begins to simmer. Pour the hot cream over chopped dark chocolate in a heatproof bowl.
Let the mixture sit undisturbed for 2-3 minutes to allow the chocolate to melt. Stir from the center outward until completely smooth and glossy.
Add unsalted butter, corn syrup, and a pinch of salt, stirring until fully incorporated. The ganache should be smooth and pourable when warm.
Cool the ganache until it reaches spreadable consistency, approximately 30 minutes at room temperature.
Assembly
Place one cake layer on your serving plate. Spread a generous layer of cooled caramel over the surface, leaving a small border around the edges.
Top with the second cake layer, pressing gently to adhere. Apply a thin crumb coat of chocolate ganache around the entire cake to seal in any loose crumbs.
Refrigerate for 30 minutes to set the crumb coat. Apply the remaining ganache in smooth, even strokes using your offset spatula.
Finish by pressing crushed shortbread cookies around the bottom edge of the cake. Top with chopped Twix bars and drizzle with additional caramel sauce. Sprinkle with flaky sea salt just before serving.
Directions for Assembly

Now comes the exciting part where we transform our individual components into a spectacular Twix cake masterpiece. We’ll build each layer methodically to ensure our cake maintains its structure while delivering maximum flavor impact.
Layer One: Cake Base
We begin by placing our first cake layer on a sturdy cake board or serving plate. Our cake base features the essential shortbread foundation that gives this dessert its authentic Twix character.
Press the prepared shortbread dough evenly into the bottom of our lined 8-inch round pans. We want to create a uniform crust that will support the layers above. Bake this shortbread base at 325°F for 11-13 minutes until we achieve a light golden color.
Once our shortbread crust has cooled completely we can proceed with adding our vanilla cake layer on top. This combination creates the perfect foundation that mimics the beloved candy bar’s texture profile.
Layer Two: Caramel
Our caramel layer requires careful attention to temperature and timing for optimal results. We heat unsalted butter, light brown sugar, corn syrup, and sweetened condensed milk together over medium-high heat.
Constant stirring prevents the mixture from burning while we monitor the temperature closely. We continue cooking until our caramel reaches exactly 225°F which occurs just before the soft ball stage. This exact temperature ensures our caramel maintains the perfect consistency for spreading without being too runny.
We remove the caramel from heat immediately upon reaching temperature and stir in vanilla extract and salt. Allow this mixture to cool slightly before applying it to our cake layers to prevent melting the cake structure.
Layer Three: Chocolate Ganache
We prepare our chocolate ganache by gently melting dark chocolate and heavy cream together using a double boiler method. This technique prevents the chocolate from seizing and creates a silky smooth texture.
For those preferring chocolate buttercream we mix softened butter with cocoa powder, powdered sugar, and heavy cream until the mixture becomes completely smooth. Beat this combination for 3-4 minutes to achieve the proper light and fluffy consistency.
Our ganache should coat the back of a spoon when ready and flow smoothly from our mixing utensil. We can adjust the consistency by adding small amounts of cream for thinning or powdered sugar for thickening.
Final Touches: Twix Decoration
We spread a generous layer of our chocolate buttercream or ganache over the first cake layer using our offset spatula. Even distribution ensures each bite contains the perfect ratio of flavors.
Sprinkle crushed shortbread cookies and chopped Twix bars over the buttercream layer while it’s still soft. These elements will adhere better when the frosting hasn’t set completely. We drizzle warm caramel sauce over these crumbs using a spoon or squeeze bottle for controlled application.
Repeat this layering process with our second cake layer, adding buttercream, crumbs, and caramel in the same sequence. Our final cake layer receives a complete coating of buttercream or ganache on the top and sides.
We finish our masterpiece by arranging additional chopped Twix bars around the top perimeter and creating decorative caramel drizzles across the surface. A final sprinkle of flaky sea salt enhances all the flavors and adds visual appeal to our completed Twix cake.
Make-Ahead Instructions

Planning ahead makes assembling this show stopping Twix cake much more manageable for busy schedules or special occasions. We can prepare several components days or even weeks in advance to streamline the final assembly process.
Cake Layers
The vanilla cake layers freeze beautifully and maintain their moisture when properly stored. We recommend baking the layers completely and allowing them to cool to room temperature before wrapping tightly in plastic wrap. These wrapped layers stay fresh at room temperature for up to two days or can be frozen for longer storage. When freezing cake layers, place them in airtight containers or freezer bags to prevent freezer burn. Frozen layers thaw quickly at room temperature in about 30 minutes while still wrapped.
Caramel Filling Storage
Our caramel filling component offers the most flexibility for advance preparation. This rich mixture of sweetened condensed milk, unsalted butter, light brown sugar, corn syrup, and heavy cream can be made up to one month ahead of time. Store the finished caramel in an airtight container in the refrigerator where it will maintain its perfect consistency. Before using refrigerated caramel, allow it to come to room temperature or warm it gently to achieve the ideal spreading consistency.
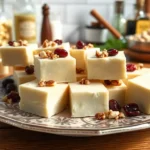
Shortbread Crumbs Preparation
The shortbread cookie crumbles add essential texture contrast to our Twix cake layers. These crumbs store exceptionally well in an airtight container at room temperature for up to four days. For longer storage, we can freeze the shortbread crumbles where they maintain their crunch for several weeks. The sugar, flour, and cold butter mixture bakes into perfect golden crumbles that retain their texture even after extended storage.
Chocolate Buttercream Planning
The chocolate buttercream frosting made with unsalted butter, powdered sugar, natural unsweetened cocoa powder, milk, and vanilla extract stores beautifully in the refrigerator. We can prepare this rich frosting several days in advance and store it covered in the refrigerator. Before using stored buttercream, bring it to room temperature and rewhip it briefly to restore its smooth, pipeable consistency. This advance preparation saves important time during final assembly while ensuring consistent results.
Storage Tips

We recommend storing your Twix cake properly to maintain its delicious flavors and perfect texture. Our cake stays fresh at room temperature in an airtight container for up to 3 days when properly sealed.
Room Temperature Storage
Keep the assembled cake covered in an airtight container at room temperature for optimal freshness. We find this method works best for cakes that will be consumed within three days of preparation.
Refrigerated Storage
Store your Twix cake in the refrigerator for extended freshness lasting up to one week. We suggest slicing the cake before refrigeration and placing individual pieces in an airtight container to prevent the cake from drying out.
Freezing for Long-Term Storage
Freeze your completed Twix cake for up to one month when wrapped properly. We recommend wrapping the entire cake or individual slices tightly in plastic wrap followed by aluminum foil before freezing.
| Storage Method | Duration | Container Type |
|---|---|---|
| Room Temperature | 3 days | Airtight container |
| Refrigerated | 1 week | Airtight container |
| Frozen | 1 month | Wrapped tightly |
Component Storage Guidelines
Prepare your caramel filling up to two weeks in advance and store it in an airtight container in the refrigerator. We can also make this component up to one month ahead for ultimate convenience.
Store chocolate frosting in the refrigerator for up to one month in an airtight container. We always stir the frosting well before using it after refrigeration to restore its smooth consistency.
Proper Thawing Techniques
Transfer frozen cake to the refrigerator the night before serving to allow gradual thawing. We let the cake sit at room temperature for approximately 30 minutes before serving to achieve the perfect texture.
Always chill your assembled cake in the refrigerator for at least 30 minutes after applying the first crumb coat. We use this technique to ensure smooth frosting application and professional-looking results.
Serving Suggestions

We love presenting our Twix cake as the centerpiece for celebrations and special gatherings. The rich layers and stunning visual appeal make this dessert perfect for birthdays where guests will appreciate the nostalgic candy bar flavors. Anniversaries become more memorable when we serve slices alongside champagne or sparkling cider to complement the sweet caramel notes.
Coffee pairs beautifully with every bite of this decadent cake. We recommend serving freshly brewed espresso or a robust dark roast to balance the sweetness of the chocolate buttercream and caramel filling. Tea enthusiasts will find that Earl Grey or English Breakfast creates an elegant contrast to the rich flavors.
Whipped cream adds a light and airy element that enhances each serving. We often dollop fresh whipped cream alongside individual slices to provide a creamy counterpoint to the dense chocolate layers. Vanilla ice cream works equally well for those who prefer a cold accompaniment.
Our favorite presentation technique involves placing chopped Twix bars strategically around each plate. These candy pieces reinforce the theme while adding extra texture and flavor bursts. Fresh berries like strawberries or raspberries provide a tart contrast that cuts through the richness beautifully.
Room temperature serving brings out the best flavors in our Twix cake. We remove the cake from refrigeration about 30 minutes before serving to allow the buttercream to soften slightly. This timing ensures that each slice cuts cleanly while maintaining the perfect creamy texture.
Individual portions benefit from a final drizzle of warm caramel sauce just before serving. We keep extra caramel filling warm in a small saucepan and drizzle it artfully over each slice. A light sprinkle of flaky sea salt on top elevates the dessert to restaurant quality presentation.
Conclusion
We’ve created the ultimate dessert that brings together every element that makes Twix candy bars irresistible. This cake transforms familiar flavors into an elegant centerpiece that’ll have your guests asking for the recipe.
The beauty of this Twix cake lies in its versatility and make-ahead friendly nature. Whether you’re planning a birthday celebration or simply want to treat your family we’ve given you all the tools and techniques needed for bakery-quality results at home.
Now it’s time to gather your ingredients and start baking. Trust us – once you taste that perfect combination of moist chocolate cake creamy caramel and crunchy shortbread you’ll understand why this dessert deserves a permanent spot in your recipe collection.
Frequently Asked Questions
What makes a Twix cake different from a regular chocolate cake?
A Twix cake combines moist chocolate cake layers with gooey salted caramel filling, rich chocolate ganache, and crushed shortbread cookies to recreate the iconic candy bar flavors. The addition of chopped Twix bars and caramel drizzle creates the signature taste and texture that sets it apart from traditional chocolate cakes.
Can I make the Twix cake components ahead of time?
Yes! The vanilla cake layers can be baked and frozen, while caramel filling can be prepared up to a month in advance and refrigerated. Shortbread cookie crumbles can be stored at room temperature or frozen, and chocolate buttercream can be made ahead and refrigerated for easy assembly.
What equipment do I need to make a Twix cake?
Essential tools include mixing bowls in various sizes, two 9-inch round cake pans, an offset spatula for frosting, a bench scraper for smooth sides, piping bags for decoration, and optionally an icing comb for textured finishes. These tools ensure professional-looking results.
How should I store a Twix cake?
Store the assembled cake in an airtight container at room temperature for up to 3 days or refrigerate for up to 1 week. For longer storage, wrap properly and freeze for up to 1 month. Individual components can be stored separately following specific guidelines for each.
What are the best serving suggestions for Twix cake?
Serve at room temperature for optimal taste and texture. The cake pairs beautifully with champagne, espresso, or tea. Consider adding whipped cream or vanilla ice cream as accompaniments, and enhance presentation with warm caramel drizzle and chopped Twix bars around each plate.
How difficult is it to make a Twix cake from scratch?
The Twix cake is designed to be accessible for bakers of all skill levels. While it involves multiple components (cake, caramel, ganache, and toppings), the step-by-step instructions ensure manageable preparation. The make-ahead options also help streamline the process for busy schedules.