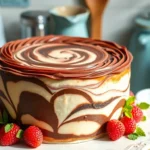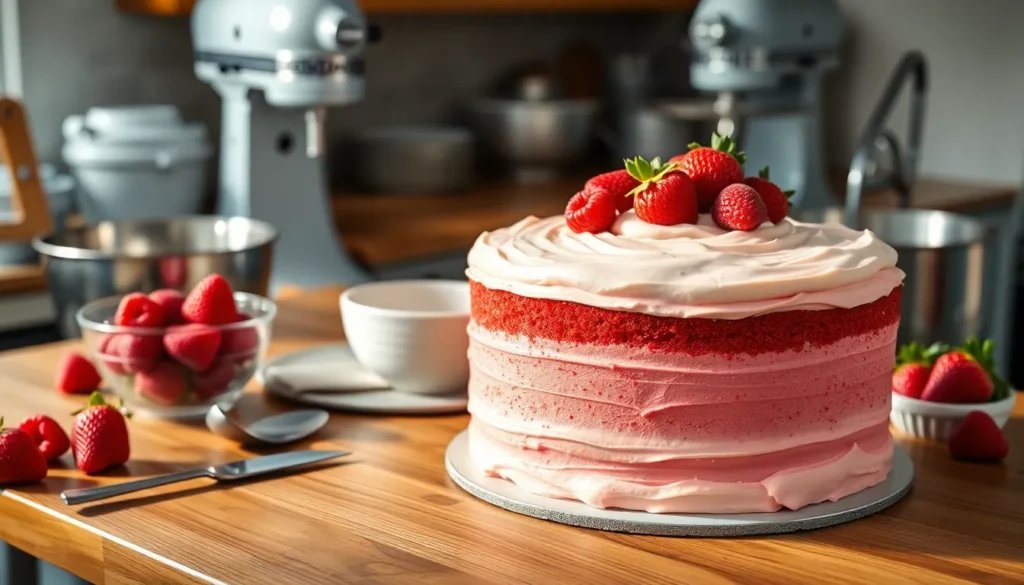
Nothing says indulgence quite like a slice of red velvet cake with its striking crimson layers and velvety smooth texture. This iconic Southern dessert has captured hearts worldwide with its subtle cocoa flavor and signature cream cheese frosting that melts perfectly on your tongue.
We’ve perfected this classic recipe to deliver that tender crumb and rich color you’re craving. The secret lies in the perfect balance of buttermilk’s tanginess cocoa’s depth and just the right amount of red food coloring to create those Instagram-worthy layers.
Whether you’re celebrating a special occasion or simply treating yourself to something extraordinary our red velvet cake recipe will transform your kitchen into a bakery. The combination of moist cake layers and luxurious frosting creates a dessert that’s both visually stunning and absolutely delicious – guaranteed to impress every single time.
Equipment Needed
We need exact equipment to create our perfect red velvet cake. Having the right tools ensures our cake achieves that signature texture and appearance we’re after.
Essential Baking Equipment:
- Two 9-inch round cake pans
- Electric mixer (stand mixer or hand mixer)
- Large mixing bowls (at least 2)
- Medium mixing bowl
- Wire cooling racks
- Measuring cups and spoons
- Rubber spatula
- Fine-mesh sieve
- Offset spatula for frosting
Preparation Tools:
- Parchment paper
- Cooking spray or butter for greasing
- Kitchen scale (optional but recommended)
- Toothpicks for testing doneness
Our stand mixer works best for achieving the proper texture in both the cake batter and cream cheese frosting. The paddle attachment creates the ideal consistency without overworking the ingredients. Hand mixers serve as excellent alternatives when stand mixers aren’t available.
We recommend using light-colored metal pans rather than dark ones. Dark pans can cause the edges to brown too quickly while the center remains undercooked. Glass pans work well too but may require slight temperature adjustments.
Wire cooling racks prevent soggy bottoms by allowing air circulation around the entire cake. We place these racks over clean kitchen towels to catch any drips during the cooling process.
Our offset spatula makes frosting application smooth and professional-looking. The angled blade gives us better control when spreading cream cheese frosting between layers and around the cake’s exterior.
Ingredients

Creating the perfect red velvet cake starts with gathering the right ingredients for both the cake and frosting. We’ve carefully measured each component to ensure our recipe delivers that signature taste and texture every time.
For the Cake
- 2 ½ cups all-purpose flour (sifted for best results)
- 3 tablespoons unsweetened cocoa powder
- 1 ¾ cups granulated sugar
- ½ cup unsalted butter (softened at room temperature)
- ½ cup vegetable oil
- 2 large eggs (room temperature)
- 1 cup buttermilk (room temperature)
- 2 tablespoons red liquid food coloring (or 1 tablespoon gel food coloring)
- 1 teaspoon baking soda
- ½ teaspoon salt
- 1 teaspoon vanilla extract
- 1 teaspoon white vinegar
For the Cream Cheese Frosting
- 16 ounces cream cheese (softened completely)
- 1 cup unsalted butter (softened at room temperature)
- 4 cups powdered sugar (sifted)
- 2 teaspoons vanilla extract
- ½ teaspoon salt
Instructions

Now that we have our ingredients measured and equipment ready, let’s transform these components into the perfect red velvet cake. These step-by-step instructions will guide us through creating tender cake layers and silky cream cheese frosting.
Prep the Pans and Oven
We begin by preheating our oven to 350°F (175°C) to ensure consistent baking temperature. Next, we grease our two 9-inch round cake pans thoroughly with butter or cooking spray. We dust the greased pans with flour, tapping out any excess to create a non-stick surface. Line the bottom of each pan with parchment paper for effortless cake removal after baking.
Make the Cake Batter
We start by sifting our dry ingredients—flour, salt, and baking soda—into a large bowl to eliminate lumps and ensure even distribution. Using our stand mixer, we beat the butter and granulated sugar together on medium speed until the mixture becomes light and fluffy, approximately 3-4 minutes. We add eggs one at a time, beating well after each addition, then incorporate the vanilla extract. We sift the cocoa powder directly into our butter mixture and blend until combined. In a separate measuring cup, we whisk together buttermilk, white vinegar, and red food coloring until smooth. We alternate adding the dry ingredients and buttermilk mixture to our main batter, beginning and ending with the flour mixture, mixing just until combined to avoid overmixing.
Bake the Cake Layers
We divide our batter evenly between the prepared pans, using a kitchen scale for precision if available. We place the pans in our preheated oven and bake for 30-35 minutes, checking for doneness with a toothpick inserted in the center—it should come out clean or with just a few moist crumbs. The cake tops should spring back when lightly touched. We cool the cakes in their pans for 10 minutes before carefully turning them out onto wire racks to cool completely.
Prepare the Cream Cheese Frosting
We ensure our cream cheese and butter are at room temperature for optimal mixing—this prevents lumps in our frosting. Using our stand mixer with the paddle attachment, we beat the cream cheese and butter together on medium speed until completely smooth and creamy, about 2-3 minutes. We add vanilla extract and a pinch of salt, mixing briefly to incorporate. We gradually add the sifted powdered sugar, one cup at a time, beating on low speed initially then increasing to medium until our frosting reaches a fluffy, spreadable consistency.
Assemble the Red Velvet Cake
We place our first cake layer on our serving plate, ensuring the top is level by trimming if necessary. We spread approximately one-third of our cream cheese frosting evenly across the top using an offset spatula. We carefully position the second layer on top, pressing gently to secure. We apply the remaining frosting to the top and sides of our cake, using smooth, even strokes for a professional finish. We refrigerate our completed cake for at least one hour before serving to allow the frosting to set properly and make slicing easier.
Storage Instructions

We understand that preserving our red velvet cake’s moisture and flavor requires proper storage techniques. Our storage approach depends on how long we plan to keep the cake and whether it’s been frosted.
Room Temperature Storage
We can safely store our covered red velvet cake at room temperature for up to 6 hours when using a cake keeper. This method works perfectly for serving the cake within the same day we bake it. After this 6-hour window we recommend moving the cake to refrigeration to maintain food safety and quality.
Refrigeration Storage
We achieve the best results by storing our red velvet cake in the refrigerator for 3 to 5 days when placed in an airtight container. Our frosted cakes require wrapping in cling film before placing them in the airtight container to prevent moisture loss. We always ensure that all cut sides remain covered to prevent the cake from drying out.
| Storage Method | Duration | Container Requirements |
|---|---|---|
| Room Temperature | Up to 6 hours | Cake keeper or covered |
| Refrigeration | 3-5 days | Airtight container |
| Freezing | 2-6 months | Plastic wrap + freezer bag |
Freezing Instructions
We can extend our red velvet cake’s life by freezing it for 2 to 3 months using most standard recipes. Some well-wrapped cakes maintain quality for up to 6 months when properly stored. We prepare unfrosted cake layers or individual slices by wrapping them tightly in plastic wrap before placing them in freezer bags or airtight containers.
Our thawing process involves moving the frozen cake to the refrigerator overnight for optimal results. This gradual thawing preserves the cake’s texture and prevents condensation from affecting the frosting.
Maintaining Cake Quality
We find that covering our cake with frosting helps retain moisture in the sponge throughout storage. Our cream cheese frosting acts as a protective barrier that keeps the cake layers from exposure to air. We always ensure that any exposed cake surfaces receive adequate coverage to maintain the signature texture our red velvet cake is known for.
Make-Ahead Tips

We understand that preparing red velvet cake ahead of time can save stress and ensure perfect results for special occasions. Our make-ahead approach allows this classic American dessert to maintain its signature moist crumb and vibrant appearance while providing scheduling flexibility.
Preparing Cake Layers in Advance
Baked cake layers store beautifully at room temperature for up to two days before assembly. We wrap each completely cooled layer tightly in plastic wrap to seal in moisture and prevent the cake from drying out. The key timing factor involves allowing layers to cool completely before wrapping to prevent condensation and sogginess.
For longer storage periods, we freeze wrapped cake layers for up to one week. Wrapping layers while they remain slightly warm helps seal in additional moisture during the freezing process. Room temperature thawing works best before frosting or serving the frozen layers.
Storage Methods and Timeline
| Storage Method | Duration | Temperature | Wrapping Required |
|---|---|---|---|
| Room Temperature | Up to 2 days | 68-72°F | Plastic wrap (tight) |
| Room Temperature (assembled) | Up to 24 hours | 68-72°F | Plastic wrap (tight) |
| Frozen Layers | Up to 1 week | 0°F | Plastic wrap (secure) |
| Refrigerated (frosted) | Up to 3 days | 35-40°F | Airtight container |
Assembly and Frosting Strategy
We recommend making cream cheese frosting the day of assembly for optimal texture and flavor. The frosting achieves better consistency when prepared fresh rather than stored ahead. Assembling the cake with fresh frosting ensures the tangy and sweet flavor contrast that defines red velvet cake.
Frosted cakes require refrigeration and maintain quality for up to three days when stored properly. We place assembled cakes in airtight containers or cover them securely with plastic wrap before refrigerating. This storage method preserves both the cake’s moisture and the frosting’s creamy texture.
Optimal Make-Ahead Schedule
Planning our red velvet cake preparation involves strategic timing for best results. We bake cake layers two days ahead and store them wrapped at room temperature. The day before serving, we prepare fresh cream cheese frosting and assemble the complete cake. This schedule allows flavors to meld while maintaining the cake’s signature texture and vibrant appearance.
Serving Suggestions

Serving our red velvet cake opens up wonderful possibilities to enhance this already spectacular dessert. We recommend pairing it with classic cream cheese frosting as the most traditional and beloved combination. The creamy and tangy contrast perfectly complements the cake’s inherent sweetness while highlighting its signature flavor profile.
Vanilla-based accompaniments create another excellent pairing option. Classic vanilla ice cream provides a cool contrast to the rich cake, while bourbon vanilla adds sophisticated depth to each bite. These vanilla variants allow the red velvet’s unique cocoa and buttermilk notes to shine through without overwhelming the palate.
For those seeking more adventurous flavor combinations, we suggest exploring chocolate ganache as an alternative topping. White chocolate drizzle offers elegance and sweetness, while chai-spiced accompaniments introduce warm aromatic notes. Cookies and cream elements can transform your red velvet into an indulgent dessert experience that appeals to diverse taste preferences.
Fresh fruits and nuts elevate the presentation while adding textural variety. Strawberries complement the cake’s red color beautifully, while raspberries provide tartness that balances the sweetness. Chopped pecans or walnuts sprinkled on top create delightful crunch and enhance the overall eating experience.
Beverage pairings enhance the cozy dessert atmosphere we all crave. Coffee creates a classic combination that brings out the subtle cocoa notes in our red velvet cake. Warm tea offers a gentler pairing that allows the buttermilk tanginess to remain prominent. Both options create memorable moments whether you’re hosting guests or enjoying a quiet afternoon treat.
Temperature considerations matter when serving red velvet cake. We recommend serving it slightly chilled to maintain the cream cheese frosting’s structure while allowing the cake’s flavors to fully develop. Room temperature serving works well too, especially when you want the buttery notes to be more pronounced.
Conclusion
We’ve shared everything you need to master this beloved dessert from scratch. The combination of proper technique thoughtful ingredient selection and strategic timing ensures your red velvet cake will impress every time.
Whether you’re celebrating a milestone or simply treating yourself this recipe delivers consistent results. The make-ahead tips and storage methods we’ve outlined help you plan efficiently while maintaining that signature moist texture and rich flavor.
Your homemade red velvet cake awaits – complete with its stunning crimson layers and luxurious cream cheese frosting. We’re confident you’ll love both the baking process and the delicious results that follow.
Frequently Asked Questions
What makes red velvet cake different from regular chocolate cake?
Red velvet cake has a unique flavor profile that combines buttermilk’s tanginess with cocoa powder’s subtle chocolate notes. The addition of red food coloring creates its signature vibrant appearance. Unlike regular chocolate cake, red velvet has a more delicate chocolate flavor and a distinctively smooth, velvety texture achieved through the specific balance of acidic ingredients.
What equipment do I need to make red velvet cake?
Essential equipment includes two 9-inch round cake pans (preferably light-colored metal), an electric or stand mixer, multiple mixing bowls, wire cooling racks, and an offset spatula. Light-colored pans prevent uneven baking, while wire racks ensure proper air circulation during cooling. A stand mixer helps achieve the ideal texture for both batter and frosting.
How long can I store red velvet cake?
Red velvet cake can be stored at room temperature for up to 6 hours using a cake keeper. When refrigerated in an airtight container, it lasts 3-5 days. For longer storage, properly wrapped cake layers can be frozen for 2-6 months. Always thaw frozen cake gradually in the refrigerator to maintain texture and prevent condensation.
Can I make red velvet cake ahead of time?
Yes! Baked cake layers can be stored at room temperature for up to two days or frozen for one week when tightly wrapped. The optimal make-ahead schedule involves baking layers two days in advance and preparing fresh cream cheese frosting the day before serving. This timing ensures the best flavor and texture.
What’s the best way to serve red velvet cake?
Serve red velvet cake slightly chilled or at room temperature for optimal taste and texture. Classic pairings include cream cheese frosting, vanilla ice cream, or bourbon vanilla. For variety, try chocolate ganache, fresh berries, or nuts. Complement with coffee or warm tea for a complete dessert experience.
How do I achieve the perfect red velvet cake texture?
The key to perfect texture lies in precise ingredient measurements and proper mixing techniques. Sift dry ingredients, cream butter and sugar thoroughly, and alternate adding dry and wet ingredients to the batter. Use buttermilk for tanginess and moisture, and avoid overmixing to maintain the cake’s signature velvety texture.