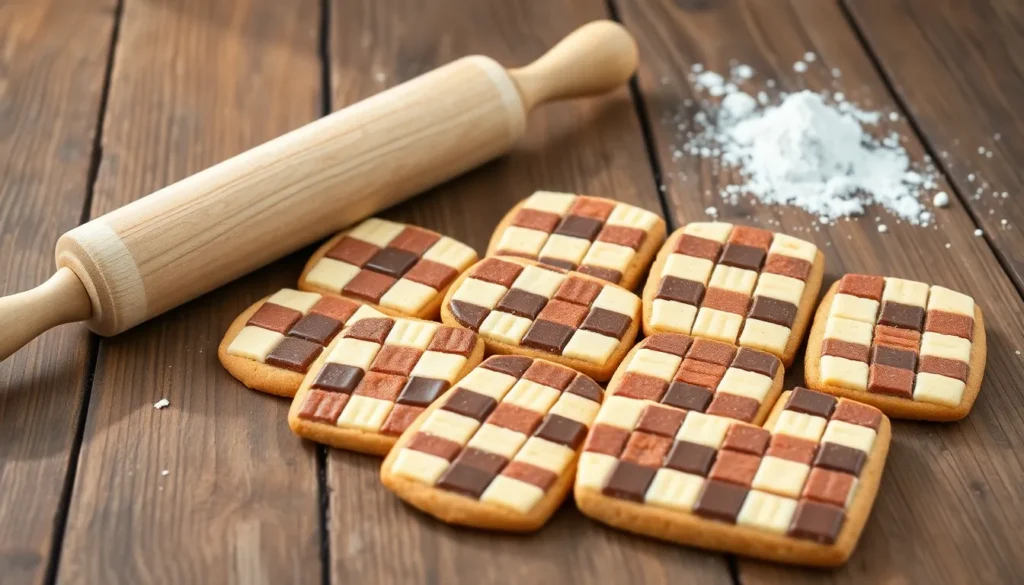
We’ve all admired those stunning checkerboard cookies in bakery windows – you know the ones with their perfect alternating squares of vanilla and chocolate that look almost too beautiful to eat. These eye-catching treats aren’t just gorgeous to look at; they’re surprisingly achievable in your own kitchen with the right technique.
The secret behind these show-stopping cookies lies in a simple yet clever dough-rolling method that creates those distinctive geometric patterns. While they might appear complex we promise they’re much easier to make than you’d expect. The key is patience during the assembly process and keeping your dough properly chilled.
What makes checkerboard cookies truly special is how they transform simple ingredients into an impressive display. They’re perfect for holidays special occasions or whenever you want to wow your family and friends with your baking skills. Let’s jump into creating these stunning cookies that taste as amazing as they look.
Ingredients
Creating perfect checkerboard cookies requires separate doughs that maintain their distinct colors while baking beautifully together. We organize our ingredients into three categories to ensure smooth preparation and assembly.

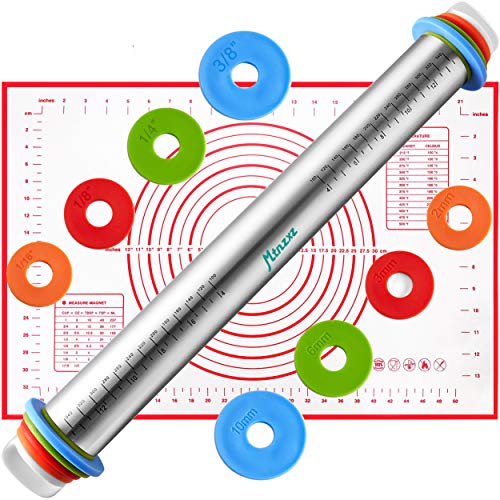
Stainless steel rolling pin with thickness rings: This 17-inch rolling pin is made from high quality stainless steel for superior durability and longevity. It resists rust far better than ordinary aluminium rolling pins, embossed rolling pin or tortilla roller. The sturdy and robust construction ensures it will last a long time even with frequent use. Compared to traditional dough roller such as a rolling pin and mat or silicone rolling pin, this rolling pin for dough will add durability to your baking needs.

4 Thickness Adjustments: The rolling pin has 4 removable rings: 1/16, 1/8, 1/4, and 3/8 inches (2mm, 3mm, 6mm, 10mm), helping precisely control dough thickness for easy baking of pancakes, bread, pies, noodles, cookies, etc
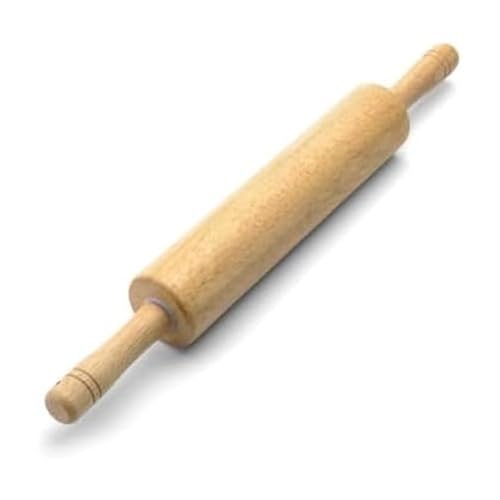
PREMIUM HARDWOOD CONSTRUCTION: Built from moisture-resistant hardwood that delivers a smooth, non-dragging rolling surface for consistent results every time; the 10-inch barrel and balanced weight distribution make rolling all types of dough effortless
For the Vanilla Dough
- 1 cup (226g) unsalted butter, softened at room temperature
- ¾ cup (150g) granulated sugar
- 1 large egg, room temperature
- 1 teaspoon pure vanilla extract
- 2¼ cups (281g) all-purpose flour
- ½ teaspoon salt
- 2 tablespoons whole milk
For the Chocolate Dough
- 1 cup (226g) unsalted butter, softened at room temperature
- ¾ cup (150g) granulated sugar
- 1 large egg, room temperature
- 1 teaspoon pure vanilla extract
- 2 cups (250g) all-purpose flour
- ¼ cup (21g) unsweetened cocoa powder
- ½ teaspoon salt
- 3 tablespoons whole milk
For Assembly
- 1 large egg white, lightly beaten
- 2 tablespoons coarse sugar for sprinkling (optional)
Equipment Needed

Creating perfect checkerboard cookies requires exact tools that ensure precision and consistent results. We recommend gathering all equipment before starting to streamline your baking process.
Essential Mixing Equipment
- Mixing bowls for preparing separate vanilla and chocolate doughs
- Stand mixer or hand mixer to cream butter and sugar efficiently (optional but recommended)
- Measuring cups and spoons for accurate ingredient portions
Shaping and Assembly Tools
- Sharp knife for clean, precise cuts when slicing cookie logs
- Rolling pin to roll dough into even ropes and sheets
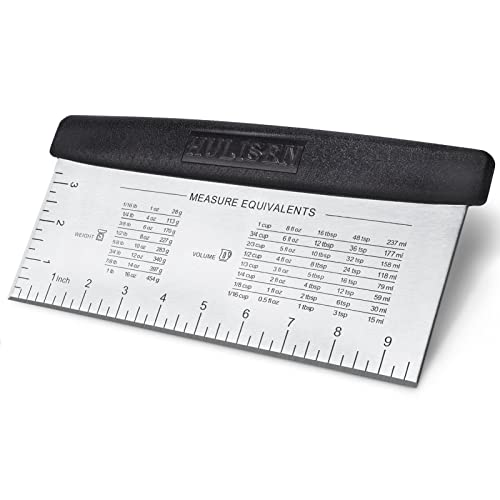
- Dough scraper for easy dough handling and transfer
- Ruler to measure consistent dough dimensions for uniform checkerboard squares
- Bench scraper for additional dough manipulation (optional)
Precision and Finishing Equipment
- Kitchen scale for exact measurements when precision matters most (optional)
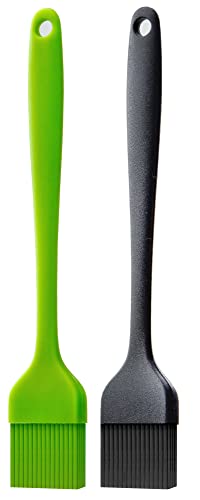
- Pastry brush for applying egg white wash during assembly
- Baking trays for cookie placement during baking
- Parchment paper to prevent sticking and ensure easy removal (optional)
Having these tools ready transforms what could be a challenging process into an organized and enjoyable baking experience. The ruler and sharp knife prove particularly crucial for achieving those clean checkerboard lines that make these cookies so visually striking.

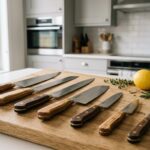
PREMIUM PERFORMANCE – Perfectly engineered slicing carving knife tapered to a razor-sharp edge for effortless carving and slicing of brisket, turkey, roast, ribs, prosciutto and other meats.
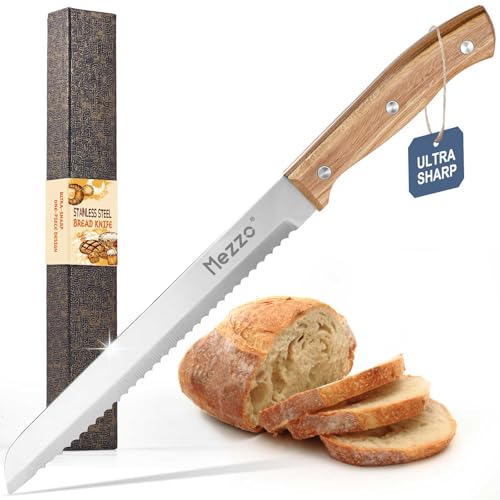
【ULTRA-SHARP】 : This Serrated Bread Knife engineered with a long, ultra-sharp blade for effortless slicing of bread, ensuring precise cuts with minimal effort. The premium stainless steel serrated blade easy maintenance & cleaning. Enjoy cutting with this ultra-sharp knife.

Expertly Crafted: Knives are made from premium 304 stainless steel for easy edge maintenance and long-lasting sharpness
Instructions

Now that we have our ingredients and equipment ready, let’s walk through the step-by-step process to create these stunning checkerboard cookies. We’ll start by making two separate doughs and then combine them to achieve that perfect alternating pattern.
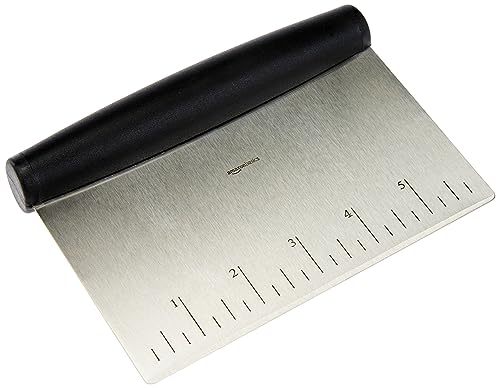
Multi-purpose scraper/chopper tool for portioning bread and pastry dough, chopping and measuring

Sharp bench scraper chopper: The pastry scraper is made from premium 430 stainless steel which is anti-rust and anti-deformation. The sharpness can stand the test of time and will give you a good clean cut for ingredients
Extra Wide Bench Scraper: Bigger size, 10 inch long stainless steel scraper perfect for smoothing frosting onto the sides of tall buttercream cake, make a nice and smooth edge for cake decorating
Make the Vanilla Dough
We begin by combining butter and sugar in a stand mixer or large bowl using an electric mixer. Beat the mixture until it becomes smooth and creamy, which typically takes 2-3 minutes. Add the egg, vanilla extract, baking powder, and salt to the creamed mixture and mix until well incorporated. Gradually add the flour and mix until just combined, being careful not to overmix the dough. Remove exactly half of this dough from the bowl and set it aside for later use.
Make the Chocolate Dough
We transform the remaining vanilla dough in the bowl into chocolate dough by mixing in the cocoa powder. Mix thoroughly until the cocoa powder is fully incorporated and the dough has a uniform chocolate color throughout. The chocolate dough should have the same consistency as our vanilla dough.
Chill the Dough
We divide both doughs and shape each portion into squared logs that measure approximately 2 inches tall and 6 inches long. Place these shaped logs in the refrigerator and chill for at least one hour or until the dough becomes firm but remains pliable enough to work with.
Shape the Checkerboard Pattern
We create the signature checkerboard pattern by slicing each chilled log lengthwise into three equal strips. Lay one vanilla strip, one chocolate strip, and one vanilla strip together on a flat surface, pressing them tightly together. Top this layer with alternating colors, placing chocolate where vanilla was below and vanilla where chocolate was positioned, building a square log shape. Press all strips together firmly while maintaining the square shape throughout the process. Repeat this assembly method to form a second complete log.
Wrap and Chill Again
We wrap each shaped checkerboard log tightly in plastic wrap to maintain their form. Chill the wrapped logs in the refrigerator for at least 30 minutes to ensure they become firm enough for clean slicing. This second chilling step is crucial for achieving crisp, defined edges on our cookies.
Slice and Bake
We preheat the oven to 350°F and line our baking sheets with parchment paper. Remove the chilled logs from the refrigerator and slice each log into 1/4-inch thick pieces using a sharp knife. Place the sliced cookies on the prepared baking sheets, leaving adequate space between each cookie for slight expansion during baking. Bake for 9-12 minutes or until the edges are set and slightly golden. Allow cookies to cool on the baking sheet for a few minutes before transferring them to a wire rack to cool completely.
Tips for Perfect Checkerboard Cookies


King Arthur Baking Company Professional Pastry Brush: gently coats crusts, pastries, and breads with butter, egg wash, water, glaze, and more without dragging or misshaping the dough; ideal for everyday recipe prep and finishing holiday baking and effective as a natural boar bristle pastry brush for baking

Unique bristle design won’t retain odors or clump during cleaning
Use Cold Butter for Better Texture
Cold butter creates the ideal foundation for our checkerboard cookies. We recommend using an electric mixer to cream the cold butter with sugar until the mixture becomes smooth and well incorporated. This technique prevents the dough from becoming too warm during mixing and helps maintain the structural integrity needed for clean pattern lines.
Master the Dough Division Technique
Splitting our cookie dough requires precision to achieve balanced flavors. We divide the creamed butter mixture into two equal portions after adding the egg. One portion receives flour, baking powder, and salt to form our vanilla base. The second portion gets cocoa powder added alongside the same dry ingredients to create the chocolate component.
Chill Dough for Easier Handling
Proper chilling ensures our dough maintains its shape during the pattern formation process. We recommend refrigerating both vanilla and chocolate doughs until they firm up completely. This step prevents the colors from bleeding together and makes rolling the strips significantly easier.
Create Uniform Strips for Clean Patterns
Rolling each dough into consistent long strips forms the backbone of our checkerboard design. We place three strips on our cutting board, alternating between vanilla and chocolate colors. The top layer follows the same alternating pattern to create the signature checkered appearance.
Maintain Proper Baking Temperature
Following precise temperature guidelines produces cookies with optimal texture and appearance. We bake our sliced checkerboard cookies until they become lightly golden around the edges. This approach prevents overbaking while ensuring the pattern remains visible and the cookies develop the perfect crispy exterior.
Handle Assembly with Care
Gentle pressure when combining our dough strips preserves the distinct pattern boundaries. We press the layers together just enough to bond them without distorting the individual squares. This careful handling technique ensures each cookie slice reveals crisp, well defined checkerboard squares.
Make-Ahead Instructions

Making checkerboard cookies ahead of time offers tremendous convenience for busy bakers and special occasions. We can prepare these impressive treats well in advance using proper storage techniques that maintain their quality and visual appeal.

Precision Crafting: Our dough scraper set features meticulously calibrated stainless steel and plastic scrapers with precise measurement guides, enabling you to effortlessly create bakery-perfect portions every time.

Versatile kitchen essential: This stainless steel scraper, dough cutter and vegetable chopper makes portioning pizza dough, cutting cookie dough and prepping vegetables simple, earning its spot among your kitchen utensils set

【Multifunctional】 Plastic dough scraper can be used to scrape, scoop up, chop cream, cakes, cheese, chocolate, dough, scrape flour, paste, flip sugar, scoop up cakes, cut sourdough and other ingredients. Plastic bench scraper can not only prevent dough from sticking to hands, but also scrape off leftover food from plates, making it a good helper for baking and cooking.
Refrigerator Storage
Our assembled cookie dough logs store beautifully in the refrigerator for extended periods. Wrap each formed log tightly in plastic wrap to prevent moisture loss and flavor absorption from other foods. The wrapped logs maintain their quality for up to five days when stored in the fridge.
Before baking we must chill the logs for at least 30 minutes to firm up the dough structure. This essential chilling step ensures clean slicing and prevents the checkerboard pattern from becoming distorted during cutting.
Freezer Storage
Freezing provides even longer storage options for our checkerboard cookie preparation. We can freeze the entire wrapped logs or slice them into individual portions for ultimate convenience. Both methods work exceptionally well for busy schedules.
| Storage Method | Duration | Notes |
|---|---|---|
| Whole frozen logs | Up to 2 months | Best for bulk preparation |
| Pre-sliced portions | Up to 2 months | Convenient for small batches |
| Refrigerated logs | Up to 5 days | Quick access option |
Frozen dough requires slight thawing at room temperature before slicing. Allow the logs to soften just enough for clean cuts while maintaining their structural integrity. This partial thawing prevents cracking and ensures our checkerboard pattern remains crisp and defined.
Slicing and Baking from Storage
Remove our chilled or partially thawed logs from storage and slice them into 1/4 inch thick rounds using a sharp knife. The proper thickness ensures even baking and maintains the cookie structure we worked so carefully to create.
Preheat the oven to 350°F while preparing our cookie sheets. Bake the sliced cookies for 8 to 13 minutes until the edges turn golden brown. The exact timing depends on our desired texture preference and oven characteristics.
Storage and Serving

Proper storage techniques help maintain the fresh taste and crisp texture of our checkerboard cookies for extended enjoyment. We recommend storing these delightful treats in an airtight container at room temperature where they stay fresh for 4 to 7 days. Room temperature storage preserves the cookie’s texture while keeping the distinctive checkerboard pattern intact.
Freezing offers an excellent long term storage solution for our checkerboard cookies. After baking and cooling completely we can freeze the cookies for up to 3 months in a freezer safe container. Placing waxed paper between cookie layers prevents sticking and maintains their beautiful appearance during frozen storage. When ready to enjoy we simply thaw the cookies overnight in the refrigerator before serving.
| Storage Method | Duration | Container Type | Special Instructions |
|---|---|---|---|
| Room Temperature | 4-7 days | Airtight container | Store completely cooled cookies |
| Freezer Storage | Up to 3 months | Freezer-safe container | Use waxed paper between layers |
| Thawing Process | Overnight | Refrigerator | Allow to reach room temperature before serving |
Serving our checkerboard cookies at room temperature delivers the best flavor profile and optimal texture experience. The cookies taste most delicious when they reach room temperature after refrigerated storage. We find that bringing frozen cookies to room temperature after thawing enhances their buttery flavor and maintains the perfect bite.
Visual presentation plays a crucial role in serving these stunning cookies. Trimming any rounded edges from the baked cookies creates neat precise checkerboard patterns that showcase our careful craftsmanship. The clean geometric lines make each cookie a miniature work of art that impresses guests and family members alike.
Fresh cookies maintain their crispness and vibrant appearance when we follow proper storage guidelines. These storage methods ensure our checkerboard cookies retain their quality whether we bake them fresh for immediate enjoyment or prepare them ahead for special occasions.

High-Quality Stainless Steel: Ordinary aluminum Rolling Pin is prone to rust and damage,our rolling pin is made of 100 percent of food-grade 304 stainless steel. Elegant and stylish, high-grade satin brushed stainless steel finish for long life, very easy to clean

PREMIUM SOLID WOOD - The whole french rolling pin is made of natural original wood, it has no paint, no wax, no burrs and no cracking unlike other beech wood on the market
High Quality --- Rolling pin is made of 100 percent of food-grade 304 stainless steel. Elegant and stylish, high-grade satin brushed stainless steel finish for long life, very easy to clean. The stainless steel dough roller is so smooth to surprise you.
Variations

We can transform our classic checkerboard cookies by experimenting with different flavors and colors while maintaining the same striking pattern. These variations offer exciting alternatives to the traditional vanilla and chocolate combination.

Sourdough Bread Baking – Elevate your home baking with our premium sourdough bread Knife, featuring a high-quality bread knife for homemade bread that ensures clean, perfect slices every time.

High-carbon Raw Materials: Crafted with high-carbon stainless steel from Germany; 10 inch bread knife delivers exceptional durability and improved anti-corrosion performance. Whether you're slicing through crusty sourdough, fluffy brioche, or delicate angel food cake, the ultra-sharp serrated edge ensures clean, tear-free slices every time—great choice for home bakers who value precision and presentation

PREMIUM CARVING KNIFE – Precision engineered brisket slicing knife, expertly sharpened for effortless carving and slicing for brisket, turkey, roast, ribs, prosciutto, and other meats.
Strawberry Checkerboard Cookies
We recommend using freeze-dried strawberries to create stunning pinkish-red dough that delivers both vibrant color and subtle fruity flavor. The freeze-dried berries work better than fresh strawberries because they add intense flavor without introducing excess moisture that could affect our dough’s consistency. We simply grind the freeze-dried strawberries into a fine powder and incorporate them into our vanilla dough base.
Our strawberry dough alternates beautifully with vanilla or another complementary flavor to maintain the checkerboard design. The assembly process remains identical to our traditional method, but we substitute the strawberry dough for one of the original flavors. This variation creates eye-catching cookies with a delicate berry taste that appeals to both children and adults.
Lemon Checkerboard Cookies
We incorporate fresh lemon zest and a small amount of lemon juice into one portion of our dough to create bright citrus-flavored cookies. The lemon zest provides intense flavor while the juice adds subtle tanginess without compromising the dough’s structure. We can enhance the visual contrast by adding a drop of yellow food coloring or pairing the lemon dough with contrasting flavors like vanilla or matcha.
Our lemon variation follows the same assembly technique as the classic recipe, with the lemon-flavored segment replacing or alternating with another flavor. The fresh citrus notes create a refreshing twist on the traditional checkerboard pattern, making these cookies perfect for spring celebrations or when we want a lighter flavor profile.
Troubleshooting Common Issues

We understand that creating perfect checkerboard cookies can present unique challenges. Here are the most common issues we encounter and effective answers to overcome them.

[High-Quality Stainless Steel] Made from food-grade stainless steel, this scraper is durable and essential for baking. Rust-resistant and dishwasher safe for long-lasting use

Bench scraper by Ateco

✔ Size: 5.2" x 3.7" (13.2x 9.3cm); medium size, color: white, green.
Sticky Dough Problems
When your dough becomes too sticky to handle, we recommend chilling it in the refrigerator for 15-20 minutes. This brief cooling period firms up the butter and makes the dough more manageable for rolling and shaping. We find that working with slightly cool hands also prevents the dough from becoming overly soft during assembly.
Managing Dry Dough Texture
Even though the initial appearance of dryness, we advise continuing to mix the dough as checkerboard cookies require a high flour ratio to maintain their structural integrity. The dough needs this higher flour content to hold its distinctive pattern during baking. We recommend adding milk one teaspoon at a time if the mixture remains too crumbly after thorough mixing.
Achieving Clean Pattern Lines
To create distinct checkerboard squares, we use lightly whisked egg whites as an effective binding agent between dough logs. This technique ensures the vanilla and chocolate sections adhere properly without blending together. We apply a thin layer of egg white to each surface before pressing the logs together firmly.
Securing Loose Log Assembly
When dough logs fail to stick together properly, we wrap them tightly in plastic wrap and apply gentle pressure along the seams. Rolling the wrapped logs on a flat surface helps compress the sections and eliminates air pockets. We always chill assembled logs for at least 2 hours before slicing to ensure they hold their shape.
Preventing Uneven Cuts
Sharp chef’s knives produce the cleanest cuts and preserve the checkerboard design integrity. We rotate the log a quarter turn after every few slices to prevent flattening on one side. Wiping the blade clean between cuts removes dough buildup that can drag and distort the pattern.
Maintaining Pattern Definition
Temperature control plays a crucial role in pattern preservation. We ensure the dough logs remain adequately chilled throughout the slicing process. Room temperature logs become soft and lose their defined edges when cut. Returning partially sliced logs to the refrigerator for 10-15 minutes helps maintain clean cuts.
Conclusion
We’ve walked you through everything you need to create stunning checkerboard cookies that’ll impress at any gathering. These delightful treats prove that professional-looking results are achievable in your own kitchen with just a bit of patience and the right techniques.
The beauty of checkerboard cookies lies in their versatility – whether you stick with the classic vanilla-chocolate combination or experiment with strawberry and lemon variations we’ve shared. Each slice reveals that perfect geometric pattern that makes these cookies truly special.
Remember that practice makes perfect when it comes to achieving those clean lines and defined patterns. Don’t be discouraged if your first batch isn’t flawless – even slightly imperfect checkerboard cookies taste absolutely delicious and still create that wow factor you’re after.
Start baking these impressive cookies today and watch as they become a requested favorite at every special occasion!

100% BPA FREE & FOOD GRADE SILCIONE : This silicone basting brush made of 100% BPA FREE food grade silicone. All bristles of this basting brush set are BPA-free material which are safe and good for your health. whole basting brush body covered by soft silicone material which can offer you perfect using feeling. At the same time, this basting brushes kitchen silicone is non-staining and won't pick up food particles (unlike wooden basting brush).

[ FOOD GRADE MATERIALS ]: This Silicone Basting Brush Set BPA Free,Non-toxic, lead free Odourless. With Stainless Steel core inside non slip handle.100% made in premium Food Grade silicone, unlike other bristle brushes, the silicone bristles will not break or shed in your food, more healthy.

[ FOOD GRADE MATERIALS ]: This Silicone Basting Brush Set BPA Free,Non-toxic, lead free Odourless. With Stainless Steel core inside non slip handle.100% made in premium Food Grade silicone, unlike other bristle brushes, the silicone bristles will not break or shed in your food, more healthy.
Frequently Asked Questions

Versatile kitchen essential — This multipurpose stainless steel bench scraper chops dough, portions bread/pizza, cuts brownies, and scrapes flour off your work surface for baking and meal prep.Or used as a smoother for cake decorating or batter spreader.

Crafted from durable and flexible PE plastic, these dough scrapers offer superior bendability compared to traditional rigid PP materials, ensuring long-lasting use for various baking tasks.

【Simple and Modern style】Pizz cutter/Dough scraper/Dough Cutter designed to scrape and split bread dough,So it's easy to use and make your baking more effective and No worry about hand and wrist fatigue!
What makes checkerboard cookies special?
Checkerboard cookies are known for their stunning visual appeal featuring alternating squares of vanilla and chocolate dough. Despite their impressive appearance, they’re surprisingly easy to make with proper rolling technique and dough chilling. They’re perfect for special occasions and holidays when you want to impress guests with beautiful, homemade treats.
What ingredients do I need for checkerboard cookies?
You’ll need ingredients for both vanilla and chocolate dough. The vanilla dough requires unsalted butter, granulated sugar, egg, vanilla extract, all-purpose flour, salt, and whole milk. The chocolate dough uses similar ingredients plus unsweetened cocoa powder. For assembly, you’ll need a lightly beaten egg white and optional coarse sugar for sprinkling.
What equipment is essential for making perfect checkerboard cookies?
Essential tools include mixing bowls, stand or hand mixer, measuring cups and spoons, sharp knife, rolling pin, dough scraper, ruler, and baking trays. These tools ensure precision and consistent results, helping you achieve the clean lines that make checkerboard cookies visually striking and professionally crafted.
How do I create the checkerboard pattern?
After preparing both vanilla and chocolate doughs and chilling them, roll each into rectangles and cut into strips. Layer alternating colored strips, pressing them together with egg white as binding. Form into logs, wrap, and chill again before slicing into cookies that reveal the distinctive checkerboard squares.
Can I make checkerboard cookies ahead of time?
Yes! Assembled cookie dough logs can be stored in the refrigerator for up to 5 days or frozen for up to 2 months, either whole or pre-sliced. Proper wrapping maintains quality and visual appeal. Chill refrigerated logs or partially thaw frozen ones before slicing for clean cuts.
How should I store baked checkerboard cookies?
Store baked cookies in an airtight container at room temperature for 4-7 days to maintain freshness and crisp texture. For longer storage, freeze for up to 3 months with waxed paper between layers to prevent sticking. Serve at room temperature for the best flavor and texture.
What are some popular variations of checkerboard cookies?
Popular alternatives include Strawberry Checkerboard Cookies using freeze-dried strawberries for vibrant color and flavor, and Lemon Checkerboard Cookies incorporating fresh lemon zest and juice for a refreshing twist. Both variations follow the same assembly process while offering creative flavor combinations beyond the classic vanilla-chocolate pairing.
What common problems should I watch out for when making these cookies?
Common issues include sticky or dry dough, uneven pattern lines, loose log assembly, uneven cuts, and blurred patterns. Solutions include proper dough chilling, using egg whites as binding agent, employing sharp knives for clean cuts, and maintaining consistent dough temperature throughout the process for perfect results.