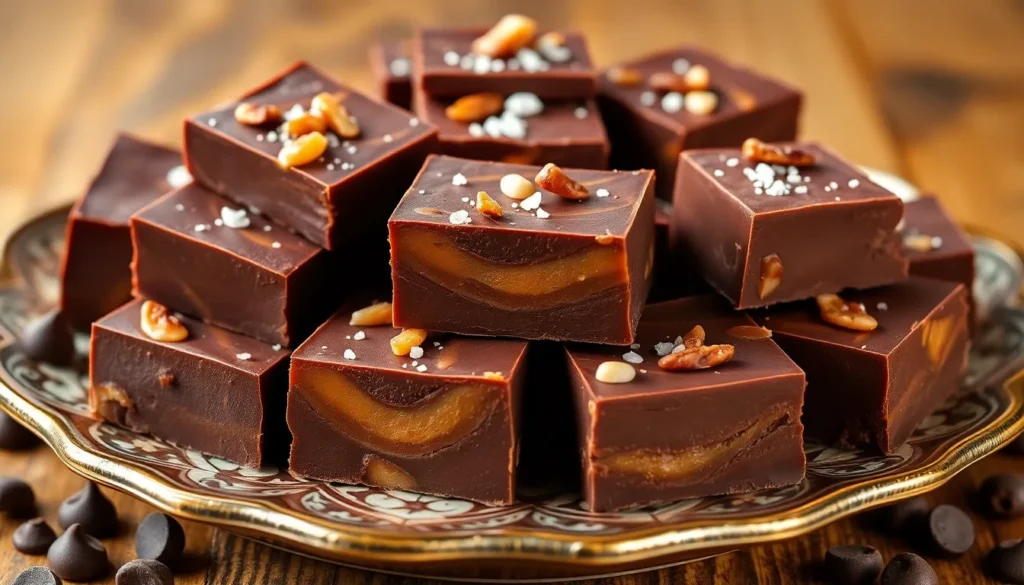
We’ve all experienced that moment when our sweet tooth demands something truly extraordinary – and that’s exactly what chocolate caramel fudge delivers. This rich, indulgent treat combines the deep intensity of premium chocolate with ribbons of buttery caramel that melt on your tongue. It’s the kind of dessert that transforms ordinary moments into pure bliss.
Creating homemade chocolate caramel fudge might seem intimidating, but we’re here to show you it’s surprisingly achievable. With just a handful of quality ingredients and some patience, you’ll create squares of pure decadence that rival any high-end confectionery. The secret lies in achieving that perfect balance between fudgy texture and smooth caramel swirls.
Whether you’re planning holiday gifts or simply treating yourself, this chocolate caramel fudge recipe will become your go-to indulgence. We promise each bite delivers that satisfying contrast of flavors that keeps you coming back for more.
Equipment Needed
Creating perfect chocolate caramel fudge requires the right tools to ensure smooth preparation and professional results. We recommend gathering these essential items before starting your fudge-making adventure.
Essential Cookware:
- Heavy-bottomed saucepan (2-3 quart capacity)
- Medium mixing bowl
- 8×8 inch square baking pan
- Wire cooling rack
Measuring and Mixing Tools:
- Digital kitchen scale (for precise measurements)
- Liquid measuring cups
- Dry measuring cups and spoons
- Wooden spoon or silicone spatula
- Whisk
Temperature Control:
- Candy thermometer or instant-read thermometer
- Timer
Preparation Essentials:
- Parchment paper
- Aluminum foil
- Cooking spray or butter (for greasing)
- Sharp knife (for cutting finished fudge)
Optional but Helpful:
- Stand mixer or hand mixer
- Offset spatula (for smooth spreading)
- Rubber spatula (for scraping bowls clean)
The heavy-bottomed saucepan prevents hot spots that could burn your caramel or chocolate. A candy thermometer ensures your mixture reaches the proper temperature for that perfect fudgy consistency. Parchment paper makes removal from the pan effortless and creates clean edges for professional-looking squares.
Quality equipment makes the difference between good fudge and exceptional fudge. We suggest having everything ready and within reach since timing becomes crucial once you start cooking the caramel base.


Ingredients

Our chocolate caramel fudge recipe requires carefully selected ingredients organized into three distinct layers that work together to create the perfect balance of rich chocolate and smooth caramel. Each component plays a crucial role in achieving the ideal texture and flavor profile.
For the Chocolate Fudge Base
We use premium ingredients to create a smooth and creamy foundation that forms the heart of our fudge:
- Milk Chocolate Chips: 2 cups (340 grams) – provides the rich chocolate base
- Sweetened Condensed Milk: ¾ cup (234 grams) – creates the signature fudgy texture
- Unsalted Butter: ¼ cup (57 grams) – adds smoothness and prevents grittiness
- Optional Spices: Cinnamon or nutmeg – enhances the chocolate flavor with warm notes
For the Caramel Layer
The caramel swirl requires these exact ingredients to achieve the perfect consistency and flavor:
- Caramels: 1 cup (Kraft Caramels work perfectly), cut into quarters for easier melting
- White Chocolate Chips: ½ cup – balances the caramel sweetness and adds creaminess
- Heavy Cream: ¼ cup – creates a smooth, pourable caramel mixture
- Butter: 1 tablespoon – ensures silky texture and prevents separation
For the Chocolate Topping
- Additional Milk Chocolate Chips – perfect for creating an extra chocolate layer or elegant drizzling patterns
- Coarse Sea Salt – enhances the caramel flavor and adds gourmet appeal
- Chopped Nuts – provides textural contrast and additional flavor complexity


Prep Work

Proper preparation sets the foundation for smooth fudge making and professional results. We’ll walk through the essential prep steps that ensure our chocolate caramel fudge turns out perfectly every time.
Preparing Your Pan
We start by lining our 8×8 inch or 9×9 inch baking dish with parchment paper or wax paper. This crucial step prevents the fudge from sticking and makes removal effortless once the fudge has set completely.
When parchment paper isn’t available, we lightly grease the pan with butter or cooking spray as an effective alternative. The key is creating a non-stick surface that allows for clean removal and neat edges.
Making the Caramel Sauce
We begin our caramel preparation by combining the caramels and heavy cream in a microwave-safe bowl. We mix these ingredients thoroughly until each caramel piece is completely coated with cream.
Next, we heat this caramel mixture in the microwave on HIGH for 1 to 2 minutes. We stir the mixture every 30 seconds to ensure even heating and prevent burning. The caramel is ready when it reaches a smooth and runny consistency.
While the caramel heats, we prepare our chocolate base in a saucepan. We combine sweetened condensed milk, chocolate chips, and salt over medium heat. We stir this mixture constantly until it becomes completely smooth and melted, creating the perfect foundation for our layered fudge.


Instructions

Now that we have our ingredients prepared and equipment ready, we can begin crafting our chocolate caramel fudge layers. The process requires careful attention to timing and temperature for the perfect result.
Making the Chocolate Fudge Base
We start by combining our chocolate chips, sweetened condensed milk, and a pinch of salt in our medium saucepan. Place the saucepan over medium heat and stir the mixture constantly to prevent burning. The chocolate will gradually melt and blend with the condensed milk to create a smooth, thick consistency.
Keep stirring until the mixture becomes completely uniform and glossy. This process typically takes 3 to 5 minutes of continuous stirring. Once we achieve the desired smoothness, we remove the saucepan from heat and add vanilla extract if using. Pour half of this chocolate mixture into our prepared pan and spread it evenly across the bottom to form our base layer.
Adding the Caramel Layer
We prepare our caramel by placing the cut caramels and heavy cream in a microwave-safe bowl. Microwave the mixture in 30-second intervals, stirring thoroughly between each heating session. Continue this process until the caramels completely melt and blend with the cream to create a smooth, pourable consistency.
The caramel should flow easily from our spoon when ready. Pour the warm caramel directly over our chocolate base layer while it remains soft. We spread the caramel evenly using a spatula, ensuring it reaches all corners of the pan. The caramel will settle into a perfect middle layer as it begins to cool.
Creating the Chocolate Topping
We return to our remaining chocolate fudge mixture, reheating it gently if it has begun to set. Pour this final chocolate layer over our caramel, covering it completely. Using a clean spatula, we spread the chocolate evenly across the surface.
For a marbled effect, we can gently swirl a knife through the top layer, creating decorative patterns. Alternatively, we keep the surface smooth for clean, distinct layers. The choice depends on our preferred presentation style.
Setting and Cooling
We smooth the final surface with our spatula to create an even finish. Cover the pan with plastic wrap or aluminum foil, ensuring the covering does not touch the fudge surface. Place the covered pan in our refrigerator for 2 to 4 hours until the fudge becomes completely firm.
The fudge reaches proper consistency when it springs back lightly to touch and holds its shape when cut. Remove the pan from refrigeration and lift out the fudge using our parchment paper overhang. Cut into uniform squares using a sharp knife, wiping the blade clean between cuts for the neatest presentation.


Directions for Cutting and Serving

We need to prepare our chocolate caramel fudge properly before cutting to achieve clean professional edges. Remove the fudge from the refrigerator and carefully peel it off the parchment paper. Place the fudge block on a cutting board and put on disposable gloves to prevent leaving fingerprints on the surface.
Sharp knives work best for cutting through the dense layers of chocolate and caramel. We recommend using a large chef’s knife or pastry cutter to score the fudge first before making the final cuts. Score the surface in a grid pattern to mark where each square will be cut.
Clean cuts require wiping the knife blade with a wet towel between each slice. This technique prevents the sticky caramel from building up on the blade and ensures smooth edges on every piece. Make steady downward cuts using firm pressure to slice through all three layers at once.
Small squares work perfectly for serving since this fudge delivers intense richness and sweetness. We suggest cutting pieces approximately 1 to 1.5 inches square for optimal portion sizes. Larger pieces can be overwhelming due to the concentrated flavors.
Room temperature or slightly chilled fudge offers the best texture and flavor experience. Allow refrigerated fudge to sit at room temperature for 10 to 15 minutes before serving if you prefer a softer bite. The caramel layer becomes more pliable and the chocolate develops fuller flavor at this temperature.
Arrange the cut squares on a serving platter with small paper liners or parchment squares underneath each piece. This presentation method makes it easy for guests to pick up individual portions without touching the fudge directly. Store any remaining pieces in an airtight container in the refrigerator to maintain freshness for up to one week.


Storage Instructions

Once we’ve crafted our delicious chocolate caramel fudge and enjoyed those first perfect squares, proper storage becomes essential to maintain its rich flavor and ideal texture. We want to ensure every piece remains as decadent as the day we made it.
Room Temperature Storage
Our homemade chocolate caramel fudge stays fresh for 1 to 2 weeks when stored at room temperature. We should place the fudge in an airtight container and keep it in a cool, dry location away from direct sunlight. The fudge may gradually harden or lose some freshness over time, but it remains perfectly enjoyable throughout this period.
| Storage Method | Duration | Key Requirements |
|---|---|---|
| Room Temperature | 1-2 weeks | Cool, dry place away from sunlight |
| Refrigeration | 2-3 weeks | Airtight container |
| Freezing | Up to 3 months | Wrapped in wax paper, then foil |
Refrigeration Guidelines
Refrigerated storage extends our fudge’s life to 2 to 3 weeks. We must store the pieces in an airtight container to prevent moisture absorption and keep them from drying out. The cold environment will make our fudge firmer than usual, so we recommend letting it sit at room temperature for several minutes before serving to restore its perfect texture.
Freezing for Long-Term Storage
Freezing offers the longest storage option, keeping our chocolate caramel fudge fresh for up to 3 months. We begin by wrapping individual pieces or the entire batch in wax paper or parchment paper. Next, we cover the wrapped fudge with plastic wrap or aluminum foil for additional protection. Finally, we place everything in an airtight container or freezer bag to prevent freezer burn.
Best Practices for Freshness
We always use clean utensils when handling our fudge to prevent contamination and extend its shelf life. Regular inspection helps us catch any signs of spoilage early, including unusual odors, mold development, or unexpected texture changes. These simple habits ensure we can enjoy our chocolate caramel fudge at its absolute best quality throughout its storage period.


Tips for Perfect Chocolate Caramel Fudge

Mastering the art of chocolate caramel fudge requires attention to detail and proper technique. We’ve gathered these essential tips to ensure your fudge turns out perfectly every time.
Temperature control makes all the difference when creating smooth fudge. Keep your heat at low to medium settings throughout the cooking process to prevent the mixture from boiling or burning. This gentle approach preserves the delicate flavors and prevents the chocolate from seizing.
The double pot method streamlines your cooking process by allowing you to prepare both the chocolate base and caramel layer simultaneously. Use two separate pots to ensure both components are ready at the same time. This technique prevents one layer from cooling while you prepare the other.
Constant stirring becomes crucial especially when heating sugar components. Move your spoon continuously through the mixture to distribute heat evenly and avoid hot spots that could burn the caramel. This steady motion creates the smooth texture we’re aiming for.
Work quickly once your mixture begins to thicken since fudge sets rapidly. Have all your ingredients measured and ready before you begin cooking. Once the mixture reaches the proper consistency add any final ingredients and pour immediately into your prepared pan.
Microwave method offers convenience for busy cooks who want excellent results with minimal effort. This five ingredient approach uses just one bowl and significantly reduces cooking time while maintaining the rich flavors we love.
Swirling technique creates beautiful marbled patterns that make your fudge visually appealing. Use a hot spoon or knife to create gentle swirls through the caramel layer. This method distributes the caramel evenly while creating an attractive presentation.
Refrigeration time cannot be rushed for proper setting. Allow your fudge to chill for at least two hours before attempting to cut it. This patience ensures clean cuts and prevents the layers from separating.
Small cuts provide the best serving experience since fudge is rich and dense. Cut your finished product into approximately 1 to 1.5 inch squares for optimal portion sizes that satisfy without overwhelming.
| Timing Guidelines | Duration |
|---|---|
| Minimum refrigeration time | 2 hours |
| Optimal setting time | 2-4 hours |
| Room temperature rest before serving | 10-15 minutes |
Troubleshooting Common Issues

Even experienced bakers encounter challenges when making chocolate caramel fudge. We’ve identified the most common problems and their answers to help you achieve perfect results every time.
Fudge Not Setting Properly
Temperature control remains the most critical factor in fudge making. When our fudge refuses to set correctly we usually find the mixture failed to reach the proper temperature range of 115 to 120°C (239 to 248°F).
Solution: Reheat the mixture while stirring constantly until it reaches the correct temperature. Adding a small amount of corn syrup can help stabilize the mixture if it continues to resist setting.
Runny or Soft Fudge
Insufficient cooking time or incorrect temperature typically causes this frustrating issue. Our fudge should hold its shape when properly set rather than spreading or feeling overly soft.
Answers:
- Reheat the mixture to reach the proper temperature range
- Transform the soft fudge into cookie filling or bar centers
- Roll the mixture into balls and coat with melted chocolate for individual candies
Grainy or Tough Texture
Overcooking or excessive stirring during the cooling process creates an unpleasant grainy texture. We must balance thorough mixing with gentle handling to maintain smoothness.
Solution: Reheat the mixture slowly to dissolve sugar crystals then allow it to cool gradually. Minimize stirring during the cooling phase to prevent crystal formation.
Fudge Separating
Incorrect cooling methods or improper tempering causes the fudge layers to separate or develop an oily appearance.
Solution: Ensure slow cooling at room temperature before refrigerating. Avoid excessive stirring during cooling and try remelting then cooling slowly if separation occurs.
| Issue | Temperature Range | Cooking Time | Key Factor |
|---|---|---|---|
| Not Setting | 115-120°C (239-248°F) | Extended heating | Temperature accuracy |
| Runny Texture | Below 115°C (239°F) | Insufficient cooking | Undercooking |
| Grainy Texture | Above 120°C (248°F) | Overcooking | Temperature control |
| Separation | Variable | Rapid cooling | Cooling method |
Essential Prevention Tips
Using a candy thermometer eliminates guesswork and ensures consistent results. We recommend stirring constantly during heating to prevent scorching while avoiding over-stirring during cooling phases.
Slow cooling helps our fudge set properly without developing unwanted textures. Room temperature cooling followed by gradual refrigeration produces the smoothest final product.
Working quickly once the mixture reaches proper temperature prevents premature setting. Having all equipment prepared and ingredients measured beforehand allows us to focus on technique rather than preparation.


Variations and Flavor Additions

Our classic chocolate caramel fudge recipe serves as the perfect foundation for countless creative variations that transform this beloved treat into exciting new flavors. We love experimenting with different combinations to create unique desserts that surprise and delight every palate.
Chocolate Caramel Marble Fudge
Creating a stunning marbled effect elevates our basic recipe into a visually striking dessert. We achieve this by using milk chocolate chips with sweetened condensed milk for the base layer while preparing the caramel swirl with caramel pieces and heavy cream. The key lies in gently swirling the warm caramel through the chocolate base using a knife or skewer to create beautiful patterns without overmixing.
Caramel Pecan Turtle Fudge
Adding chopped pecans transforms our fudge into the beloved turtle candy flavor profile. We create this variation by incorporating roughly chopped pecans into our semi-sweet chocolate chip base made with sweetened condensed milk. Our caramel layer involves melting caramel pieces with heavy cream before swirling it through the chocolate mixture. A final sprinkle of sea salt on top enhances the sweet and salty contrast that makes turtle desserts so irresistible.
White Chocolate Caramel Pecan Fudge
Substituting white chocolate chips creates a lighter and creamier version that appeals to those who prefer milder chocolate flavors. We prepare this variation using the same technique as our classic recipe but incorporate chopped pecans directly into the white chocolate base. The caramel sauce drizzle becomes more prominent against the pale background while maintaining the perfect balance of textures and flavors.
Salted Caramel Chocolate Fudge
Improving our basic recipe with coarse sea salt creates the popular salted caramel combination that has become a modern classic. We sprinkle the salt over the top layer just before refrigeration which allows the crystals to partially dissolve and create pockets of intense flavor throughout each bite.
Creative Enhancement Options
| Chocolate Type | Flavor Profile | Best Paired With |
|---|---|---|
| Milk Chocolate | Sweet and creamy | Caramel and vanilla |
| Semi-sweet | Balanced chocolate flavor | Nuts and sea salt |
| Dark Chocolate | Rich and intense | Berries and spices |
| White Chocolate | Mild and buttery | Citrus and vanilla |
Different chocolate types completely change the character of our fudge while maintaining the same preparation method. Dark chocolate creates a more sophisticated flavor profile that pairs beautifully with raspberry preserves swirled through the layers. Semi-sweet chocolate provides the ideal balance for incorporating crunchy elements like toasted almonds or walnuts.
We recommend experimenting with evaporated milk instead of heavy cream when preparing lighter caramel sauces that won’t overpower delicate flavor additions. This substitution works particularly well when incorporating extracts like vanilla or almond that might get lost in richer cream-based preparations.
Texture variations become endless when we consider adding elements like crushed cookies, dried fruits, or even mini marshmallows between the layers. Each addition requires slight timing adjustments to ensure proper setting while maintaining the smooth consistency that defines perfect fudge.


Conclusion
We’ve shown you everything you need to create this irresistible chocolate caramel fudge right in your own kitchen. With proper technique and quality ingredients you’ll be amazed at how professional your results can look and taste.
Whether you’re making this for special occasions or simply treating yourself you now have all the tools for success. The best part? Once you’ve mastered the basic recipe you can experiment with countless variations to make it uniquely yours.
So grab your ingredients and get started – we’re confident you’ll love every rich and creamy bite of your homemade chocolate caramel fudge!
Frequently Asked Questions
What ingredients do I need to make chocolate caramel fudge?
You’ll need milk chocolate chips, sweetened condensed milk, unsalted butter, caramels, heavy cream, white chocolate chips, and salt for the basic recipe. Optional additions include cinnamon, nutmeg, coarse sea salt, and chopped nuts for extra flavor and texture.
How long does it take to make chocolate caramel fudge?
The actual cooking and preparation time is about 30-45 minutes. However, the fudge needs to refrigerate for 2-4 hours to set properly before cutting and serving, so plan for at least 3-4 hours total.
What equipment do I need for making fudge?
Essential equipment includes a heavy-bottomed saucepan, mixing bowls, measuring cups and spoons, a candy thermometer, and parchment paper. Having all tools ready before starting is crucial since timing is important once cooking begins.
How do I prevent my fudge from being grainy or tough?
Maintain proper temperature control using a candy thermometer, stir constantly during heating, and avoid overcooking. Let the fudge cool slowly at room temperature before refrigerating to achieve a smooth, creamy texture.
How should I store chocolate caramel fudge?
Store at room temperature in an airtight container for 1-2 weeks, or refrigerate for 2-3 weeks. For longer storage, freeze properly wrapped fudge for up to 3 months. Use clean utensils to prevent contamination.
What should I do if my fudge doesn’t set properly?
If your fudge remains soft or runny, it likely wasn’t cooked to the proper temperature or long enough. Next time, use a candy thermometer and cook until the mixture reaches the correct consistency before cooling.
Can I make variations of chocolate caramel fudge?
Yes! Try Chocolate Caramel Marble Fudge, Caramel Pecan Turtle Fudge, White Chocolate Caramel Pecan Fudge, or Salted Caramel Chocolate Fudge. You can also add crushed cookies, dried fruits, or different extracts for personalized flavors.
How do I cut fudge cleanly?
Remove fudge from refrigerator, peel off parchment paper, and place on a cutting board. Use a sharp knife to score a grid pattern first, then make final cuts. Wipe the blade with a wet towel between cuts for clean edges.


