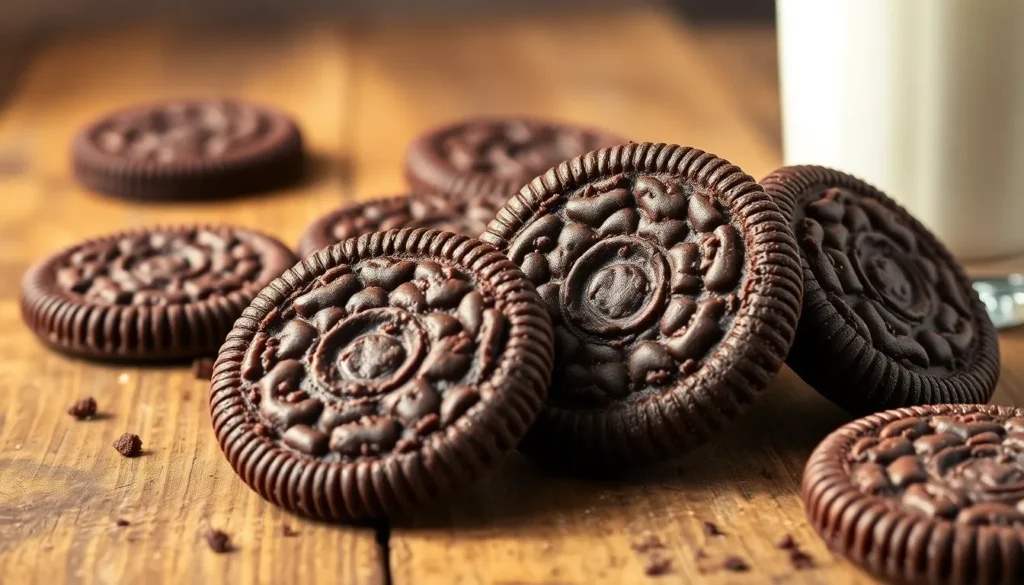
Craving the perfect chocolate cookie that rivals your favorite store-bought treat? Our homemade chocolate Oreo cookies deliver that iconic deep cocoa flavor and satisfying crunch you’ve been searching for. These rich, dark cookies capture everything we love about the classic sandwich cookie – minus the cream filling but packed with even more chocolate intensity.
We’ve perfected this recipe to create cookies that are crispy on the outside with a tender bite that melts perfectly on your tongue. The secret lies in using high-quality cocoa powder and just the right balance of sugars to achieve that distinctive Oreo-style flavor profile.
Whether you’re baking for a special occasion or simply satisfying your chocolate cravings, these cookies deliver bakery-quality results every time. They’re perfect for dunking in milk, crushing over ice cream, or enjoying straight from the cooling rack.
Ingredients
Creating authentic chocolate Oreo cookies requires precise measurements and quality ingredients. We’ve organized our ingredient list to ensure you achieve that perfect balance of rich chocolate flavor and creamy filling.

Unpretentious Black Cocoa Powder

REACH YOUR RICHEST CHOCOLATE FLAVOR: Experience this cocoa powder's fabulous high fat content of 22-24% that'll give you the freedom to create rich, fudgy creations with chocolate depth and intensity like never before. Whether it's a decadent dessert or a dreamy drink, this Dutch processed cocoa powder will bestow bold and beautiful chocolate flavor.

REACH YOUR RICHEST CHOCOLATE FLAVOR: Experience this cocoa powder's fabulous high fat content of 22-24% that'll give you the freedom to create rich, fudgy creations with chocolate depth and intensity like never before. Whether it's a decadent dessert or a dreamy drink, this Dutch processed cocoa powder will bestow bold and beautiful chocolate flavor.
For the Chocolate Cookie Base
- 1¼ cups all-purpose flour
- ¾ cup unsweetened cocoa powder (high-quality Dutch-processed preferred)
- 1 cup granulated sugar
- ½ cup packed light brown sugar
- ½ cup unsalted butter, softened to room temperature
- 1 large egg, room temperature
- 1 teaspoon vanilla extract
- ¾ teaspoon baking soda
- ½ teaspoon salt
- 2-3 tablespoons whole milk (as needed for dough consistency)
For the Cream Filling
- ½ cup unsalted butter, softened to room temperature
- 2 cups powdered sugar, sifted
- 2 tablespoons heavy cream or whole milk
- 1 teaspoon vanilla extract
- Pinch of salt
Equipment Needed

Creating authentic chocolate Oreo cookies at home requires exact equipment to achieve the perfect texture and assembly that mimics commercial production methods. We need mixing machines to properly combine our ingredients into a smooth dough that will hold together during baking.
Essential Kitchen Equipment:
- Stand mixer or hand mixer – Cream butter and sugars effectively for optimal cookie texture
- Large mixing bowls – Accommodate all ingredients during the mixing process
- Baking sheets – Provide even heat distribution for consistent cookie baking
- Conventional oven – Bake cookies at precise temperatures for 15 minutes to achieve crispiness
- Wire cooling racks – Allow proper air circulation for cooling and quality inspection
- Cookie scoop or spoon – Shape dough into uniform spheres before flattening
- Rolling pin or flat surface – Flatten dough spheres into the iconic circular Oreo shape
Assembly and Finishing Tools:
- Offset spatula or butter knife – Apply cream filling evenly across cookie surfaces
- Small bowl for cream mixing – Prepare smooth vanilla cream filling separately
- Measuring cups and spoons – Ensure accurate ingredient proportions for consistent results
- Parchment paper – Prevent sticking and help easy cookie removal
The production process benefits from having conveyor belt principles in mind when organizing your workspace. We arrange our equipment in a logical sequence that allows cookies to move smoothly from mixing through baking to final assembly. Mechanical presses aren’t necessary for home baking but gentle hand pressure creates the perfect sandwich structure when assembling our homemade Oreos.
Packaging machinery becomes simple storage containers for our finished cookies. We recommend airtight containers to maintain the crispy texture we’ve worked to achieve through proper baking and cooling techniques.

✅ Party Stars Sandwich Cookie Mold Designed to Embed Double Stuff Sandwich Cookies

Includes Molding Instructions

1. Precision Crafting: Each oreo molds silicone boasts 12 intricately designed cavities, precisely measuring 2.1 inches x 0.82 inches. This meticulous design of our oreo cookie mold ensures uniformity in your creations, allowing you to produce professional-looking and visually appealing desserts, chocolates, or other treats.
Instructions

Follow these detailed steps to create perfect chocolate Oreo cookies with authentic flavor and texture. We’ll guide you through each stage from mixing the dough to assembling the final sandwich cookies.
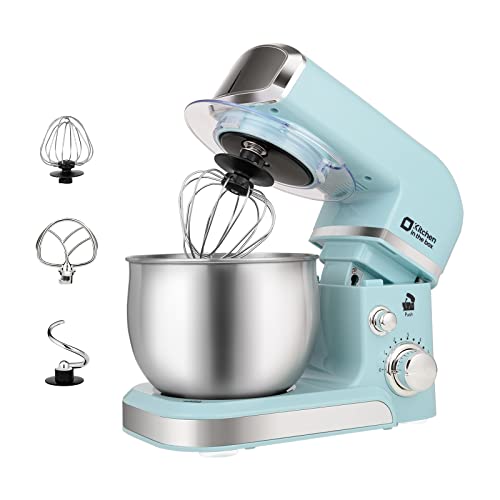
Compact Designed And More Color Options - The stand mixer is less than 7lbs with dimension 12.9*7*10.2 In, small and easy to storage,which could help space-saving. Perfectly suitable for small kitchen,apartment,or limited storage space. And multiple colors to choose,meet a variety of aesthetic needs for your kitchen.
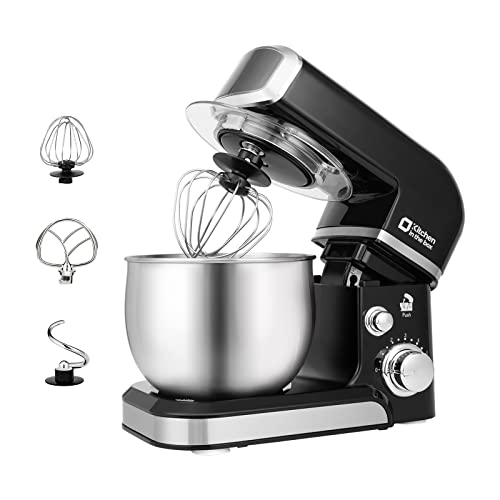
Compact Designed And More Color Options - The stand mixer is less than 7lbs with dimension 12.9*7*10.2 In, small and easy to storage,which could help space-saving. Perfectly suitable for small kitchen,apartment,or limited storage space. And multiple colors to choose,meet a variety of aesthetic needs for your kitchen.

Prep the Cookie Dough
Begin by whisking together the all-purpose flour, unsweetened cocoa powder, baking soda, and salt in a large mixing bowl. Set this dry mixture aside while you prepare the wet ingredients.
Cream the softened butter with both granulated sugar and light brown sugar using your stand mixer or hand mixer on medium speed for 3-4 minutes until the mixture becomes light and fluffy. Add the egg and vanilla extract, beating until fully incorporated.
Gradually add the dry ingredients to the butter mixture, alternating with the whole milk. Mix on low speed until just combined, being careful not to overmix the dough. The finished dough should be smooth and slightly sticky to the touch.
Make the Cream Filling
Whip the softened butter in a clean mixing bowl until light and fluffy, approximately 2-3 minutes on medium speed. Gradually add the powdered sugar, one cup at a time, beating well after each addition.
Pour in the heavy cream and vanilla extract, then add the pinch of salt. Continue beating on high speed for 2-3 minutes until the filling becomes smooth and holds its shape when piped. The consistency should be similar to traditional Oreo filling.
Roll and Cut the Cookies
Divide the cookie dough in half and wrap each portion in plastic wrap. Chill the dough in the refrigerator for at least 30 minutes to prevent excessive spreading during baking.
Roll out one portion of chilled dough on a lightly floured surface to 1/4 inch thickness. Use a round cookie cutter to cut uniform circles, re-rolling scraps as needed. Place the cut cookies on parchment-lined baking sheets, spacing them 2 inches apart.
Bake the Cookies
Preheat your oven to 350°F (177°C). Bake the cookies for 10-12 minutes, rotating the baking sheets halfway through for even browning. The cookies are done when the edges appear set and the centers look slightly underdone.
Allow the cookies to cool on the baking sheet for 5 minutes before transferring them to wire cooling racks. Complete cooling takes approximately 15-20 minutes and ensures the cookies won’t break during assembly.
Assemble the Sandwich Cookies
Pair up cookies of similar size, setting aside the most uniform ones for assembly. Pipe or spread approximately 1 tablespoon of cream filling onto the flat side of one cookie in each pair.
Gently press the second cookie on top, creating a sandwich. Twist slightly to distribute the filling evenly to the edges. Store the assembled cookies in airtight containers to maintain their crispy texture and prevent the filling from hardening.
Directions for Perfect Results

Mastering the art of chocolate Oreo cookies requires attention to detail in every step of the process. We’ll guide you through the essential techniques that ensure bakery-quality results every time.

#60,#40,#20, Three Size Cookie Scoops - The small one is #60 cookie scoop, hold 1 tablespoon/ 0.5 OZ; the medium one is #40 cookie scoop, hold 2 tablespoon/ 1 OZ; the large one is #20 cookie scoop, hold 3 tablespoon/ 1.5 OZ. These cookie dough scoops can make cookies in a variety of sizes.

#16 COOKIE SCOOP, 2 OZ SCOOP– The large cookie scoop is 2.3 inch/ 58MM diameter, its capacity is 4 tablespoons/ 60 ml / 2 oz. Perfect size for cupcake, Muffins, Large Cookies or Meatballs.

SUITABLE SIZE, #20, #40, #60 – The cookie scoops for baking set of 3 include small, medium and large scoop. Small cookie scoop: #60 cookie scoop, 1 Tbsp/ 0.5 OZ capacity. Medium cookie scoop: #40 cookie scoop, 2 Tbsp/ 1 OZ capacity. Large cookie scoop: #20 cookie scoop, 3 Tbsp/ 1.5 OZ capacity.
Getting the Right Cookie Texture
We begin by preheating our oven to 350°F (175°C) for optimal baking conditions. Our first step involves combining flour, baking soda, salt, and Oreo crumbs in a large bowl, whisking these dry ingredients until evenly distributed.
Next, we cream together butter, brown sugar, and granulated sugar using our mixer until the mixture becomes light and fluffy. This process typically takes 3-4 minutes and creates the foundation for our cookie’s perfect texture. We then beat in eggs and vanilla extract until the mixture is well combined and smooth.
Gradually adding our dry ingredients to the wet mixture prevents overmixing, which can result in tough cookies. We mix just until the ingredients are combined, then fold in chocolate chips and Oreo pieces to distribute them evenly throughout the dough.
Achieving Smooth Cream Filling
Our cream filling requires careful attention to achieve that signature smooth consistency. We start by whipping together butter, cream cheese, and vanilla extract until the mixture is completely smooth and free of lumps.
Gradually adding powdered sugar ensures our filling maintains its silky texture without becoming grainy. We incorporate the sugar slowly, allowing each addition to blend completely before adding more. When we need to adjust the consistency, we add milk or heavy cream one tablespoon at a time until we reach the desired spreadable texture.
The key to professional results lies in ensuring all ingredients are at room temperature before mixing, which prevents the filling from separating or becoming lumpy.
Proper Assembly Technique
We scoop our prepared dough into uniform balls and flatten them slightly before baking for 12-15 minutes. This technique ensures even cooking and the characteristic flat shape of Oreo cookies.
Cooling the cookies completely on the pan before transferring them to a wire rack is crucial for maintaining their structure. We never attempt to frost warm cookies, as this causes the filling to melt and slide off.
For applying our cream filling, we use either a piping bag or a zip-top bag with a corner cut off to create clean, even spirals. We start from the center of one cookie and work outward in a circular motion, then gently press a second cookie on top. Finally, we sprinkle crushed Oreos around the edges for an authentic finishing touch that adds both visual appeal and extra flavor.
Make-Ahead Instructions

We can prepare our chocolate Oreo cookies days or even weeks in advance to save time for special occasions. The versatility of these cookies makes them perfect for meal prep and event planning.
Freezing Baked Cookies
Our finished chocolate Oreo cookies freeze beautifully once they’re completely assembled and cooled. We wrap each cookie individually in cling wrap to prevent freezer burn and maintain their texture. After wrapping, we place them in an airtight container or freezer bag for up to three months. When we’re ready to serve, we simply thaw the cookies at room temperature for 30 minutes.
Storing Unfilled Cookie Bases
We can bake our chocolate cookie bases ahead of time and store them separately from the filling. The cooled, unfilled cookies keep their crispiness when stored in an airtight container at room temperature for up to two days. Beyond this timeframe, the cookies may lose some of their signature crispy texture that makes homemade Oreos so appealing.
Dough Preparation Tips
Our cookie dough benefits from advance preparation through chilling. We wrap the formed dough in plastic wrap and refrigerate it for at least 2 hours or overnight. This chilling process helps maintain the cookie structure during baking and prevents excessive spreading. The cold dough also rolls out more easily and holds its shape better when cut.
Cream Filling Storage
We prepare our cream filling up to 5 days in advance and store it covered in the refrigerator. Before using, we let the filling come to room temperature and give it a quick stir to restore its smooth consistency. This advance preparation streamlines our assembly process when we’re ready to complete the cookies.
Assembly Timeline
We recommend assembling our chocolate Oreo cookies no more than 24 hours before serving to maintain optimal texture. The assembled cookies stay fresh in an airtight container in the refrigerator for up to two weeks, making them excellent for parties and gatherings.

Riccle Piping Bags and Tips Set, 11.8 Inch 100 Anti Burst Piping Bags, 124 Pcs Cake Decorating Kit with 16 Piping Tips, 1 Reusable Pastry Bags, 3 Cake Scrapers

PROFESSIONAL SILICONE PASTRY BAGS: Compared with others,ELK's piping bags uses the 60HA elastic silicone, which is the perfect material for the piping tips set. The slight elasticity ensures its reusability, allowing the viscous liquids to flow smoothly inside. It won’t blow out even if you knead the thick batter with it. Its high stretchiness means that all of the squeezing efforts you make gets transferred to bulging sides as it stretches out, instead of forcing the frosting out the bottom.

【Cream Filling Nozzle Set】Package includes: 3 stainless steel cream icing piping nozzle tips (small, medium, large) with three nozzle sizes (3.74in, 3.42in, 2.99in) to accommodate various filling needs, 50 disposable piping bags, and 1 puff cream filling piping tip cleaning brush (easy to clean). Cream piping tips are perfect for donuts, cupcakes, éclairs, and cream puffs.
Storage Tips

Proper storage ensures our chocolate Oreo cookies maintain their signature crispy texture and rich chocolate flavor for days after preparation. We recommend storing these homemade treats in an airtight container at room temperature for up to 3-4 days to preserve their optimal taste and texture.

Intense Flavor: Dutch processed black cocoa powder delivers a rich, dark chocolate taste to your baked goods, perfect for creating decadent cakes, cookies, and frostings with a deep, unsweetened flavor profile

E. Guittard Cocoa Powder

USDA Certified Organic Culinary Grade Cocoa Powder - Batch Tested Gluten Free
Room Temperature Storage
We store our assembled chocolate Oreo cookies in a cool, dry place away from direct sunlight and heat sources to prevent the chocolate elements from melting or becoming discolored. An airtight container protects the cookies from moisture that can make them soggy or stale. When stacking multiple layers, we place wax paper between each layer to prevent the cookies from sticking together and maintain their perfect sandwich structure.
Extended Storage Options
For longer storage periods, we can freeze our chocolate Oreo cookies for up to 30 days while maintaining their quality. We wrap each cookie individually in cling wrap before placing them in an airtight container to prevent freezer burn. When ready to enjoy, we let them thaw at room temperature or warm them briefly in the microwave for that fresh-baked taste.
Refrigeration Considerations
While refrigeration can extend the shelf life of our chocolate Oreo cookies, we ensure they remain in an airtight container to prevent absorbing odors or flavors from other foods. The refrigerated environment might slightly affect the texture and taste of the chocolate coating, but our cookies will stay fresh for up to two weeks when properly stored.
Storage Environment Guidelines
We avoid storing our chocolate Oreo cookies in warm or humid environments, as these conditions can cause chocolate to melt or develop an unappetizing white bloom. Always checking for signs of spoilage before consuming ensures we enjoy our homemade cookies at their peak quality and safety.
Serving Suggestions

Our homemade chocolate Oreo cookies offer endless possibilities for creative serving and presentation. We recommend transforming these cookies into Oreo balls by crushing them into fine crumbs and mixing with softened cream cheese. Roll the mixture into bite-sized balls and coat them in melted chocolate—whether dark, white, or semi-sweet depending on your preference. Garnish these treats with a chocolate drizzle, colorful sprinkles, or extra crushed Oreo crumbs for an elegant finishing touch.
For entertaining, we love creating an Oreo PB & Chocolate Dip that showcases our cookies beautifully. Combine cream cheese, peanut butter, and honey with finely chopped Oreo cookies, then top with chocolate spread and more chopped cookies. Serve this rich dip with additional whole cookies or fresh fruit like strawberries, bananas, and pineapple for dipping. The contrast between the smooth dip and crunchy cookies creates an irresistible texture combination.
Chocolate Oreo Trifle presents another stunning serving option that highlights our cookies’ versatility. Layer crushed cookies with chocolate pudding, Heath Bar bits, and whipped topping in a clear trifle bowl for maximum visual impact. We often add nuts, berries, or mini chocolate chips between layers for extra texture and flavor complexity. This dessert works perfectly for special occasions when you want to impress guests with minimal effort.
Baking enthusiasts will appreciate incorporating our cookies into Hot Chocolate & Oreo Bread. Crush several cookies and fold them into a rich bread batter enhanced with hot chocolate powder and cocoa. Serve warm slices with vanilla ice cream for a comforting dessert that combines the best of both worlds. The cookies maintain their crunch while adding bursts of chocolate flavor throughout each slice.
| Serving Option | Prep Time | Key Ingredients | Best Served |
|---|---|---|---|
| Oreo Balls | 30 minutes | Cream cheese, melted chocolate | Chilled |
| PB & Chocolate Dip | 15 minutes | Peanut butter, honey, cream cheese | Room temperature |
| Chocolate Trifle | 20 minutes | Pudding, whipped topping, Heath Bar bits | Chilled |
| Hot Chocolate Bread | 60 minutes | Hot chocolate powder, cocoa | Warm |
Simple presentation ideas work just as well for everyday enjoyment. Arrange our cookies on a decorative platter with glasses of cold milk for a classic pairing that never goes out of style. Stack them in mason jars for portable treats or package them in cellophane bags tied with ribbon for thoughtful homemade gifts.

☀【High Quality】Made of high quality food grade PET material, durable and reusable. Specially designed for making chocolate covered Round Cookies, it is very easy to unmold.

【Cookie Mold】you will get 1pcs Cookie silicone fondant molds. The size of each mold is different; Please refer to the picture for the specific size. With this Cookie silicone mold, it's easy to create detailed shapes in exciting designs, Great for decorating your cakes. Really a time saver! enabling you to bring a quality to your work.

🍪 For Chocolate-Covered Cookie Making Specially designed to make smooth, uniform chocolate shells for round cookies. Each 2.17" x 2.17" x 0.79" cavity forms clean-edged chocolate coatings with a professional finish, avoiding messy or uneven coatings.
Conclusion
We’ve crafted homemade chocolate Oreo cookies that deliver the perfect balance of crispy texture and rich chocolate flavor. These cookies prove that with the right ingredients and techniques you can create treats that rival store-bought favorites while offering superior taste and quality.
The beauty of this recipe lies in its versatility and make-ahead convenience. Whether you’re preparing them for a special occasion or storing them for later enjoyment our detailed storage and serving suggestions ensure your cookies maintain their signature crispiness and delicious taste.
From simple milk dunking to elaborate trifles these homemade chocolate Oreo cookies open up endless possibilities for creative dessert presentations. We’re confident that once you master this recipe it’ll become your go-to choice for satisfying chocolate cravings and impressing family and friends alike.
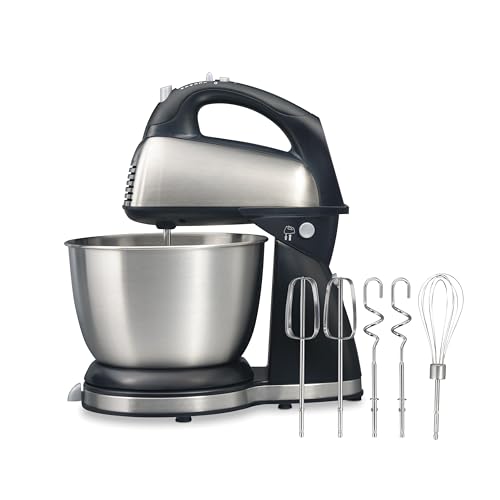
2 PRODUCTS IN 1: Why take up room in your kitchen for 2 mixers when 1 space-saving appliance does it all. The stand mixer is perfect for thick mixtures like cookie and bread dough and the hand mixer easily unlocks from the base for quick mixing jobs.


Note: Compatible with almost all KitchenAid 4.5-quart and 5-quart tilt-head stand mixers. You can find your model on the bottom of the mixer. Compatible models include: K45, K45SS, KN15,KDM90, KA15, BEA30, RRK150, KSM45, KSM75, KSM85, KSM88, KSM90, KSM95, KSM96, KSM100, KSM103, KSM106, KSM110, KSM111, KSM120, KSM125, KSM150, KSM151, KSM152, KSM153, KSM154, KSM155, KSM156, KSM160, KSM170, KSM175, KSM177, KSM180,KSM195, KSM200
Frequently Asked Questions

This cookie scoop Included Small (1 Tbsp/15ml/0.5 oz),Medium (2 Tbsp/30ml/1 oz),Large (3 Tbsp/45ml/1.5 oz),perfect for all your baking and cooking needs.Depending on the use, they can be ice cream scoops, cookie scoops, melon ball scoops or meat ball scoops

Size 40 scoop makes 2.75-in diameter cookies

【MULTI USES】 #40 cookie scooper for baking, is about 2 Tbsp / 30ml / 1 oz. Diameter is 1.72 inch/44 mm. You can use it as ice cream scooper, cookie scooper, cookie dough scoop, cupcake scoop, meatball scoop, melon baller scoop, food ball maker, sorbet scoop, even as measure spoon to satisfy kinds of different needs.
How long do homemade chocolate Oreo cookies stay fresh?
Homemade chocolate Oreo cookies stay fresh for 3-4 days when stored in an airtight container at room temperature. For longer storage, they can be frozen for up to 30 days if wrapped individually to prevent freezer burn. Assembled cookies can also be refrigerated for up to two weeks in an airtight container.
Can I make the cookie dough ahead of time?
Yes, you can make the cookie dough ahead of time. Chilling the dough actually helps maintain the cookies’ structure during baking. The dough can be prepared and stored in the refrigerator, and unfilled cookie bases can be stored at room temperature for up to two days after baking.
What equipment do I need to make chocolate Oreo cookies?
You’ll need a stand mixer or hand mixer, large mixing bowls, baking sheets, wire cooling racks, a cookie scoop or spoon, and a rolling pin. For assembly, an offset spatula and measuring cups are helpful. A conventional oven and airtight containers for storage are also essential.
How do I achieve the perfect crispy exterior and tender interior?
Use high-quality unsweetened cocoa powder and a balanced mix of granulated and light brown sugar. Avoid overmixing the dough when combining wet and dry ingredients. Preheat your oven properly and ensure cookies cool completely on wire racks before assembling to maintain the desired texture.
Can I prepare the cream filling in advance?
Yes, the cream filling can be made ahead of time and stored in the refrigerator. Use room temperature ingredients and gradually add powdered sugar for smooth consistency. This advance preparation streamlines the assembly process when you’re ready to make the sandwich cookies.
How should I store assembled cookies to maintain quality?
Store assembled cookies in an airtight container at room temperature, away from direct sunlight and heat sources. Avoid warm or humid environments to prevent melting or spoilage. For best results, assemble cookies no more than 24 hours before serving to ensure optimal texture and flavor.