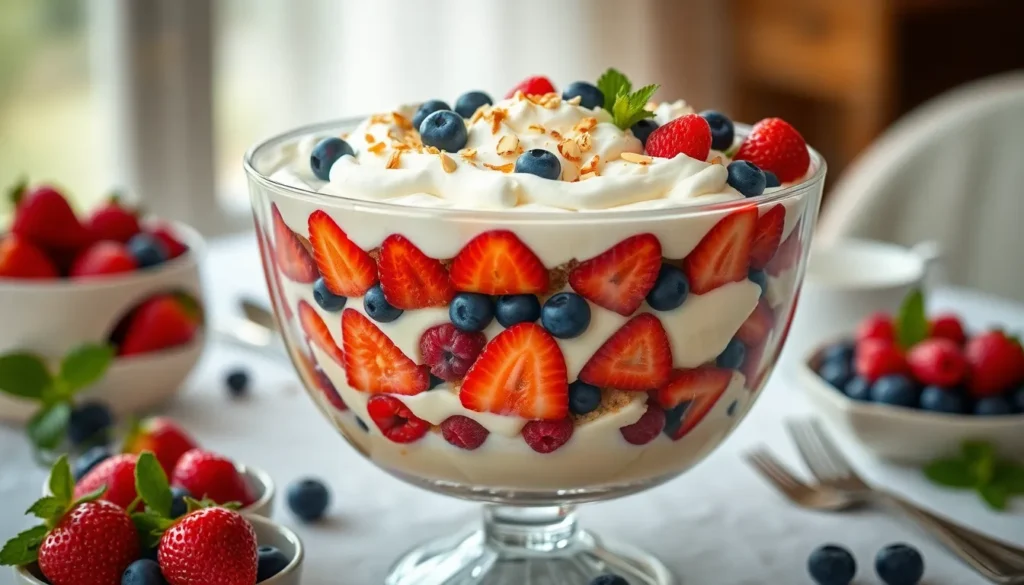
We’ve all experienced that moment when we need a dessert that’s both stunning and surprisingly simple to make. Classic trifle delivers exactly that – a show-stopping layered dessert that looks like it came from a fancy bakery but requires no baking skills whatsoever.
This beloved British dessert transforms humble ingredients into something magical. We’re talking tender sponge cake soaked in sherry, rich custard, fresh berries, and billowy whipped cream all layered in perfect harmony. The beauty lies in how each spoonful delivers multiple textures and flavors that complement each other beautifully.
What makes trifle truly special is its flexibility and make-ahead nature. We can customize it with seasonal fruits, substitute the alcohol, or even make individual portions for elegant dinner parties. Plus it actually tastes better after sitting overnight, making it the perfect stress-free dessert for entertaining.
Ingredients
Gathering the right ingredients ensures our classic trifle achieves perfect balance between rich custard, tender cake, and fresh fruit. We’ve organized everything by component to make preparation seamless.
For the Sponge Cake
- 1 store-bought pound cake (12 oz) or ladyfingers (7 oz package)
- 1/3 cup sweet sherry or raspberry liqueur
- 2 tablespoons berry jam or preserves
For the Custard
- 6 large egg yolks
- 1/2 cup granulated sugar
- 1/4 cup cornstarch
- 2 cups whole milk
- 1 teaspoon vanilla extract
- 2 tablespoons unsalted butter
For the Fruit Layer
- 2 cups fresh strawberries, hulled and sliced
- 1 cup fresh raspberries
- 1 cup fresh blueberries
- 2 tablespoons granulated sugar
- 1 tablespoon lemon juice
For the Whipped Cream
- 2 cups heavy whipping cream
- 1/4 cup powdered sugar
- 1 teaspoon vanilla extract
For Assembly
- 1/4 cup sliced almonds, toasted
- Fresh berries for garnish
- Mint leaves for decoration (optional)
Equipment Needed

Creating our perfect classic trifle requires exact tools that make the assembly process smooth and professional. We recommend gathering all equipment before starting to ensure seamless preparation.
Large Glass Bowl serves as our primary vessel for this stunning dessert. A trifle bowl with straight sides works best for showcasing the beautiful layers, though any large clear bowl will display the colorful components effectively.
Whisk or Hand Mixer becomes essential for preparing our silky custard and achieving perfectly whipped cream. Electric mixers save time and energy while ensuring consistent texture throughout both components.
Medium Saucepan handles our custard preparation with even heat distribution. Heavy bottomed pans prevent scorching and provide better temperature control during the delicate custard cooking process.
Fine Mesh Strainer eliminates any lumps from our custard mixture. This tool ensures our final custard layer remains perfectly smooth and professional looking in the finished trifle.
Sharp Knife cuts our pound cake or ladyfingers into uniform pieces. Consistent sizing creates even layers and helps with proper liquid absorption throughout the sponge base.
Measuring Cups and Spoons guarantee accurate proportions for each component. Precise measurements ensure our custard sets properly and our flavors balance perfectly in every serving.
Large Spoon or Ladle assists with gentle layering techniques. These tools help us create distinct layers without disturbing the components underneath during assembly.
Plastic Wrap protects our assembled trifle during chilling time. Covering prevents the top layer from drying out and allows flavors to meld beautifully overnight in the refrigerator.
Instructions

Creating a classic trifle requires careful preparation of each component before assembly. We’ll guide you through making each layer from scratch to achieve the perfect balance of flavors and textures.
Make the Sponge Cake
We start by preheating our oven to 350°F and greasing a 9×13 inch baking pan. Beat 4 large eggs in a large bowl until light and fluffy using an electric mixer on high speed for about 3 minutes. Gradually add 3/4 cup granulated sugar while continuing to beat until the mixture becomes pale and thick.
Sift together 3/4 cup all-purpose flour and 1/4 teaspoon salt in a separate bowl. Gently fold the flour mixture into the egg mixture using a rubber spatula, being careful not to overmix. Pour the batter into our prepared pan and spread it evenly.
Bake for 12-15 minutes until the cake springs back when lightly touched and pulls away slightly from the sides. Cool completely in the pan before cutting into 2-inch squares or rectangles. Store-bought pound cake or ladyfingers work perfectly as alternatives if you prefer to save time.
Prepare the Custard
We combine 6 large egg yolks and 1/2 cup granulated sugar in a medium bowl, whisking until the mixture becomes pale and smooth. Add 3 tablespoons cornstarch and whisk until no lumps remain.
Heat 2 cups whole milk in a medium saucepan over medium heat until it just begins to simmer. Remove from heat and slowly pour about 1/2 cup of the hot milk into our egg mixture while whisking constantly to prevent the eggs from scrambling.
Pour the tempered egg mixture back into the saucepan with the remaining milk. Cook over medium-low heat while stirring constantly with a wooden spoon for 5-7 minutes until the custard thickens enough to coat the back of the spoon. Remove from heat and stir in 2 teaspoons vanilla extract and 2 tablespoons butter until smooth.
Strain the custard through a fine mesh strainer into a clean bowl to remove any lumps. Press plastic wrap directly onto the surface to prevent a skin from forming and refrigerate until completely cool.
Prepare the Fruit
We hull and slice 2 cups fresh strawberries into 1/4-inch thick pieces, placing them in a large bowl. Add 1 cup fresh raspberries and 1 cup fresh blueberries to the strawberries.
Sprinkle 3 tablespoons granulated sugar and 1 tablespoon fresh lemon juice over the fruit mixture. Gently toss everything together using a large spoon, being careful not to crush the berries.
Let the fruit macerate at room temperature for 15-20 minutes, allowing the natural juices to develop and create a light syrup. This process enhances the fruit flavors and adds moisture to our trifle layers.
Make the Whipped Cream
We pour 2 cups heavy whipping cream into a large, chilled bowl and begin beating with an electric mixer on medium speed. Continue beating until the cream starts to thicken and hold soft peaks when the beaters are lifted.
Add 1/4 cup powdered sugar and 1 teaspoon vanilla extract to the cream. Increase the mixer speed to medium-high and continue beating until stiff peaks form, being careful not to overbeat and create butter.
Use the whipped cream immediately or cover and refrigerate for up to 2 hours before assembling our trifle. The cream should hold its shape well and provide the perfect light, airy texture for our final layer.
Directions for Assembly

Now we bring together all our carefully prepared components to create the stunning layered masterpiece that makes trifle such a beloved dessert. The assembly process transforms individual elements into a cohesive whole that’s both visually striking and deliciously balanced.
Layer the Base
We begin by arranging one-third of our bite-sized sponge cake cubes evenly across the bottom of our glass trifle dish. This foundational layer should cover the entire base without leaving gaps. Next we brush the cake pieces with sweet sherry or raspberry liqueur to add moisture and depth of flavor. The alcohol soaks into the sponge creating a tender texture that won’t become soggy. We then spread a generous layer of berry jam over the moistened cake using the back of a spoon to create an even coating. This jam layer acts as a flavor bridge between the cake and fruit while adding natural sweetness.
Add the Fruit Layer
Our macerated berries come next as we spoon one-third of the fruit mixture over the jam-coated cake. We distribute the strawberries, raspberries, and blueberries evenly to ensure each serving contains a variety of fruit. The natural juices from our macerated berries seep down into the cake layer creating additional moisture and flavor integration. Some recipes incorporate a layer of flavored gelatin at this stage but we find fresh fruit provides superior taste and texture.
Pour the Custard
We carefully spoon one-third of our cooled custard over the fruit layer using a large spoon to distribute it gently. The custard should be completely cool to prevent it from wilting the fruit or creating an unpleasant warm layer. We spread the custard to the edges of the dish ensuring complete coverage of the fruit below. This creamy layer provides richness and acts as a smooth foundation for our final topping.
Top with Whipped Cream
Our sweetened whipped cream forms the crowning layer as we spread one-third of it over the custard using a spatula or large spoon. We create gentle peaks and swirls in the cream surface for visual appeal while ensuring complete coverage. The whipped cream should hold its shape but remain light and airy. We avoid overworking the cream at this stage to maintain its delicate texture.
Final Garnish
We repeat the entire layering process two more times if we desire a taller more dramatic presentation. Our final garnish includes fresh berries arranged artfully on top along with toasted sliced almonds for added crunch and visual contrast. Pomegranate seeds or chopped pistachios make excellent alternative garnishes that provide both color and texture. We finish with a few fresh mint leaves if desired before covering with plastic wrap and chilling until serving time.
Make-Ahead Instructions

We love how classic trifle becomes an ideal make-ahead dessert that actually improves with time. The flavors meld beautifully when we prepare this dessert 1–2 days in advance, making it perfect for entertaining without last-minute stress.
Optimal Timing for Assembly
Our assembled trifle can be prepared and chilled for 1–2 days before serving. We recommend covering the dessert (minus the final whipped cream layer) with plastic wrap or a lid and refrigerating for at least 8 hours or overnight. The layers will settle and compress slightly over time, but this enhances the flavor development with only minimal textural changes.
Strategic Layer Management
We suggest holding back the final whipped cream layer until just before serving. When whipped cream sits too long, it can separate or deflate, affecting both texture and appearance. Instead, we add this crowning layer right before presentation to maintain its light, airy texture.
Storage Best Practices
| Timeline | Storage Method | Notes |
|---|---|---|
| 1-2 days ahead | Refrigerate covered without top cream layer | Flavors develop and improve |
| 8+ hours minimum | Plastic wrap or lid coverage required | Essential chilling time |
| Just before serving | Add final whipped cream and garnishes | Maintains optimal texture |
Final Presentation Tips
We always add fresh fruit, additional whipped cream, or decorative garnishes like mint leaves or toasted almonds right before serving. This ensures the best appearance and texture for our guests. The clear glass bowl remains essential throughout the chilling process, allowing us to showcase those beautiful layers even after extended refrigeration.
Our make-ahead approach transforms trifle preparation from a rushed dessert assembly into a leisurely, stress-free experience that delivers exceptional results.
Storage Tips

We can store our finished trifle in the refrigerator for up to 3 to 4 days when properly covered with plastic wrap. Our dessert maintains its quality best when kept in an airtight container to prevent absorbing other fridge odors.
Refrigerator Storage Guidelines
| Storage Method | Duration | Best Practices |
|---|---|---|
| Refrigerated (covered) | 3-4 days | Use plastic wrap or airtight container |
| Make-ahead assembly | 1-2 days | Prepare without final whipped cream layer |
| Component preparation | Up to 2 weeks | Freeze cake layers separately |
Our trifle actually benefits from advance preparation since the flavors meld beautifully when we make it a day or two ahead of serving. We recommend preparing all components except the final whipped cream layer to maintain optimal texture.
Freezing Considerations
We do not recommend freezing completed trifle as the textures of whipped cream and fruit do not hold up well after thawing. But we can freeze individual cake layers up to two weeks in advance and assemble them on serving day.
Identifying Spoilage
Our leftover trifle should be consumed within the 3 to 4 day window for best quality. We need to watch for signs of spoilage including off smells, sour taste, color changes, or visible mold formation.
Serving Strategy
We suggest considering individual portion servings to maintain freshness longer and provide better portion control. Our guests appreciate personal trifle cups that stay fresh throughout the serving period.
Serving Suggestions

The traditional trifle bowl showcases our layered masterpiece most beautifully. We recommend using a large glass bowl that allows guests to admire the distinct layers while highlighting the vibrant colors of the berries and cream. This presentation method creates a stunning centerpiece that draws attention to the dessert’s visual appeal.
Individual servings offer an elegant alternative for dinner parties and special occasions. Clear glasses with wide openings work perfectly for this approach, allowing us to create perfectly portioned servings while maintaining the visual impact. We find that wine glasses or small glass bowls provide the ideal vessel for showcasing each layer in miniature form.
Even layers enhance the visual appeal significantly when presenting our trifle. We suggest using a large spoon to carefully distribute each component, ensuring uniform thickness throughout. This technique creates clean lines between the sponge cake, fruit, custard, and whipped cream layers that make the dessert truly impressive.
Temperature plays a crucial role in serving the perfect trifle. We recommend removing the dessert from the refrigerator 10 to 15 minutes before serving to allow the flavors to come to room temperature slightly. This brief warming period enhances the taste while maintaining the structural integrity of the layers.
Garnish options elevate the final presentation beyond the basic recipe. Fresh berries scattered on top add color and freshness, while toasted almonds provide textural contrast. We often finish with a light dusting of grated chocolate or a few mint leaves for added sophistication.
Serving portions should accommodate the rich nature of this dessert. We typically plan for smaller servings since the combination of custard, cream, and fruit creates a satisfying treat. A standard trifle bowl serves 8 to 10 people generously, while individual portions work well for groups of 6 to 8.
Accompaniment suggestions can complement the trifle without overwhelming its flavors. We find that a simple cup of coffee or tea pairs beautifully with the dessert’s richness. Light cookies or shortbread provide an optional textural element for guests who prefer additional sweetness.
Conclusion
We’ve shown you that mastering the classic trifle doesn’t require professional pastry skills – just patience and attention to detail. This timeless dessert rewards careful layering with stunning visual impact and incredible flavor development.
The beauty of trifle lies in its forgiving nature and make-ahead convenience. Whether you’re hosting a dinner party or celebrating a special occasion your guests will be impressed by this elegant dessert that actually improves with time.
Remember that practice makes perfect when it comes to achieving those picture-perfect layers. Don’t be afraid to experiment with seasonal fruits or different flavor combinations to make this classic your own signature dessert.
Frequently Asked Questions
What is a trifle and why is it so popular?
Trifle is a classic British layered dessert featuring sponge cake, custard, fresh berries, and whipped cream. It’s popular because it’s visually impressive yet surprisingly easy to make. The combination of different textures and flavors creates a delightful eating experience, while its make-ahead nature makes it perfect for entertaining guests without last-minute stress.
What are the main components of a classic trifle?
A traditional trifle consists of four main layers: sponge cake (often soaked with sherry or liqueur), homemade or store-bought custard, fresh seasonal fruits (typically berries), and sweetened whipped cream. These components are layered in a clear glass bowl to showcase the beautiful presentation, with optional garnishes like toasted almonds or mint leaves.
Can I make trifle ahead of time?
Yes, trifle actually tastes better when made ahead! You can prepare it 1-2 days in advance, allowing the flavors to meld beautifully. Assemble all layers except the final whipped cream, then chill for at least 8 hours or overnight. Add the whipped cream layer just before serving to maintain its texture.
What equipment do I need to make trifle?
Essential equipment includes a large glass bowl for presentation, a whisk or hand mixer for custard and cream, a medium saucepan for cooking custard, and a fine mesh strainer for smooth texture. You’ll also need a sharp knife for cutting cake, measuring cups and spoons, a large spoon for layering, and plastic wrap for covering during chilling.
How should I store leftover trifle?
Store finished trifle in the refrigerator for 3-4 days in an airtight container to prevent odor absorption. Don’t freeze the completed trifle as it affects the texture of whipped cream and fruit. Individual cake components can be frozen for up to two weeks. Serve individual portions to maintain freshness and control portions effectively.
What are the best fruits to use in trifle?
Fresh strawberries, raspberries, and blueberries are traditional choices that work beautifully. These berries should be macerated with sugar and lemon juice to enhance their flavors and create natural juices. You can customize with seasonal fruits, but berries provide the ideal balance of sweetness, tartness, and vibrant color for the perfect trifle.
Can I substitute ingredients in trifle?
Absolutely! Trifle is highly customizable. Use store-bought pound cake or ladyfingers instead of homemade sponge. Replace alcohol with fruit juice if preferred. Substitute different seasonal fruits, use store-bought custard to save time, or try alternative garnishes like pomegranate seeds. The key is maintaining the balance of textures and flavors across all layers.
How do I achieve perfect layers in my trifle?
Use a large glass bowl to showcase layers clearly. Cut sponge cake into uniform pieces, brush with liqueur for flavor, and spread components evenly. Add each layer gently using a large spoon to avoid disturbing previous layers. Repeat layering for height, ensuring even distribution. Chill properly to set layers and enhance the final presentation.


