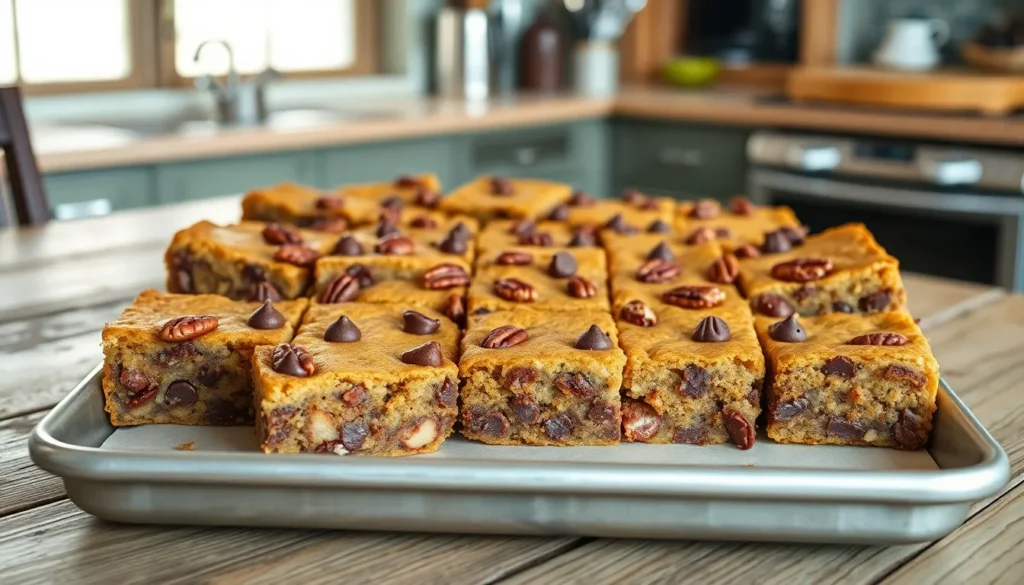
We’ve all been there – craving something sweet that’s not quite a cookie but definitely more exciting than plain brownies. Enter Congo bars, the chewy blondie bars that’ll satisfy every sweet tooth in your house. These golden treats pack chocolate chips and nuts into a rich, buttery base that’s impossible to resist.
Congo bars earned their name from their wild mix of textures and flavors, creating a delightfully chaotic dessert that’s become an American baking staple. They’re the perfect middle ground between brownies and chocolate chip cookies, delivering that coveted chewy texture with crispy edges that make everyone fight over the corner pieces.
What makes these bars truly special is their incredible versatility and foolproof nature. Whether you’re a baking novice or seasoned pro, Congo bars come together in one bowl with pantry staples you likely already have. They’re ideal for potlucks, bake sales, or those moments when you need something homemade in under an hour.
What Are Congo Bars
Congo bars are thick chewy blondie bars that bridge the gap between brownies and chocolate chip cookies. We make these beloved treats with a brown sugar base that creates their signature butterscotch flavor and golden appearance. The bars get their name from their rich color and dense texture that resembles the deep earthy tones of the Congo region.
These dessert bars feature a vanilla-flavored dough packed with chocolate chips and chopped nuts. We bake them in a square or rectangular pan which gives them their characteristic bar shape. The texture sets Congo bars apart from other desserts – they have a slightly crispy exterior with a soft chewy interior that holds together beautifully when cut.
Congo bars originated in American home kitchens during the mid-20th century as a simpler alternative to traditional brownies. We find them particularly appealing because they require no melting chocolate or complex techniques. The brown sugar base provides natural caramel notes while the chocolate chips distribute evenly throughout each bite.
Most Congo bar recipes include essential ingredients like butter, brown sugar, eggs, flour, vanilla extract, chocolate chips, and nuts. We often use walnuts or pecans though any nut variety works well. Some bakers add coconut flakes or butterscotch chips for extra flavor complexity.
The bars typically measure about one inch thick when properly baked. We cut them into squares or rectangles after they cool completely. Their sturdy texture makes them perfect for packing in lunch boxes or serving at gatherings where finger foods work best.


Ingredients

Creating perfect Congo bars requires quality ingredients that work together to achieve that signature chewy texture and rich butterscotch flavor. We’ve organized our ingredient list into two categories to make preparation easier and ensure you don’t miss any essential components.
For The Base
- 1 cup salted butter (softened to room temperature)
- 2 1/4 cups packed brown sugar
- 1/2 cup granulated sugar
- 3 large eggs (room temperature)
- 2 teaspoons vanilla extract
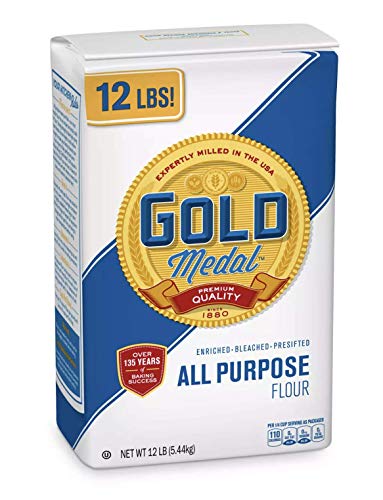
- 2 3/4 cups all-purpose flour
- 1 teaspoon baking soda
- 1 teaspoon salt
For The Topping
- 1 1/2 cups semi-sweet chocolate chips
- 1 cup milk chocolate chips
- 1 cup toasted pecans (chopped)
- 1/2 cup unsweetened shredded coconut (optional)
| Ingredient Category | Key Components | Purpose |
|---|---|---|
| Base | Brown sugar, butter, eggs | Creates chewy texture and butterscotch flavor |
| Flour mixture | All-purpose flour, baking soda, salt | Provides structure and lift |
| Toppings | Chocolate chips, nuts, coconut | Adds flavor variation and texture contrast |


Essential Equipment

Creating perfect Congo bars requires just a few essential pieces of equipment that most home bakers already have in their kitchen. We recommend gathering these items before starting to ensure smooth preparation and optimal results.
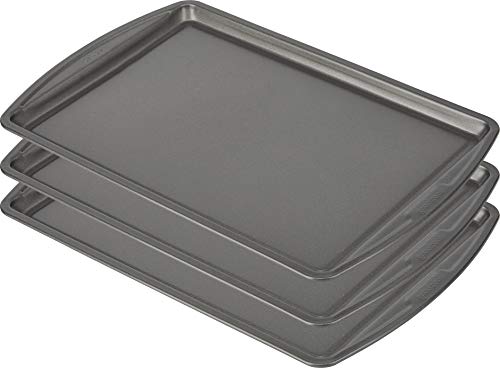
A 9×13-inch baking pan serves as our primary baking vessel for these delicious bars. This standard rectangular pan provides the ideal depth for achieving the signature thick and chewy texture that makes Congo bars so irresistible. For larger batches or thinner bars, a 10×15-inch sheet pan works equally well and accommodates bigger gatherings.
Our mixing process becomes effortless with a reliable hand mixer or stand mixer. While we can certainly mix the batter by hand, an electric mixer ensures proper incorporation of ingredients and creates the smooth, creamy texture we want in our brown sugar base. The mixer also helps achieve the perfect consistency when combining wet and dry ingredients.
A standard oven preheated to 350°F forms the foundation of our baking success. Consistent temperature control ensures even baking throughout the pan and prevents overcooking the edges while leaving the center underdone.
Additional helpful tools include measuring cups and spoons for accurate ingredient portions, a large mixing bowl for combining ingredients, and a rubber spatula for folding in chocolate chips and nuts without overmixing. Parchment paper or cooking spray helps prevent sticking and makes removal from the pan much easier.
These basic tools transform simple ingredients into bakery-quality Congo bars that transport well and satisfy crowds at any gathering. The simplicity of required equipment makes this recipe accessible to bakers of all experience levels.


Instructions

Follow these step-by-step instructions to create perfectly chewy Congo bars with their signature butterscotch flavor and rich chocolate chips. Our method ensures consistent results every time.
Prep The Pan
We begin by preparing our 9×13-inch baking pan to ensure easy removal after baking. Generously grease the pan with cooking spray or butter, making sure to coat all corners and sides. Line with parchment paper for best results, leaving some overhang for simple lifting. This preparation prevents sticking and allows us to cut neat, clean squares.
Make The Batter
We start by creaming the softened butter with both brown sugar and granulated sugar until the mixture becomes light and fluffy, approximately 3-4 minutes with an electric mixer. Beat in the eggs one at a time, ensuring each is fully incorporated before adding the next. Mix in the vanilla extract until well combined.
In a separate bowl, we whisk together the all-purpose flour, baking soda, and salt. Gradually add these dry ingredients to the wet mixture, mixing on low speed until just incorporated. Avoid overmixing to maintain the tender texture that makes Congo bars special.
Add Mix-Ins
We fold in the semi-sweet chocolate chips, milk chocolate chips, and chopped toasted pecans using a rubber spatula or wooden spoon. Gently incorporate the optional shredded coconut if using. Mix just until the add-ins are evenly distributed throughout the batter, ensuring every bite contains delicious mix-ins.
Bake The Congo Bars
We spread the batter evenly into our prepared pan, using the back of a spoon or offset spatula to smooth the surface. Sprinkle any remaining chocolate chips on top if desired for extra visual appeal. Bake at 350°F for 22-25 minutes, until the edges are lightly golden and a toothpick inserted in the center comes out with moist crumbs.
| Baking Temperature | Time Range | Visual Cues |
|---|---|---|
| 350°F | 22-25 minutes | Lightly golden edges, moist crumbs on toothpick |
Cool And Cut
We allow the Congo bars to cool completely in the pan before cutting, which helps them set properly and makes slicing easier. Cool for at least 1 hour at room temperature for clean cuts. Using a sharp knife, we cut into squares or rectangles of desired size. For extra indulgence, serve with vanilla ice cream or a drizzle of hot fudge as optional toppings.


Directions For Perfect Results

Achieving bakery-quality Congo bars requires mastering two critical techniques that separate perfect bars from mediocre ones. We’ll guide you through the essential methods for testing doneness and creating clean cuts.
Testing For Doneness
We recommend using the toothpick test to determine when your Congo bars are perfectly baked. Insert a toothpick into the center of the pan and look for moist crumbs clinging to it rather than wet batter or completely clean results. The edges should appear lightly golden brown and slightly firm to the touch while the center remains soft but set.
Our preferred visual cues include edges that have pulled away slightly from the pan sides and a surface that springs back gently when lightly pressed. We avoid overbaking since Congo bars continue cooking from residual heat even after removal from the oven. The bars should maintain their chewy texture rather than becoming crispy or dry throughout.
Cutting Clean Bars
We always allow Congo bars to cool completely before cutting to ensure clean edges and prevent crumbling. This cooling period typically takes at least one hour at room temperature though we often recommend waiting two hours for optimal results. The bars will firm up significantly during this time making them much easier to slice.
We suggest using a sharp knife wiped clean between cuts to maintain neat squares or rectangles. Running the knife under warm water and drying it between cuts helps create even cleaner lines through the dense texture. For the most professional appearance we score the surface lightly before making full cuts to establish uniform portion sizes.
Refrigerating the cooled bars for 30 minutes before cutting provides even better results for those seeking perfectly clean edges. We find this extra step particularly helpful when preparing Congo bars for special occasions or gift giving.


Storage Instructions

We’ve found that proper storage keeps our Congo bars fresh and maintains their signature chewy texture for extended periods. Following these storage methods ensures every bite tastes as delicious as the day we baked them.
Room Temperature Storage
We recommend storing Congo bars at room temperature for up to one week in an airtight container. This method preserves moisture and prevents the bars from drying out while maintaining their ideal texture. We always ensure our bars cool completely before sealing them to avoid condensation that could make them soggy.
Our storage approach focuses on keeping the container in a cool dry area away from heat and direct sunlight. The airtight seal becomes crucial for maintaining freshness throughout the week. We’ve discovered that proper room temperature storage keeps the bars’ chewy interior and slightly crispy exterior perfectly balanced.
Freezing Congo Bars
We freeze Congo bars for long-term storage lasting 2 to 3 months without compromising quality. Our method involves wrapping each bar individually in plastic wrap or wax paper to prevent sticking. We then place the wrapped bars in freezer-safe airtight bags or containers for maximum protection.
Thawing requires patience for optimal results. We remove frozen bars and let them thaw at room temperature for several hours or overnight in the refrigerator. Microwaving changes their texture so we avoid this shortcut method entirely.
| Storage Method | Duration | Container Type | Key Requirements |
|---|---|---|---|
| Room Temperature | Up to 1 week | Airtight container | Cool, dry area |
| Freezing | 2-3 months | Freezer-safe airtight bag/container | Individual wrapping |
Our storage success depends on maintaining clean dry and tightly sealed conditions regardless of the chosen method. We always store bars away from heat sources and use plastic wrap when refrigerating for extra days of freshness.


Variations And Substitutions

Congo bars offer endless possibilities for customization to suit different tastes and dietary needs. We can easily adapt our classic recipe with simple ingredient swaps while maintaining the signature chewy texture and rich flavor.
Chocolate Chip Alternatives
Traditional semi-sweet chocolate chips work beautifully in Congo bars but we love experimenting with different varieties to create unique flavor profiles. White chocolate chips bring a creamy sweetness that pairs perfectly with the butterscotch base while butterscotch chips amplify the caramel notes already present in the brown sugar. Peanut butter chips add a nutty richness that complements the chewy texture wonderfully.
We can also incorporate toffee bits for an extra crunch that contrasts beautifully with the soft interior. Chopped candy bars such as Snickers or Heath bars create exciting bursts of flavor and texture throughout each bite. When using alternative chips or mix-ins we recommend maintaining the same 2 1/2 cup total measurement to ensure proper texture and baking results.
Nut-Free Options
Our traditional Congo bar recipe naturally accommodates nut-free diets since the base relies on flour and chocolate chips without requiring nuts. We simply omit the chopped pecans from our topping mixture and increase the chocolate chips to 2 cups total for maintaining the same volume and visual appeal.
When selecting chocolate chips for nut-free versions we always verify the packaging to ensure they’re produced in nut-free facilities. Many brands clearly label their products as nut-free which gives us confidence when baking for those with severe allergies. The bars maintain their signature chewy texture and rich flavor even without nuts making them perfect for school events or gatherings where nut allergies are a concern.
Gluten-Free Version
Converting our Congo bars to gluten-free requires only one simple substitution in the base ingredients. We replace the 2 3/4 cups of all-purpose flour with an equal amount of gluten-free flour blend using a 1:1 ratio for seamless results.
Most high-quality gluten-free flour blends already contain xanthan gum but if our chosen blend doesn’t include it we add 1 teaspoon to improve the texture and binding. The bars may have a slightly different texture compared to traditional versions but they still deliver the same chewy satisfaction and butterscotch flavor. We ensure all other ingredients including chocolate chips and any mix-ins are certified gluten-free to maintain the integrity of our gluten-free Congo bars.


Tips For Success

Master the Doneness Test
We recommend using multiple indicators to determine when your Congo bars are perfectly baked. The toothpick test remains our most reliable method – insert a clean toothpick into the center and look for moist crumbs rather than wet batter. Visual cues also help us achieve consistent results. Watch for lightly golden edges and a surface that springs back gently when touched. Overbaking creates dry bars while underbaking results in gooey centers that won’t hold their shape.
Achieve Clean Cuts Every Time
Our secret to professional-looking bars starts with patience during the cooling process. Allow the bars to cool completely for at least two hours before attempting to cut them. This cooling time lets the texture set properly and prevents cracking or crumbling. We suggest chilling the bars for 30 minutes before cutting to achieve the crispest edges and cleanest presentation.
Use a sharp knife and wipe it clean between each cut to maintain neat lines. Start by scoring the surface lightly to mark your cutting lines before making full cuts through the bars.
Prevent Sticking Issues
Line your baking pan with wax paper to create an easy release surface and prevent caramel or chocolate from adhering to the pan. This technique saves time during cleanup and ensures your bars release intact. We extend the parchment or wax paper over the edges of the pan to create handles for lifting the entire batch out before cutting.
Control Texture Through Temperature
Chilling the batter for 30 minutes before baking helps achieve a crisper exterior while maintaining the signature chewy interior. This temperature contrast creates the ideal texture balance that makes Congo bars irresistible. Room temperature ingredients blend more easily and create a smoother batter that bakes evenly throughout.
Monitor Browning Carefully
Keep a close eye on your bars during the final minutes of baking to prevent overbrowning. Oven hot spots can cause uneven browning so rotate the pan halfway through baking if needed. The bars should maintain their golden color without developing dark edges or corners.
Optimize Ingredient Distribution
Press mix-ins like chocolate chips and nuts gently into the surface before baking to ensure even distribution and prevent them from sinking to the bottom. This technique creates consistent flavor in every bite and maintains visual appeal across the entire batch.
Conclusion
Congo bars prove that the best desserts often come from the simplest ingredients. We’ve shown you how these chewy blondie bars deliver bakery-quality results with minimal effort and maximum flavor satisfaction.
Whether you’re a beginner baker or seasoned pro you’ll find these butterscotch-flavored treats incredibly rewarding to make. The versatility we’ve explored means you can customize them to match any preference or dietary need.
Now it’s time to preheat that oven and create your own batch of these irresistible bars. Your family and friends will thank you for discovering this perfect blend of cookie and brownie goodness that’s destined to become a household favorite.
Frequently Asked Questions
What are Congo bars and how do they differ from brownies?
Congo bars are thick, chewy blondie bars made with a brown sugar base that creates a signature butterscotch flavor and golden appearance. Unlike brownies which are chocolate-based, Congo bars feature a vanilla-flavored dough packed with chocolate chips and nuts. They have a slightly crispy exterior with a soft, chewy interior and are baked in rectangular pans for easy cutting.
What ingredients do I need to make Congo bars?
Essential ingredients include 1 cup softened salted butter, 2¼ cups brown sugar, ½ cup granulated sugar, 3 large eggs, 2 teaspoons vanilla extract, 2¾ cups all-purpose flour, 1 teaspoon baking soda, and 1 teaspoon salt. For toppings, you’ll need 1½ cups semi-sweet chocolate chips, 1 cup milk chocolate chips, 1 cup chopped toasted pecans, and optionally ½ cup shredded coconut.
How long do Congo bars stay fresh and how should I store them?
Congo bars stay fresh at room temperature in an airtight container for up to one week. For longer storage, individually wrap bars and freeze in airtight containers for 2-3 months. Always ensure bars are completely cooled before storing to prevent sogginess. Thaw frozen bars at room temperature or in the refrigerator, avoiding microwaving to preserve texture.
Can I make variations of Congo bars for different dietary needs?
Yes! For nut-free versions, omit nuts and increase chocolate chips. For gluten-free options, substitute all-purpose flour with a gluten-free blend. You can also swap chocolate chips for white chocolate, butterscotch, or peanut butter chips. Additional variations include adding toffee bits, chopped candy bars, or coconut flakes while maintaining the signature chewy texture.
What’s the best way to cut Congo bars cleanly?
Cool bars completely for at least 2 hours before cutting. Use a sharp knife and wipe it clean between cuts. For even cleaner cuts, refrigerate bars for 30 minutes before slicing. This prevents the bars from crumbling and ensures professional-looking squares perfect for serving at gatherings or gifting.
What equipment do I need to make Congo bars?
You’ll need a 9×13-inch baking pan for thick bars (or 10×15-inch for larger batches), a hand or stand mixer, measuring cups, a large mixing bowl, rubber spatula, and parchment paper or cooking spray. Most home bakers already have these basic tools, making Congo bars accessible to all skill levels and perfect for transforming simple ingredients into bakery-quality treats.


