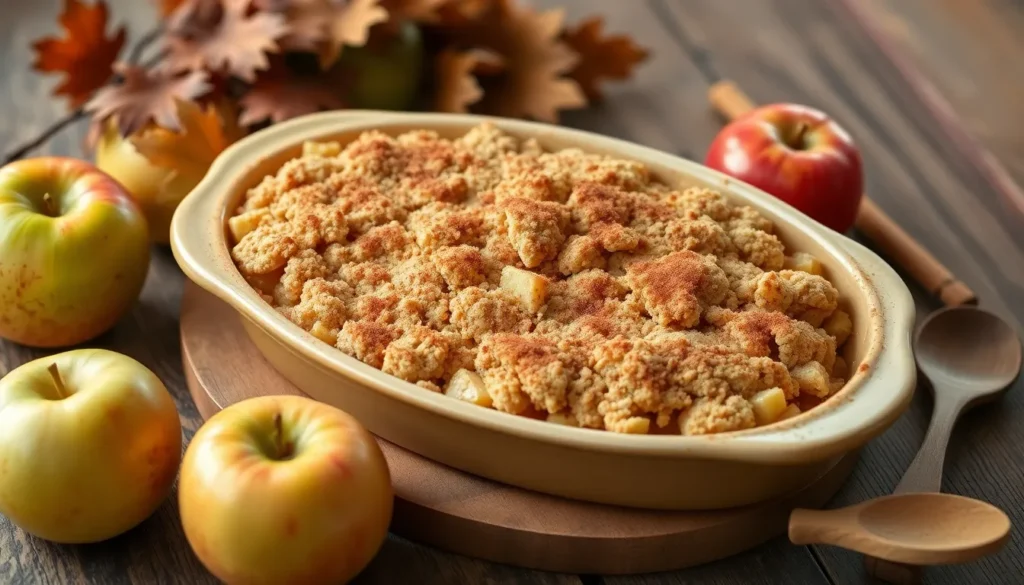
When autumn arrives and apples are at their peak, there’s nothing quite like the comforting aroma of easy apple crumble baking in our ovens. This classic dessert transforms simple ingredients into pure magic – tender, cinnamon-spiced apples topped with a golden, buttery crumble that’s absolutely irresistible.
We’ve perfected this foolproof recipe that delivers bakery-quality results without any fuss. The beauty of apple crumble lies in its simplicity: you don’t need fancy techniques or hours of prep time. Just toss sliced apples with warm spices, create our signature crumble topping, and let the oven work its magic.
Whether you’re hosting a dinner party or craving a cozy weeknight dessert, this easy apple crumble recipe never disappoints. It’s the perfect way to showcase seasonal apples while creating those memorable moments that bring families together around the table.
Ingredients
We’ve carefully selected simple pantry staples and fresh apples to create this irresistible dessert. Our ingredient list focuses on quality basics that deliver maximum flavor with minimal effort.
For the Apple Filling
- 6 large Granny Smith apples, peeled and sliced into thin wedges
- 1/3 cup granulated sugar
- 2 tablespoons all-purpose flour
- 1 teaspoon ground cinnamon
- 1/4 teaspoon ground nutmeg
- 1/4 teaspoon salt
- 2 tablespoons fresh lemon juice
- 1 teaspoon vanilla extract
For the Crumble Topping
- 1 cup old-fashioned rolled oats
- 3/4 cup all-purpose flour
- 2/3 cup packed light brown sugar
- 1/2 teaspoon ground cinnamon
- 1/4 teaspoon salt
- 1/2 cup cold unsalted butter, cubed into small pieces
- 1/3 cup chopped walnuts (optional)


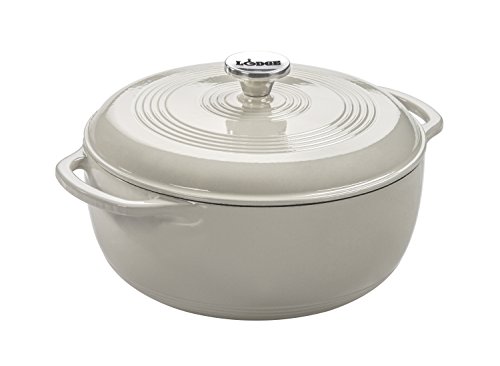
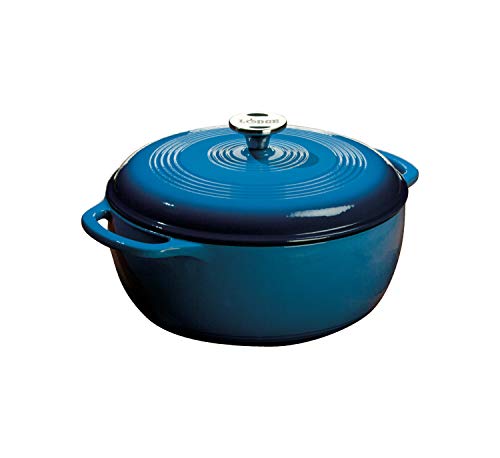
Equipment Needed
 1")
We keep our equipment list simple for this apple crumble recipe since most items are standard kitchen essentials. Our approach focuses on using tools you likely already have in your kitchen drawers and cabinets.
Essential cooking equipment includes:
- Large saucepan with lid – We use this for gently stewing our apple filling until the fruit reaches perfect tenderness
- Mixing bowl – A medium to large bowl works best for combining our crumble topping ingredients
- Baking dish – We recommend a 30cm round dish or large rectangular baking dish that can accommodate all our ingredients
- Conventional or fan forced oven – Either oven type works perfectly for achieving that golden brown crumble top
Helpful mixing tools:
- Wooden spoon – We use this for stirring the apple mixture as it cooks
- Clean fingers or pastry cutter – Our preferred method for mixing butter into the crumble topping creates those perfect small clusters
- Measuring cups and spoons – Accurate measurements ensure consistent results every time we bake
Optional time saving equipment:
- Apple peeler corer slicer – This tool dramatically speeds up apple preparation if you plan to make apple crumble regularly
- Kitchen scale – We find weighing ingredients provides the most accurate measurements for professional results
Most home kitchens already contain these basic tools. We recommend lightly greasing your baking dish before assembly to prevent sticking. Fan forced ovens work at the temperatures we specify, while conventional ovens require increasing the temperature by 10 to 20 degrees Celsius for equivalent results.


Instructions
 2")
Follow these simple steps to create a perfectly golden apple crumble that balances sweet and tart flavors with a satisfying crunchy topping. We’ll guide you through each stage to ensure bakery quality results in your own kitchen.
Prep the Apples
Begin by selecting our recommended mix of sweet and tart apples for the best flavor profile. Granny Smith and Honeycrisp varieties work exceptionally well together. Wash and dry each apple thoroughly before proceeding.
Peel the apples using a sharp paring knife or apple peeler if you prefer a smoother texture in your filling. Leave the peels on if you enjoy additional fiber and rustic appeal. Core each apple and slice into uniform pieces approximately 1/4 inch thick to ensure even cooking throughout the baking process.
Transfer the sliced apples to a large mixing bowl. Add 1/2 cup granulated sugar, 2 tablespoons all purpose flour, 1 teaspoon ground cinnamon, 1/4 teaspoon nutmeg, 1/4 teaspoon salt, 2 tablespoons fresh lemon juice, and 1 teaspoon vanilla extract. Toss the mixture gently with your hands or a wooden spoon until every apple slice is evenly coated with the spice mixture.
Make the Crumble Topping
Combine 1 cup rolled oats, 3/4 cup all purpose flour, 3/4 cup packed brown sugar, 1 teaspoon ground cinnamon, and 1/2 teaspoon salt in a separate mixing bowl. Whisk these dry ingredients together until well distributed.
Cut 6 tablespoons of cold unsalted butter into small cubes. Add the butter pieces to the dry mixture and work them in using your fingertips or a pastry cutter. Rub the butter into the flour mixture until it resembles coarse crumbs with some larger butter pieces remaining. Add 1/2 cup chopped walnuts if desired for extra crunch and flavor.
Assemble the Apple Crumble
Preheat your oven to 350°F (180°C) while you assemble the crumble. Lightly grease a 9×13 inch baking dish with butter or cooking spray to prevent sticking.
Spread the seasoned apple mixture evenly in the prepared baking dish. Distribute the fruit in a single layer as much as possible for uniform cooking. Sprinkle the crumble topping over the apples, covering the surface completely while leaving some texture visible.
Bake the Crumble
Cover the baking dish tightly with aluminum foil and place in the preheated oven for 20 minutes. Remove the foil carefully to avoid steam burns and continue baking for an additional 25 to 30 minutes until the topping turns golden brown and the apple juices bubble around the edges.
Check for doneness by inserting a fork into the center of the dish. The apples should be tender and easily pierced. Allow the crumble to cool for 10 to 15 minutes before serving to let the juices thicken slightly and prevent burns from the hot filling.


Tips for Perfect Easy Apple Crumble
 3")
Choose the Right Apple Varieties
We recommend using Granny Smith apples as our foundation for their perfect balance of sweetness and tartness. These apples hold their shape beautifully during baking and provide the ideal texture contrast to our crumble topping. Mixing Granny Smith with Honeycrisp apples creates an even more complex flavor profile that elevates the entire dessert.
| Apple Variety | Flavor Profile | Baking Properties |
|---|---|---|
| Granny Smith | Tart and crisp | Holds shape well |
| Honeycrisp | Sweet and juicy | Adds natural sweetness |
| Mixed varieties | Balanced complexity | Optimal texture and taste |
Master the Crumble Topping Technique
Our crumble topping requires careful attention to achieve that perfect crumbly texture. We combine rolled oats, flour, sugar, cinnamon, and melted butter without overmixing to maintain the desired consistency. The key lies in stopping as soon as the mixture resembles coarse crumbs rather than continuing to blend.
Prepare Your Apple Filling Properly
We enhance our apple filling by combining sliced apples with sugar, lemon juice, and cinnamon before baking. This preparation step allows the flavors to meld while the natural apple juices create a delicious syrup during the baking process. The lemon juice prevents browning and adds brightness to balance the sweetness.
Follow the Optimal Baking Method
We preheat our oven to 350°F (180°C) for consistent results every time. Our proven technique involves covering the assembled crumble with foil for the first 20 minutes of baking. This method prevents the topping from browning too quickly while allowing the apples to soften properly.
After removing the foil, we continue baking for an additional 25 to 40 minutes until the crumble achieves a golden brown color. The filling should be bubbling around the edges when properly done.
Allow Proper Resting Time
We always let our apple crumble rest for several minutes after removing it from the oven. This crucial step allows the filling to thicken naturally as it cools slightly. The resting period ensures cleaner serving portions and prevents the filling from being too liquidy when plated.
Variations and Substitutions
 4")
Our apple crumble recipe offers endless possibilities for customization based on your taste preferences and available ingredients. We love experimenting with different combinations to create unique flavor profiles while maintaining the dessert’s comforting essence.
Fruit Variations
We can easily transform our classic apple crumble by incorporating mixed fruits for additional flavor dimensions. Strawberries, raspberries, or blackberries pair beautifully with apples and add vibrant color to the dessert. Cranberries work exceptionally well during the holiday season and provide a delightful tart contrast to the sweet apples.
For apple variety substitutions, we recommend experimenting beyond the traditional Granny Smith and Honeycrisp combination. Jonagold apples offer a perfect balance of sweet and tart flavors, while Braeburn varieties contribute a crisp texture and complex taste. Pink Lady apples bring natural sweetness and hold their shape beautifully during baking.
Topping Modifications
Our crumble topping becomes even more exciting with simple additions and substitutions. Chopped walnuts or pecans create extra crunch and richness that elevates the entire dessert experience. We often add rolled oats to the topping mixture for a heartier texture and subtle nutty flavor that complements the fruit filling perfectly.
Brown sugar can replace granulated sugar in the topping for deeper caramel notes, while maple syrup or honey offers natural sweetness alternatives. These liquid sweeteners require slight adjustments to the flour content to maintain proper consistency.
Spice and Flavor Enhancements
Beyond our base cinnamon seasoning, we enjoy incorporating additional warming spices. Nutmeg adds aromatic depth, while allspice brings complexity to the fruit filling. Fresh ginger provides a subtle heat that pairs wonderfully with apples during cooler months.
Dietary Adaptations
We can easily accommodate various dietary needs without sacrificing flavor. Gluten-free flour blends work seamlessly as direct substitutions for all-purpose flour in both the filling and topping. Dairy-free butter alternatives maintain the crumble’s texture while keeping the recipe vegan-friendly.
Individual serving portions work wonderfully when we divide the recipe among ramekins, creating elegant single-serving desserts perfect for dinner parties.
Thickening Agent Options
Cornstarch remains our preferred thickening agent for crystal-clear results, but all-purpose flour serves as an excellent substitute when cornstarch isn’t available. Both options effectively bind the fruit juices during baking to prevent overly wet crumbles.


Storage and Reheating Instructions
 5")
Proper storage keeps our apple crumble fresh and delicious for days after baking. We recommend allowing the crumble to cool completely before covering it with aluminum foil or transferring portions to an airtight container. The dessert stays fresh in the refrigerator for up to four days when stored correctly.
Refrigerator Storage
Our homemade apple crumble maintains its quality best when stored in the refrigerator rather than at room temperature. We cover the baking dish lightly with foil to prevent the topping from becoming soggy while protecting it from absorbing other flavors. Individual portions can be transferred to sealed containers for convenient grab-and-go servings throughout the week.
Reheating Methods
Reheating brings back the crispy texture we love in our crumble topping. We preheat the oven to 300°F (150°C) and warm the crumble for 10-15 minutes until heated through. This gentle reheating method preserves the contrast between tender apples and crunchy topping without overcooking the fruit.
For single servings, we use the microwave on medium power for 30-60 seconds, checking frequently to avoid overheating. The oven method produces superior results by restoring the topping’s crispness, while microwave reheating works well when time is limited.
Freezing Options
Our apple crumble freezes beautifully for up to three months when wrapped properly. We cool the dessert completely before wrapping it tightly in plastic wrap and aluminum foil. Individual portions freeze well in freezer-safe containers, making it easy to enjoy single servings whenever cravings strike.
Thawing frozen crumble overnight in the refrigerator produces the best texture before reheating. We reheat thawed portions using the same oven method at 300°F (150°C) for 15-20 minutes until warmed through and the topping regains its golden crispness.


Serving Suggestions
 6")
Our warm apple crumble deserves accompaniments that enhance its comforting flavors and textures. We recommend serving this dessert while it’s still warm to maximize the contrast between the crispy topping and tender apples beneath.
Vanilla ice cream stands out as the ultimate pairing for apple crumble. The cold, creamy sweetness perfectly balances the warm, spiced fruit filling. We love how the ice cream slowly melts into the crumble, creating delightful temperature and texture contrasts that make each bite memorable.
Whipped cream offers another excellent choice for those who prefer a lighter accompaniment. Fresh whipped cream adds airiness without overwhelming the dessert’s natural flavors. We often add a touch of vanilla extract to our whipped cream to complement the apple and cinnamon notes.
Warm custard brings traditional British comfort to the table. This classic pairing creates a rich, velvety experience that transforms our apple crumble into an elegant dessert. The custard’s smooth texture provides a beautiful contrast to the crumble’s rustic appeal.
Caramel sauce elevates the dessert with its sweet, buttery richness. We drizzle warm caramel over individual servings to add an extra layer of indulgence. The caramel’s deep sweetness pairs beautifully with the tart apples and creates a restaurant quality presentation.
Tea or coffee makes perfect beverage companions for apple crumble. We particularly enjoy serving Earl Grey tea or freshly brewed coffee alongside this dessert. The warm beverages enhance the cozy atmosphere and help cleanse the palate between bites.
For special occasions, we combine multiple accompaniments to create an impressive dessert spread. A scoop of vanilla ice cream topped with a drizzle of caramel sauce transforms our simple apple crumble into a show stopping finale for any meal.


Conclusion
This easy apple crumble recipe proves that exceptional desserts don’t require complicated techniques or endless ingredients. We’ve shown you how simple pantry staples and fresh apples can create a dessert that rivals any bakery creation.
Whether you’re hosting a dinner party or enjoying a quiet evening at home this apple crumble delivers comfort and satisfaction with every bite. The versatility we’ve outlined means you can adapt it to your preferences and dietary needs without sacrificing flavor.
Now it’s time to gather your ingredients and fill your kitchen with the irresistible aroma of baking apples and golden crumble. We’re confident this recipe will become a cherished favorite in your dessert repertoire.
Frequently Asked Questions
What type of apples work best for apple crumble?
Granny Smith and Honeycrisp apples are ideal choices for apple crumble. Granny Smith apples hold their shape well during baking and provide a nice tart flavor, while Honeycrisp adds sweetness and texture. You can also use Jonagold or Braeburn apples as alternatives. Mixing different varieties creates the perfect balance of sweet and tart flavors.
How long does apple crumble last in the refrigerator?
Apple crumble stays fresh in the refrigerator for up to 4 days when properly stored. Allow the crumble to cool completely before covering with aluminum foil or transferring to an airtight container. This prevents condensation from making the topping soggy and maintains the dessert’s quality.
Can I make apple crumble ahead of time?
Yes, you can prepare apple crumble ahead of time. Assemble the entire dish and refrigerate before baking, or bake it completely and store it covered. The crumble can also be frozen for up to 3 months. Thaw overnight in the refrigerator before reheating to restore the crispy topping.
What’s the best way to reheat apple crumble?
Reheat apple crumble in the oven at 300°F (150°C) for 10-15 minutes to restore the topping’s crispness. For individual servings, you can use the microwave, though this won’t maintain the crunchy texture. Cover with foil if the top browns too quickly during reheating.
Can I make gluten-free apple crumble?
Absolutely! Replace regular flour with gluten-free flour in both the apple filling and crumble topping. The recipe works just as well with gluten-free alternatives. Make sure to use certified gluten-free oats if you’re serving someone with celiac disease, as regular oats may contain trace amounts of gluten.
What can I serve with apple crumble?
Apple crumble pairs wonderfully with vanilla ice cream, creating a delightful temperature and texture contrast. Other excellent accompaniments include whipped cream, warm custard, or caramel sauce. For a cozy experience, serve alongside tea or coffee. These pairings enhance the dessert’s comforting flavors.
How do I know when my apple crumble is done baking?
Your apple crumble is ready when the topping is golden brown and the apple filling is bubbling around the edges. The total baking time is typically 45-55 minutes at 350°F (180°C). Start with foil covering for the first 25 minutes, then remove to allow browning.
Can I add other fruits to my apple crumble?
Yes, you can create delicious variations by adding strawberries, cranberries, or other seasonal fruits to your apple mixture. Mix fruits complement apples beautifully and add color and flavor complexity. Adjust sugar amounts based on the sweetness of additional fruits you choose to include.


