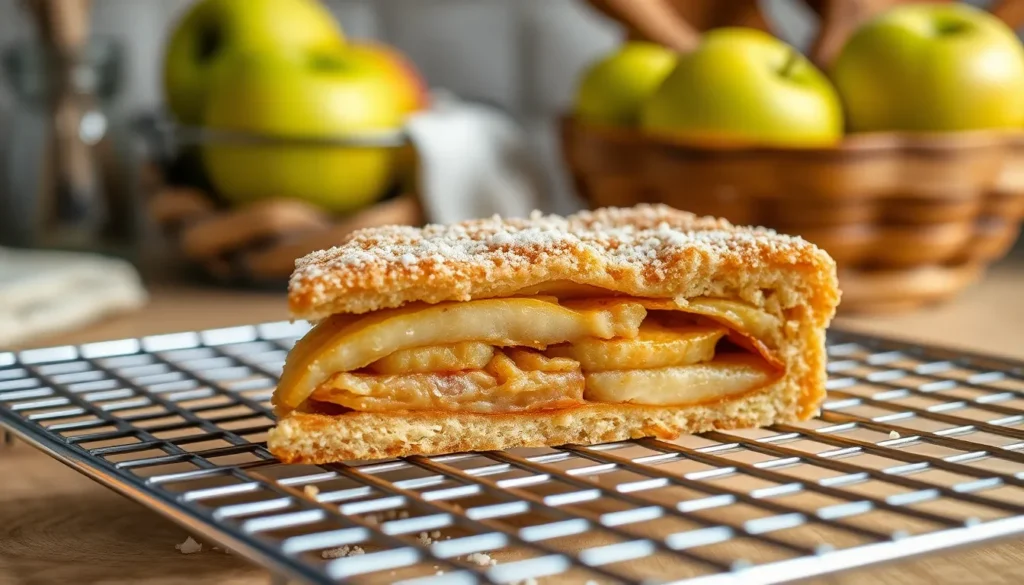
We’ve all been there – craving something sweet and homemade but lacking the time for elaborate baking projects. That’s where our easy apple slice comes to the rescue! This beloved Australian-inspired treat delivers all the comfort of traditional apple pie with a fraction of the effort.
What makes this recipe so irresistible? It’s the perfect balance of tender, spiced apples nestled between layers of buttery, crumbly pastry. We’re talking about a dessert that practically bakes itself while filling your kitchen with the most incredible cinnamon-apple aroma.
The best part? You’ll likely have most ingredients already sitting in your pantry. No fancy techniques or special equipment required – just simple mixing, pressing, and baking. Whether you’re feeding a crowd at a potluck or treating your family to weekend dessert, this apple slice delivers bakery-quality results every single time. Trust us, once you try this foolproof recipe, it’ll become your go-to dessert for any occasion.
Ingredients
We’ve kept this ingredient list simple and accessible using pantry staples you likely already have on hand. Our easy apple slice requires just three components that come together to create layers of delicious flavor.
For the Base
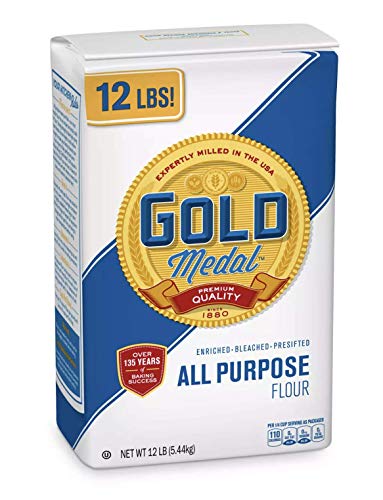
- 2 cups all-purpose flour
- 1/2 cup unsalted butter, cold and cubed
- 1/4 cup granulated sugar
- 1 large egg
- 2-3 tablespoons cold water
- 1/2 teaspoon salt
For the Apple Filling
- 6 large Granny Smith apples, peeled and thinly sliced
- 1/3 cup granulated sugar
- 2 tablespoons brown sugar, packed
- 1 teaspoon ground cinnamon
- 1/4 teaspoon ground nutmeg
- 2 tablespoons cornstarch
- 1 tablespoon lemon juice
- 1/4 teaspoon vanilla extract
For the Topping
- 1 cup all-purpose flour
- 1/2 cup rolled oats
- 1/2 cup brown sugar, packed
- 1/3 cup unsalted butter, melted
- 1/2 teaspoon ground cinnamon
- 1/4 teaspoon salt


Equipment Needed

Creating our easy apple slice requires just a few basic kitchen tools that most home bakers already have on hand. We’ve organized the essential equipment to ensure your baking process runs smoothly from start to finish.
Essential Baking Tools:
- Large mixing bowl – We need this for combining our dry ingredients and tossing the apple mixture
- Medium saucepan or microwave-safe bowl – Perfect for melting butter safely without overheating
- 9×13 inch slice tin – This standard size ensures even baking and proper thickness for our apple slice
- Parchment paper or cooking spray – We use this to line and grease our tin for easy removal
- Sharp knife – Essential for dicing our apples into uniform pieces
- Cutting board – Provides a stable surface for apple preparation
- Wooden spoon or spatula – Ideal for mixing ingredients without overmixing the batter
Optional but Helpful Tools:
- Apple corer – Speeds up apple preparation significantly
- Measuring cups and spoons – Ensures accuracy in our ingredient ratios
- Wire cooling rack – Allows proper cooling and prevents soggy bottoms
Our standard home oven completes the setup perfectly. We recommend preheating to 350°F (180°C) before beginning the mixing process. This temperature ensures our apple slice bakes evenly while developing that golden brown top we’re looking for.
Most home kitchens already contain these basic tools. We find that having everything ready before starting creates a more enjoyable baking experience and better results.


Instructions

Now that we have all our ingredients and equipment ready, let’s walk through each step to create this delicious apple slice. These clear instructions will guide you through the process from start to finish.
Prep the Pan and Oven
Preheat the oven to 350°F (180°C) for a standard oven or 320°F (160°C) for a fan-forced oven. This temperature ensures even baking and creates that perfect golden brown top we’re looking for.
Prepare the baking pan by greasing and lining an 8-inch square baking pan with parchment paper. Make sure two sides overhang for easy removal once our apple slice is finished baking.
Make the Base
Mix the shortbread crust ingredients by combining 1 cup of flour with sugar, coconut, and a pinch of salt in our large mixing bowl. The dry ingredients should be evenly distributed before adding the wet components.
Add melted butter to the flour mixture and combine until the mixture resembles wet sand. We want the texture to hold together when pressed but not be overly sticky.
Press the mixture firmly into our prepared baking pan, creating an even layer across the bottom. Bake for 10-12 minutes or until lightly golden, which creates the perfect foundation for our apple filling.
Prepare the Apple Filling
Option 1 for canned apples: Use canned apple slices and mix with sugar, cinnamon, and allspice if desired. This method saves time while still delivering excellent flavor.
Option 2 for fresh apples: Peel, core, and dice 3 apples into uniform pieces. Mix the diced apples with sugar, self-raising flour, and optional spices like cinnamon or nutmeg for added depth.
Assemble the Apple Slice
For the shortbread crust version: Pour the prepared apple mixture over the slightly cooled crust, spreading it evenly to ensure consistent baking.
For the no-crust option: Spoon the apple mixture directly into our prepared pan, distributing it evenly across the surface.
Add sugar topping by sprinkling granulated sugar over the top just before baking. This creates a delightfully crunchy texture that contrasts beautifully with the tender apples beneath.
Bake to Perfection
Bake for 35-40 minutes or until the top turns golden brown and a skewer inserted into the center comes out clean. The surface should look set and slightly crispy.
Check for doneness by looking for bubbling around the edges and a firm center that doesn’t jiggle when gently shaken. Remove from the oven and allow to cool in the pan for at least 15 minutes before cutting into squares.


Cooling and Serving

The cooling process plays a crucial role in achieving the perfect apple slice texture. We recommend allowing the apple slice to cool completely in the tin for at least 30 minutes before attempting to cut it. This cooling period ensures the filling sets properly and the slice holds its shape when we remove it from the pan.
Temperature control makes all the difference in serving success. The apple slice needs time for the hot filling to thicken and the crust to firm up. We find that rushing this step often results in a messy slice that falls apart when cut.
Cutting technique determines the final presentation quality. We use a sharp knife to slice through the cooled apple slice, wiping the blade clean between cuts for neat edges. The slice cuts best when completely cool, creating clean lines that showcase the beautiful layers.
Serving options enhance the overall dessert experience. We can serve the apple slice on its own for a satisfying treat, or elevate it with complementary toppings. Whipped cream adds lightness and balances the sweet apple flavors perfectly.
Vanilla ice cream creates a delightful temperature contrast when paired with the room temperature slice. The creamy texture complements the crisp topping and tender apple filling beautifully. We often serve warm apple slice with cold ice cream for an exceptional dessert experience.
Storage considerations extend the enjoyment of our apple slice. The cooled slice keeps well covered at room temperature for up to three days. We can also refrigerate it for longer storage, though we recommend bringing it back to room temperature before serving for the best flavor and texture.


Storage Tips

Proper storage ensures our easy apple slice maintains its delicious taste and texture for days after baking. We recommend storing the completely cooled apple slice in an airtight container at room temperature for up to three days.
Refrigerator Storage
For longer storage periods, we place our apple slice in the refrigerator where it stays fresh for up to one week. Before serving refrigerated slices, we allow them to come to room temperature for about 30 minutes to restore their optimal texture and flavor.
Freezing for Extended Storage
We can freeze our baked apple slice for up to three months by wrapping individual portions in plastic wrap and placing them in freezer bags. Remove as much air as possible from the bags to prevent freezer burn. When ready to enjoy, we thaw the slices at room temperature or warm them gently in a 300°F oven for 10-15 minutes.
Maintaining Freshness
| Storage Method | Duration | Temperature |
|---|---|---|
| Room Temperature | Up to 3 days | Cool, dry place |
| Refrigerator | Up to 1 week | 35-40°F |
| Freezer | Up to 3 months | 0°F or below |
To maintain the best texture, we always store our apple slice in airtight containers. This prevents the crust from becoming soggy and keeps the apple filling from drying out. We avoid storing the slice in direct sunlight or near heat sources, as temperature fluctuations can affect the quality.
Serving After Storage
When serving stored apple slice, we find that slightly warming refrigerated or frozen pieces enhances their flavor and creates that fresh-baked texture we all love. A quick 30-second microwave warming or a few minutes in a toaster oven brings back the delightful contrast between the crispy topping and tender apple filling.
Recipe Variations

Our basic apple slice recipe serves as the perfect foundation for countless delicious adaptations. We’ve developed these popular variations to help you customize this treat for different tastes and dietary needs.
Caramel Apple Slice
Transform your apple slice into an indulgent dessert by incorporating rich caramel flavors throughout the recipe. We recommend drizzling 1/2 cup of caramel sauce directly over the apple filling before adding the crumb topping. This technique creates pockets of gooey caramel that complement the tender apples beautifully.
For an even more decadent approach, swirl 1/3 cup of caramel sauce into your apple mixture before spreading it over the base. The caramel will partially caramelize during baking, creating deeper flavor notes. We also love serving the finished slice with additional warm caramel sauce drizzled on top, making each bite absolutely irresistible.
Spiced Apple Slice
Elevate your apple slice with warming spices that enhance the natural apple flavors without overwhelming them. We suggest adding 1 teaspoon of ground cinnamon to your apple filling for that classic apple pie taste. Ground allspice brings a subtle complexity when used in 1/2 teaspoon amounts, while freshly grated nutmeg adds warmth with just 1/4 teaspoon.
Mix these spices directly into your apple mixture, or sprinkle them between the base layer and apple filling for more defined flavor layers. We particularly enjoy sprinkling an additional pinch of cinnamon on top of the crumb topping before baking, which creates an aromatic crust that fills your kitchen with incredible scents.
Gluten-Free Option
Creating a gluten-free version of our apple slice requires only simple substitutions while maintaining the same delicious results. Replace the all-purpose flour with your preferred gluten-free flour blend, using a 1:1 ratio for both the base and crumb topping.
Since gluten-free flour lacks the natural leavening properties of regular flour, we add 1.5 teaspoons of baking powder per cup of gluten-free flour used. This addition ensures your slice maintains the proper texture and rise. We recommend using a flour blend that contains xanthan gum for the best binding results, though you can add 1/2 teaspoon of xanthan gum if your blend doesn’t include it.
| Variation | Key Ingredients | Special Instructions |
|---|---|---|
| Caramel Apple Slice | 1/2 cup caramel sauce | Drizzle over apples before baking |
| Spiced Apple Slice | 1 tsp cinnamon, 1/2 tsp allspice, 1/4 tsp nutmeg | Mix into apple filling |
| Gluten-Free Option | Gluten-free flour blend, 1.5 tsp baking powder per cup | Use 1:1 flour substitution ratio |


Conclusion
We’ve shown you how simple it is to create a bakery-quality apple slice that’ll impress family and friends every time. This versatile recipe works perfectly for any occasion and can be customized with our suggested variations to suit different tastes and dietary needs.
The beauty of this apple slice lies in its straightforward approach – no complex techniques or hard-to-find ingredients required. With proper storage techniques you can enjoy this delicious treat for days or even freeze portions for future cravings.
Whether you’re a seasoned baker or just starting your baking journey this foolproof recipe will quickly become your go-to dessert. Give it a try and discover why homemade apple slice beats store-bought every single time.
Frequently Asked Questions
What ingredients do I need for this easy apple slice recipe?
You’ll need common pantry staples divided into three components: Base – all-purpose flour, cold unsalted butter, granulated sugar, egg, cold water, and salt. Apple filling – Granny Smith apples, granulated and brown sugars, cinnamon, nutmeg, cornstarch, lemon juice, and vanilla extract. Topping – flour, rolled oats, brown sugar, melted butter, cinnamon, and salt.
What equipment is required to make apple slice?
Essential equipment includes a large mixing bowl, medium saucepan or microwave-safe bowl, 9×13 inch slice tin, parchment paper or cooking spray, sharp knife, cutting board, and wooden spoon or spatula. Optional tools like an apple corer, measuring cups and spoons, and wire cooling rack can enhance the baking process and make preparation easier.
What temperature should I preheat my oven to?
Preheat your oven to 350°F (180°C) before beginning the recipe. This temperature ensures even baking and helps achieve a golden brown top. Having the oven preheated and all tools ready beforehand contributes to a more enjoyable baking experience and better results for your apple slice.
How long should I let the apple slice cool before cutting?
Allow the apple slice to cool completely in the tin for at least 30 minutes. This cooling time is crucial as it allows the filling to set properly and ensures the slice holds its shape when cut. For clean presentation, use a sharp knife and wipe the blade between cuts.
How should I store leftover apple slice?
Store cooled apple slice in an airtight container at room temperature for up to 3 days, or refrigerate for up to 1 week. For longer storage, freeze individual portions wrapped in plastic wrap and placed in freezer bags for up to 3 months. Bring refrigerated pieces to room temperature before serving for optimal flavor.
Can I make variations of this apple slice recipe?
Yes! The article includes several variations: Caramel Apple Slice with added caramel sauce for richness, Spiced Apple Slice with enhanced warming spices, and a Gluten-Free Option using gluten-free flour blend with baking powder. Each variation includes specific ingredients and instructions to customize the recipe to your preferences.
Can I use canned apples instead of fresh apples?
Yes, the recipe provides instructions for both fresh and canned apples. If using canned apples, make sure to drain them well to prevent excess moisture in your apple slice. Fresh Granny Smith apples are recommended for their tartness and firm texture, but canned apples offer convenience for quick preparation.


