We’ve discovered the ultimate game-changer for chocolate lovers and health-conscious bakers alike: flourless brownies that’ll blow your mind with their rich, fudgy perfection. These decadent treats prove you don’t need traditional flour to create bakery-quality brownies that satisfy every chocolate craving.
What makes these flourless brownies truly special is their incredibly dense, almost truffle-like texture that’s impossible to achieve with regular flour-based recipes. We’re talking about brownies so rich and chocolatey that one bite transports you straight to dessert heaven. Plus, they’re naturally gluten-free, making them perfect for anyone following a gluten-free lifestyle or dealing with dietary restrictions.
Ingredients
We’ve carefully selected each ingredient to create the perfect flourless brownie that delivers exceptional richness and fudgy texture. Our ingredient list balances simplicity with flavor to ensure these gluten-free brownies exceed your expectations.
Wet Ingredients
- 1/2 cup unsalted butter, melted and slightly cooled
- 3/4 cup granulated sugar
- 1/2 cup packed light brown sugar
- 3 large eggs, room temperature
- 1 teaspoon pure vanilla extract
- 1/4 cup strong brewed coffee, cooled (enhances chocolate flavor)
Dry Ingredients
- 3/4 cup unsweetened cocoa powder, sifted
- 1/2 teaspoon salt
- 1/4 teaspoon baking powder
- 1/2 cup mini chocolate chips or chopped dark chocolate
Optional Add-ins
- 1/2 cup chopped walnuts or pecans
- 1/4 cup dried cherries or cranberries
- 1 tablespoon espresso powder for deeper chocolate flavor
- 1/4 cup peanut butter chips
- 1 teaspoon orange zest for citrus brightness
- 1/4 cup shredded coconut
Equipment Needed

Creating perfect flourless brownies requires the right tools to achieve that coveted dense, fudgy texture. We recommend gathering these essential pieces of equipment before starting your baking adventure.
Mixing Bowl or Blender
A large mixing bowl serves as your primary workspace for combining ingredients smoothly. Alternatively, a high-powered blender creates an exceptionally smooth batter that eliminates any lumps from cocoa powder or other dry ingredients.
Microwave-Safe Bowl or Saucepan
Melting chocolate and butter requires either a microwave-safe bowl for quick preparation or a heavy-bottomed saucepan for stovetop melting. Both methods work effectively, though we find the microwave method more convenient for most home bakers.
Whisk, Hand Mixer, or Sifter
Achieving a smooth, lump-free batter depends on proper mixing tools. A sturdy whisk works well for manual mixing, while a hand mixer provides effortless blending. Sifting cocoa powder beforehand prevents clumps and ensures uniform chocolate distribution throughout your brownies.
8×8-Inch Baking Dish or Pan
The pan size directly affects your brownies’ thickness and baking time. We prefer metal pans over glass because they conduct heat more evenly, creating consistent results. An 8×8-inch pan produces the ideal thickness for fudgy flourless brownies.
Parchment Paper or Foil
Lining your pan with parchment paper or foil ensures easy removal without breaking your brownies. This step proves especially important since flourless brownies tend to be more delicate than traditional versions.
Non-Stick Cooking Spray or Extra Fat
Even with parchment paper, we recommend greasing your pan lightly to prevent any sticking. Butter or coconut oil works perfectly for this purpose, adding an extra layer of protection for flawless brownie removal.
Instructions

Creating perfect flourless brownies requires precise timing and technique to achieve that coveted fudgy texture. We’ll guide you through each step to ensure your brownies turn out rich and decadent every time.
Prep Work
We start by preheating our oven to 350°F (177°C) to ensure consistent baking temperature. Next, we line our 8×8-inch baking pan with parchment paper or foil, leaving some overhang for easy removal later. We lightly grease the lined pan with non-stick spray or a small amount of butter to prevent any sticking. This preparation takes only a few minutes but makes a important difference in the final presentation of our brownies.
Mixing the Batter
We begin by melting our butter and chocolate together, either in a microwave-safe bowl in 30-second intervals or in a saucepan over low heat, stirring constantly until smooth. Once melted, we remove from heat and whisk in the granulated sugar until well combined. We add our eggs one at a time, whisking thoroughly after each addition to create a glossy mixture. Next, we sift together the cocoa powder and cornstarch (or arrowroot) to eliminate lumps, then gradually fold these dry ingredients into our wet mixture. We mix vigorously until the batter becomes smooth and glossy, using a hand mixer if needed for the perfect consistency. The vanilla extract and salt get whisked in during the final moments of mixing.
Baking Process
We pour our prepared batter into the lined pan, spreading it evenly with a spatula to ensure uniform thickness. The brownies bake for 20 to 35 minutes, depending on our desired level of fudginess. We check for doneness by looking for a center that appears slightly undercooked, as the brownies will continue setting while cooling. Overbaking results in dry, cake-like brownies rather than the rich, fudgy texture we want. Once removed from the oven, we allow the brownies to cool completely in the pan for several hours, or we can refrigerate them to speed up the process. The characteristic gooey center and crinkle top develop during this cooling period, not directly from the oven heat.
Cooling and Cutting

Proper cooling transforms our flourless brownies from a gooey mess into perfectly sliceable squares with that coveted fudgy texture. We must resist the temptation to cut these brownies immediately after removing them from the oven. The cooling process allows the structure to set properly and develop the characteristic dense consistency that makes flourless brownies so irresistible.
Essential Cooling Steps
We recommend allowing the brownies to cool in the pan for at least 30 minutes after baking. This initial cooling period prevents the brownies from falling apart when we attempt to remove or cut them. Room temperature cooling works perfectly for most serving situations, but we achieve even better results when we let them cool completely.
For the cleanest cuts and firmest texture, we often refrigerate our brownies before slicing. Chilled brownies maintain their rich, fudgy consistency when served at room temperature, making this extra step worthwhile for special occasions or when presentation matters most.
Professional Cutting Techniques
Clean, straight cuts require the right tools and technique. We always use a long, straight-blade knife such as a chef’s knife rather than serrated or small knives. This approach minimizes sticking and prevents the dragging that creates messy, uneven edges.
Our secret for flawless cuts involves running the knife blade under hot water and wiping it completely dry before each slice. This technique helps the blade glide smoothly through the brownie without sticking to the rich, dense texture. We clean the blade between each cut to maintain consistent, professional-looking results.
| Cooling Method | Time Required | Best For |
|---|---|---|
| Pan cooling | 30 minutes minimum | Quick serving |
| Room temperature | 1-2 hours | Standard presentation |
| Refrigerated | 2-3 hours | Cleanest cuts |
Lifting the brownies from the pan using parchment paper overhangs before cutting creates the most even, neat slices. This method allows us to work on a cutting board rather than maneuvering around pan edges, resulting in perfectly uniform squares that showcase the beautiful fudgy interior of our flourless creation.
Storage Instructions

Proper storage ensures our flourless brownies maintain their signature fudgy texture and rich chocolate flavor. We’ve developed proven methods to keep these gluten-free treats fresh whether you plan to enjoy them within days or save them for later.
Short-term Storage
We recommend storing our flourless brownies in an airtight container once they have cooled completely. These decadent treats maintain their optimal texture and flavor when kept at room temperature for 2–5 days.
Refrigeration extends the shelf life significantly. Our brownies stay fresh in the refrigerator for up to two weeks when properly stored. For the best texture experience, we suggest briefly reheating refrigerated brownies in the microwave before serving to restore their fudgy consistency.
The key to successful short-term storage lies in using truly airtight containers that prevent moisture loss. We avoid stacking or tightly packing brownies while they’re still warm to prevent condensation and sogginess.
Freezing Instructions
Freezing offers an excellent long-term storage solution for our flourless brownies. We ensure the brownies have cooled completely after baking before beginning the freezing process.
For optimal results, we wrap each brownie individually in plastic wrap before placing them in a freezer-safe container or bag. This method prevents freezer burn and maintains the brownies’ rich texture for up to three months.
Alternatively, we can slice the brownies and transfer them directly to a freezer-safe bag if individual wrapping isn’t preferred. This approach works well for quick grab-and-go portions.
When ready to serve, we defrost frozen brownies at room temperature while keeping them uncovered to prevent excess moisture accumulation. Our brownies can also be reheated directly from frozen in the oven until warmed through, making them perfect for unexpected guests or spontaneous chocolate cravings.
Serving Suggestions

These rich, fudgy flourless brownies shine brightest when paired with complementary flavors and textures that enhance their decadent chocolate profile. We recommend serving them at room temperature to fully appreciate their dense, chewy consistency and intense cocoa flavor.
Vanilla ice cream creates the perfect temperature and texture contrast against warm brownies. The creamy coldness balances the rich chocolate while adding a classic dessert element that never fails to impress. We suggest serving a generous scoop alongside each brownie square for the ultimate indulgent experience.
Salted caramel topping transforms these brownies into a gourmet dessert with its sweet and salty contrast. Drizzle the warm caramel over individual portions just before serving to create an irresistible combination of flavors. The salt enhances the chocolate’s depth while the caramel adds luxurious sweetness.
Fresh berries provide a bright, acidic counterpoint to the brownies’ richness. Strawberries, raspberries, or blackberries cut through the dense chocolate and add visual appeal with their vibrant colors. We often arrange mixed berries around the plate for both flavor and presentation benefits.
Whipped cream offers a lighter accompaniment that doesn’t compete with the brownies’ intense flavor. A dollop of freshly whipped cream adds airiness to each bite while providing a neutral canvas that lets the chocolate truly shine. Consider adding a touch of vanilla extract to the cream for extra depth.
Coffee or espresso makes an excellent beverage pairing that amplifies the chocolate notes. The bitter coffee compounds complement the brownies’ sweetness while cleansing the palate between bites. We find that a strong brew works particularly well with these dense, fudgy squares.
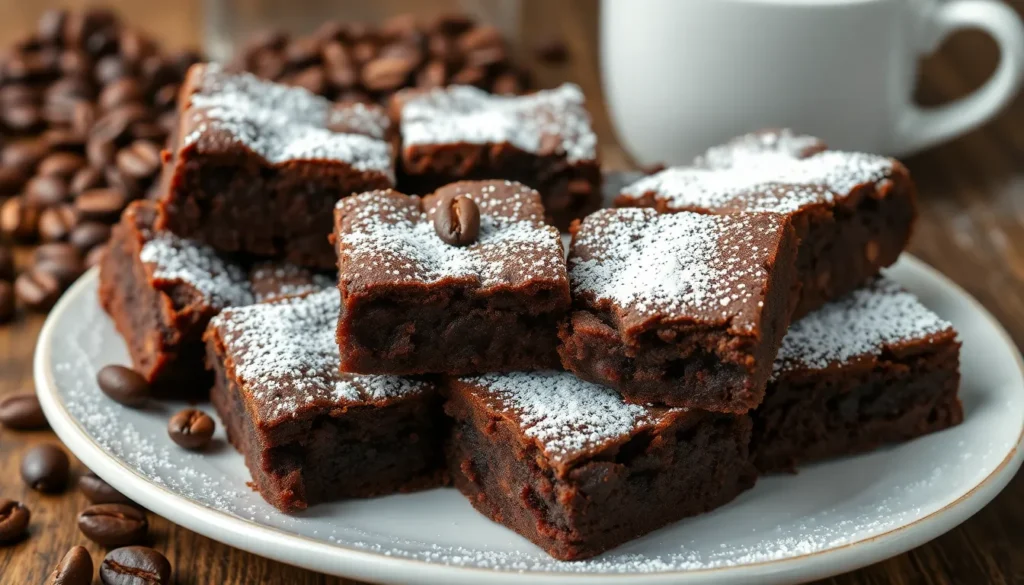
For special occasions, dust the brownies with powdered sugar just before serving to create an elegant presentation. The white powder creates beautiful contrast against the dark chocolate surface while adding a subtle sweetness that doesn’t overpower the brownies’ natural flavor profile.
Recipe Variations

Our flourless brownie recipe adapts beautifully to different dietary needs and preferences. These variations maintain the signature fudgy texture while accommodating exact nutritional requirements.
Keto-Friendly Version
We transform our classic recipe into a keto powerhouse by swapping traditional sweeteners for low-carb alternatives. Replace the granulated and brown sugars with erythritol or stevia, using a 1:1 ratio for erythritol or adjusting stevia according to package instructions. Sugar-free dark chocolate chips work perfectly in place of regular chocolate, ensuring we stay within keto macros while delivering intense chocolate flavor.
The cocoa powder remains unchanged since it naturally fits keto requirements. We recommend using at least 70% dark chocolate for melting, as it contains fewer carbs than milk chocolate varieties. This adaptation typically reduces the net carbs from 15-20 grams per serving to just 3-5 grams, making it perfect for those following ketogenic lifestyles.
Vegan Adaptation
Our vegan version replaces animal products without sacrificing the beloved fudgy texture. Substitute each egg with a flax egg (1 tablespoon ground flaxseed mixed with 3 tablespoons water, let sit for 5 minutes) or use ¼ cup unsweetened applesauce per egg. Coconut oil or vegan butter replaces regular butter at a 1:1 ratio.
Choose dairy-free chocolate chips and ensure your cocoa powder is processed without milk products. The melted chocolate component works beautifully with vegan dark chocolate bars. We find that adding an extra tablespoon of coconut oil helps achieve the same richness that butter typically provides. These modifications create brownies that are completely plant-based while maintaining the dense, decadent quality we expect.
Protein-Packed Version
We boost the nutritional profile by incorporating protein powder directly into our base recipe. Add 1-2 scoops (approximately 25-50 grams) of your preferred protein powder, reducing the cocoa powder by half the amount of protein powder added. Chocolate or vanilla protein powders work exceptionally well, with chocolate improving the overall flavor profile.
The protein addition may require slight moisture adjustments, so we recommend adding an extra tablespoon of melted butter or oil if the batter appears too thick. This variation transforms our brownies into a post-workout treat or healthy snack option, providing 8-12 grams of additional protein per serving while preserving the signature texture that makes these brownies irresistible.
Troubleshooting Tips

Even with our perfect flourless brownie recipe, we sometimes encounter challenges that can affect the final result. Understanding these common issues helps us create consistently delicious brownies every time.
Temperature Matters for Perfect Texture
Cold eggs often create the most frustrating mixing problems in flourless brownies. We recommend bringing all eggs to room temperature before starting our recipe. This simple step ensures smooth incorporation into the batter and prevents the chocolate mixture from seizing when we add the eggs.
Preventing Cocoa Powder Clumps
Powdery chunks of cocoa powder can ruin the smooth texture we’re aiming for in our flourless brownies. We always sift our unsweetened cocoa powder before adding it to the wet ingredients. This extra step eliminates lumps and creates the silky consistency that makes these brownies irresistible.
Avoiding Dense or Sunken Results
Overmixing our batter leads to dense, heavy brownies that lack the perfect fudgy texture. We fold the dry ingredients gently into the wet mixture just until combined. Also, using the correct amount of baking powder prevents our brownies from sinking in the center after cooling.
Recognizing Proper Doneness
Flourless brownies often appear undercooked when they’re actually perfect. We look for edges that feel slightly firm to the touch and have developed a subtle crispiness. The center should still appear slightly wet but not jiggly. Allowing our brownies to cool completely in the pan lets them finish setting to the ideal consistency.
Balancing Sugar for Optimal Chewiness
The wrong sugar ratios can result in brownies that lack the characteristic chewy texture we desire. We use both granulated and brown sugar as specified in our recipe. Brown sugar provides moisture and chewiness, while granulated sugar contributes to the crinkly top surface that makes flourless brownies so appealing.
Ensuring Proper Fat Integration
Fat binding issues create uneven textures and can cause our brownies to fall apart. We make sure our melted butter and chocolate are fully incorporated before adding other ingredients. Substituting oil for butter in this recipe often leads to binding problems, so we stick with the specified fats for best results.
| Common Issue | Solution | Result |
|---|---|---|
| Cold eggs | Use room temperature eggs | Smooth batter incorporation |
| Cocoa clumps | Sift cocoa powder before adding | Silky texture |
| Dense texture | Avoid overmixing | Perfect fudgy consistency |
| Undercooked appearance | Look for firm edges, cool completely | Properly set brownies |
| Lack of chewiness | Use correct sugar ratios | Optimal texture |
| Poor fat binding | Fully incorporate melted fats | Even, stable structure |
Make-Ahead Instructions

We recommend preparing these flourless brownies up to several days in advance for optimal convenience and flavor development. The brownies actually improve in texture as they rest, allowing the rich chocolate flavors to meld and intensify over time.
Baking and Initial Storage
Bake the brownies according to our standard instructions and allow them to cool completely in the pan. Once cooled, we suggest cutting them into squares and transferring to an airtight container lined with parchment paper. This method prevents the brownies from sticking together while maintaining their signature fudgy texture.
Room Temperature Storage Timeline
Store the prepared brownies at room temperature for 1-2 days maximum when planning to serve them soon. We find this storage method preserves their gooey centers and crispy edges perfectly. Place a sheet of parchment paper between layers if stacking multiple brownies in your container.
Refrigerated Make-Ahead Storage
Refrigerate cut brownies for up to 5 days when preparing them well in advance. We wrap individual brownies in plastic wrap or store them in sealed containers with tight-fitting lids. The cold storage helps maintain structural integrity while preserving the intense chocolate flavor profile.
Freezer Storage for Extended Planning
Freeze brownies for up to 3 months when planning special events or batch preparation. We recommend wrapping each brownie individually in plastic wrap, then placing them in freezer-safe bags with excess air removed. Label containers with the preparation date for optimal freshness tracking.
Serving Preparation
Remove refrigerated brownies 30 minutes before serving to restore their ideal texture. We suggest bringing frozen brownies to room temperature for 2-3 hours or warming them briefly in a 300°F oven for 5-8 minutes. This gentle reheating process revives their signature molten chocolate cake-like consistency without compromising the delicate structure.
Conclusion
We’ve shown you that flourless brownies aren’t just a gluten-free alternative—they’re actually superior to traditional brownies in every way. The intense chocolate flavor and impossibly fudgy texture make these treats irresistible to anyone who tries them.
Whether you’re following a exact diet or simply want the best brownies possible these recipes deliver consistent results every time. With proper storage techniques and our troubleshooting tips you’ll never have to worry about disappointing desserts again.
Now it’s time to get baking and experience the magic of flourless brownies for yourself. Your taste buds will thank you for discovering this game-changing recipe that proves sometimes less really is more.
Frequently Asked Questions
What makes flourless brownies different from regular brownies?
Flourless brownies have a denser, fudgier texture than traditional brownies because they rely on eggs, chocolate, and cocoa powder for structure instead of flour. They’re naturally gluten-free and offer a more intense chocolate flavor. The absence of flour creates a rich, decadent consistency that many find superior to conventional brownies.
How long do flourless brownies need to bake?
Flourless brownies typically bake for 20-35 minutes at 350°F (177°C), depending on your desired level of fudginess. The center should appear slightly undercooked when you remove them from the oven, as they’ll continue to set while cooling. Check for doneness with a toothpick – it should come out with moist crumbs.
Can I make flourless brownies ahead of time?
Yes, flourless brownies are excellent make-ahead treats. Store them in an airtight container at room temperature for 2-5 days or refrigerated for up to two weeks. For longer storage, wrap individually and freeze for up to three months. The flavor actually improves after a day or two of storage.
What’s the best way to cut flourless brownies cleanly?
Allow brownies to cool completely for at least 30 minutes, then refrigerate before cutting for the cleanest slices. Use a long, straight-blade knife and run it under hot water between cuts. Lift the brownies using parchment paper overhangs for easy removal and perfectly uniform squares.
Can I make vegan or keto versions of flourless brownies?
Absolutely! For vegan brownies, substitute eggs with flax eggs or applesauce and use dairy-free chocolate. For keto versions, replace sugar with low-carb sweeteners like erythritol or stevia. You can also add protein powder for a protein-packed version. Each adaptation maintains the signature fudgy texture.
Why are my flourless brownies crumbly or falling apart?
Crumbly brownies usually result from overmixing the batter, using cold eggs, or not incorporating fats properly. Use room temperature eggs, gently fold dry ingredients, and ensure butter and chocolate are well-integrated. Also, avoid overbaking – the center should look slightly undercooked when removed from the oven.
What are the best toppings or accompaniments for flourless brownies?
Flourless brownies pair beautifully with vanilla ice cream, salted caramel, or fresh berries. Whipped cream offers a lighter contrast, while coffee or espresso enhances the chocolate notes. For elegant presentation, dust with powdered sugar. Serve at room temperature for the best texture and flavor experience.


