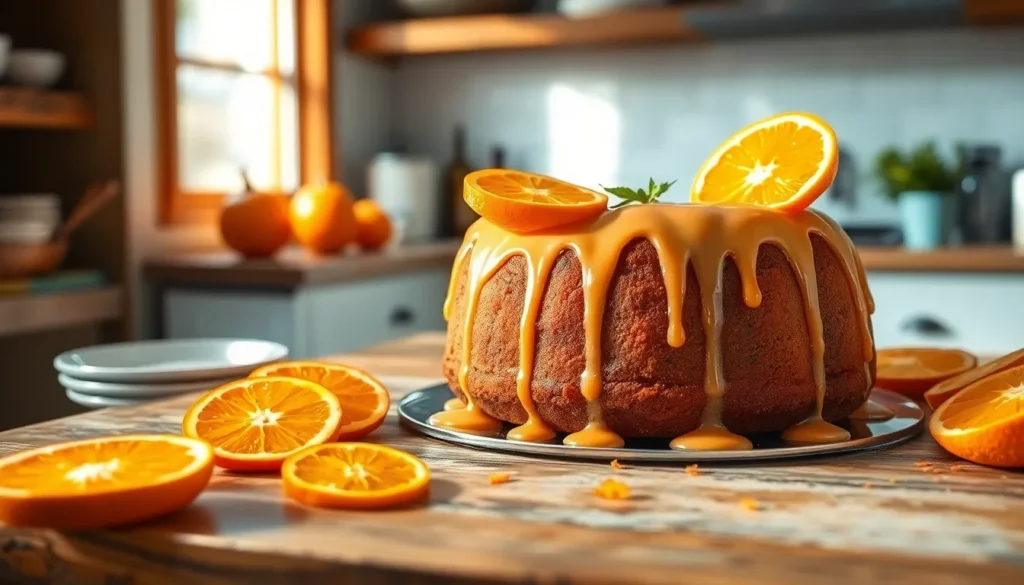
We’ve discovered the perfect solution for citrus lovers who need to avoid gluten – our gluten-free orange cake that’s so moist and flavorful, you’ll never miss the wheat flour. This vibrant dessert captures the essence of fresh oranges in every bite while maintaining that tender crumb we all crave in a classic cake.
What makes this recipe truly special is how it transforms simple gluten-free ingredients into something extraordinary. The natural oils from fresh orange zest infuse the entire cake with bright citrus notes, while our carefully balanced flour blend ensures the perfect texture every time.
Ingredients
Our gluten-free orange cake requires two distinct sets of ingredients that work together to create this extraordinary dessert. We carefully selected each component to ensure optimal flavor and texture in both the cake and its finishing glaze.
For the Cake
- 2 cups gluten-free flour blend (containing rice flour, potato starch, and tapioca flour)
- 1½ cups granulated sugar
- 3 large eggs, room temperature
- ¾ cup unsalted butter, softened
- 1 cup whole milk
- 2 tablespoons fresh orange zest
- ½ cup fresh orange juice
- 2 teaspoons baking powder
- 1 teaspoon vanilla extract
- ½ teaspoon salt
- ¼ teaspoon xanthan gum (if not included in flour blend)
For the Orange Glaze
- 2 cups powdered sugar, sifted
- ¼ cup fresh orange juice
- 2 tablespoons fresh orange zest
- 2 tablespoons unsalted butter, melted
- 1 teaspoon vanilla extract
- Pinch of salt


Equipment Needed
 1")
We recommend gathering all essential equipment before starting this gluten-free orange cake recipe to ensure smooth preparation and professional results.
Essential Baking Equipment:
- 8-inch springform pan for easy cake removal
- Food processor to blend whole oranges if using them
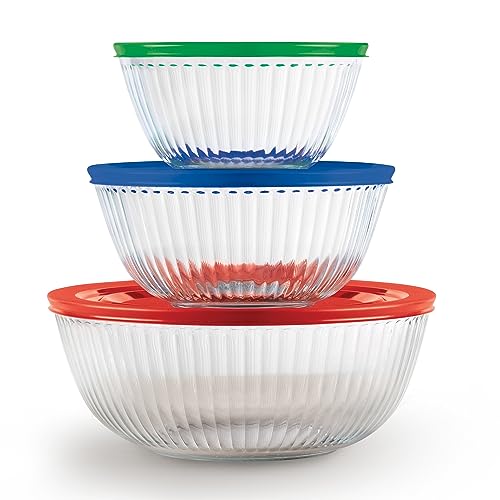
- Stand mixer or hand mixer for proper batter consistency
- Measuring cups and spoons for accurate ingredient ratios
Testing and Preparation Tools:
- Cake tester or wooden skewer to check doneness
- Wire cooling rack for proper cake cooling
- Rubber spatula for folding ingredients gently
- Fine-mesh sieve for sifting dry ingredients
Additional Helpful Items:
- Microplane grater for fresh orange zest
- Digital kitchen scale for precise measurements
- Parchment paper to line the pan bottom
- Small saucepan for preparing the glaze
The springform pan proves particularly valuable for gluten-free cakes since they can be more delicate than traditional wheat-based versions. Our food processor becomes essential when incorporating whole oranges into the batter for maximum citrus flavor. We always keep our cake tester handy since gluten-free batters may require slightly different baking times than conventional recipes.
Having the right equipment ready streamlines the baking process and helps achieve the moist texture and vibrant orange flavor that makes this cake exceptional.


Instructions
 2")
Creating our gluten-free orange cake requires careful attention to each step to achieve that perfect moist texture and vibrant citrus flavor. We’ll guide you through the process systematically to ensure exceptional results.
Prep the Pan and Oven
We start by preheating our oven to 350°F (175°C) for optimal baking conditions. Next we grease our 8-inch springform pan thoroughly and line it with parchment paper to prevent sticking and ensure easy removal. The parchment paper should extend slightly above the pan edges for convenient lifting once our cake has cooled.
Mix the Dry Ingredients
In a large mixing bowl we whisk together our gluten-free flour blend with the baking powder and salt until evenly distributed. This step ensures our leavening agents are properly incorporated throughout the flour mixture. We recommend sifting the flour blend if it appears lumpy to achieve the smoothest possible texture in our finished cake.
Prepare the Wet Ingredients
Using our stand mixer or hand mixer we cream the softened butter with granulated sugar until the mixture becomes light and fluffy. We then add our eggs one at a time beating well after each addition to maintain proper emulsification. In a separate bowl we combine the fresh orange juice orange zest milk and vanilla extract. The fresh zest provides the intense citrus flavor that makes this cake extraordinary.
Combine and Mix the Batter
We alternate adding our dry ingredients and wet orange mixture to the creamed butter and sugar beginning and ending with the flour mixture. This technique prevents overmixing while ensuring all ingredients are thoroughly incorporated. We mix just until the batter comes together smoothly avoiding overworking which could result in a dense cake texture.
Bake the Cake
We pour our batter into the prepared springform pan and smooth the top with our rubber spatula. Our cake bakes for 25-35 minutes until a cake tester inserted in the center comes out clean or with just a few moist crumbs attached. The top should spring back lightly when touched and the edges will start pulling away slightly from the pan sides. We transfer the pan to our wire cooling rack and allow the cake to cool for 10 minutes before removing the springform sides.


Making the Orange Glaze
 3")
With our cake cooling on the wire rack, we now turn our attention to creating the perfect orange glaze that will crown this gluten-free masterpiece. This glossy finishing touch intensifies the citrus flavor while adding visual appeal to our dessert.
We begin by sifting 2 cups of powdered sugar into a medium mixing bowl to eliminate any lumps. The smooth texture of our glaze depends on this crucial step. Next, we gradually whisk in 3-4 tablespoons of fresh orange juice, starting with smaller amounts to control consistency. Fresh orange zest from one medium orange gets added to amplify the citrus essence throughout the glaze.
Our melted butter (2 tablespoons) goes in next, followed by a pinch of salt to balance the sweetness. We whisk these ingredients together until the mixture achieves a smooth, pourable consistency. The glaze should coat the back of a spoon but still flow freely when drizzled.
Timing becomes essential at this stage. We wait until our cake has cooled completely before applying the glaze, as warm cake will cause the glaze to slide off rather than set properly. Once our cake reaches room temperature, we position it on a serving plate or cake stand.
We pour the glaze starting from the center of the cake, allowing it to naturally flow toward the edges. A gentle back-and-forth motion helps distribute the glaze evenly across the surface. Some glaze will drip down the sides, creating an elegant cascading effect that enhances the cake’s presentation.
| Glaze Component | Amount | Purpose |
|---|---|---|
| Powdered sugar | 2 cups | Base sweetener |
| Fresh orange juice | 3-4 tablespoons | Citrus flavor and consistency |
| Orange zest | 1 medium orange | Intense citrus essence |
| Melted butter | 2 tablespoons | Richness and shine |
| Salt | Pinch | Flavor balance |
The glaze sets within 10-15 minutes, creating a beautiful glossy finish that complements our moist gluten-free orange cake perfectly. This final touch transforms our dessert into a bakery-worthy creation that showcases the vibrant orange flavors we’ve carefully built throughout the recipe.


Assembly and Finishing
 4")
We ensure the cake reaches room temperature completely before beginning the finishing process. This crucial step prevents the glaze from melting or becoming runny when applied to the warm surface.
Preparing for Assembly
Our first task involves checking the cake’s doneness by gently pressing the center with our fingertip. The surface should spring back without leaving an indentation. We then allow the cake to rest in the springform pan for 10 minutes before carefully releasing the sides.
Applying the Orange Glaze
We position the cooled cake on our serving plate or cake stand before glazing begins. Starting from the center of the cake we pour the prepared orange glaze in a steady spiral motion working outward toward the edges. The glaze naturally flows down the sides creating an elegant cascading effect.
| Glaze Setting Times | Duration |
|---|---|
| Initial set | 5-7 minutes |
| Complete set | 10-15 minutes |
| Ready to serve | 20 minutes |
Final Presentation Touches
Fresh orange zest becomes our signature garnish once the glaze achieves its initial set. We use a microplane grater to create delicate curls of zest directly over the glazed surface. Thin orange wheel slices arranged around the base add visual appeal and hint at the vibrant citrus flavors within.
Storage and Serving Preparation
We cover the finished cake with a dome or tent it loosely with plastic wrap to protect the glossy glaze surface. Room temperature storage works perfectly for up to three days while refrigeration extends freshness to one week. Before serving chilled cake we allow it to return to room temperature for optimal flavor and texture.
The completed gluten free orange cake showcases a professional bakery appearance with its smooth glaze finish and aromatic citrus essence that promises exceptional taste in every slice.


Storage Instructions
 5")
Our gluten-free orange cake maintains its exceptional texture and flavor when stored properly. We recommend following these exact storage guidelines to preserve the cake’s moist consistency and vibrant citrus taste.
Room Temperature Storage
We can keep our finished gluten-free orange cake at room temperature for optimal texture and flavor. The cake stays fresh for up to 3 days when covered with an airtight container or cake dome. This storage method preserves the cake’s tender crumb while protecting the glossy orange glaze from dust and air exposure.
| Storage Method | Duration | Best For |
|---|---|---|
| Room Temperature | Up to 3 days | Maintaining optimal texture |
| Refrigeration | Up to 1 week | Extended freshness |
| Freezing | Up to 2 months | Long-term storage |
Refrigeration
We store our orange cake in the refrigerator when we need extended freshness beyond three days. The cake remains delicious for up to one week when properly wrapped or placed in an airtight container. Keep in mind that refrigeration may cause the cake’s texture to firm up slightly compared to room temperature storage. We recommend bringing refrigerated cake back to room temperature for about 30 minutes before serving to restore its ideal texture.
Freezing for Long-Term Storage
We can freeze our gluten-free orange cake for up to two months with proper preparation. Wrap individual slices or the whole cake tightly in plastic wrap before placing in an airtight container or freezer bag. This double protection prevents freezer burn and maintains the cake’s moisture content. We suggest freezing the cake before applying the glaze as this makes handling much easier during the thawing process.
Serving After Storage
We enhance our stored cake with fresh accompaniments when ready to serve. A dollop of coconut whipped cream or Greek yogurt complements the citrus flavors beautifully. Fresh edible flowers like pansies or violets add an elegant decorative touch that elevates the cake’s presentation. For frozen slices we can quickly reheat them in the microwave for 15 to 20 seconds to restore warmth and enhance the orange aroma.
Tips for Success
 6")
Room temperature ingredients create the foundation for our perfect gluten-free orange cake. We always remove eggs, butter, and milk from the refrigerator at least 30 minutes before baking to ensure optimal mixing and texture. Cold ingredients prevent proper emulsification and can result in a dense cake that lacks the desired light and airy quality.
Sifting our gluten-free flour blend eliminates lumps that could create dense pockets in the finished cake. We recommend passing the flour through a fine mesh sieve twice before measuring to guarantee smooth incorporation. This extra step prevents the grainy texture that sometimes plagues gluten-free baked goods.
| Ingredient Temperature | Recommended Time at Room Temperature |
|---|---|
| Eggs | 30-45 minutes |
| Butter | 45-60 minutes |
| Milk | 20-30 minutes |
Gentle mixing preserves the delicate structure our gluten-free flour blend creates. We fold wet ingredients into dry ingredients using slow deliberate motions rather than vigorous stirring. Overmixing develops the starches in gluten-free flour and produces a gummy texture that compromises the cake’s appeal.
Fresh orange zest delivers the most vibrant citrus flavor we can achieve. We grate only the colored portion of the orange peel while avoiding the bitter white pith underneath. The oils in fresh zest provide aromatic compounds that dried zest simply cannot match.
Testing for doneness requires attention to visual and tactile cues since gluten-free cakes behave differently than traditional versions. We insert a cake tester into the center and look for just a few moist crumbs rather than complete cleanliness. The cake should spring back lightly when touched and pull slightly away from the pan edges.
Proper cooling prevents structural collapse that can occur with gluten-free cakes. We allow our cake to rest in the pan for 10 minutes before transferring to a wire rack. This brief cooling period lets the proteins set while the cake remains warm enough for easy removal from the springform pan.
Sweetness adjustments accommodate personal preferences without compromising the cake’s structure. We can reduce granulated sugar by up to 25% if desired though this may slightly affect the cake’s moisture retention. Adding extra orange zest compensates for reduced sweetness while maintaining the vibrant citrus profile.
Conclusion
We’ve created a showstopping gluten-free orange cake that proves dietary restrictions don’t mean sacrificing flavor or texture. This vibrant dessert delivers the perfect balance of moist crumb and bright citrus notes that’ll impress everyone at your table.
The combination of fresh orange zest balanced flour blend and carefully crafted glaze creates a bakery-quality result you can achieve at home. With proper storage techniques this cake maintains its exceptional taste for days making it perfect for meal prep or special occasions.
Whether you’re serving guests with gluten sensitivities or simply craving a delicious citrus treat this recipe delivers consistent professional results. The detailed techniques we’ve shared ensure your success every time you bake this remarkable cake.
Frequently Asked Questions
Is this gluten-free orange cake as moist as regular cake?
Yes, this gluten-free orange cake is exceptionally moist and rivals traditional wheat-based cakes. The specially balanced gluten-free flour blend and fresh orange juice create an ideal texture that maintains moisture while delivering vibrant citrus flavor.
What equipment do I need to make this orange cake?
Essential equipment includes an 8-inch springform pan, food processor for blending oranges, stand or hand mixer, cake tester, wire cooling rack, rubber spatula, microplane grater, and digital kitchen scale for best results.
How long does the orange glaze take to set?
The orange glaze sets within 10-15 minutes after application, creating a glossy finish. Make sure the cake is completely cooled to room temperature before applying the glaze to prevent melting.
How should I store this gluten-free orange cake?
Store at room temperature in an airtight container for up to 3 days for optimal texture. Refrigerate for up to one week, though this may slightly firm the texture. The cake can be frozen for up to 2 months when properly wrapped.
Why is it important to use room temperature ingredients?
Room temperature ingredients blend more easily and create better texture in the final cake. This ensures proper mixing, prevents lumps, and helps achieve the light, moist consistency that makes this gluten-free orange cake exceptional.
Can I adjust the sweetness of the cake?
Yes, you can adjust sweetness to personal preference in both the cake and glaze. However, maintain the overall ingredient balance to preserve the cake’s moist texture and structural integrity.
How do I know when the cake is properly baked?
Test doneness with a cake tester or toothpick inserted into the center. It should come out clean or with just a few moist crumbs. The cake should also spring back lightly when touched.


