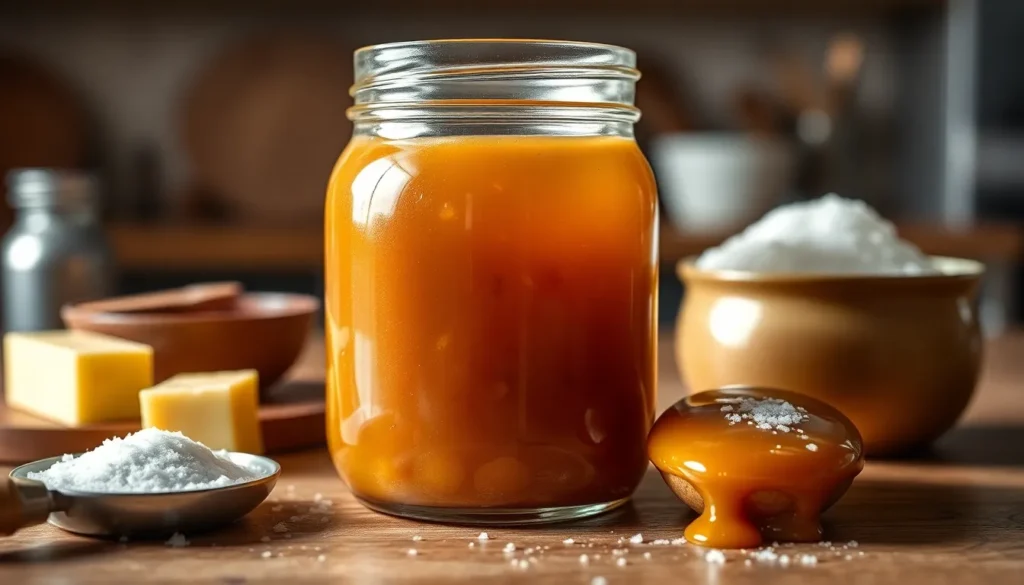
Nothing beats the rich, buttery sweetness of homemade salted caramel sauce drizzled over your favorite desserts. We’ve perfected this restaurant-quality recipe that transforms simple ingredients into liquid gold in just minutes. The combination of caramelized sugar, heavy cream, and a pinch of sea salt creates an irresistible sauce that’ll elevate everything from ice cream to apple pie.
Making salted caramel at home isn’t as intimidating as you might think. We’ll walk you through each step to ensure you get that perfect balance of sweet and salty every single time. No more store-bought versions filled with preservatives when you can create this luxurious sauce in your own kitchen.
Once you master this technique, you’ll find yourself adding this golden treasure to coffee, brownies, cheesecakes, and more. Get ready to impress your family and friends with a homemade touch that makes every dessert extraordinary.
Ingredients
Our homemade salted caramel sauce requires just five simple ingredients that work together to create that perfect sweet and salty balance. We recommend gathering these high-quality ingredients before starting the cooking process to ensure smooth preparation.
- 1 cup granulated sugar
- 6 tablespoons unsalted butter, cut into cubes and at room temperature
- ½ cup heavy cream, at room temperature
- 1 teaspoon vanilla extract
- 1 teaspoon sea salt (or to taste)
We use granulated sugar as our base because it caramelizes evenly and creates that deep amber color we’re looking for. The unsalted butter adds richness and helps create the smooth texture that makes this sauce so luxurious. Heavy cream is essential for achieving the perfect consistency while preventing the caramel from becoming too thick or grainy.
Room temperature ingredients blend more easily and prevent the hot caramel from seizing when we add them. We prefer sea salt over table salt because it provides a cleaner flavor that enhances rather than overpowers the caramel’s sweetness. The vanilla extract adds depth and rounds out all the flavors beautifully.
Having everything measured and ready before we begin cooking ensures we can work quickly once the sugar starts caramelizing. This preparation step is crucial because caramel moves fast and we need to add ingredients at just the right moments.
Equipment Needed
 1")
Creating silky smooth salted caramel sauce requires the right tools to ensure success. We recommend gathering these essential pieces of equipment before starting your caramel making journey.
Medium Heavy-Bottomed Saucepan serves as our foundation for even heat distribution. The heavy bottom prevents hot spots that can cause sugar to burn unevenly during the caramelization process. We prefer a light-colored interior that allows us to monitor the amber color development clearly.
Heat-Resistant Whisk becomes our most important tool for incorporating ingredients smoothly. Silicone or metal whisks work best since they withstand the high temperatures of molten caramel. We use this to stir constantly during sugar melting and to blend in butter and cream seamlessly.
Flexible Spatula helps us scrape every bit of caramel from the pan sides. This tool prevents waste and ensures uniform texture throughout our sauce. We find silicone spatulas particularly useful for their heat resistance and flexibility.
Glass Storage Jar provides the perfect vessel for storing our finished sauce. Glass containers don’t absorb flavors or odors like plastic alternatives might. We recommend choosing a jar with a tight-fitting lid to maintain freshness and prevent contamination.
Having all equipment ready and within reach makes the caramel making process much smoother. We cannot stress enough how important preparation is when working with hot sugar that transforms quickly from perfect to burnt.
Instructions
 2")
Now that we have our ingredients measured and equipment ready, let’s walk through the process of creating this luxurious salted caramel sauce. We’ll take this step by step to ensure perfect results every time.
Prep the Ingredients
We need to have everything measured and at room temperature before we start. Place the granulated sugar in a bowl within easy reach of our stovetop. Cut the unsalted butter into small cubes and arrange them on a plate. Measure the heavy cream into a spouted measuring cup and let it come to room temperature for better incorporation. Keep our flaky sea salt nearby for the final touch. Having everything prepared and accessible is crucial since caramel moves quickly once we begin the cooking process.
Make the Caramel
We start by placing the granulated sugar in our medium heavy-bottomed saucepan over medium heat. Using our heat-resistant whisk, we stir the sugar constantly as it begins to dissolve and melt. The sugar will first clump together before gradually melting into a smooth liquid. We continue stirring constantly until the sugar transforms into a beautiful amber color, which typically takes 8 to 10 minutes. Watch carefully during this stage as the sugar can quickly go from perfect amber to burnt.
Add Butter and Cream
Once our caramel reaches the desired amber color, we immediately add the cubed butter while whisking continuously. The mixture will bubble vigorously, but we keep stirring until the butter completely melts and incorporates. Next, we remove the pan from heat and slowly pour in the room temperature heavy cream while whisking constantly. This step requires caution as the mixture will bubble and steam dramatically. We continue whisking until the cream is fully incorporated and our sauce becomes smooth and glossy.
Finish with Salt
We stir in our flaky sea salt to taste, starting with a small pinch and adding more as desired. The salt enhances the caramel’s sweetness and creates that perfect sweet and salty balance we’re after. We give the sauce a final whisk to ensure the salt is evenly distributed. Our homemade salted caramel sauce will thicken as it cools, so we can transfer it to our glass storage jar while it’s still warm for easy pouring.
Tips for Perfect Homemade Salted Caramel Sauce
 3")
Temperature control becomes crucial when working with caramel ingredients. We recommend bringing both butter and heavy cream to room temperature before starting the cooking process. This simple step prevents violent splattering when these ingredients meet the hot sugar and creates a smoother final texture.
Sugar monitoring requires our constant attention during the caramelization phase. We watch the color transformation carefully as granulated sugar melts over medium heat. The mixture progresses from white crystals to golden liquid and finally reaches that perfect deep amber shade. Once we stop whisking and allow the sugar to melt completely, gentle pan swirling helps achieve even coloring.
Safety precautions protect us from potential burns during this high-temperature cooking process. We keep kitchen gloves nearby when adding cream since the mixture bubbles vigorously upon contact. The bubbling reaction is normal but can splash hot caramel, so we pour slowly while maintaining steady whisking motions.
| Safety Tip | Purpose | Timing |
|---|---|---|
| Room temperature ingredients | Prevents splattering | Before cooking |
| Kitchen gloves | Protects from burns | During cream addition |
| Steady whisking | Controls bubbling | Throughout process |
Timing considerations help us avoid overcooking the sugar base. We remove the pan from heat immediately after adding butter to prevent the temperature from climbing too high. Caramel transforms quickly from perfect amber to bitter burnt sugar, so we stay vigilant during the final cooking stages.
Storage preparation ensures our finished sauce maintains quality over time. We allow the caramel to cool for 10 to 15 minutes before transferring it to a clean glass jar. The sauce naturally thickens during the cooling process and develops its signature consistency. Proper refrigeration extends shelf life up to one month while preserving the rich flavor profile we worked to achieve.
Storage Instructions
 4")
Proper storage extends the life of our homemade salted caramel sauce while maintaining its silky texture and rich flavor. We recommend following exact guidelines based on how long you plan to keep the sauce.
Room Temperature Storage
Our salted caramel sauce can sit at room temperature in a covered container for one to two days maximum. We don’t recommend this method for longer periods as the sauce may spoil without refrigeration. Room temperature storage works best when you plan to use the sauce within 48 hours.
Refrigerator Storage
After our caramel cools completely we transfer it to a glass jar or airtight container for refrigeration. The sauce stays fresh in the refrigerator for up to one month when properly stored. Refrigerated caramel will thicken or solidify as it cools but we can easily restore its drizzling consistency by gently reheating on the stove or in the microwave at low heat.
Freezer Storage
Long-term storage requires transferring our sauce to an airtight plastic container rather than glass to prevent cracking from temperature changes. Frozen salted caramel sauce maintains quality for up to three months. We thaw frozen sauce overnight in the refrigerator or at room temperature for several hours then gently rewarm before serving.
Reheating Guidelines
Gentle reheating preserves the texture and flavor of our caramel sauce. We avoid boiling the sauce during reheating as this can affect both consistency and taste. Low heat on the stove or microwave works best for restoring the sauce to its original smooth texture.
Safety Tips
Hot caramel can crack glass containers so we always let our sauce cool to room temperature before transferring to storage jars. Labeling containers with storage dates helps track freshness and we include reheating instructions when giving the sauce as gifts.
| Storage Method | Container Type | Duration | Reheating Instructions |
|---|---|---|---|
| Room temperature | Covered container | 1–2 days | Not necessary |
| Refrigerator | Glass jar/airtight lid | Up to 1 month | Gentle stove/microwave low heat |
| Freezer | Airtight plastic | Up to 3 months | Thaw then gentle warming |
Serving Suggestions
 5")
Our homemade salted caramel sauce transforms ordinary treats into extraordinary indulgences. This versatile sauce elevates everything from simple desserts to warming beverages with its perfect balance of sweet and salty flavors.
Dessert Pairings
Ice cream becomes an instant gourmet experience when we drizzle our salted caramel sauce over vanilla or chocolate scoops. The contrast between cold ice cream and warm caramel creates a delightful temperature play that enhances every bite.
Cakes receive an elegant upgrade with our homemade sauce as a topping or layer filling. We love drizzling it over pound cake or using it between cake layers for added richness and moisture.
Brownies gain sophisticated flavor depth when we add a generous swirl of salted caramel on top before serving. The sauce complements the chocolate while adding textural interest.
Cheesecakes become restaurant quality desserts when we swirl our caramel sauce into the batter for a marbled effect. This technique creates beautiful visual appeal while distributing flavor throughout each slice.
Cupcakes transform into bakery style treats when we use the sauce as a filling or frosting base. We inject it into the center or mix it with buttercream for professional looking results.
Fresh fruit dips become party favorites when we serve our warm caramel sauce alongside apple slices or strawberries. Marshmallows also pair beautifully for an interactive dessert experience.
Beverage Uses
Hot chocolate reaches new heights of indulgence when we stir in a spoonful of our salted caramel sauce. The combination creates a rich drink with complex flavor notes that warm both body and soul.
Coffee drinks gain coffeehouse quality when we add our caramel sauce to lattes or cappuccinos. The deep caramel flavor enhances the coffee’s natural richness while the salt balances any bitterness.
Milkshakes become gourmet treats when we blend our sauce directly into vanilla ice cream and milk. We can also drizzle it around the glass rim for an impressive presentation.
Troubleshooting Common Issues
 6")
Even experienced cooks encounter challenges when making homemade salted caramel sauce. We’ve compiled the most effective answers to help you achieve perfect results every time.
Sugar Crystallization and Graininess
Grainy texture ranks as the most frustrating problem we face with caramel making. This issue stems from sugar crystals forming on the pan’s sides or excessive stirring during the cooking process.
Control your heat by maintaining medium-low temperature throughout the caramelization process. This gradual approach prevents burning while ensuring even melting without unwanted crystallization.
Avoid stirring once the sugar begins melting. Instead we recommend gently swirling the pan to distribute heat evenly across the surface. This technique prevents crystal formation that stirring can trigger.
Use a wet pastry brush to clean the pan’s sides during cooking. Brush down any sugar crystals that form before they can spread and cause widespread crystallization throughout your caramel.
Lumps and Unmelted Sugar
Uneven heating often leaves stubborn sugar lumps that refuse to dissolve completely. Poor quality pans frequently contribute to this persistent problem.
Choose heavy-bottomed pans for optimal heat distribution. High-quality cookware ensures consistent temperature across the entire surface area.
Wait for complete melting before adding any other ingredients. Patience during this stage prevents lumpy texture in your finished sauce.
| Equipment Quality | Heat Distribution | Success Rate |
|---|---|---|
| Heavy-bottomed pans | Even heating | 95% success |
| Thin-bottomed pans | Uneven heating | 60% success |
| Poor quality pans | Hot spots | 40% success |
Butter or Cream Separation
Cold ingredients added to hot caramel create rapid temperature changes that cause separation. This common mistake can ruin an otherwise perfect batch.
Warm your ingredients slightly before incorporating them into the hot caramel. Room temperature butter and cream prevent the shocking temperature difference that triggers separation.
Whisk vigorously if separation occurs even though your precautions. Quick whisking action can often re-emulsify the mixture back to smooth consistency.
Residual Lumps After Mixing
Stubborn sugar crystals sometimes persist even after careful preparation and cooking techniques.
Strain your warm caramel through a fine mesh sieve to remove any remaining lumps. This final step ensures completely smooth texture in your finished sauce.
The key to success lies in using proper equipment and maintaining consistent technique. Heavy-bottomed high-quality pans provide the foundation for professional results every time we make salted caramel sauce.
Conclusion
We’ve shown you that creating restaurant-quality salted caramel sauce at home isn’t just possible—it’s surprisingly straightforward with the right approach. Armed with five simple ingredients and proper techniques you can create a luxurious sauce that rivals any gourmet version.
The beauty of homemade salted caramel lies in its endless possibilities. Whether you’re drizzling it over ice cream or stirring it into your morning coffee you’re adding a touch of elegance to everyday moments.
Remember that practice makes perfect when working with caramel. Don’t be discouraged if your first attempt isn’t flawless—each batch teaches you something new about timing and temperature control.
Now it’s time to head to your kitchen and start creating. Your taste buds (and anyone lucky enough to try your creation) will thank you for choosing homemade over store-bought every single time.
Frequently Asked Questions
What ingredients do I need to make homemade salted caramel sauce?
You only need five simple ingredients: granulated sugar, unsalted butter, heavy cream, vanilla extract, and sea salt. Use high-quality ingredients for the best results. Make sure to bring butter and heavy cream to room temperature before starting to prevent the caramel from seizing and ensure smooth mixing.
What equipment is essential for making salted caramel sauce?
You’ll need a medium heavy-bottomed saucepan for even heat distribution, a heat-resistant whisk for smooth mixing, and a flexible spatula to scrape every bit of caramel. A glass storage jar is recommended for storing the finished sauce. Having all equipment ready beforehand is crucial since caramel-making requires quick action.
How long can I store homemade salted caramel sauce?
At room temperature, the sauce lasts 1-2 days in a covered container. Refrigerated in a glass jar or airtight container, it keeps for up to one month. For long-term storage, freeze in an airtight plastic container for up to three months. Always label containers with storage dates.
How do I prevent my caramel from crystallizing or becoming grainy?
Maintain medium-low heat and avoid excessive stirring while the sugar melts. Use a heavy-bottomed pan for even heating and ensure all ingredients are at room temperature before adding them to the hot caramel. If lumps form, strain the finished caramel through a fine mesh sieve for smoothness.
What’s the best way to reheat stored salted caramel sauce?
Gently reheat the sauce on low heat, stirring constantly to restore its original consistency. Never boil the reheated caramel as this can cause it to separate or become grainy. You can also microwave it in short intervals, stirring between each interval until it reaches the desired consistency.
What can I use salted caramel sauce for?
The sauce is incredibly versatile! Drizzle it over ice cream, cakes, brownies, cheesecakes, and cupcakes. It’s also perfect for beverages like hot chocolate, coffee drinks, and milkshakes. The rich, buttery sweetness with a hint of salt transforms ordinary treats into gourmet indulgences.


