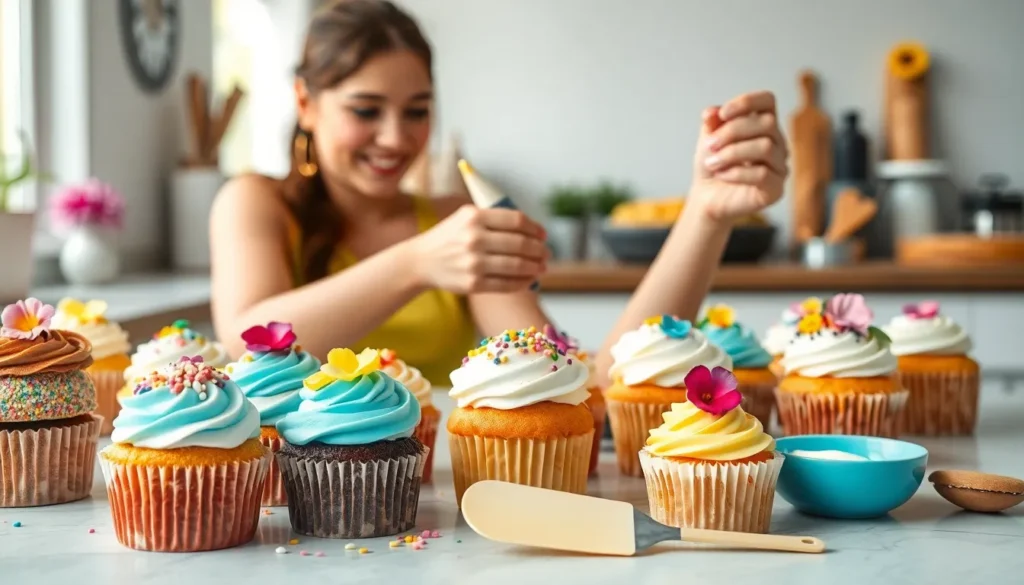
We’ve all been there – staring at a batch of freshly baked cupcakes wondering how to transform them from simple treats into stunning showstoppers. Decorating cupcakes isn’t just about making them look pretty; it’s about creating edible art that brings joy to every celebration.
Whether you’re planning a birthday party or just want to elevate your weekend baking, mastering cupcake decoration opens up endless creative possibilities. From classic buttercream swirls to intricate fondant designs, we’ll guide you through proven techniques that work every time.
The best part? You don’t need expensive tools or years of experience to create professional-looking results. With a few simple supplies and our foolproof methods, you’ll be decorating cupcakes like a pro in no time. Let’s jump into the sweet industry of cupcake artistry and discover how easy it is to make your treats truly unforgettable.
Essential Tools and Equipment for Cupcake Decorating
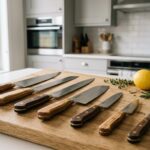
Having the right tools transforms ordinary cupcakes into stunning works of art. We’ll guide you through the must-have equipment that makes professional-quality decorating accessible to every home baker.

Unique Decorating Piping Tip Set : This Large decorating piping tip set includes a variety of cake decorating piping tips: 1A, 1E, 1M, 1C, 6B, 195,356, 853, and 9FT, providing you with professional-grade cake decoration tools for making cupcakes, cookies, and cakes at home.

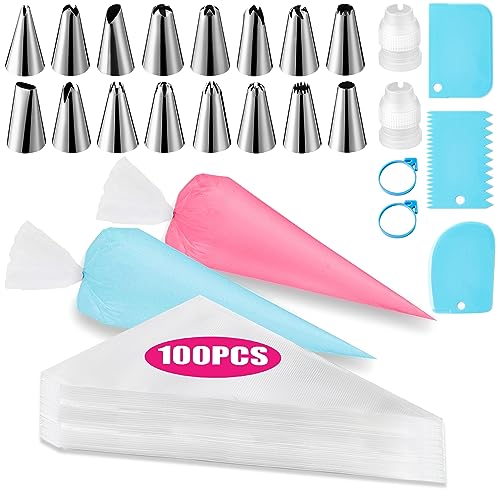
Riccle Piping Bags and Tips Set, 11.8 Inch 100 Anti Burst Piping Bags, 124 Pcs Cake Decorating Kit with 16 Piping Tips, 1 Reusable Pastry Bags, 3 Cake Scrapers

Complete Cake Decorating Kit: Includes 10 XL frosting nozzles and 20 icing pastry bags, giving you everything for professional-level cupcake, cookie, and cake decorating at home.
Basic Decorating Tools
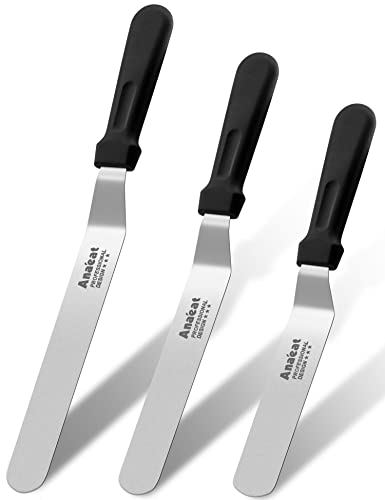
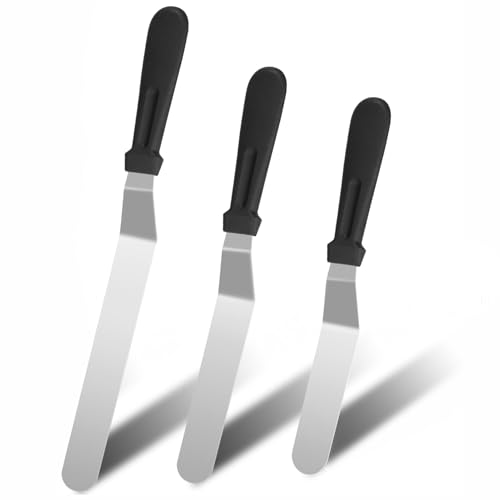
We recommend starting with an offset spatula for smooth buttercream application and clean edges. This angled tool allows us to spread frosting evenly while maintaining control over texture and height.
A bench scraper becomes invaluable when creating perfectly smooth sides on frosted cupcakes. We use this flat metal tool to achieve that bakery-quality finish by gently scraping excess frosting while rotating the cupcake.
Small spoons and teaspoons help us create simple swirls and peaks in our frosting. These everyday kitchen tools work wonderfully for beginners who want to practice basic techniques before investing in specialized equipment.
Food coloring gels provide vibrant colors without thinning our frosting consistency. We prefer gel colors over liquid versions because they maintain the proper texture while delivering intense color payoff.
Piping Tips and Bags
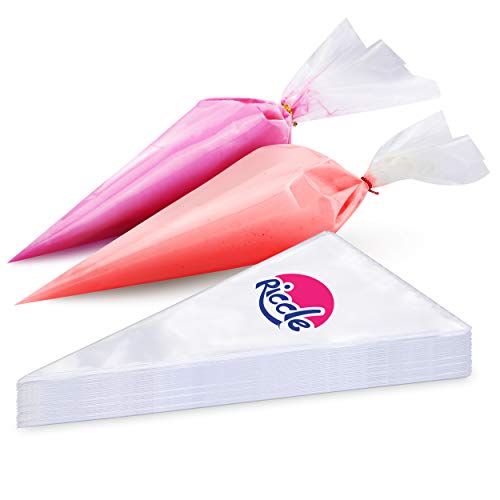
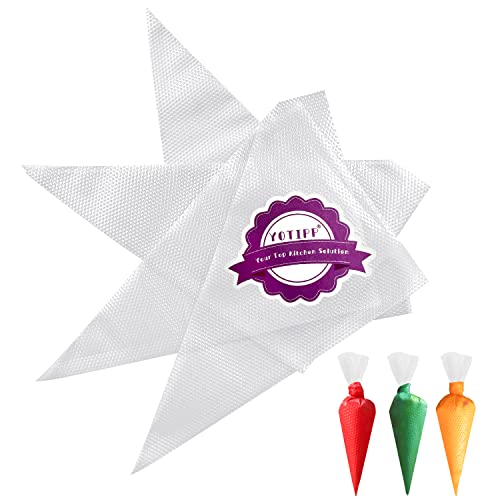
Disposable piping bags offer convenience and hygiene for our decorating projects. We fill these plastic bags with frosting and twist the top to create pressure for consistent piping results.
Round tips in various sizes create dots, writing, and outline work on our cupcakes. We keep sizes 2, 4, and 8 on hand for different detail levels and text applications.
Star tips produce beautiful rosettes, borders, and textured surfaces. The classic 1M tip creates perfect swirled frosting tops while smaller star tips add delicate accent details.
Leaf tips allow us to pipe realistic foliage and nature-inspired decorations. We use these specialized tips to create buttercream flowers, vines, and botanical elements that bring our cupcakes to life.
Petal tips open up endless possibilities for buttercream roses and flower decorations. These flat, teardrop-shaped openings help us layer petals naturally for stunning floral designs.
Specialty Equipment
A turntable elevates our decorating precision by allowing smooth rotation while we work. We place cupcakes on this spinning platform to achieve even frosting distribution and consistent piping angles.
Silicone molds create fondant decorations, chocolate accents, and sugar paste elements. We press these flexible tools into service when we want three-dimensional decorations that stand out from traditional piping.
Edible glitter and pearl dust add glamorous finishing touches to our creations. We dust these shimmery products over completed decorations for special occasions and elegant presentations.
Cookie cutters work beyond cookies to create fondant shapes and chocolate decorations. We roll fondant thin and cut out stars, hearts, and themed shapes that complement our cupcake designs.
Fine-tipped brushes help us apply edible paint, dust details, and blend colors on our decorations. These precision tools give us control when adding intricate artwork or color gradients to our cupcake surfaces.
Ingredients for Cupcake Decorating

Now that we have our essential tools ready, let’s gather the key ingredients that will bring our cupcake decorations to life. The right combination of frosting components and decorative elements makes all the difference in achieving professional results.
PERFECT BALANCE BETWEEN STIFFNESS & FLEXIBILITY: Anaeat Spatula gives you more control when icing your cake. The Professional Angled cake spatula is good to move easier when frosting cake. Great for frosting and smoothing icing on cakes to keep your hands and finger away from the icing.

Perfect for icing cakes, brownies, and other pan baked goods

ANGLED OFFSET DESIGN FOR SMOOTH FROSTING: The offset blade keeps your hands away from the cake, allowing better control and cleaner finishes. Easily frost cake tops, sides, cupcakes, and hard-to-reach areas without smudging.
Frosting Ingredients
We recommend starting with classic buttercream as our foundation since it provides the perfect canvas for any decorating technique. Our go-to recipe requires 1 cup of butter at room temperature for optimal mixing consistency. 2 cups of powdered sugar creates the sweet base that holds everything together beautifully.
Milk or cream adjusts the frosting to our desired consistency – we add it gradually until we achieve the perfect texture for piping or spreading. The amount varies depending on humidity and temperature, so we always add small amounts at a time.
Decorative Elements
Piping tips transform basic frosting into stunning designs with minimal effort. The Wilton 1M tip excels at creating rosettes and classic swirls that look professionally crafted. For beautiful easy swirls, we rely on the Wilton 8B tip which produces consistent results every time.
The Ateco 849 tip opens up possibilities for wide swirls and elegant ruffled designs that add sophisticated texture to our cupcakes. Sprinkles in various colors and shapes provide instant visual impact and can match any party theme or seasonal celebration.
Edible flowers elevate our cupcakes to an elegant level that impresses guests at special occasions. These delicate decorations work particularly well for weddings, baby showers, or sophisticated dinner parties.
Food Coloring Options
Liquid food coloring offers convenience for basic color needs, requiring just a few drops to tint our frosting. We add it gradually while mixing to achieve the exact shade we want.
Gel or paste colors deliver more vibrant and intense colors without thinning our frosting consistency. These concentrated options work especially well when we need bold, saturated hues that make our cupcakes pop visually.
Preparing Your Cupcakes for Decorating

Before we jump into the creative aspects of decorating, we need to ensure our cupcakes have the perfect foundation. Proper preparation creates a stable canvas that makes decorating easier and produces professional-looking results.

High Quality Cake Scraper: Teenitor cake smoother is made from high grade PP plastic to guard your healthy and safe life. Very sturdy and easy to use. High-quality plastic that can withstand repeated use and cleaning

Versatile kitchen essential — This multipurpose stainless steel bench scraper chops dough, portions bread/pizza, cuts brownies, and scrapes flour off your work surface for baking and meal prep.Or used as a smoother for cake decorating or batter spreader.

High-quality Materials: Our cake scraper smoother is made of stainless steel material, non-toxic and odorless, thick, safe to use, easy to clean, can be used for a long time
Cooling Your Cupcakes
Allow cupcakes to cool completely in the pan for about 5 minutes after baking. This initial cooling period prevents the delicate crumb structure from breaking apart when we move them. Transfer the cupcakes to a wire rack and let them cool completely before decorating. Hot or warm cupcakes will cause buttercream to melt and slide off, ruining our decorative efforts.
Freeze cupcakes for 30 minutes if they seem particularly fragile or crumbly. This optional step makes handling much easier and prevents the cake from tearing during the decorating process. Frozen cupcakes also provide a firmer surface that holds piped decorations better.
Room temperature cupcakes work best for most decorating techniques, but slightly chilled cupcakes give us more control when working with delicate designs.
Leveling and Trimming
Level each cupcake using a serrated knife to create an even surface. We slice off any domed tops that rose during baking to ensure our decorations sit flat and stable. Uneven surfaces make piping difficult and can cause decorative elements to slide or look lopsided.
Trim excess cake from the edges if needed to create clean lines around the perimeter. This step becomes especially important when we plan to use fondant decorations or want crisp geometric designs. Sharp edges give our finished cupcakes a bakery-quality appearance.
Store prepared cupcakes in an airtight container at room temperature for up to 24 hours before decorating. This timing allows us to batch our preparation work while maintaining optimal cake texture for decoration.
Basic Frosting Techniques

Mastering fundamental frosting techniques forms the foundation of professional cupcake decorating. We’ll explore three essential methods that transform plain cupcakes into beautifully finished treats.

QUALITY YOU CAN SEE: Our high quality liqua-gel food colorings are true-to-shade and add vibrant, fade-resistant color to your desserts without altering the taste, texture or consistency of the final product.
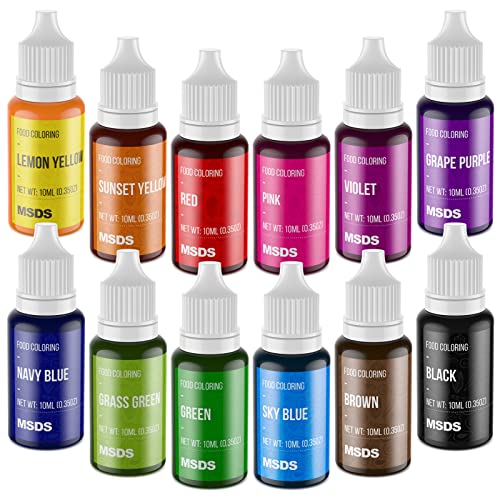
VIVID COLORS FOR CAKE DECORATING - Comes with 12 virbant color highly concentrated edible food coloring in a wide range of bright vivid colors. Includes: Lemon Yellow, Sunset Yellow, Grass Green, Violet, Grape Purple, Navy Blue, Sky Blue, Red, Brown, Pink, Green and Black. (each color is 0.35 fl.oz). You just need a little bit coloring to get the bright color you want. Colors could be mixed together to create new shades

Superior coloring strength over any other food color
Smooth Buttercream Application
We begin by frosting one cupcake at a time with a fairly thick layer of buttercream icing. This generous application ensures complete coverage while providing enough material to work with during the smoothing process.
Apply the buttercream directly to the center of the cupcake using either a piping bag or offset spatula. Spread the icing outward from the center using gentle circular motions. The key lies in maintaining consistent pressure throughout the application process.
Ensure the icing covers the entire cupcake surface completely. Work methodically to eliminate any gaps or thin spots that might compromise the final appearance. A properly frosted cupcake should have an even layer that extends slightly beyond the cupcake’s edge.
Simple Spreading Methods
An offset spatula serves as our primary tool for achieving smooth and professional results. The angled blade allows for better control and prevents our knuckles from dragging through the frosting.
Position the spatula at a 45-degree angle to the cupcake surface. Apply gentle but steady pressure while rotating the cupcake slowly with your other hand. This technique creates an even distribution without disturbing the cupcake’s structure.
Continue spreading until the frosting reaches a uniform thickness across the entire surface. The final result should appear seamless with no visible spatula marks or uneven areas.
Creating Texture with a Spatula
Transform smooth frosting into artistic designs using simple spatula techniques. Hold the spatula at an angle and move it in a circular motion to create a textured swirl on top of the cupcake. This method adds visual interest while maintaining the frosting’s structural integrity.
Create elegant ruffles by using the edge of the spatula in a press and lift motion. Start at one edge of the cupcake and work across the surface in a continuous pattern. Each gentle press followed by an upward lift creates individual ruffle segments that combine into an attractive overall design.
Practice these movements on a test surface before applying them to finished cupcakes. The key to success lies in maintaining consistent pressure and rhythm throughout each technique.
Piping Techniques for Cupcake Decorating

Piping techniques elevate cupcake decorating from simple frosting application to artistic expression. These methods transform basic buttercream into elegant designs that rival professional bakery creations.

VALUE FOR MONEY SET: Cake piping bags and tips contains 12 kinds of decoration tips, 2 couplers, 1 reusable silicone piping bags, and 100 disposable pastry bags. The extremely high cost performance allows you to start creating like a professional quickly.
Thick Pastry Bags: Did your previous bags leaked? Are you afraid to squeeze them? Not now! Made of durable, anti-burst, non-slip and food grade plastic that is flexible, strong, reliable and thick enough to bear pressure of squeezing and frosting without any burst or leakage

Affordable Piping Bags Combo: Package include 100 x disposable pastry bags, 1 x silicone pastry bags, 12 x stainless steel decorating tips, 3 x plastic scrapers, 1 x frosting couplers, 2 x piping bag ties. No matter your pro or novice, this affordable pack could meet your need.
Basic Piping Skills
We hold the piping bag at a 90-degree angle to the cupcake surface for most decorating techniques. This angle provides optimal control and creates consistent results across different piping styles.
Pressure control becomes essential for managing frosting flow and achieving uniform designs. We apply steady pressure while moving the bag smoothly to dispense the right amount of buttercream for each technique.
Practice with consistent movements helps develop muscle memory for professional-looking results. We recommend starting with simple designs before progressing to more complex patterns.
Creating Rosettes and Swirls
The rosette technique uses either a Wilton 1M or Ateco 844 tip to create elegant flower-like designs. We start in the center of the cupcake and apply steady pressure while swirling outward to form the rosette pattern.
For classic swirls that resemble soft serve ice cream we begin piping on the outer edge with a 1M tip. We build layers by spiraling inward until reaching the center while maintaining consistent pressure throughout the motion.
Both techniques require smooth continuous movements to achieve the desired visual effect. We find that practicing the motion without frosting first helps perfect the technique before decorating actual cupcakes.
Star Tips and Border Techniques
Open star patterns use a 4B tip to create decorative elements across the cupcake surface. We pipe individual stars in patterns or clusters to add texture and visual interest to our designs.
The open star swirl combines the star tip with swirling motion for unique textures. We start on the outer edge with the 4B tip and spiral toward the center while maintaining the star pattern throughout the design.
| Piping Tip | Technique | Best Use |
|---|---|---|
| 1M | Rosettes & Swirls | Classic designs |
| 2D | Advanced swirls | Professional look |
| 4B | Open stars | Textured patterns |
Border techniques frame cupcakes beautifully and provide clean finished edges. We use star tips to create borders around the cupcake perimeter for polished presentations.
Writing and Detail Work
Small round tips like #1 or #2 enable precise writing and message creation on cupcake surfaces. We use these tips for personalized messages birthday greetings or special occasion text.
Detail work requires finer tips for intricate designs and small decorative elements. We create features like eyes mouths or delicate flourishes using these precision tools.
Steady hand control becomes crucial for writing and detail work success. We recommend practicing letter formation and small design elements on parchment paper before decorating cupcakes directly.
Advanced Decorating Methods

We move beyond traditional piping techniques to explore sophisticated decorating methods that transform ordinary cupcakes into professional masterpieces. These advanced approaches require minimal additional investment but deliver stunning visual impact.

PROFESSIONAL SILICONE PASTRY BAGS: Compared with others,ELK's piping bags uses the 60HA elastic silicone, which is the perfect material for the piping tips set. The slight elasticity ensures its reusability, allowing the viscous liquids to flow smoothly inside. It won’t blow out even if you knead the thick batter with it. Its high stretchiness means that all of the squeezing efforts you make gets transferred to bulging sides as it stretches out, instead of forcing the frosting out the bottom.

47 PCS RUSSIAN PIPING TIPS SET: Includes: 12 flower frosting tips nozzles Icing tips for cake decorating tips kit. Baking supplies for cookie cupcake, 2 leaf piping tips, 2 couplers, 30 pastry baking bags, 1 reusable silicone bag. Our 47 russian piping tips set let you have everything you need to decorating your cupcakes, cakes, cookies, pastries etc!

1. Versatile Design: Our stainless steel piping tips offers unparalleled versatility for your baking endeavors.Each frosting tips is carefully selected to provide a diverse range of decorating options.The piping tips set includes a round plain tip for classic borders and outlines,an open star tip for beautiful swirls and rosettes,a closed star tip for intricate designs and textures,a drop flower tip for delicate floral embellishments,and a french star tip for unique patterns and accents.With these large piping tips, you'll mees all your needs.
Fondant Decorations
Working with fondant opens endless possibilities for creating elegant cupcake toppers. We roll fondant to approximately 1/8 inch thickness and use cookie cutters to create shapes that complement our cupcake theme. Fondant figures require patience but allow us to create detailed characters or decorative elements that sit beautifully atop buttercream frosting.
The fondant wrapping technique creates a smooth polished finish around the entire cupcake. We measure each cupcake circumference and cut fondant strips accordingly leaving extra length for overlap. Brushing the cupcake surface with simple syrup helps the fondant adhere properly and prevents air bubbles.
Store-bought fondant works well for beginners while homemade marshmallow fondant offers superior taste and flexibility. We recommend kneading food coloring into fondant before rolling to achieve even color distribution throughout the decoration.
Chocolate Drizzles and Ganache
Melted chocolate creates sophisticated finishing touches that elevate cupcake presentation dramatically. Chocolate drizzles require precise temperature control – we heat chocolate to 88-90°F for optimal flow consistency. Using a spoon or squeeze bottle we create artistic patterns that harden within minutes at room temperature.
Ganache topping transforms cupcakes into decadent desserts worthy of fine bakeries. We combine equal parts heavy cream and chocolate heating the cream to just below boiling before pouring over chopped chocolate. The resulting mixture should coat the back of a spoon smoothly.
For ganache application we dip each cupcake face-down into the mixture then lift straight up allowing excess to drip off. This technique creates perfectly smooth tops with professional appearance. We can enhance ganache with vanilla extract butter or liqueurs for complex flavor profiles.
Edible Glitter and Sprinkles
Strategic application of edible glitter adds glamour without overwhelming the overall design. We apply glitter while frosting remains slightly tacky ensuring maximum adherence. Mixing glitter with a small amount of clear extract creates a paste that we can brush onto exact areas for controlled placement.
Sprinkles offer versatility beyond simple scattering – we press them into frosting sides for textured borders or arrange them in patterns for geometric designs. Nonpareils create subtle texture while larger shapes make bold statements.
| Decoration Type | Best Application Time | Storage Life |
|---|---|---|
| Edible Glitter | Within 5 minutes of frosting | 12+ months |
| Nonpareils | Immediately after frosting | 6-8 months |
| Shaped Sprinkles | Before frosting sets | 8-10 months |
Combining multiple advanced techniques creates layered visual interest. We might apply ganache as a base then add fondant cutouts and finish with strategic glitter placement for maximum impact.
Theme-Based Cupcake Decorating Ideas

Choosing the right theme transforms our cupcakes from simple treats into memorable centerpieces that capture the spirit of any celebration. We can organize our decorating approach around three main categories that cover most occasions throughout the year.

Three Versatile Sizes for Precision and Flexibility This set includes three offset spatulas with blade lengths of 6 inches, 8 inches, and 10 inches, giving you the flexibility to handle various baking and decorating tasks with ease. The 6-inch cake spatula is perfect for detailed work, such as spreading frosting on cupcakes or small pastries. The 8-inch blade is ideal for mid-sized cakes, while the 10-inch icing spatula excels in decorating larger tiered cakes, ensuring a smooth, professional finish every time
【MULTIPLE SIZES] Icing spatula set comes in Three different sizes 6, 8, 10 inches for different applications. It's great for icing cakes, cheese, pizzas, sandwiches, even cutting curds. This is your best choice to decorate a cake perfectly.

Two Professional Cake Decorating Spatulas: PUCKWAY offset spatula set comes in two different sizes: 6 inch and 8 inch blade. This is your best choice to decorate a cake perfectly.
Holiday Decorations
Christmas cupcakes become magical when we combine red and green frosting with carefully crafted fondant holly leaves. We pipe snowflakes using star tips to create delicate winter patterns that sparkle under warm lighting. The key lies in balancing traditional colors with creative piping techniques that bring festive joy to every bite.
Halloween offers us exciting opportunities to experiment with bold orange and black color combinations. We create spiders and bats from dark fondant while creating jack o lantern faces using simple piping techniques. These designs work especially well when we add edible glitter for an extra spooky shimmer that catches the eye.
Easter celebrations call for soft pastel frosting colors that evoke springtime renewal. We shape fondant into miniature Easter eggs and adorable bunnies that sit perfectly atop our cupcakes. The gentle color palette creates an elegant presentation that appeals to both children and adults at family gatherings.
Birthday Party Themes
Princess themed cupcakes transport us into a industry of royal elegance with pink and purple frosting swirls. We create stunning crowns and tiaras from sugar or fondant that add height and drama to our presentations. These decorative elements work best when we pipe rosettes underneath to create a regal foundation that supports the royal accessories.
Superhero themes demand bold color choices that capture the energy and excitement of comic book adventures. We create superhero logos and flowing capes from fondant while using vibrant frosting colors that pop against darker backgrounds. The contrast creates visual impact that matches the powerful themes we want to convey.
Seasonal Designs
Spring decorating focuses on nature’s awakening with colorful fondant flowers that bloom across our cupcake surfaces. We add delicate bees and butterflies that seem to dance around the floral arrangements. These elements create movement and life that perfectly captures the season’s vibrant energy.
Summer cupcakes transport us to beach destinations with fondant seashells and tiny sunglasses that evoke vacation memories. We create beach balls using striped frosting techniques that add playful texture to our designs. The bright colors and fun accessories create an instant mood lift that brings sunshine to any gathering.
Autumn decorating embraces warm orange and yellow frosting that mirrors changing leaves. We shape fondant into realistic leaves and acorns that cluster naturally across our cupcake tops. These earthy elements create cozy presentations that celebrate harvest season and family traditions.
Troubleshooting Common Decorating Problems

Even experienced bakers encounter decorating challenges that can turn a beautiful cupcake project into a frustrating experience. We’ll address the most common problems and provide practical answers to help you achieve professional results every time.

Premium Stainless Steel Blade: High-strength, heat-resistant, and durable stainless steel ensures long-lasting performance and easy cleaning for cake finishing.

Package includes: 1 stainless steel cake scraper, size is 12*3.2*0.04 inches, with measuring scale design, which can bring you a lot of convenience

Ergonomic and Comfortable design for continuous professional daily use in bakeries, pizzerias, or even your home kitchen
Fixing Frosting Issues
Runny frosting ranks among the most frustrating decorating problems we encounter. When your buttercream refuses to hold its shape, gradually add powdered sugar one tablespoon at a time until the consistency improves. The frosting should hold peaks without drooping when you lift your spatula.
Overly thick frosting creates the opposite challenge but proves equally problematic. Add liquid ingredients sparingly to achieve the perfect consistency. We recommend starting with one teaspoon of milk or cream, mixing thoroughly before adding more. Heavy cream works better than milk for maintaining stability while thinning the texture.
Temperature affects frosting consistency more than most bakers realize. Warm kitchens cause buttercream to soften and lose structure. Place your frosting bowl in the refrigerator for 15-20 minutes to firm up the mixture. Cold frosting pipes more easily and maintains sharp decorative details.
| Frosting Problem | Solution | Amount to Add |
|---|---|---|
| Runny frosting | Powdered sugar | 1 tablespoon at a time |
| Thick frosting | Heavy cream or milk | 1 teaspoon at a time |
| Too warm | Refrigerate | 15-20 minutes |
Dealing with Messy Decorations
Air bubbles in piping bags create uneven frosting flow and unpredictable decorating results. Twist the top of your piping bag tightly and squeeze gently to push air toward the tip before you begin decorating. We always test our piping pressure on parchment paper first to ensure smooth frosting flow.
Frosting smudges happen when decorations shift or when our hands accidentally touch wet buttercream. Clean smudges immediately with a small offset spatula or knife tip. Fresh frosting can cover minor imperfections when applied with gentle dabbing motions rather than spreading movements.
Crooked or uneven decorations often result from inconsistent piping pressure or hand movement. Practice maintaining steady pressure while moving your piping bag in smooth, controlled motions. We recommend practicing basic techniques on parchment paper until muscle memory develops.
Collapsed decorations indicate frosting that’s too soft or piping bags filled beyond capacity. Fill piping bags no more than two-thirds full to maintain proper pressure control. Room temperature buttercream should feel firm enough to hold its shape when squeezed through decorating tips.
Storage and Transportation Tips

Proper storage and transportation preserve our beautifully decorated cupcakes and maintain their professional appearance from kitchen to celebration. We must allow our frosted cupcakes to set at room temperature for 1 to 2 hours before attempting to store them. This setting time prevents smudging and helps decorations maintain their shape during handling.

12 Colors Included: Comes with Kelly Green, Copper, Brown, Black, Burgundy, Violet, Royal Blue, Teal, Lemon Yellow, Golden Yellow, Pink, and No-Taste Red

🌈Gel Food Coloring Liquid Set: Enjoy a variety of vibrant shades with our 12-color liquid natural food coloring set: Red, Black, White, Cherry Red, Pink, Brown, Lemon Yellow, Sunset Yellow, Grape Purple, Sky Blue, Grass Green, Green; each bottle contains 6ml/0.25 fl oz of high-quality; Colors could be mixed two or more colors together to create a new shades

Consistency Preserved: Keep your cake batter and icing intact with this gel-based color formula. These liquid food coloring won't change textures and alter the consistency of your creations.
Storing Decorated Cupcakes
Our decorated cupcakes require airtight containers to prevent drying and preserve freshness. We recommend storing cupcakes in single layers whenever possible to avoid damage to decorations. Refrigeration becomes necessary when our frosting contains perishable ingredients or when environmental temperatures rise above comfortable room temperature levels.
Temperature considerations play a crucial role in maintaining cupcake quality. We should bring refrigerated cupcakes to room temperature before serving to restore optimal texture and flavor. Cold cupcakes often taste dense and less flavorful than those served at proper temperature.
Transportation Methods
Cupcake carriers and sturdy boxes with fitted inserts provide the best protection during transport. We recommend using carriers specifically designed for cupcakes as they prevent movement and maintain proper spacing between treats. Standard cardboard boxes work well when fitted with proper inserts that hold each cupcake securely in place.
Transport considerations become especially important for elaborately decorated cupcakes. We must transport cupcakes with tall or intricate decorations in single layers to prevent crushing or damage. Stacking boxes containing decorated cupcakes often results in ruined designs and disappointed recipients.
Best Practices for Safe Transport
Level transportation prevents sliding and maintains the integrity of our decorative work. We keep transport boxes away from direct sunlight and heat sources that could melt frosting or cause decorations to droop. Vehicle air conditioning helps maintain stable temperatures during warm weather transport.
Planning our transport route minimizes handling time and reduces opportunities for damage. We secure boxes properly in vehicles to prevent shifting during turns or sudden stops. These precautions ensure our decorated cupcakes arrive at their destination looking as stunning as when they left our kitchen.
Conclusion
Now you’re equipped with all the essential knowledge to transform ordinary cupcakes into stunning masterpieces. We’ve covered everything from basic frosting techniques to advanced decorating methods that’ll help you create professional-looking results every time.
Remember that practice makes perfect when it comes to cupcake decorating. Don’t be discouraged if your first attempts don’t look exactly like you envisioned – even professional bakers had to start somewhere. The key is to keep experimenting with different techniques and themes until you find your signature style.
Your decorated cupcakes are ready to become the centerpiece of any celebration. Whether you’re creating themed treats for holidays or elegant designs for special occasions we’re confident you’ll impress everyone with your newfound decorating skills.
Upgraded Thickened Material: Strong and sturdy material makes it stronger to withstand pressure

Upgraded thick piping bag: Made of durable, burst, slip resistant, food grade plastic, flexible, strong, reliable, thick enough to withstand extrusion and frost pressure, no burst, no leakage do not be afraid to squeeze the bag. Make your baking time better.
Cake Decorating Kit: Package include 100 x piping bags disposable, 16 x stainless steel frosting tips, 2 x frosting couplers, 2 x piping bag ties, 3 x plastic scrapers. You will have all the necessary tools to decorate delectable cakes.
Frequently Asked Questions
What essential tools do I need to start decorating cupcakes?
You’ll need basic tools like an offset spatula, bench scraper, small spoons, disposable piping bags, and various piping tips. Food coloring gels are recommended over liquid colors for vibrant results. Optional specialty equipment includes a turntable for easier decorating and edible glitter for added sparkle. These tools make professional-quality decorating accessible without expensive equipment.
How should I prepare cupcakes before decorating?
Always let cupcakes cool completely before decorating to prevent melting buttercream. For fragile cupcakes, freeze them briefly for easier handling. Level the tops with a serrated knife to create an even surface for professional-looking results. Store prepared cupcakes in an airtight container at room temperature for optimal texture before decorating.
What’s the best frosting for cupcake decorating?
Classic buttercream is the foundational frosting for cupcake decorating. It’s easy to make, pipes beautifully, and holds its shape well for various decorating techniques. Buttercream works perfectly with different piping tips to create stunning designs like rosettes, swirls, and borders. It also accepts food coloring easily for customized colors.
How do I achieve smooth buttercream application?
Apply a thick layer of buttercream to each cupcake, ensuring complete coverage. Use an offset spatula to spread the frosting evenly across the surface. Work with one cupcake at a time for best results. Practice consistent pressure and smooth movements to achieve professional-looking results that form the foundation for more advanced decorating techniques.
What piping tips are best for beginners?
Start with the Wilton 1M tip for beautiful rosettes and swirls, and the Ateco 844 tip for different textures. Star tips create lovely open star patterns and borders. Small round tips are perfect for writing messages and detail work. These versatile tips cover most basic decorating needs and help build fundamental piping skills.
How do I fix common frosting problems?
For runny buttercream, add more powdered sugar or chill briefly. If it’s too thick, add small amounts of milk or cream. Temperature affects consistency, so work in a cool environment. For messy decorations, practice pressure control and steady movements. Remove air bubbles from piping bags before use to prevent uneven flow.
How should I store decorated cupcakes?
Allow frosted cupcakes to set at room temperature before storing. Use airtight containers, preferably storing cupcakes in single layers to avoid damage. Refrigerate cupcakes with perishable ingredients or in warm conditions. For transportation, use cupcake carriers or sturdy boxes with inserts to prevent movement and protect decorations during transport.
What advanced techniques can make my cupcakes look professional?
Try fondant decorations for elegant toppers, chocolate drizzles and ganache for artistic patterns, and strategic use of edible glitter and sprinkles for glamour. Combine multiple techniques for layered visual interest. Practice fondant rolling and cutting techniques, master ganache consistency, and learn proper application methods for professional-quality results.