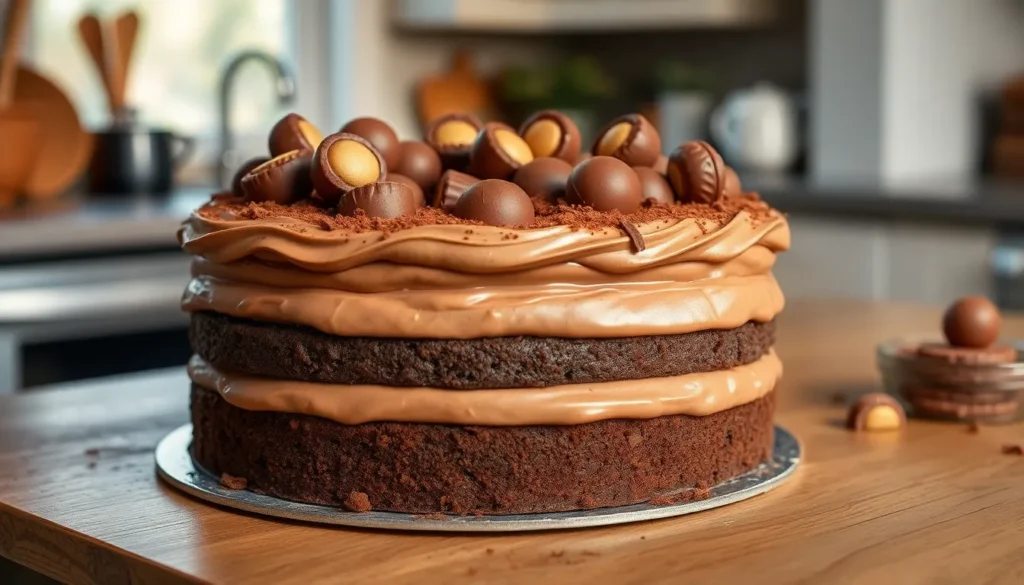
We’ve discovered the ultimate crowd-pleaser that’ll have everyone asking for seconds – Malteser cake! This decadent chocolate creation combines the beloved crunchy malt balls with rich, moist chocolate cake layers, creating a dessert that’s pure indulgence in every bite.
What makes this cake absolutely irresistible is how those iconic Maltesers add the perfect textural contrast. The crispy honeycomb centers and smooth chocolate coating create delightful pockets of crunch throughout each forkful. Whether you’re celebrating a birthday, hosting a dinner party, or simply treating yourself to something special, this show-stopping dessert delivers both visual wow-factor and incredible flavor.
Ingredients
We’ve carefully selected each ingredient to create the perfect balance of chocolate richness and malty crunch. Our recipe breaks down into three essential components that work together harmoniously.
For the Chocolate Cake
- 1¾ cups all-purpose flour
- 2 cups granulated sugar
- ¾ cup unsweetened cocoa powder
- 2 teaspoons baking soda
- 1 teaspoon baking powder
- 1 teaspoon salt
- 2 large eggs at room temperature
- 1 cup buttermilk
- 1 cup strong black coffee cooled
- ½ cup vegetable oil
- 1 teaspoon vanilla extract
For the Malteser Buttercream
- 1 cup unsalted butter softened
- 4 cups powdered sugar sifted
- ¼ cup heavy cream
- 2 teaspoons vanilla extract
- ¼ teaspoon salt
- 1 cup Maltesers crushed into small pieces
- 2 tablespoons malted milk powder
For Decoration
- 2 cups whole Maltesers
- ½ cup mini Maltesers
- 2 tablespoons chocolate shavings
- 1 tablespoon cocoa powder for dusting


Equipment Needed

Creating the perfect Malteser cake requires the right tools to achieve professional results. We recommend gathering all equipment before starting to ensure a smooth baking process.
Essential Mixing Equipment
- Large mixing bowls for combining ingredients separately
- Stand mixer or hand mixer for creaming butter and sugar effectively
- Measuring cups and spoons for precise ingredient ratios
- Whisk for incorporating wet ingredients smoothly
- Flexible spatula for folding and scraping bowl sides clean
Baking and Preparation Tools
- Two round cake tins (18 cm or 20 cm diameter work best)
- Parchment paper for lining cake tins and preventing sticking
- Cooling racks for proper air circulation during cooling
- Fine mesh sieve for sifting dry ingredients
Decorating Equipment
- Piping bags with round tips for buttercream application
- Offset spatula for spreading frosting evenly
- Cake scraper for achieving smooth sides and professional finish
- Small bowl for crushing Maltesers into desired sizes
| Equipment Category | Essential Items | Optional Upgrades |
|---|---|---|
| Mixing | Large bowls, mixer, measuring tools | Stand mixer with paddle attachment |
| Baking | Round tins, parchment paper | Non-stick cake tins |
| Decorating | Spatulas, piping bags | Turntable, multiple piping tips |
Having quality equipment makes the difference between a good cake and an exceptional one. We find that investing in proper cake tins and a reliable mixer ensures consistent results every time we bake this showstopping dessert.


Instructions

Now we’ll guide you through each step to create this stunning Malteser cake. Follow our detailed instructions to achieve perfect results every time.
Prep Work
We begin by gathering all ingredients for both the chocolate cake and Malteser buttercream. Room temperature butter ensures optimal mixing results while sifted dry ingredients create a smoother batter. Our cake requires butter or baking spread, caster sugar, light brown sugar, eggs, milk, vanilla extract, all-purpose flour, cocoa powder, malt powder (such as Ovaltine or Horlicks), and baking powder. For the buttercream, we need softened butter, powdered icing sugar, malt powder, vanilla extract, milk, and melted chocolate for enhanced flavor. Prepare your cake tins by greasing and lining with parchment paper before starting.
Making the Chocolate Cake
We start by creaming butter and sugars until the mixture becomes light and fluffy. This process typically takes 3-4 minutes with an electric mixer. Next, we whisk together eggs, milk, and vanilla extract in a separate bowl before gradually adding this mixture to our creamed butter and sugars.
Sift flour, cocoa powder, malt powder, and baking powder together to eliminate lumps and ensure even distribution. We then gently fold or whisk these dry ingredients into our wet mixture until the batter appears smooth and well combined. Avoid overmixing to prevent a tough cake texture.
Pour the batter evenly between prepared pans and bake at 350°F (180°C). Baking time ranges from 45-60 minutes depending on pan size. We test for doneness by inserting a skewer into the center – it should come out clean when the cake is ready. Allow cakes to cool completely in their pans before removing.
Preparing the Malteser Buttercream
We begin by creaming softened butter until it becomes light and airy. Beat in powdered sugar and malt powder gradually until the mixture appears smooth and well incorporated. The consistency should be spreadable but hold its shape when piped.
Add milk as needed to achieve the desired texture. For richer flavor, we melt chocolate separately, allow it to cool slightly, then mix it into our buttercream. This step adds depth and complements the Malteser flavor perfectly.
Assembly and Decoration
We level our cooled cakes by trimming any domed tops for even stacking. Cut layers horizontally if creating multiple tiers for added height and visual impact. Spread Malteser buttercream generously between each layer, ensuring even coverage to the edges.
Coat the entire outside of our cake with remaining buttercream using an offset spatula for smooth application. We then press whole Maltesers onto the top and sides of the cake, creating an impressive textural display. Some bakers prefer spreading Malteser chocolate spread as an additional topping or drizzle for extra indulgence.
Use a piping bag for neat edges and professional presentation. Chill the completed cake briefly before serving to make slicing easier and maintain structural integrity. Store in a cool place to preserve the buttercream’s consistency.


Directions for Best Results

Following proper techniques ensures our Malteser cake achieves the perfect texture and flavor balance. These essential guidelines help create professional results every time.
Temperature Tips
We recommend preheating the oven to 180°C (350°F) for optimal baking results. This temperature provides even heat distribution throughout the cake layers without causing the edges to overcook before the center sets.
Room temperature butter creates the foundation for successful mixing. We suggest removing butter from the refrigerator 1-2 hours before baking to achieve the proper consistency. Properly softened butter should yield slightly to gentle pressure without being too soft or melted.
Cold ingredients can cause the batter to seize or create lumpy textures. We ensure eggs and milk reach room temperature before incorporating them into our mixture for smooth blending.
Mixing Techniques
The creaming method forms the backbone of our chocolate cake preparation. We combine butter with both light brown sugar and caster sugar until the mixture becomes light and fluffy, typically requiring 3-4 minutes of vigorous mixing.
Dry ingredient preparation requires careful attention to avoid lumps. We blend flour, cocoa powder, and malt powder (Ovaltine or Horlicks) in a separate bowl before adding to the wet ingredients. This technique ensures even distribution throughout the batter.
Gradual incorporation prevents overmixing when adding wet ingredients. We slowly add eggs one at a time, followed by milk and hot water, mixing just until each addition becomes fully combined. Overmixing develops gluten and creates tough cake layers.
Storage Guidelines
Freezing cake layers extends their shelf life up to three months when properly wrapped. We wrap individual layers in plastic wrap followed by aluminum foil to prevent freezer burn and maintain moisture.
| Storage Method | Duration | Temperature |
|---|---|---|
| Room temperature thawing | 2-3 hours | 68-72°F |
| Fresh cake storage | 2-3 days | Room temperature |
| Frozen layers | 3 months | 0°F |
Thawing requires patience for best results. We allow frozen layers to reach room temperature naturally over 2-3 hours before decorating to preserve the cake’s structure and prevent condensation.
Fresh storage maintains optimal taste and texture. We consume our iced Malteser cake on the day of completion for peak flavor, though leftovers stay fresh in airtight containers for 2-3 days at room temperature.


Make-Ahead Instructions

Planning ahead transforms our Malteser cake baking experience into a stress-free try. We can prepare several components in advance to streamline the process and ensure perfect results when serving time arrives.
Preparing Sponge Layers in Advance
Our chocolate sponge layers freeze beautifully for extended storage. We recommend wrapping each cooled cake layer individually in plastic wrap, then placing them in freezer-safe bags or containers. These prepared layers maintain their quality for up to three months in the freezer.
When we’re ready to assemble our cake, we simply remove the frozen layers and allow them to defrost at room temperature. This thawing process typically takes 2-3 hours, depending on the thickness of our layers. The defrosted sponges will taste just as fresh as the day we baked them.
Assembly Timeline Recommendations
Timing plays a crucial role in achieving optimal freshness and presentation. We suggest assembling and decorating our Malteser cake as close to serving time as possible. This approach ensures the buttercream maintains its perfect texture and the Maltesers retain their satisfying crunch.
| Component | Make-Ahead Timeline | Storage Method |
|---|---|---|
| Sponge Layers | Up to 3 months | Wrapped and frozen |
| Assembled Cake | 3-4 days maximum | Airtight container |
| Buttercream | 2-3 days | Refrigerated, re-whip before use |
Short-Term Storage Strategy
Our completed Malteser cake stores well for immediate enjoyment. We can keep the fully assembled and decorated cake in an airtight container at room temperature for up to four days. This storage method preserves both the moisture of our chocolate layers and the texture of our Malteser decorations.
For best results, we avoid refrigerating the assembled cake unless absolutely necessary, as cold temperatures can affect the buttercream’s smooth consistency and the Maltesers’ crunch factor.


Serving Suggestions

We recommend warming individual slices of our Malteser cake slightly in the microwave for 15-20 seconds before serving to enhance the chocolate flavors and create a more indulgent experience. This gentle heating brings out the rich chocolate notes while maintaining the perfect texture contrast between the soft cake and crunchy Maltesers.
Our Malteser cake serves 10-15 people generously, making it an ideal centerpiece for celebrations and special occasions. We suggest cutting clean slices using a sharp knife wiped between cuts to maintain the cake’s beautiful presentation and prevent the buttercream from smearing.
For optimal presentation, we arrange whole Maltesers around each slice and dust lightly with cocoa powder just before serving. The visual appeal increases dramatically when we garnish individual plates with a few mini Maltesers and chocolate shavings scattered artfully around the base.
We find that serving this cake at room temperature provides the best flavor experience, as the buttercream remains smooth and the Maltesers maintain their satisfying crunch. Cold cake can mute the chocolate flavors, while overly warm cake may cause the buttercream to soften too much.
When hosting larger gatherings, we prepare the cake display by placing it on an elevated cake stand surrounded by additional Maltesers for guests to enjoy alongside their slices. This creates an impressive dessert station that becomes a conversation starter.
For children’s parties, we recommend cutting smaller portions and providing small bowls of extra Maltesers as a fun interactive element. The combination of cake and additional treats creates excitement while ensuring everyone gets their desired amount of the beloved malt balls.
We pair our Malteser cake beautifully with vanilla ice cream or fresh berries to balance the rich chocolate flavors. A cup of strong coffee or cold milk complements the sweet, malty notes perfectly for adult guests.


Conclusion
We’ve shown you how to create a show-stopping Malteser cake that’ll become your go-to dessert for special occasions. This recipe brings together the best of both worlds – rich chocolate cake layers and that irresistible malty crunch we all love.
The beauty of this cake lies in its versatility and make-ahead options. You can prepare components in advance and assemble when needed making it perfect for busy schedules. Whether you’re hosting a birthday party or simply treating yourself the combination of smooth buttercream and crispy Maltesers never fails to impress.
Remember that the key to success is using quality ingredients and following our temperature guidelines. With the right technique and a little patience you’ll have a bakery-quality dessert that’s sure to become a family favorite for years to come.
Frequently Asked Questions
What is a Malteser cake?
A Malteser cake is a rich chocolate dessert that combines layers of moist chocolate sponge with Malteser buttercream and decorative malt balls. The cake features a delightful contrast between the crispy honeycomb centers and smooth chocolate coating of Maltesers, creating an irresistible texture and flavor combination perfect for celebrations.
What ingredients do I need for a Malteser cake?
You’ll need ingredients for three components: chocolate cake (all-purpose flour, granulated sugar, cocoa powder, butter, eggs), Malteser buttercream (unsalted butter, powdered sugar, crushed Maltesers), and decorations (whole Maltesers, mini Maltesers, chocolate shavings, cocoa powder). This combination ensures the perfect balance of chocolate richness and malty crunch.
What equipment is essential for making a Malteser cake?
Essential equipment includes mixing tools (large bowls, stand or hand mixer, measuring cups, whisk, spatula), baking items (two round cake tins, parchment paper, cooling racks, fine mesh sieve), and decorating tools (piping bags, offset spatula, cake scraper). Quality equipment significantly enhances your baking experience and ensures consistent results.
How should I store a Malteser cake?
Store the fully assembled cake in an airtight container at room temperature for up to 4 days. Cake layers can be frozen for up to 3 months when wrapped in plastic wrap. The buttercream can be refrigerated for 2-3 days and re-whipped before use. Consume freshly iced cake on the day of completion for best results.
Can I make a Malteser cake ahead of time?
Yes! Prepare sponge layers in advance by wrapping cooled layers in plastic wrap and freezing for up to 3 months. Defrost at room temperature when ready to assemble. However, complete assembly and decoration close to serving time to maintain buttercream texture and Malteser crunch for optimal quality.
How many people does a Malteser cake serve?
A Malteser cake typically serves 10-15 people, making it ideal for celebrations and gatherings. For children’s parties, consider smaller portions with extra Maltesers for an interactive element. Use an elevated cake stand for impressive presentation at larger gatherings, and pair with vanilla ice cream or fresh berries.
What’s the best way to serve Malteser cake?
Serve at room temperature for optimal flavor and texture. Warm individual slices slightly in the microwave to enhance rich chocolate flavors. Garnish with whole Maltesers and dust with cocoa powder for visual appeal. Cut clean slices using a sharp knife, and consider pairing with vanilla ice cream or fresh berries.


