Melting Moments live up to their name in the most delightful way possible. These buttery, crumbly cookies literally melt in your mouth with each bite, creating a texture that’s both tender and satisfying. Originally from Australia and New Zealand, these treats have become a beloved classic that spans generations.
What makes Melting Moments truly special is their simplicity and versatility. We love how these cookies strike the perfect balance between sweet and buttery, with a delicate crumb that practically dissolves on your tongue. The traditional recipe often features a dusting of powdered sugar or a light glaze, but you can easily customize them with different flavors and toppings.
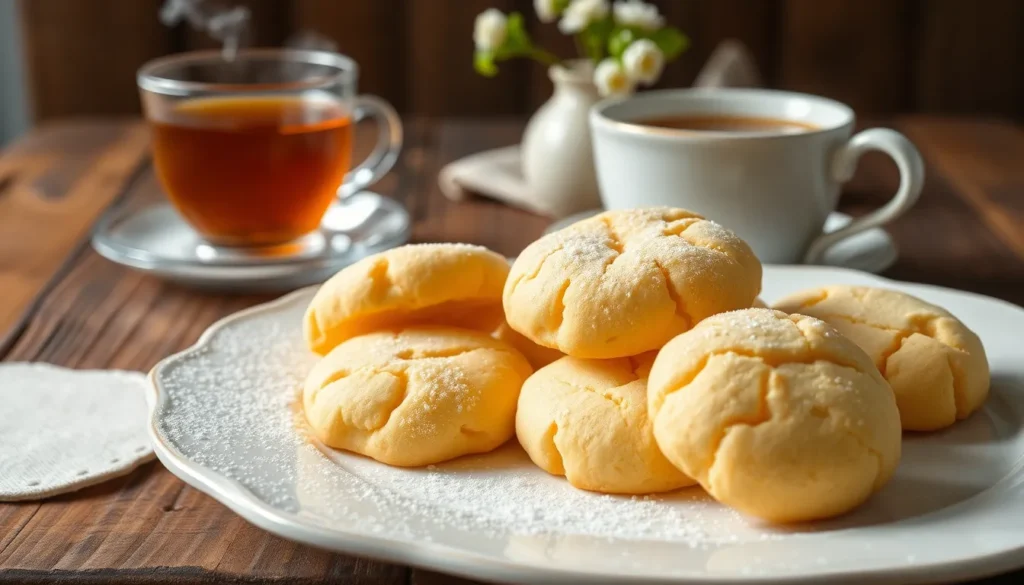
Whether you’re hosting afternoon tea, looking for a quick dessert, or simply craving something sweet and comforting, Melting Moments deliver every time. They’re surprisingly easy to make and require just a handful of pantry staples you likely already have on hand.
What Are Melting Moments
Melting Moments are delicate shortbread cookies that literally dissolve on your tongue with their incredibly tender texture. We love these Australian and New Zealand classics because they deliver pure buttery bliss in every bite.
These cookies earn their name from their signature characteristic: they practically melt the moment they touch your mouth. The secret lies in their high butter content and careful mixing technique that creates an almost powdery crumb structure. We find that properly made Melting Moments should crumble at the gentlest touch yet hold together perfectly when handled with care.
Traditional Melting Moments feature a simple base of butter, powdered sugar, flour, and cornstarch. The cornstarch plays a crucial role in achieving that distinctive melt-in-your-mouth texture by reducing the protein content and creating extra tenderness. We often see variations that include vanilla extract or lemon zest for added flavor complexity.
Most recipes produce cookies with a pale golden color and slightly cracked surface that signals their delicate nature. The texture should be both crisp and tender, breaking apart easily between your teeth before dissolving completely. We appreciate how these cookies maintain their shape during baking while developing that coveted fragile consistency.
Many bakers enhance Melting Moments with powdered sugar dustings, chocolate coatings, or jam fillings between sandwich-style pairs. The neutral buttery base accepts these additions beautifully without overwhelming the fundamental melt-away quality that defines the cookie. We find that regardless of the variation, the core characteristic remains the same: an almost ethereal texture that disappears on your palate.
Essential Equipment and Tools

Creating perfect melting moments requires the right equipment to achieve their signature delicate texture. We recommend gathering these essential tools before starting your baking journey to ensure smooth preparation and professional results.
Mixing bowls form the foundation of our baking setup. A large mixing bowl provides ample space for creaming butter and sugar without spillage. Stainless steel or glass bowls work best as they maintain temperature stability during the mixing process.
Hand mixer or stand mixer becomes crucial for achieving the light and fluffy butter mixture that defines melting moments. Electric mixers incorporate air into the butter and powdered sugar combination more effectively than manual whisking. Stand mixers offer consistent results with less effort while hand mixers provide greater control over mixing speed.
Rubber spatula helps us scrape down bowl sides and fold ingredients gently. This tool prevents overmixing when incorporating flour and ensures all ingredients combine uniformly. Silicone spatulas work particularly well as they bend easily around bowl curves.
Baking sheets provide the cooking surface for our delicate cookies. Light colored aluminum sheets distribute heat evenly and prevent excessive browning on cookie bottoms. We suggest using rimmed baking sheets to contain any butter that might spread during baking.
Piping bag and tip become essential when preparing the lemon buttercream filling. These tools create consistent filling portions and professional presentation for sandwich cookies. A star tip adds decorative appeal while a round tip offers simplicity for beginners.
| Equipment | Purpose | Alternative Options |
|---|---|---|
| Mixing Bowl | Combining ingredients | Glass or stainless steel preferred |
| Electric Mixer | Creaming butter and sugar | Hand mixer or stand mixer |
| Rubber Spatula | Folding and scraping | Silicone spatula recommended |
| Baking Sheet | Cookie surface | Light colored aluminum ideal |
| Piping Bag | Filling application | Zip bag with corner cut works |
Having these tools ready streamlines the baking process and helps achieve the tender texture that makes melting moments truly special.
Ingredients

We’ve organized our ingredients into two essential categories to help you create these delicate treats and their signature buttercream filling. Each component plays a crucial role in achieving that perfect melt-in-your-mouth texture.
For the Cookies
- ¾ cup (225g) unsalted butter, softened at room temperature
- ½ cup powdered sugar, sifted to remove lumps
- 1 cup all-purpose flour
- ½ cup cornstarch
- 1 teaspoon vanilla extract
- Pinch of salt
For the Buttercream Filling
- 2 tablespoons unsalted butter, softened
- 1½ cups powdered sugar, sifted
- 2 tablespoons fresh lemon juice
- 1 teaspoon lemon zest
- 1-2 tablespoons milk or cream (as needed for consistency)
Instructions

We’ll walk through the step-by-step process to create these delicate buttery cookies that truly melt in your mouth. Our technique ensures the perfect texture and flavor combination every time.
Prep
We start by preheating our oven to 350°F (180°C) to ensure even baking temperature. Line two baking sheets with parchment paper for easy cookie removal. Remove butter from the refrigerator 30 minutes before beginning to allow it to reach room temperature for optimal creaming. Set up our electric mixer and gather all ingredients within easy reach to streamline the process.
Making the Cookie Dough
We cream the ¾ cup unsalted butter in our mixing bowl using an electric mixer until light and fluffy, approximately 3-4 minutes. Add the ½ cup powdered sugar gradually while continuing to beat until well incorporated. Pour in the vanilla extract and pinch of salt, mixing until combined.
In a separate bowl, we whisk together the 1 cup all-purpose flour and ½ cup cornstarch to eliminate lumps. Gradually add this dry mixture to our butter mixture, beating on low speed just until a soft dough forms. Avoid overmixing to maintain the tender texture that makes these cookies special.
Shaping and Coating
We use a cookie scoop or tablespoon to portion the dough into uniform balls, each about 1 tablespoon in size. Place these balls on our prepared baking sheets, spacing them 2 inches apart to allow for slight spreading. Gently flatten each ball using the tines of a fork, creating a crosshatch pattern on top. This traditional marking helps the cookies bake evenly while giving them their characteristic appearance.
Baking the Cookies
We bake the cookies for 16-18 minutes until the edges are set but not browned. The centers should remain pale and slightly soft to the touch. Remove from the oven when they appear just done, as they will continue cooking on the hot baking sheet. Allow cookies to cool on the baking sheet for 5 minutes before carefully transferring to a wire rack using a thin spatula.
Preparing the Buttercream Filling
We beat the 2 tablespoons unsalted butter until creamy and light in color. Gradually add the 1½ cups powdered sugar, beating continuously to prevent lumps. Mix in the 2 tablespoons fresh lemon juice and 1 teaspoon lemon zest until well combined. Add 1-2 tablespoons milk or cream as needed to achieve a smooth, pipeable consistency. Transfer the buttercream to a piping bag fitted with a small round tip for easy application.
Assembly
We match cookies in pairs of similar size for uniform assembly. Pipe a small dollop of buttercream filling onto the flat bottom of one cookie. Gently sandwich with another cookie, pressing lightly until the filling reaches the edges. Repeat with remaining cookies and filling. Allow assembled cookies to rest for 15 minutes before serving to let the flavors meld together. Dust lightly with powdered sugar if desired for an elegant finishing touch.
Directions for Perfect Results

Achieving perfect Melting Moments requires attention to key baking fundamentals that ensure your cookies maintain their signature delicate texture. We’ll guide you through essential temperature control, texture techniques, and proper storage methods to guarantee success every time.
Temperature Tips
We recommend preheating your oven between 300°F (150°C) and 350°F (180°C) depending on your exact recipe requirements. Lower temperatures around 300°F help maintain the cookies’ shape and prevent excessive spreading, while standard temperatures of 325°F to 350°F ensure even cooking and develop that perfect delicate crumb.
| Temperature Range | Purpose | Result |
|---|---|---|
| 300°F (150°C) | Shape retention | Minimal spread, firmer structure |
| 325°F (163°C) | Balanced baking | Even cooking, tender texture |
| 350°F (180°C) | Quick baking | Golden color, light crumb |
Chilling the dough for approximately 1 hour becomes essential when the mixture feels too soft to handle properly. This cooling period firms up the butter content and makes shaping much easier. Room temperature butter creates the ideal base for creaming, so we always ensure our butter sits out for about 30 minutes before beginning the mixing process.
Texture Guidelines
Perfect Melting Moments should exhibit a light, buttery quality with that coveted melt-in-your-mouth characteristic. We achieve this by beating butter and powdered sugar until the mixture becomes light and fluffy, typically requiring 3 to 4 minutes of mixing time.
Avoiding over-mixing once we add the dry ingredients prevents tough cookies and maintains the tender crumb structure. The dough should hold together when pressed but still feel delicate and slightly crumbly. Cookies that crumble excessively when held indicate they need additional baking time to set properly.
We look for cookies that are just set around the edges with a pale golden color throughout. The surface should show slight cracks, which indicates the proper delicate texture has developed during baking.
Storage Instructions
We store completed Melting Moments in airtight containers at room temperature for up to 5 days to maintain their fresh taste and texture. Unfilled cookies remain crisp and tender when kept away from moisture and air exposure.
Sandwich cookies with buttercream filling require refrigeration to prevent the filling from becoming too soft or spoiling. We recommend bringing refrigerated filled cookies to room temperature for 30 minutes before serving to restore their optimal texture and flavor profile.
| Storage Method | Duration | Best For |
|---|---|---|
| Room temperature (airtight) | Up to 5 days | Plain cookies |
| Refrigerated (covered) | Up to 1 week | Filled cookies |
| Hot/humid climates | Refrigerate always | All varieties |
Hot or humid climates necessitate refrigeration for all varieties to prevent softening or texture deterioration. We always allow chilled cookies to come to room temperature before serving for the best eating experience.
Variations and Flavor Options

The beauty of melting moments lies in their adaptability to different flavors while maintaining that signature melt-in-your-mouth texture. We can easily customize the base recipe by incorporating various ingredients into either the cookie dough or the buttercream filling.
Chocolate Melting Moments
We transform our classic melting moments into chocolate delights by substituting 2-3 tablespoons of cornstarch or flour with cocoa powder. This adjustment allows us to control the chocolate intensity while preserving the delicate crumb structure that makes these cookies special.
For deeper chocolate flavor we can incorporate melted chocolate directly into the dough after it has cooled slightly. The key is maintaining the proper fat content so our cookies retain their tender texture. We recommend using chocolate buttercream or rich ganache as a filling between two cookies for an indulgent treat.
Our chocolate variation works exceptionally well when we dust the finished cookies with powdered sugar to create a beautiful contrast against the dark cookie surface.
Lemon Melting Moments
We create these bright citrusy treats by adding fresh lemon zest and juice to our buttercream filling rather than altering the cookie base. This traditional approach preserves the delicate cookie texture while infusing each bite with refreshing lemon flavor.
Our lemon buttercream requires 2 tablespoons of fresh lemon juice and 1 teaspoon of zest for optimal flavor balance. We sandwich two cookies together with this tangy filling to create the classic lemon melting moment experience. The citrus brightness cuts through the rich butter perfectly.
We can also experiment with passionfruit buttercream as an alternative citrus option that provides tropical flair while maintaining the same assembly method.
Coconut Melting Moments
We incorporate finely shredded or desiccated coconut directly into our cookie dough by adding 1/4 to 1/2 cup to the dry ingredients before combining with butter. This addition creates subtle coconut flavor throughout each cookie while maintaining the characteristic crumbly texture.
For enhanced coconut presence we can roll the shaped cookie balls in additional coconut before baking. This technique creates a delightful textural contrast with a slightly toasted coconut exterior surrounding the tender interior.
We pair these coconut cookies with either vanilla buttercream or coconut flavored buttercream depending on how prominent we want the coconut flavor to be. Both options complement the coconut in the cookies without overwhelming the delicate balance.
Make-Ahead Instructions

Melting Moments are exceptionally well-suited for advance preparation, making them an ideal choice for busy schedules or special occasions. We can prepare these delicate cookies several different ways to accommodate our timing needs while maintaining their signature melt-in-your-mouth quality.
Freezing Options
Freezer Storage: We can freeze baked Melting Moments for up to 3 months without compromising their tender texture. Store the cookies in airtight containers with layers of wax paper between each cookie to prevent sticking and maintain their delicate structure. This method preserves both the flavor and texture perfectly for future enjoyment.
Dough Preparation: The cookie dough itself freezes beautifully for future baking sessions. Roll the dough into individual balls and place them on baking sheets lined with parchment paper. Freeze until solid, then transfer the frozen dough balls to freezer bags or airtight containers. We can bake these directly from frozen by adding an extra 1-2 minutes to the original baking time.
Room Temperature Storage
Short-Term Storage: Store completed Melting Moments in airtight containers at room temperature for up to 2 weeks. This storage method works particularly well for unfilled cookies, maintaining their crispy exterior and tender interior throughout the storage period.
Dough Chilling: When the dough feels too soft to handle, chill it for at least 30 minutes before shaping and baking. This technique not only makes the dough easier to work with but also helps the cookies maintain their shape during baking.
Buttercream Considerations
Filling Preparation: We recommend preparing the lemon buttercream filling separately and storing it in the refrigerator for up to one week. Assemble the sandwich cookies just before serving to prevent the filling from making the cookies soggy and compromising their delicate texture.
Assembly Timing: For best results, fill the cookies within 24 hours of serving. This timing ensures the cookies retain their characteristic melt-away quality while allowing the flavors to meld beautifully together.
Troubleshooting Common Issues

Even experienced bakers encounter challenges when crafting these delicate cookies. We’ve identified the most common problems that arise during the Melting Moments baking process and provided practical answers to ensure your cookies turn out perfectly every time.
Soft Mixture Problems
When our butter becomes too melted during the creaming process, the mixture turns overly soft and becomes difficult to handle. This typically happens when we use butter that’s too warm or when our kitchen temperature is particularly high. We recommend chilling the soft dough in the refrigerator for 20-30 minutes before attempting to shape the cookies. Room temperature butter should feel slightly cool to the touch and give slightly when pressed, but it shouldn’t be so soft that it loses its shape completely.
Uneven Butter Distribution
Inadequate mixing creates pockets of butter that cause uneven spreading during baking. We must ensure all butter gets scraped from the mixing bowl sides and bottom during the creaming process. Using a rubber spatula to scrape down the bowl at least twice during mixing prevents butter from hiding in corners. This thorough incorporation creates a uniform texture that bakes evenly across all cookies.
Excessive Spreading Issues
Cookies that spread too much during baking lose their delicate shape and become thin wafers. We solve this by using small cookie scoops that measure approximately 2 teaspoons of dough per cookie. Larger portions create cookies that spread beyond their intended size and may merge together on the baking sheet. Also, ensuring our dough is properly chilled before baking helps maintain the cookies’ structure in the oven.
Crumbly Dough Texture
Sometimes our dough becomes too dry and crumbly, making it impossible to form smooth balls. This usually occurs when we add too much flour or cornstarch, or when we overmix the dry ingredients into the butter mixture. We can remedy this by adding one teaspoon of softened butter at a time until the dough holds together without being sticky.
Overbaking Concerns
Melting Moments require careful timing since they should remain pale with only the slightest golden tinge. We watch for the edges to set rather than waiting for important color change. Overbaked cookies lose their tender, melt-in-your-mouth quality and become hard. Removing them when they appear almost underdone ensures they finish cooking on the hot baking sheet while maintaining their signature texture.
Buttercream Consistency Problems
Our lemon buttercream filling sometimes becomes too thick or too thin for proper spreading. Thick buttercream tears the delicate cookies when we try to assemble them, while thin buttercream runs out the sides. We adjust consistency by adding powdered sugar for thickness or milk one teaspoon at a time for thinning. The ideal consistency should spread easily without being runny.
Serving Suggestions

We recommend pairing our freshly made Melting Moments with hot beverages that complement their delicate buttery flavor. Coffee creates an ideal combination as the bitter notes balance the sweet, crumbly texture of these cookies. Tea service also works beautifully, with black teas like Earl Grey or English Breakfast providing a classic backdrop for the vanilla and lemon notes.
Room temperature presentation brings out the best in these cookies, especially when they contain buttercream filling. We suggest removing filled Melting Moments from refrigeration about 15 minutes before serving to allow the buttercream to soften slightly. This timing ensures the filling spreads smoothly when bitten while maintaining the cookie’s structural integrity.
| Serving Occasion | Recommended Quantity | Storage Duration |
|---|---|---|
| Afternoon Tea | 2-3 cookies per person | Serve within 2 hours |
| Coffee Break | 1-2 cookies per person | Up to 5 days in airtight container |
| Dessert Course | 3-4 cookies per person | Best served fresh |
Presentation enhances the visual appeal of our Melting Moments significantly. We dust unfilled cookies with powdered sugar just before serving to create an elegant finish. Arranging them on delicate china plates or tiered serving stands elevates their appearance for special occasions.
Beverage temperature considerations matter when serving these tender cookies. Hot drinks help dissolve the buttery texture on the palate, creating that signature melting sensation. Cold beverages like iced coffee or cold milk work well too, though they provide a different textural contrast.
Portion control becomes important due to their rich, buttery nature. We find guests typically enjoy 2-3 cookies during casual gatherings, while formal tea service calls for smaller portions alongside other treats. The cookies pair excellently with fresh fruit like strawberries or grapes, which cleanse the palate between bites.
Conclusion
These ethereal cookies truly live up to their name with their signature melt-in-your-mouth texture that’s become beloved across Australia and New Zealand. We’ve covered everything from essential ingredients to troubleshooting common baking challenges so you can create these delicate treats with confidence.
Whether you’re serving them at afternoon tea or preparing them for a special occasion the versatility of Melting Moments makes them a perfect addition to any baker’s repertoire. The make-ahead options and flavor variations we’ve discussed ensure you’ll never run out of ways to enjoy these buttery delights.
Now it’s time to gather your ingredients fire up that oven and experience the pure joy of watching these tender cookies dissolve on your tongue. Happy baking!
Frequently Asked Questions
What are Melting Moments cookies?
Melting Moments are classic Australian and New Zealand shortbread cookies known for their incredibly delicate, buttery texture that literally melts in your mouth. They get their name from their signature characteristic of dissolving upon contact with your tongue, achieved through high butter content and careful mixing techniques that create a powdery crumb structure.
What ingredients do I need to make Melting Moments?
For the cookies, you’ll need ¾ cup unsalted butter, ½ cup powdered sugar, 1 cup all-purpose flour, ½ cup cornstarch, 1 teaspoon vanilla extract, and a pinch of salt. For the buttercream filling, gather 2 tablespoons butter, 1½ cups powdered sugar, 2 tablespoons fresh lemon juice, 1 teaspoon lemon zest, and 1-2 tablespoons milk or cream.
Why do Melting Moments have cornstarch in them?
Cornstarch is a key ingredient that contributes to the tender, melt-in-your-mouth texture that defines Melting Moments. It helps create the delicate, powdery crumb structure by reducing the protein content of regular flour, resulting in cookies that are incredibly soft and literally dissolve on your tongue rather than requiring chewing.
What temperature should I bake Melting Moments at?
Bake Melting Moments at a lower temperature between 300°F and 350°F. The lower temperature helps maintain their delicate shape and prevents excessive spreading while ensuring they bake evenly. This gentle baking approach is crucial for achieving the perfect tender texture that makes these cookies special.
How long do Melting Moments last?
Unfilled Melting Moments can be stored in airtight containers at room temperature for up to 5 days or frozen for up to 3 months. Filled cookies should be refrigerated and brought to room temperature before serving. For best results, assemble filled cookies just before serving to maintain their delicate texture.
Can I make different flavors of Melting Moments?
Yes! Popular variations include chocolate (substitute some flour with cocoa powder), lemon (add zest to the buttercream), and coconut (incorporate shredded coconut into the dough). These variations maintain the signature melt-in-your-mouth texture while offering different flavor profiles to suit various preferences and occasions.
Why is my Melting Moments dough too soft?
If your dough is too soft, chill it in the refrigerator for about an hour to firm up the butter. This makes the dough easier to handle and shape. Soft dough can also result from warm room temperatures or overmixing, so ensure your butter is at the right consistency and mix just until combined.
What’s the best way to serve Melting Moments?
Serve Melting Moments at room temperature for optimal texture, paired with hot beverages like coffee or black tea. Dust unfilled cookies with powdered sugar and arrange them on elegant serving dishes. For filled cookies, allow them to come to room temperature before serving to ensure the best melt-in-your-mouth experience.


