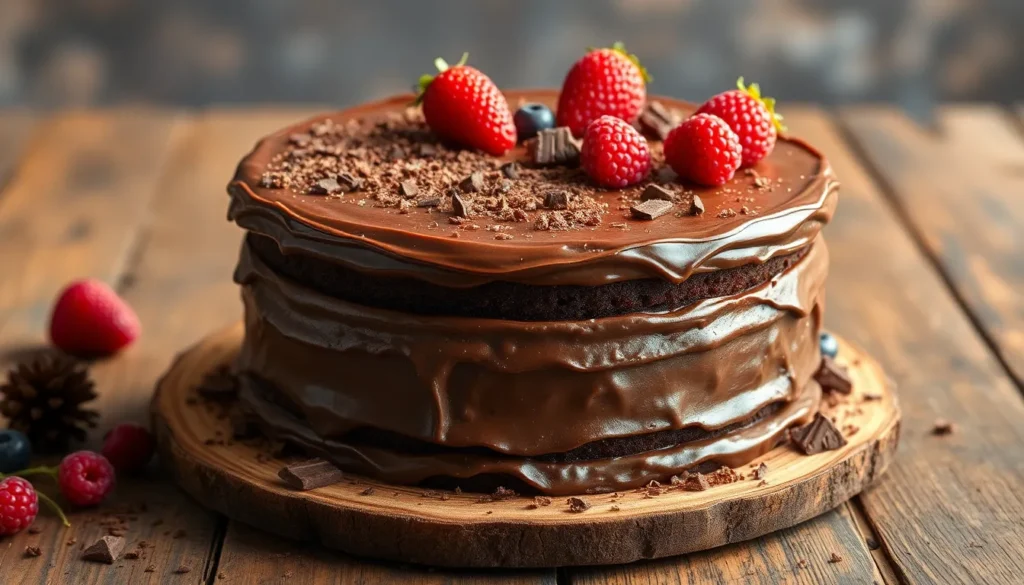
Nothing beats the rich decadent taste of a perfectly moist chocolate cake that melts in your mouth with every bite. We’ve spent years perfecting this foolproof recipe that delivers bakery-quality results right from your home kitchen. The secret lies in our carefully balanced combination of ingredients that creates an incredibly tender crumb and deep chocolate flavor.
This isn’t just another chocolate cake recipe – it’s the one you’ll turn to for birthdays celebrations or whenever you’re craving something truly special. We use simple pantry staples combined with a few key techniques that guarantee moisture every single time. The result is a supremely soft cake that stays fresh for days.
Whether you’re a seasoned baker or just starting your baking journey we’ll guide you through each step to create a show-stopping dessert. Get ready to impress your family and friends with what might just become your new go-to chocolate cake recipe.
Ingredients
Our moist chocolate cake recipe calls for pantry staples that work together to create that perfect tender crumb and rich flavor. We’ve organized the ingredients into two sections to help you gather everything before you start baking.
For the Chocolate Cake
- 2 cups all-purpose flour
- 2 cups granulated sugar
- 3/4 cup unsweetened cocoa powder
- 2 teaspoons baking soda
- 1 teaspoon baking powder
- 1 teaspoon salt
- 2 large eggs, room temperature
- 1 cup buttermilk, room temperature
- 1 cup strong black coffee, hot
- 1/2 cup vegetable oil
- 2 teaspoons vanilla extract
For the Chocolate Frosting
- 1/2 cup unsalted butter, softened
- 2/3 cup unsweetened cocoa powder
- 3 cups powdered sugar
- 1/3 cup milk
- 1 teaspoon vanilla extract
- 1/4 teaspoon salt


Equipment Needed
 1")
Before we jump into creating our show-stopping chocolate cake, let’s gather the essential tools that will make our baking process smooth and successful. Having the right equipment on hand ensures we achieve that perfect moist texture and professional finish we’re aiming for.
Large mixing bowls serve as our primary workspace for combining ingredients. We recommend having at least two bowls available—one for our dry ingredients and another for wet ingredients. This separation helps us maintain better control over our mixing process.
A whisk becomes our best friend for blending ingredients smoothly and incorporating air into our batter. We’ll use this tool to combine our wet ingredients and create that silky texture our cake deserves.
A mesh sieve proves invaluable for sifting our flour and cocoa powder together. This step eliminates lumps and ensures our dry ingredients blend seamlessly into our batter.
Measuring cups and spoons guarantee accuracy in our ingredient proportions. Precision matters when we’re creating the perfect balance of flavors and textures that make our chocolate cake irresistible.
Two round cake pans form the foundation of our layer cake. We’ll need 8-inch or 9-inch pans, which should be greased thoroughly and lined with parchment paper to prevent sticking.
A rubber spatula helps us scrape every bit of batter from our bowls and fold ingredients together gently. We’ll also use this tool to transfer our finished batter into our prepared pans.
A wire cooling rack allows proper air circulation around our baked cakes. This prevents soggy bottoms and helps our layers cool evenly before we apply our rich chocolate frosting.
A hand mixer or wooden spoon provides backup mixing power when our whisk isn’t quite enough. These tools help us achieve the perfect consistency without overworking our batter.


Instructions
 2")
We’ll walk you through each step to create this incredible moist chocolate cake. Our method ensures perfect results every time.
Prep the Ingredients
We start by gathering all our ingredients and preparing them for mixing. Preheat your oven to 350°F (175°C) and grease two 9-inch round cake pans with butter or cooking spray.
Sift together 1 3/4 cups all-purpose flour, 1 cup unsweetened cocoa powder, 1 cup granulated sugar, 1 cup brown sugar, 1 teaspoon baking soda, 1 teaspoon baking powder, and 1 teaspoon kosher salt in a large mixing bowl. Room temperature ingredients blend more easily, so take your eggs and buttermilk out of the refrigerator 30 minutes before baking.
Brew 1 cup of hot black coffee and set aside to cool slightly. Measure out 1/2 cup vegetable oil, 2 large eggs, 1 cup buttermilk, and 2 teaspoons vanilla extract in separate containers for easy access during mixing.
Make the Cake Batter
We combine our wet ingredients first to create a smooth base. Whisk together the eggs, buttermilk, vegetable oil, and vanilla extract in a separate large bowl until well blended.
Pour the wet ingredient mixture into the bowl with our dry ingredients. Mix gently with a wooden spoon or hand mixer on low speed until just combined. Gradually add the hot coffee while stirring continuously to prevent lumping.
Beat the batter for 2 minutes until smooth and well incorporated. Our batter will appear thin, which is exactly what we want for maximum moisture. Scrape down the sides of the bowl to ensure even mixing throughout.
Bake the Cake
We divide the batter evenly between our prepared cake pans using a rubber spatula. Tap each pan gently on the counter to release air bubbles and level the surface.
Place both pans on the center rack of our preheated oven. Bake for 30-35 minutes until a toothpick inserted in the center comes out with just a few moist crumbs attached.
Cool the cakes in their pans for 10 minutes before turning them out onto wire racks. Allow them to cool completely before frosting, which takes about 1 hour.
Prepare the Frosting
We begin by melting 4 ounces of dark chocolate and letting it cool slightly. Beat 1 cup of unsalted butter with an electric mixer until light and fluffy, about 3 minutes.
Gradually add 3 cups powdered sugar and 1/2 cup cocoa powder, alternating with 1/4 cup milk. Beat on medium speed until smooth and creamy.
Incorporate the melted chocolate mixture and 2 teaspoons vanilla extract into our frosting. Beat for an additional 2 minutes until the frosting reaches a spreadable consistency.
Assemble the Cake
We place our first cake layer on a serving plate and spread about 1 cup of frosting evenly across the top. Position the second layer carefully on top, pressing gently to secure.
Apply a thin crumb coat of frosting around the entire cake to seal in any loose crumbs. Refrigerate for 15 minutes to set this initial layer.
Spread the remaining frosting generously over the top and sides of our cake using smooth, even strokes. Create decorative swirls or patterns with an offset spatula for a professional finish.


Pro Tips for Extra Moist Chocolate Cake
 3")
We’ve perfected our chocolate cake recipe through years of testing, and these professional techniques will transform your baking results from good to extraordinary.
Use Moisture-Rich Ingredients
Sour cream stands as our secret weapon for achieving bakery-level moisture. This ingredient adds richness and dairy notes that create an incredibly tender crumb. We recommend using full-fat sour cream for the best results.
Vegetable oil works better than butter for moisture retention because unsaturated fats help cakes stay moist longer. We always choose neutral oils like canola or vegetable oil rather than olive oil to avoid competing flavors.
Some bakers swear by mayonnaise for its moisture and emulsifying properties. We’ve tested this technique and found it creates an exceptionally tender texture due to the egg yolks and oil content.
Maximize Chocolate Flavor
Blooming cocoa powder elevates your chocolate cake dramatically. We dissolve our cocoa powder in hot liquid first to enhance both chocolate flavor and aroma. This simple step releases more complex chocolate compounds.
Dark chocolate with 50-70% cocoa solids intensifies the chocolate taste without overwhelming bitterness. We melt dark chocolate directly into our frosting for deeper flavor complexity.
Optimize Sugar and Liquid Content
Brown sugar replaces white sugar in our moisture-focused recipes because it retains more moisture due to its molasses content. We substitute up to half the granulated sugar with packed brown sugar.
Hot coffee or espresso serves dual purposes in our cakes. The hot liquid enhances moisture while the coffee activates our leavening agents more effectively. Coffee also amplifies chocolate flavor without making the cake taste like coffee.
Master Essential Techniques
Accurate measurements determine success or failure in cake baking. We always weigh our ingredients when possible because volume measurements can vary significantly.
Proper mixing techniques like creaming and gentle folding preserve the delicate structure we’ve built. We cream butter and sugar until light and fluffy, then fold in dry ingredients just until combined to avoid tough cake texture.
Storage Instructions
 4")
Proper storage keeps our moist chocolate cake fresh and delicious for days. We recommend different storage methods depending on how long you plan to keep your cake and whether it’s frosted.
Room Temperature Storage
Our unfrosted chocolate cake stays fresh at room temperature for 2 to 5 days when stored in a covered container. We place the cake in an airtight container or cover it with a cake dome to prevent it from drying out. But, if we’ve added frosting to our cake, we need to consider refrigeration since most frostings require cooler temperatures to maintain their stability.
Refrigerator Storage
We store frosted chocolate cakes in the refrigerator for optimal freshness. This method maintains the cake’s moisture and prevents the frosting from melting or becoming too soft. Our refrigerated chocolate cake stays fresh for up to 5 days when properly covered. We wrap the cake in plastic wrap or store it in an airtight container to prevent it from absorbing other flavors from the refrigerator.
Freezing Options
Freezing extends our chocolate cake’s lifespan significantly. We have several freezing methods that work exceptionally well:
Whole Cakes and Layers: We wrap completely cooled cakes in plastic wrap first, then add a layer of aluminum foil for extra protection. Our frozen cake layers maintain their quality for up to 3 months using this double-wrap method.
Individual Cupcakes: We wrap each cooled cupcake in plastic wrap and place them in a plastic bag or airtight container. These frozen cupcakes stay fresh for up to 3 months.
Single Slices: We wrap individual slices in plastic wrap and store them in an airtight container. Our frozen cake slices maintain their texture and flavor for up to 1 month.
| Storage Method | Duration | Container Type |
|---|---|---|
| Room Temperature (unfrosted) | 2-5 days | Covered container |
| Refrigerated (frosted) | Up to 5 days | Airtight container |
| Frozen whole cakes | Up to 3 months | Plastic wrap + foil |
| Frozen cupcakes | Up to 3 months | Plastic bag/airtight container |
| Frozen slices | Up to 1 month | Airtight container |
Thawing Process
We allow our frozen cakes to thaw completely at room temperature before serving. This gradual thawing process preserves the cake’s moisture and prevents condensation from forming on the surface. We never rush this process by using heat, as it can compromise the cake’s texture and create uneven thawing.


Make-Ahead Tips
 5")
Planning ahead transforms this moist chocolate cake into a stress-free dessert that saves precious time during busy occasions. We’ve discovered several proven techniques that maintain the cake’s signature moisture and rich flavor when prepared in advance.
Preparing Cake Layers in Advance
Cake layers benefit tremendously from advance preparation. Once our layers cool completely, we wrap them tightly in plastic wrap to lock in moisture. This method preserves the cake’s tender texture while preventing it from drying out. Wrapped layers stay fresh in the refrigerator for up to 24 hours, making them perfect for next-day assembly.
For longer storage, we freeze the wrapped layers using a double-protection method. First, we wrap each layer in plastic wrap, then add a layer of aluminum foil. This technique preserves both moisture and texture for extended periods, allowing us to prepare layers weeks ahead of special events.
Advance Frosting Preparation
Our chocolate frosting responds beautifully to advance preparation. We prepare the frosting and store it in the refrigerator, where it maintains its creamy consistency and rich chocolate flavor. The cold storage actually helps the frosting firm up slightly, making it easier to work with during assembly.
Strategic Assembly Timing
Assembly timing plays a crucial role in maintaining cake quality. We assemble the frosted cake just before serving to ensure peak freshness and optimal presentation. This approach prevents the layers from becoming soggy while maintaining the frosting’s smooth appearance.
Storage Duration and Quality
| Storage Method | Duration | Quality Maintenance |
|---|---|---|
| Refrigerated wrapped layers | 1 day | Excellent moisture retention |
| Frozen wrapped layers | Extended periods | Preserves texture and moisture |
| Refrigerated frosted cake | 5 days | Maintains freshness and texture |
Properly stored moist chocolate cakes maintain their quality for approximately 5 days when refrigerated. The refrigeration process helps set the cake’s shape while preserving the moisture that makes this recipe so exceptional. Our make-ahead approach ensures that every slice delivers the same rich, moist experience as a freshly assembled cake.
Serving Suggestions
 6")
Our moist chocolate cake transforms into a stunning centerpiece with the right presentation choices. We recommend serving this rich dessert with complementary toppings that enhance its deep chocolate flavor without overwhelming the palate.
Classic Frosting Options
Chocolate fudge frosting creates the ultimate indulgence when paired with our moist cake layers. We often choose this combination for birthday celebrations and special occasions. Silky chocolate ganache provides another elegant option that flows beautifully over the cake’s surface. Classic buttercream frosting offers a lighter contrast to the intense chocolate base while maintaining the dessert’s luxurious appeal.
Layer Cake Presentation
Stacking cake layers with frosting between each level creates a visually impressive dessert perfect for celebrations. We suggest spreading frosting evenly between layers to ensure each slice delivers consistent flavor. This presentation method works exceptionally well for birthdays and formal gatherings where visual impact matters.
Individual Serving Ideas
Transform the same batter into cupcakes for parties or individual portions that guests can easily enjoy. We find this format particularly useful for casual gatherings and children’s events. Each cupcake maintains the same moist texture and rich flavor as the full-sized cake.
Complementary Pairings
Fresh berries add a bright, tart contrast that balances the cake’s richness beautifully. We recommend strawberries or raspberries for their natural sweetness and vibrant color. Vanilla ice cream creates a temperature contrast that enhances the chocolate experience. Lightly sweetened whipped cream provides a airy texture that complements the dense, moist crumb.
Decorative Finishing Touches
Chocolate shavings scattered across the frosted surface add professional bakery appeal to your homemade creation. We suggest using a vegetable peeler on room temperature chocolate for the best results. Colorful sprinkles work perfectly for birthday celebrations and children’s parties. A light dusting of powdered sugar creates an elegant finish for more sophisticated presentations.
Storage for Optimal Serving
Room temperature storage maintains the cake’s ideal texture for serving. We keep unfrosted portions in airtight containers for up to three days to preserve moisture. This storage method ensures each slice delivers the same tender crumb and rich flavor that makes this cake exceptional.


Conclusion
We’ve shared everything you need to create a chocolate cake that’ll become your go-to recipe for years to come. From the perfect balance of ingredients to expert storage tips this recipe delivers consistent bakery-quality results every time.
The beauty of this moist chocolate cake lies in its versatility and reliability. Whether you’re celebrating a special occasion or simply craving rich chocolate indulgence you can count on this recipe to impress both family and guests.
With proper storage techniques and make-ahead options you’ll never have to stress about dessert again. Try this recipe once and we’re confident it’ll earn a permanent spot in your baking repertoire.
Frequently Asked Questions
What makes this chocolate cake recipe different from others?
This recipe creates bakery-quality results with a rich, moist texture that stays fresh for days. The secret lies in using moisture-rich ingredients like buttermilk, vegetable oil, and hot coffee, plus specific techniques like blooming cocoa powder to intensify the chocolate flavor.
How long does this chocolate cake stay fresh?
Unfrosted cake layers can be stored at room temperature for 2-5 days in a covered container. Frosted cakes should be refrigerated and will stay fresh for up to 5 days. For longer storage, freeze whole cakes for up to 3 months.
Can I make this chocolate cake ahead of time?
Yes! You can prepare cake layers up to 24 hours in advance by wrapping them tightly in plastic wrap and refrigerating. The chocolate frosting can also be made ahead and stored in the refrigerator. Assemble the cake just before serving for best results.
What equipment do I need to make this chocolate cake?
Essential equipment includes large mixing bowls, a whisk, mesh sieve, measuring cups and spoons, two round cake pans, rubber spatula, wire cooling rack, and either a hand mixer or wooden spoon for mixing.
Why does the recipe call for hot coffee in chocolate cake?
Hot coffee enhances both the moisture and chocolate flavor without making the cake taste like coffee. The coffee intensifies the cocoa’s richness and creates a deeper, more complex chocolate taste in the finished cake.
How should I store leftover chocolate cake?
Store unfrosted cake at room temperature in a covered container for 2-5 days. Refrigerate frosted cake for up to 5 days. For freezing, wrap individual slices for 1 month or whole cakes for 3 months in proper wrapping.
Can I turn this cake recipe into cupcakes?
Yes! This batter works perfectly for cupcakes, making it ideal for casual gatherings or individual servings. Adjust baking time accordingly as cupcakes will bake faster than full-sized cake layers.
What are the best frosting options for this chocolate cake?
Classic options include chocolate fudge frosting, silky ganache, or traditional buttercream. The recipe includes instructions for a rich chocolate frosting that complements the cake’s deep chocolate flavor perfectly.


