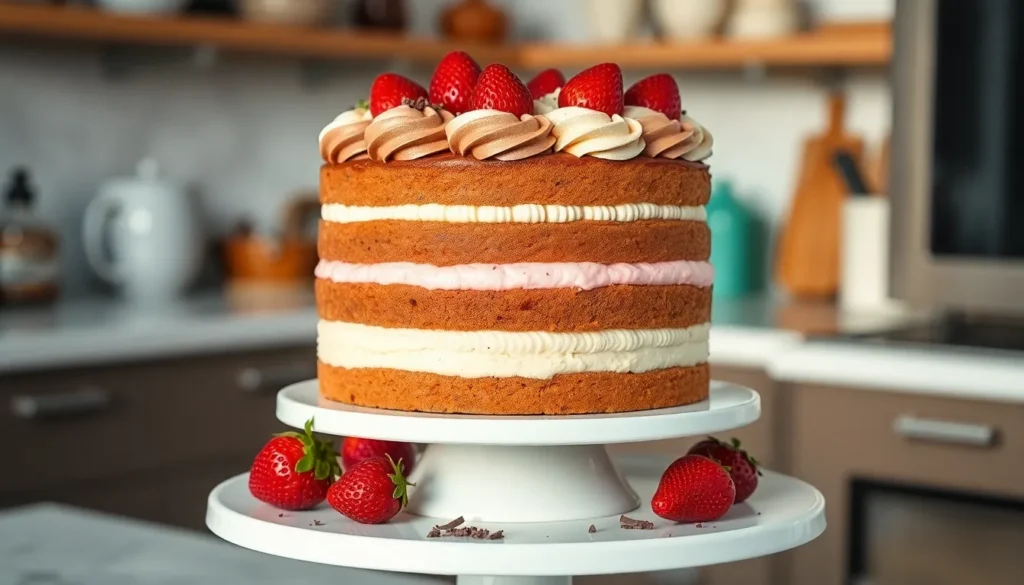
Few desserts capture the magic of combining classic flavors quite like Neapolitan cake. This stunning three-layer masterpiece brings together vanilla, chocolate, and strawberry in perfect harmony – just like the beloved ice cream that inspired it. We’ve perfected this recipe to deliver moist tender layers that’ll have your guests asking for seconds.
What makes our Neapolitan cake truly special isn’t just its gorgeous presentation with those distinct pink, white, and brown stripes. It’s the way each flavor complements the others without overpowering them. The subtle vanilla base lets the rich chocolate and bright strawberry flavors shine through beautifully.
Whether you’re celebrating a birthday or simply want to impress at your next gathering, this showstopper delivers both visual appeal and incredible taste. We’ll walk you through every step to ensure your cake turns out picture-perfect every single time.
Ingredients
Creating our Neapolitan cake requires exact ingredients for each distinct layer and the signature buttercream frosting. We’ll organize these ingredients by layer to streamline our baking process and ensure perfect results.
For the Vanilla Cake Layer
- 1 cup all-purpose flour
- 1 teaspoon baking powder
- 1/4 teaspoon salt
- 1/3 cup unsalted butter, softened
- 1/2 cup granulated sugar
- 1 large egg
- 1 teaspoon vanilla extract
- 1/2 cup whole milk
For the Chocolate Cake Layer
- 3/4 cup all-purpose flour
- 1/4 cup unsweetened cocoa powder
- 1 teaspoon baking powder
- 1/4 teaspoon salt
- 1/3 cup unsalted butter, softened
- 1/2 cup granulated sugar
- 1 large egg
- 1/2 cup whole milk
- 1/2 teaspoon vanilla extract
For the Strawberry Cake Layer
- 1 cup all-purpose flour
- 1 teaspoon baking powder
- 1/4 teaspoon salt
- 1/3 cup unsalted butter, softened
- 1/2 cup granulated sugar
- 1 large egg
- 1/2 cup whole milk
- 1/4 cup strawberry puree, made from fresh strawberries
- 2-3 drops pink food coloring (optional)
For the Neapolitan Buttercream Frosting
- 1 cup unsalted butter, softened
- 4 cups powdered sugar, sifted
- 1/4 cup heavy cream
- 1 teaspoon vanilla extract
- 2 tablespoons unsweetened cocoa powder
- 2 tablespoons strawberry puree
- Pink food coloring (optional)
Equipment Needed

Creating our perfect Neapolitan cake requires exact tools that ensure smooth preparation and professional results. We recommend gathering all equipment before starting to streamline the baking process.
Stand Mixer or Electric Hand Mixer serves as our primary tool for creaming butter and sugar to achieve the light, fluffy texture essential for each cake layer. A stand mixer provides consistent results, though a quality electric hand mixer works effectively for this recipe.
Three 8-inch or 9-inch Round Cake Pans allow us to bake each flavor layer separately for distinct, clean divisions. Standard round pans work best, though we can adapt the recipe for a single bundt pan if preferred for a marbled effect.
Food Processor or Rolling Pin becomes necessary for creating fine strawberry powder from freeze-dried strawberries. The processor delivers consistent results, while a rolling pin and sealed bag provide an alternative grinding method.
Sifter ensures our dry ingredients blend smoothly without lumps. We use this tool for flour, cocoa powder, and baking powder to create uniform batters across all three layers.
Medium Mixing Bowls in sets of at least three help us divide and flavor each batter portion separately. Glass or stainless steel bowls work best for easy mixing and ingredient visibility.
Non-Stick Spray or Butter with Flour prevents our delicate cake layers from sticking to pans. Proper pan preparation ensures clean release and maintains the cake’s beautiful appearance.
Measuring Cups and Spoons provide accuracy for our ingredient ratios. Digital scales offer even greater precision, especially for flour measurements that affect texture significantly.
Whisk and Rubber Spatula complete our essential tools for folding ingredients and achieving smooth, well-incorporated batters without overmixing.
Instructions

Now we’re ready to transform our organized ingredients into three distinct cake layers. These step-by-step instructions will guide us through creating each flavorful component of our Neapolitan masterpiece.
Prep the Pans and Oven
We start by greasing three 6-inch round baking pans with butter or non-stick spray. Line each pan with parchment paper for easy removal after baking. Preheat our oven to 350°F (180°C) for standard ovens or 320°F (160°C) for fan-forced ovens. This temperature ensures even baking across all three layers.
Make the Vanilla Cake Layer
We begin with our vanilla base by creaming together the softened butter and granulated sugar in our stand mixer until light and fluffy. Beat in the egg followed by vanilla extract until well incorporated. In a separate bowl we sift together flour, baking powder, and salt. We alternate adding the dry ingredients and milk to our butter mixture starting and ending with the flour mixture. Mix until just combined to avoid overmixing. Pour this batter into one prepared pan and set aside.
Make the Chocolate Cake Layer
We use the same technique as our vanilla layer for consistency. Cream butter and sugar until fluffy then add the egg and vanilla extract. Sift together flour, baking powder, salt, and unsweetened cocoa powder in a separate bowl. We alternate adding the dry ingredients and milk to create our chocolate batter. Add an extra tablespoon of milk if the batter seems too thick. Pour into the second prepared pan.
Make the Strawberry Cake Layer
We follow our established creaming method with butter and sugar until light and airy. Beat in the egg then add our fresh strawberry puree for natural flavor and color. Sift the flour, baking powder, and salt together. We alternate adding dry ingredients and milk as before. Add a few drops of pink food coloring if desired for enhanced color. Pour this pink batter into our third prepared pan.
Cool the Cake Layers
We bake all three layers simultaneously for approximately 30 minutes or until a toothpick inserted in the center comes out clean. Remove from oven and let pans cool on wire racks for 10 minutes. Turn out cakes onto wire racks and cool completely before frosting. This complete cooling prevents our buttercream from melting during assembly.
Prepare the Neapolitan Buttercream

Now that our cake layers have cooled completely we can focus on creating the signature three-flavored buttercream that makes this dessert truly special. We’ll start with a vanilla base and transform portions of it into chocolate and strawberry variations.
Make the Vanilla Buttercream Base
We begin by ensuring our unsalted butter reaches room temperature for optimal creaming. Place 1 cup of softened butter in the bowl of our stand mixer and beat on medium speed until the texture becomes smooth and pale.
Gradually add 4 cups of confectioners’ sugar to the creamed butter. We sift the sugar beforehand to prevent lumps from forming in our buttercream. Beat the mixture on low speed initially to avoid sugar clouds then increase to medium-high speed.
Continue mixing until the buttercream becomes light and fluffy which typically takes 3 to 4 minutes. Add 3 tablespoons of whole milk one tablespoon at a time to achieve the perfect consistency. The mixture should hold its shape but remain spreadable.
Pour in 2 teaspoons of vanilla extract and beat for another minute until fully incorporated. Our vanilla buttercream base should appear creamy white and hold stiff peaks when the beaters are lifted.
Create the Chocolate Buttercream
We transfer one-third of our vanilla buttercream base to a separate medium mixing bowl. This portion will become our rich chocolate buttercream layer.
Sift 1/3 cup of unsweetened cocoa powder to remove any lumps before adding it to the vanilla buttercream. We add the cocoa powder gradually while mixing on low speed to prevent cocoa dust from escaping the bowl.
Beat the mixture on medium speed until the cocoa powder fully incorporates and no streaks remain visible. The buttercream should transform into a rich chocolate brown color with a smooth creamy texture.
If the chocolate buttercream appears too thick we add an additional tablespoon of milk to restore the proper consistency. Our finished chocolate buttercream should match the spreadable texture of the vanilla base.
Create the Strawberry Buttercream
We reserve another third of the vanilla buttercream base in a clean mixing bowl for our strawberry variation. This final flavor completes our Neapolitan trio.
Add 3 tablespoons of strained strawberry preserves or fresh strawberry puree to the vanilla buttercream. We strain the preserves to remove any fruit chunks that might interfere with smooth piping or spreading.
Mix on medium speed until the strawberry flavor distributes evenly throughout the buttercream. The natural fruit sugars will slightly thin the mixture while adding delicious strawberry taste.
Optional pink food coloring can enhance the visual appeal of our strawberry buttercream. We add gel food coloring one drop at a time until we achieve the desired pink shade that complements the natural strawberry color.
Beat the mixture for an additional 30 seconds to ensure all ingredients blend completely. Our strawberry buttercream should maintain the same smooth consistency as the vanilla and chocolate versions.
| Buttercream Type | Base Ingredient | Key Additions | Tips/Notes |
|---|---|---|---|
| Vanilla | Butter, sugar | Vanilla extract, milk | Light, fluffy consistency |
| Chocolate | Vanilla buttercream | Cocoa powder, (optional: melted chocolate) | Blend until smooth |
| Strawberry | Vanilla buttercream | Strawberry puree/preserves/powder, food color | Adjust for desired pink |
Assembly Instructions

Now that we have our three beautifully baked cake layers and delicious buttercream varieties ready, we can bring our Neapolitan masterpiece together with professional assembly techniques.
Layer the Cake
We begin stacking our chocolate, vanilla, and strawberry cake layers to create the signature Neapolitan pattern. Place the first layer on your serving plate and secure it with a small amount of buttercream spread evenly across the surface. Add the second layer and repeat this process with another thin layer of buttercream. Top with the final layer to complete our three-tier structure.
The key to stable layering lies in using just enough buttercream between each layer to act as adhesive without creating excess that could cause sliding. We recommend using approximately 2-3 tablespoons of buttercream between each layer for optimal stability.
Apply the Crumb Coat
We start the frosting process by applying a thin crumb coat that will catch any loose cake crumbs and create a smooth foundation. Spread a light layer of buttercream over the entire surface of our assembled cake using an offset spatula. This initial coat should be thin enough that the cake layers remain visible underneath.
Once we have covered all surfaces evenly, we chill the cake in the freezer for about 15 minutes to firm up the crumb coat. This step prevents crumbs from mixing into our final frosting layer and ensures a professional appearance.
Final Frosting Application
After our crumb coat has set, we apply the second, more generous layer of buttercream frosting. Spread the frosting evenly across all surfaces using smooth, confident strokes with your spatula. We can achieve a clean finish by using a bench scraper held at a 45-degree angle while slowly rotating the cake on a turntable.
The final frosting layer should be thick enough to create smooth sides and top while covering the crumb coat completely. Take your time during this step as it determines the overall visual appeal of our Neapolitan cake.
Decorating the Neapolitan Cake
We create visual interest by incorporating all three buttercream flavors into our decoration scheme. Start by applying chocolate buttercream around the edges or base of the cake for rich contrast against the lighter colors. Use vanilla buttercream as your primary base coat for neutral coverage that highlights the other flavors.
Apply pink buttercream on the top surface for vibrant color that immediately identifies the strawberry element of our Neapolitan theme. We can create an elegant spiral design by starting in the center and spiraling outward while the cake rotates on a turntable.
For an optional finishing touch, we can drizzle melted chocolate ganache over the edges of our decorated cake. This technique adds an elegant cascade effect that elevates the overall presentation and provides another layer of chocolate flavor to complement our Neapolitan creation.
Storage and Serving Tips

After creating our beautiful Neapolitan cake, proper storage ensures we maintain its fresh flavors and stunning appearance for days to come.
Refrigerator Storage
We recommend storing our decorated Neapolitan cake in the refrigerator, especially when topped with cream cheese icing or buttercream frosting. Place the cake in a well-covered container to preserve its moisture and prevent it from absorbing other flavors from the refrigerator. Our properly stored cake maintains its quality for up to 3-4 days when refrigerated.
Freezing Options
We can extend our cake’s life by freezing either individual slices or the whole cake. Flash-freeze the decorated cake for about one hour until the frosting becomes firm. Wrap it tightly in plastic wrap followed by aluminum foil to prevent freezer burn. When we’re ready to enjoy it, we thaw the frozen cake in the refrigerator before serving.
Room Temperature Storage
Undecorated bundt versions of our Neapolitan cake store well at room temperature in an airtight container for up to 3 days. This method works best when we haven’t applied any dairy-based frostings or decorations.
| Storage Method | Duration | Best For |
|---|---|---|
| Refrigerated | 3-4 days | Decorated cakes with frosting |
| Frozen | Up to 3 months | Long-term storage |
| Room Temperature | Up to 3 days | Undecorated cakes only |
Optimal Serving Temperature
We serve our Neapolitan cake at room temperature for the best flavor experience. Refrigerated cakes should sit at room temperature for 30-60 minutes before serving to allow the flavors to fully develop and the texture to soften appropriately.
Pre-Serving Preparation
We ensure our cake layers cool completely before applying any decorations to prevent structural issues or melting. Once decorated, we store the finished cake in the refrigerator until we’re ready to serve our guests this delightful three-flavor masterpiece.
Make-Ahead Instructions

Preparing our Neapolitan cake ahead of time transforms this elaborate dessert into a manageable project that fits any busy schedule. We can break down the process into strategic phases that maximize freshness while minimizing last-minute stress.
Individual Cake Layers
Our cake layers offer excellent make-ahead flexibility. Each baked layer can be wrapped tightly in plastic wrap or aluminum foil immediately after cooling completely. Properly wrapped layers store beautifully at room temperature for up to one day without any loss in moisture or flavor.
For longer storage we freeze the wrapped layers for up to several weeks. This method proves particularly useful during holiday seasons or when planning special events. Frozen layers thaw quickly at room temperature in about 2-3 hours while maintaining their original texture and taste.
Buttercream Preparation
We can prepare our three-flavored buttercream components up to one week in advance. Store each buttercream flavor in separate airtight containers in the refrigerator. Before using we bring the buttercream to room temperature and re-whip it briefly to restore its smooth spreadable consistency.
Room temperature buttercream requires about 2-3 hours to soften properly. We recommend removing it from the refrigerator during the final cake layer thawing process for perfect timing.
Assembly Timeline
Strategic assembly timing ensures our cake maintains its structural integrity and visual appeal. We assemble and decorate the cake close to serving time especially when using whipped cream or other perishable fillings. This approach prevents layer shifting and maintains the crispness of decorative elements.
| Timeline | Task |
|---|---|
| 1-2 weeks ahead | Bake and freeze cake layers |
| 1 week ahead | Prepare buttercream components |
| Day before | Thaw cake layers if frozen |
| 2-4 hours before serving | Assemble and decorate cake |
Final Storage Considerations
Our completed Neapolitan cake requires refrigeration when using whipped cream filling or during warm weather conditions. The assembled cake maintains optimal quality for 2-3 days when properly covered in the refrigerator. We cover the cake with a large cake dome or tent it carefully with plastic wrap to prevent the buttercream from absorbing refrigerator odors.
This make-ahead approach allows us to enjoy the complex flavors and stunning presentation of our Neapolitan cake without the pressure of same-day preparation.
Troubleshooting Tips

Even the most experienced bakers encounter challenges when creating this tri-flavored masterpiece. We’ve compiled the most common issues and their answers to help you achieve perfect results every time.
Dense or Dry Cake Layers
Room temperature butter makes all the difference in creating tender cake layers. We recommend bringing your butter to the proper temperature about 2-3 hours before baking. Overmixing the batter develops too much gluten and results in tough cake layers. Mix just until ingredients combine and no flour streaks remain visible.
Measuring flour correctly prevents dense texture issues. We suggest spooning flour into measuring cups rather than scooping directly from the bag. Too much flour absorbs moisture and creates heavy layers that don’t complement the light Neapolitan profile.
Cake Not Rising Properly
Fresh leavening agents ensure proper rise in each layer. Check expiration dates on baking powder and baking soda before starting your recipe. We test baking powder freshness by adding a teaspoon to hot water – it should bubble vigorously.
Oven temperature accuracy affects how well your layers rise. Use an oven thermometer to verify your actual temperature matches the dial setting. Preheating for at least 15 minutes creates the proper environment for cake rise.
Layers Sticking to Pans
Pan preparation prevents frustrating removal issues. We run an offset spatula around pan edges immediately after removing cakes from the oven. This technique releases any areas where cake might stick during cooling.
Proper greasing and flouring creates a barrier between cake and pan. Butter every surface thoroughly and dust with flour, tapping out excess before adding batter.
Frosting Problems
| Issue | Solution | Temperature Requirement |
|---|---|---|
| Lumpy buttercream | Use room temperature butter | 65-68°F |
| Bulging between layers | Avoid overmixing frosting | Room temperature |
| Difficulty spreading | Ensure proper consistency | 70°F |
Room temperature butter creates smooth, spreadable buttercream for all three flavors. Cold butter creates lumps that won’t cream properly with powdered sugar. We let butter sit out for 2-3 hours or cut into small pieces for faster softening.
Overmixing buttercream incorporates too much air and creates bulging between layers. Mix each buttercream flavor just until smooth and combined. Stop mixing once you achieve the desired consistency.
Achieving Even Layers
Kitchen scales provide the most accurate way to divide batter evenly among three pans. We weigh empty pans first, then add equal amounts of batter to each. This method ensures consistent layer thickness and even baking times.
Visual cues help when scales aren’t available. Divide batter into three roughly equal portions using a large spoon. Level each portion gently in its pan without overpacking.
Decoration Challenges
Brief chilling prevents layers from shifting during decoration. We refrigerate assembled cakes for 15-20 minutes before applying final buttercream layers. This technique stabilizes the structure without freezing the frosting.
Cake scrapers smooth excess buttercream and create professional edges. Hold the scraper at a 45-degree angle and rotate the cake slowly for even coverage. Clean the scraper frequently for the smoothest finish.
Conclusion
We’ve walked you through every step of creating this stunning three-layer masterpiece that’s sure to impress at any gathering. With our detailed ingredient lists equipment recommendations and step-by-step instructions you’re well-equipped to tackle this beautiful dessert.
The key to success lies in proper preparation and patience. Take advantage of our make-ahead tips to spread the work across multiple days and don’t hesitate to reference our troubleshooting section if you encounter any challenges along the way.
This showstopper dessert rewards your effort with incredible visual appeal and three distinct flavors that work harmoniously together. Whether you’re celebrating a special occasion or simply want to treat your family and friends this Neapolitan cake delivers both impressive presentation and delicious taste that’ll have everyone asking for your secret.
Frequently Asked Questions
What is a Neapolitan cake?
A Neapolitan cake is a three-layer dessert inspired by the classic ice cream flavor combination. It features distinct vanilla, chocolate, and strawberry cake layers, each paired with matching buttercream frosting. The cake offers a beautiful presentation with complementary flavors that aren’t overpowering, making it perfect for celebrations and special occasions.
What ingredients do I need for each layer?
Each layer requires basic cake ingredients with flavor variations. The vanilla layer uses flour, baking powder, butter, sugar, egg, vanilla, and milk. The chocolate layer adds cocoa powder. The strawberry layer incorporates fresh strawberry puree and optional pink food coloring. The buttercream uses butter, powdered sugar, cream, and flavor-specific additions like cocoa or strawberry puree.
What equipment is essential for making this cake?
Key equipment includes a stand mixer or hand mixer, three 6-inch round cake pans, measuring cups and spoons, mixing bowls, a sifter, whisk, rubber spatula, and a food processor for strawberry preparation. Non-stick spray or butter with flour is needed for pan preparation. Having the right tools ensures smooth preparation and professional results.
How long should I bake each layer?
Bake all three layers at 350°F (180°C) for approximately 30 minutes. The cakes are done when a toothpick inserted in the center comes out clean. After baking, cool the layers completely on wire racks before frosting to prevent the buttercream from melting and ensure proper assembly.
How do I make the three different buttercreams?
Start with a vanilla buttercream base by creaming butter and gradually adding powdered sugar, milk, and vanilla. Divide into thirds. Mix cocoa powder into one portion for chocolate buttercream. Add strained strawberry preserves or puree to another portion for strawberry buttercream, with optional pink coloring for visual appeal.
What’s the proper assembly technique?
Stack layers with chocolate on bottom, vanilla in middle, and strawberry on top, using buttercream between each layer. Apply a thin crumb coat first to catch loose crumbs, then chill. Add a thicker final layer of buttercream, incorporating all three flavors in an elegant design with optional chocolate ganache drizzle.
How should I store the finished cake?
Refrigerate decorated cakes for 3-4 days in a covered container. Frozen cakes last up to 3 months when properly wrapped. Undecorated cakes can be stored at room temperature for 3 days. For best flavor, serve at room temperature by letting refrigerated cakes sit out for 30-60 minutes before serving.
Can I make components ahead of time?
Yes! Bake cake layers up to one day ahead at room temperature or freeze for weeks. Buttercream can be prepared up to a week in advance and refrigerated. Assemble close to serving time for best structural integrity. Store completed cakes with perishable fillings in the refrigerator for 2-3 days maximum.
What are common troubleshooting tips?
Use room temperature butter for proper creaming, measure flour correctly to avoid dense layers, and check leavening agent freshness. For smooth buttercream, ensure proper butter temperature and sift powdered sugar. Prevent layer bulging by using appropriate amounts of frosting. Use kitchen scales for even batter division and cake scrapers for polished finishing.


