There’s nothing quite like the tangy-sweet perfection of key lime pie on a hot summer day. This Florida-born dessert captures the essence of tropical paradise in every creamy bite. But what if we told you there’s a way to enjoy this classic treat without turning on your oven?
Our no-bake key lime pie delivers all the zesty flavor you crave with none of the kitchen heat. We’ve perfected this simple technique that transforms just a handful of ingredients into a restaurant-quality dessert that’ll have your taste buds dancing. The silky smooth filling paired with that signature tart kick creates an irresistible combination.
Whether you’re hosting a summer barbecue or simply craving something refreshing, this foolproof recipe comes together in minutes. We’ll show you how to create the perfect balance of creamy texture and bright citrus flavor that makes key lime pie so beloved. Get ready to impress your guests with minimal effort and maximum flavor.
Ingredients
We gather simple pantry staples to create this refreshing no bake dessert. Our ingredient list divides into three essential components that build layers of flavor and texture.
For the Graham Cracker Crust
- 1½ cups graham cracker crumbs (about 12 full crackers)
- 6 tablespoons unsalted butter, melted
- ¼ cup granulated sugar
- Pinch of salt
For the Key Lime Filling
- 1 (14-ounce) can sweetened condensed milk
- ¾ cup fresh key lime juice (about 20-25 key limes)
- 2 tablespoons key lime zest
- 3 large egg yolks
- 1 (8-ounce) package cream cheese, softened to room temperature
- ¼ cup powdered sugar
For the Whipped Cream Topping
- 1 cup heavy whipping cream, chilled
- 3 tablespoons powdered sugar
- 1 teaspoon vanilla extract
- Key lime slices for garnish (optional)
- Additional lime zest for garnish (optional)


Equipment Needed

Creating our no bake key lime pie requires minimal kitchen tools that most home bakers already have on hand. We’ll walk you through each essential piece of equipment to ensure your pie turns out perfectly smooth and professional looking.
Food Processor takes center stage for crushing graham crackers into fine crumbs. This powerful appliance creates the ideal texture for our crust base, ensuring even distribution and proper binding with the melted butter.
Whisk becomes our go-to tool for achieving the silky smooth filling that makes this dessert irresistible. We use it to blend the cream cheese until completely smooth and incorporate the sweetened condensed milk and key lime juice without lumps.
Spatula serves double duty in our recipe preparation. First, we use it to press the graham cracker mixture evenly into our pie pan, creating a firm foundation. Later, we rely on it to spread the filling smoothly across the crust surface.
Measuring Cups and Spoons ensure accuracy in our ingredient proportions. Precise measurements make the difference between a perfectly balanced tart and sweet flavor profile and an unsuccessful dessert.
9-inch Pie Pan provides the perfect vessel for assembling our creation. This standard size accommodates our ingredient quantities perfectly and creates the classic pie presentation we’re aiming for.
Knife becomes essential for clean, professional slices when serving. A sharp blade cuts through the set filling and crust without dragging or creating messy edges.
Piping Bag offers an optional upgrade for decorating with whipped cream. While not strictly necessary, it elevates the visual appeal and creates those bakery-style swirls that impress guests.


Instructions

Now that we have all our ingredients and equipment ready let’s create this delicious no bake key lime pie step by step. We’ll build this dessert in layers starting with the crust and finishing with the perfect chill time.
Prep the Graham Cracker Crust
We start by combining 1 ½ cups graham cracker crumbs with ½ cup melted unsalted butter in a small bowl. Mix these ingredients thoroughly until every crumb is coated with butter and the mixture holds together when pressed. Press the buttery crumb mixture firmly into the bottom and up the sides of our 9-inch pie pan. We want to create an even layer that will hold our filling securely. Use the back of a measuring cup or your fingers to pack the crust tightly against the pan.
Make the Key Lime Filling
Beat 8 ounces of softened cream cheese in a large bowl until smooth and creamy. Add 1 can (14 ounces) of sweetened condensed milk and continue mixing until well combined. Pour in ½ cup of fresh key lime juice and add 1 tablespoon of lime zest. We blend all these ingredients until the mixture is completely smooth and no lumps remain. The filling should have a pale green color and a creamy consistency that coats the back of a spoon.
Assemble the Pie
Pour our prepared key lime filling directly over the graham cracker crust. We spread the filling evenly using a spatula to ensure it reaches all edges of the crust. Gently tap the pie pan on the counter to release any air bubbles and create a smooth surface. The filling should sit level within the crust without overflowing.
Chill and Set
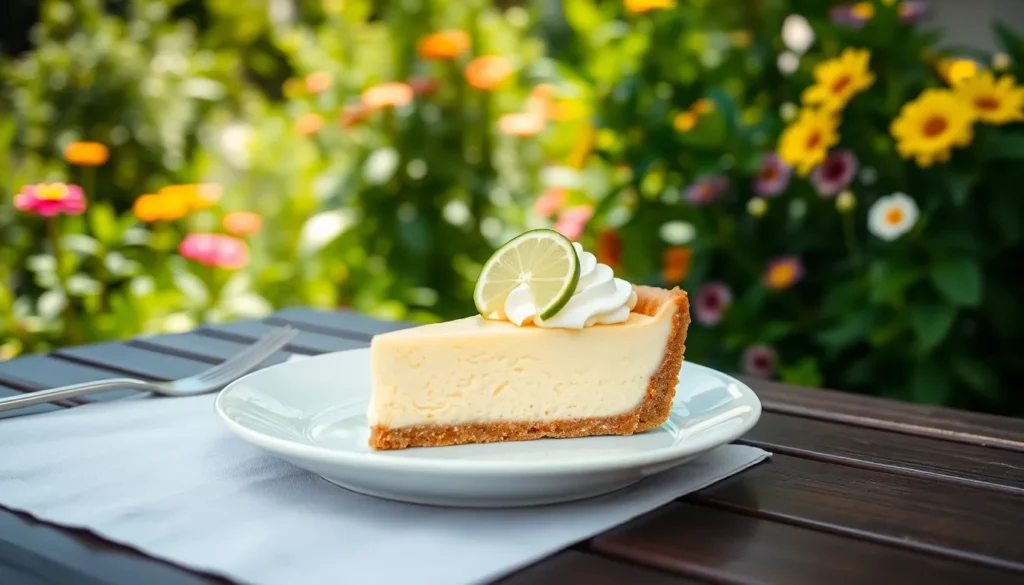
Place the assembled pie in the refrigerator for at least 1 hour to allow it to set properly. For best results we recommend chilling overnight which gives the flavors time to meld and creates the perfect firm texture. The pie is ready when the filling holds its shape and doesn’t jiggle when gently shaken. Before serving we can garnish with whipped cream and thin key lime slices for an elegant presentation.


Directions for Serving

We recommend serving our no-bake key lime pie chilled directly from the refrigerator for optimal texture and flavor. Remove the pie from the refrigerator approximately 5 minutes before serving to make cutting easier.
Cutting Clean Slices
We achieve the cleanest cuts by using a sharp knife dipped in warm water between each slice. Wipe the blade clean with a damp towel after each cut to prevent the creamy filling from sticking and creating messy edges.
Plating Presentation
Transfer each slice to individual dessert plates using a pie server or wide spatula. We place the pie slice slightly off center on the plate to create visual balance and leave room for garnishes.
Garnishing Options
Top each serving with a generous dollop of whipped cream using either a spoon or piping bag for a more elegant presentation. Add a thin key lime wheel or wedge alongside the slice for both visual appeal and an extra burst of citrus aroma. Sprinkle additional lime zest over the whipped cream to enhance the bright flavor profile.
Portion Considerations
| Serving Size | Portions per 9-inch Pie | Prep Time Before Serving |
|---|---|---|
| Standard slice | 8 servings | 5 minutes |
| Large slice | 6 servings | 5 minutes |
| Small slice | 12 servings | 5 minutes |
Temperature Guidelines
Serve the pie at 35-40°F for the best texture experience. The filling should feel firm yet creamy when you press it gently with a fork. We find that pie served too warm becomes loose and messy while overly chilled pie can taste muted.
Timing Your Service
Plan to serve the pie within 30 minutes of removing it from the refrigerator to maintain the ideal consistency. The whipped cream topping holds its shape best when the pie remains chilled throughout the serving process.


Make-Ahead Instructions

Preparing components separately maximizes convenience and ensures optimal texture when we’re ready to serve our no bake key lime pie. We recommend making the graham cracker crust up to 24 hours ahead of assembly day.
Crust Preparation
Mix our graham cracker crumbs with melted butter and press the mixture firmly into our 9-inch pie pan. Cover the prepared crust with plastic wrap and store it in the refrigerator until we’re ready to add the filling.
Filling Component
Beat cream cheese until smooth and gradually incorporate sweetened condensed milk and key lime juice the day before serving. Store this mixture in an airtight container in the refrigerator to maintain freshness and prevent absorption of other flavors.
Assembly Day Process
Pour our chilled filling over the prepared crust and smooth the surface with a spatula. Allow the assembled pie to set in the refrigerator for the recommended chilling time before adding any garnishes.
Extended Storage Options
Wrap our completed pie loosely with plastic wrap or aluminum foil for refrigerator storage up to 3 days. Freeze the pie for longer storage by wrapping it tightly in plastic wrap followed by aluminum foil for up to 2 months.
Serving Day Tips
Remove frozen pies from the freezer and transfer them to the refrigerator 4 to 6 hours before serving to achieve the perfect creamy consistency. Add whipped cream topping and fresh garnishes just before presenting to maintain their visual appeal and texture.


Storage Tips

We understand that proper storage is crucial for maintaining the creamy texture and bright flavor of your no-bake key lime pie. Our storage recommendations will help you preserve this delicious dessert for maximum enjoyment.
Refrigeration Storage
Store your finished no-bake key lime pie in the refrigerator for up to 3 days for optimal quality. We recommend covering the pie with plastic wrap or aluminum foil to prevent it from absorbing other flavors in your refrigerator. The pie must chill for at least 2 hours before serving, though we find overnight chilling produces the best texture and allows the flavors to meld beautifully.
Keep the pie on a stable shelf in your refrigerator where it won’t be jostled or damaged. We suggest placing it toward the back of the refrigerator where temperatures remain most consistent.
Freezing Options
For longer storage, we can freeze no-bake key lime pie with excellent results. Wrap individual slices or the entire pie tightly in plastic wrap, then place in airtight containers for up to 6 months in the freezer.
| Storage Method | Duration | Container Type |
|---|---|---|
| Refrigerator leftovers | Up to 3 days | Covered pie pan |
| Frozen individual slices | Up to 6 months | Shallow airtight container |
| Mini frozen pies | Up to 3 months | Silicone molds wrapped in plastic |
Mini no-bake key lime pies require special attention since they must remain frozen until serving. We store these in their silicone molds wrapped securely in plastic wrap for up to 3 months.
Serving from Storage
Always serve your no-bake key lime pie chilled directly from the refrigerator for the best texture and flavor experience. We recommend removing the pie from storage about 5 minutes before slicing to make cutting easier while maintaining the proper consistency.
For frozen mini pies, we unmold them by briefly submerging the bottom of the mold in warm water for just a few seconds. This technique releases the pies without damaging their shape or texture.
Top your chilled pie with fresh whipped cream and lime zest just before serving to maintain their vibrant appearance and prevent the garnishes from becoming soggy during storage.
Recipe Variations

Our no bake key lime pie adapts beautifully to different flavor profiles and serving styles. These variations maintain the refreshing citrus essence while offering unique twists for every occasion.
Traditional Key Lime Version
We love this classic approach that showcases the pure key lime flavor in all its glory. Our traditional version combines 8-16 oz cream cheese with 14 oz sweetened condensed milk for the perfect creamy base. The key lime juice ranges from 1/3 to 1/2 cup depending on your preferred tartness level. We recommend starting with 1/3 cup and adjusting to taste. Fresh lime zest elevates the citrus notes and provides visual appeal when sprinkled on top. The graham cracker crust serves as the perfect foundation for this timeless dessert. We often add whipped topping to create a lighter texture that balances the rich filling beautifully.
Coconut Key Lime Twist
We transform our classic recipe into a tropical paradise by incorporating coconut elements throughout. Coconut flakes mixed directly into the graham cracker crust add texture and nutty sweetness that complements the tart lime. Alternatively we blend coconut cream into the filling itself for an incredibly rich and creamy consistency. This variation transports you straight to the beach with every bite. The coconut flavors enhance rather than overpower the key lime taste. We find this version particularly popular during summer gatherings when guests crave that vacation feeling.
Individual Mini Pies
We create these charming single serving portions using mini graham cracker crusts that eliminate the guesswork of portion control. Each mini pie requires proportionally scaled down filling ingredients based on the crust size. These individual treats chill much faster than full size pies making them perfect for last minute entertaining. We can prepare dozens at once for parties and gatherings. The presentation impresses guests while offering convenient grab and go serving. Mini pies also freeze exceptionally well for make ahead convenience. Each guest receives their own perfect portion without the need for slicing or serving utensils.


Troubleshooting Tips

Even with the simplest recipes, we sometimes encounter challenges that can affect our no-bake key lime pie’s final result. Understanding these common issues helps us achieve the perfect dessert every time.
Crust Problems
Our graham cracker crust provides the foundation for this dessert, so getting it right matters significantly. When the crust crumbles or falls apart, insufficient butter coating usually causes this issue. We need to ensure every graham cracker crumb gets evenly coated with melted butter before pressing the mixture into our pie pan.
Pressing the crust mixture firmly creates a solid base that holds together beautifully. We recommend using the bottom of a measuring cup to press the mixture evenly across the pan bottom and up the sides. This technique prevents weak spots that could cause cracking or crumbling when we slice the finished pie.
Filling Consistency Issues
Our pie filling should achieve a smooth, creamy texture that holds its shape when sliced. Several factors can prevent this desired consistency from developing properly.
Insufficient chilling time represents the most common cause of filling problems. We must allow our pie to chill in the refrigerator for at least one hour, though overnight chilling produces the best results. The filling needs this extended cold time to properly set and achieve its characteristic firm yet creamy texture.
| Chilling Time | Expected Results |
|---|---|
| 1 hour minimum | Basic setting achieved |
| 2-4 hours | Good texture development |
| 12-24 hours | Optimal consistency |
When our pie remains too soft or develops a goopy texture, we need to extend the chilling time significantly. Allow the pie to chill for 12 to 24 hours before serving to achieve the proper consistency. This extended chilling period allows all ingredients to meld together and reach their ideal texture.
Overfilling Prevention
We must measure our filling carefully to avoid overfilling the pie shell. Excessive filling prevents proper setting and can cause the pie to overflow or develop an uneven texture. Our recipe provides exact measurements that work perfectly with a standard 9-inch pie pan.
The filling should reach just below the crust rim, leaving enough space for any garnishes we plan to add. This proper proportion ensures even chilling throughout the entire pie and prevents structural issues that could affect both appearance and taste.
Temperature Management
Room temperature ingredients blend more easily and create a smoother filling. We should remove our cream cheese from the refrigerator about 30 minutes before starting the recipe. This softening time prevents lumps and ensures our filling achieves the silky smooth texture we desire.
After assembly, we need to maintain proper refrigerator temperature to ensure adequate setting. Our refrigerator should maintain a temperature between 35-38°F for optimal results. Higher temperatures can prevent proper setting, while extremely cold temperatures might cause texture issues.
Conclusion
This no-bake key lime pie delivers restaurant-quality results with minimal effort and zero oven time. We’ve shown you how simple ingredients transform into a creamy tangy dessert that’s perfect for any occasion.
The beauty of this recipe lies in its flexibility – whether you’re making individual portions or experimenting with coconut variations the core technique remains foolproof. With proper storage techniques you can prepare this pie days ahead making it ideal for entertaining.
Armed with our troubleshooting tips and make-ahead strategies you’re ready to create a dessert that’ll impress every time. The bright citrus flavor and silky texture make this pie a guaranteed crowd-pleaser that captures summer’s essence in every bite.
Frequently Asked Questions
What makes this key lime pie recipe no-bake?
This recipe requires no oven time because it uses cream cheese and sweetened condensed milk as the base, which firms up when chilled. The graham cracker crust is also prepared without baking, using melted butter to bind the ingredients together. Simply mix, assemble, and refrigerate for a perfect dessert.
How long does the key lime pie need to chill?
The pie needs at least 1 hour of chilling time in the refrigerator to set properly. However, for the best texture and flavor, overnight chilling (12-24 hours) is recommended. This extended time allows the filling to achieve the perfect creamy consistency.
Can I use regular limes instead of key limes?
Yes, you can substitute regular Persian limes for key limes if needed. However, key limes provide a more authentic tart flavor and smoother texture. If using regular limes, you may need to adjust the amount slightly since they’re less acidic than key limes.
How should I store leftover key lime pie?
Store the pie covered in the refrigerator for up to 3 days. For longer storage, wrap individual slices tightly in plastic wrap and freeze for up to 6 months. When serving frozen slices, thaw them in the refrigerator and add fresh garnishes just before serving.
What equipment do I need to make this pie?
Essential tools include a food processor for crushing graham crackers, measuring cups and spoons, a whisk, a spatula, and a 9-inch pie pan. Optional items include a piping bag for decorative whipped cream and a sharp knife for clean slicing.
Can I make this pie ahead of time?
Absolutely! This pie is perfect for make-ahead preparation. You can prepare the crust up to 24 hours in advance and make the filling a day before assembly. The completed pie actually improves with overnight chilling, making it ideal for entertaining.
Why is my pie filling too runny?
Runny filling usually results from insufficient chilling time or using ingredients that weren’t at room temperature when mixed. Ensure all ingredients are properly blended and allow adequate refrigeration time. The filling will continue to firm up as it chills longer.
How do I get clean slices when cutting the pie?
Use a sharp knife dipped in warm water between each cut. Wipe the blade clean after each slice to prevent dragging the filling. Remove the pie from the refrigerator just before slicing, as it cuts more cleanly when properly chilled.


