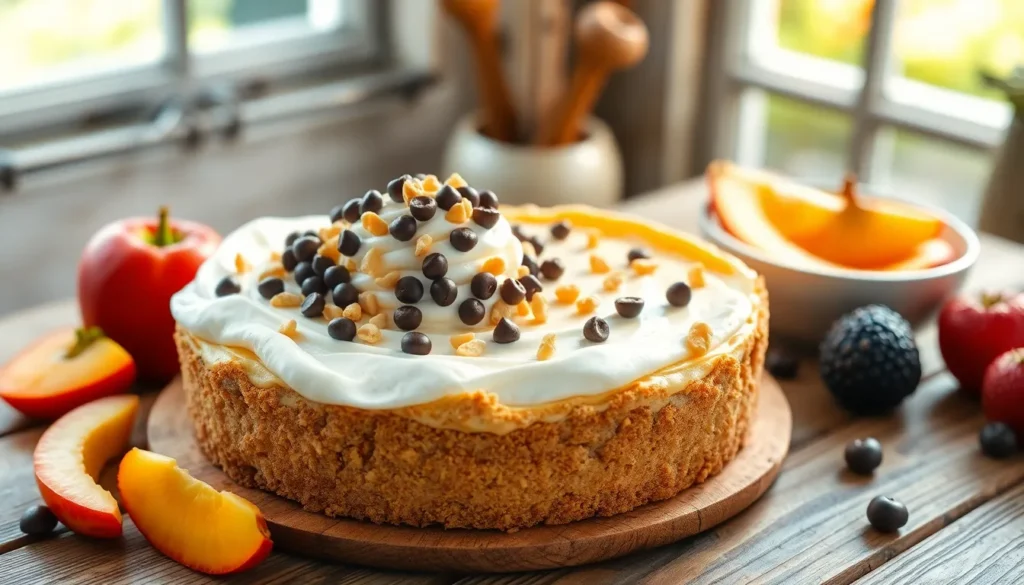
When summer heat makes turning on the oven unbearable, we’ve got the perfect dessert solution that’ll satisfy your sweet tooth without adding extra warmth to your kitchen. Our no bake peanut butter pie delivers all the creamy, nutty goodness you crave in a fraction of the time traditional pies require.
This crowd-pleasing dessert combines the rich flavor of peanut butter with a silky smooth filling that sets beautifully in the refrigerator. We love how this recipe transforms simple pantry staples into an impressive dessert that looks like it came straight from a bakery. The best part? You’ll have it ready in just 15 minutes of active prep time.
Whether you’re hosting a summer barbecue, need a last-minute dessert for dinner guests, or simply want to treat your family to something special, this no bake peanut butter pie never fails to impress. Let’s jump into this foolproof recipe that’ll become your go-to warm-weather dessert.
Ingredients
We’ve organized our ingredients into three simple categories to make this no bake peanut butter pie as straightforward as possible. Each component builds upon the next to create layers of rich peanut butter flavor.
For the Crust
- 1 1/2 cups graham cracker crumbs
- 1/3 cup granulated sugar
- 6 tablespoons unsalted butter, melted
- 1/4 teaspoon salt
For the Peanut Butter Filling
- 8 oz cream cheese, softened to room temperature
- 1 cup creamy peanut butter
- 1 cup powdered sugar
- 1 teaspoon vanilla extract
- 1 1/2 cups heavy whipping cream, cold
- 1/4 teaspoon salt
For the Topping
- 1/2 cup heavy whipping cream, cold
- 2 tablespoons powdered sugar
- 1/2 teaspoon vanilla extract
- 1/4 cup chopped peanuts
- 2 tablespoons mini chocolate chips
- Drizzle of chocolate syrup (optional)


Equipment Needed
 1")
Creating the perfect no bake peanut butter pie requires exact tools that make the process smooth and ensure professional results. We’ve organized our equipment list to help you gather everything before starting.
Essential Equipment
A deep dish pie pan measuring 9 or 10 inches in diameter forms the foundation of our recipe. Standard pie dishes often result in extra filling overflowing, while deep dish pans provide the capacity needed for our generous portions.
Our food processor or rolling pin becomes crucial for creating perfectly crushed graham cracker crumbs. We prefer the food processor for consistent texture, though a rolling pin works excellently when processing crackers in a sealed plastic bag.
A stand mixer or hand mixer handles the heavy lifting when blending cream cheese, peanut butter, sugar, and whipped cream. These powerful tools ensure our filling achieves the smooth, airy consistency that defines exceptional peanut butter pie.
Supporting Tools
We rely on a large mixing bowl for combining ingredients efficiently. The generous size prevents messy spills while accommodating all our filling components.
A rubber or silicone spatula proves invaluable for scraping bowls clean and folding mixtures gently. This tool helps us incorporate every bit of our delicious filling without waste.
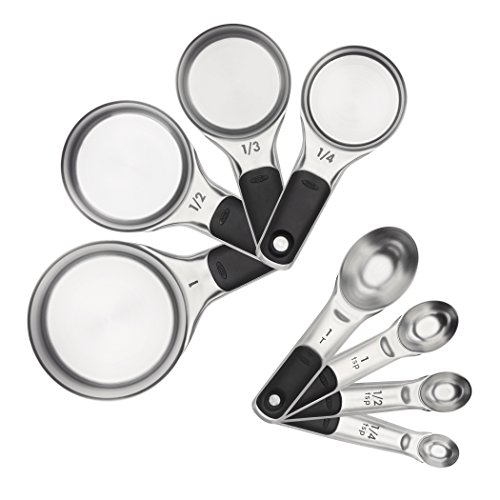
Measuring cups and spoons guarantee accuracy in our ingredient ratios. Precise measurements create consistent results every time we make this dessert.
Storage and Finishing Equipment
Our refrigerator or freezer plays a vital role in setting the crust and chilling the finished pie properly. Adequate cooling space ensures our dessert maintains its structure.
Piping bags or plastic bags with star tips add professional touches when we want decorative toppings or elegant garnishing. These optional tools elevate presentation for special occasions.
| Equipment Category | Essential Items | Optional Items |
|---|---|---|
| Mixing | Deep dish pie pan, Stand/hand mixer, Large bowl | Rubber spatula |
| Processing | Food processor or rolling pin | – |
| Measuring | Measuring cups and spoons | – |
| Storage | Refrigerator/freezer | – |
| Finishing | – | Piping bags, Star tips |
Having these tools ready streamlines our pie making process and delivers bakery quality results from our home kitchen.


Instructions
 2")
Now we’ll walk through the simple step-by-step process to create our delicious no-bake peanut butter pie. Each stage builds upon the last to create layers of creamy peanut butter perfection.
Prepare the Crust
We start by crushing 1½ cups of graham crackers into fine crumbs using our food processor or rolling pin. Transfer the crumbs to a large mixing bowl and stir in ¼ cup granulated sugar and ¼ teaspoon salt until evenly distributed.
Pour 6 tablespoons of melted butter over the crumb mixture and stir with a fork until the mixture resembles wet sand and holds together when pressed. Press the mixture firmly into the bottom and up the sides of our 9-inch deep dish pie pan using the bottom of a measuring cup or our fingers.
Place the prepared crust in the refrigerator for at least 30 minutes or freeze for 15 minutes to set completely while we prepare the filling.
Make the Peanut Butter Filling
Beat 8 ounces of softened cream cheese in our large mixing bowl using an electric mixer until light and fluffy. Add 1 cup creamy peanut butter and continue beating until the mixture is completely smooth and well combined.
Gradually add 1 cup powdered sugar and 1 teaspoon vanilla extract while mixing on medium speed. Beat in ¼ teaspoon salt to enhance the peanut butter flavor.
Pour 1 cup heavy whipping cream into a separate bowl and whip until soft peaks form. Gently fold the whipped cream into our peanut butter mixture using a rubber spatula until no white streaks remain and the filling is light and airy.
Assemble the Pie
Remove our chilled crust from the refrigerator and pour the peanut butter filling into the center. Use our rubber spatula to spread the filling evenly and smooth the top surface creating gentle swirls if desired.
Cover the pie with plastic wrap and refrigerate for at least 2 hours or overnight until the filling is completely set and firm to the touch.
Add the Topping
Whip ½ cup heavy cream with 2 tablespoons powdered sugar and ½ teaspoon vanilla extract until soft peaks form just before serving. Spread or pipe the whipped cream over the entire surface of our chilled pie.
Sprinkle ¼ cup chopped peanuts and 2 tablespoons mini chocolate chips evenly over the whipped cream for added texture and visual appeal. Drizzle chocolate syrup in decorative patterns across the top if desired for an extra indulgent finish.


Chilling and Setting Time
 3")
The success of our no-bake peanut butter pie depends entirely on proper chilling time. We need to allow the pie sufficient time to set in the refrigerator for the filling to achieve its perfect creamy consistency.
Our pie requires a minimum of 4 hours in the refrigerator to set properly. This timeframe allows the cream cheese and peanut butter mixture to firm up while maintaining its smooth texture. We recommend planning ahead since this chilling period cannot be rushed.
For optimal results, we suggest letting the pie chill overnight in the refrigerator. This extended chilling time ensures the filling reaches its ideal consistency and makes slicing much easier. The overnight method also allows all flavors to meld together beautifully.
| Chilling Method | Time Required | Storage Duration |
|---|---|---|
| Refrigerator (minimum) | 4 hours | 3-4 days |
| Refrigerator (optimal) | Overnight | 3-4 days |
| Freezer | 2-3 hours | Up to 3 months |
We can also freeze our peanut butter pie for longer storage. The pie can go directly into the freezer without refrigerating first and will keep for up to 3 months. Freezing creates a firmer texture that some people prefer, especially during hot summer months.
During the chilling process, we should keep our pie away from direct sunlight and heat sources. The refrigerator temperature should remain consistent to ensure even setting throughout the filling.
We need to ensure all filling ingredients are thoroughly incorporated before chilling begins. Any lumps or unmixed portions will remain that way after chilling, so proper mixing at the beginning saves us from texture issues later.


Make-Ahead Instructions
 4")
We love how this no bake peanut butter pie becomes even better when prepared in advance. Planning ahead allows the flavors to meld beautifully while saving us precious time on the day we want to serve it.
Prepare Components Separately
We recommend making the graham cracker crust up to 2 days before serving. Press the crust mixture into our pie pan and wrap it tightly with plastic wrap before refrigerating. The filling can also be prepared 1 day ahead and stored separately in an airtight container in the refrigerator.
Assembly Timeline
Our preferred method involves filling the prepared crust and allowing the complete pie to chill overnight. This extended chilling time creates the perfect creamy texture we’re looking for. We can safely prepare the entire pie up to 24 hours before our planned serving time.
Final Touches Strategy
We always wait to add the whipped cream topping and garnishes until just before serving. Fresh whipped cream maintains its fluffy texture best when applied within 2 hours of serving. Store any leftover whipped cream separately in the refrigerator.
Long Term Storage Options
For extended make ahead planning we can freeze the completed pie without the final toppings for up to 1 month. Wrap the pie tightly in plastic wrap followed by aluminum foil to prevent freezer burn. Transfer the frozen pie to the refrigerator 4 to 6 hours before serving to allow proper thawing.
Garnish Preparation
We can prepare chocolate drizzle and chop peanuts up to 3 days in advance. Store the chocolate syrup at room temperature and keep chopped nuts in an airtight container. Mini chocolate chips and peanut butter cups can be added directly from the package when we’re ready to serve.


Storage Tips
 5")
Proper storage ensures our no-bake peanut butter pie maintains its creamy texture and rich flavor for days after preparation. We recommend storing the finished pie in the refrigerator as our primary method for optimal freshness.
Refrigerator Storage
We store our no-bake peanut butter pie tightly covered in the refrigerator for best results. Cover the pie completely with plastic wrap or place it in an airtight container to prevent the filling from absorbing other flavors. Our pie stays fresh in the refrigerator for 3 to 5 days when properly covered. Some recipes indicate the pie can last up to one week in an airtight container.
Freezer Storage
For longer storage periods we wrap the pie well in plastic wrap before freezing. Place the wrapped pie in a shallow airtight container for extra protection against freezer burn. Our frozen peanut butter pie keeps for up to one month according to most recipes. But storage conditions and exact ingredients can extend this timeframe to 6 months in optimal conditions.
We enjoy serving the pie directly from the frozen state or allow it to thaw slightly in the refrigerator before serving. Both options provide delicious results with different texture experiences.
Storage Duration Reference
| Storage Method | Duration | Storage Requirements |
|---|---|---|
| Refrigerator | 3-7 days | Tightly covered or airtight container |
| Freezer | 1-6 months | Well wrapped in plastic and shallow container |
Storage Best Practices
We always add toppings like whipped cream chopped peanuts and chocolate drizzle just before serving rather than during storage. This prevents the toppings from becoming soggy or losing their appealing texture. Store any leftover toppings separately in the refrigerator and apply them fresh when ready to serve.
Our no-bake peanut butter pie actually improves in flavor when stored overnight as the ingredients meld together beautifully. This makes it an excellent make-ahead dessert for entertaining or busy schedules.
Serving Suggestions
 6")
We recommend serving this no-bake peanut butter pie well-chilled to maintain its signature creamy texture and rich flavor profile. The pie reaches its optimal consistency after spending at least 4 hours in the refrigerator though overnight chilling delivers the best results.
Temperature and Timing
Remove the pie from the refrigerator about 10 minutes before serving to allow for easier slicing. Cold temperatures keep the filling firm while preventing the graham cracker crust from becoming soggy. We find that serving the pie too warm compromises both texture and presentation.
Enhanced Toppings
Transform each slice into a restaurant-quality dessert by adding our recommended toppings just before serving. Sprinkle chopped peanuts across the surface for extra crunch and visual appeal. Mini peanut butter cups make an excellent garnish that reinforces the pie’s primary flavor while adding textural contrast.
Drizzle melted peanut butter over individual slices for an indulgent finishing touch. The warm peanut butter creates beautiful patterns while complementing the cool filling. We suggest warming the peanut butter in 15-second microwave intervals until it reaches a drizzling consistency.
Occasion-Exact Presentations
| Occasion | Recommended Serving Style |
|---|---|
| Summer Gatherings | Individual slices with whipped cream rosettes |
| Birthday Celebrations | Whole pie with candles and chocolate drizzle |
| Casual Entertaining | Pre-cut slices with chopped peanut garnish |
| Special Dinners | Plated portions with artistic peanut butter swirls |
Summer barbecues and outdoor gatherings showcase this pie’s refreshing qualities perfectly. The no-bake preparation makes it ideal for warm weather entertaining when we want to avoid using the oven. Birthday parties benefit from the pie’s impressive appearance and crowd-pleasing flavor that appeals to both children and adults.
Portion Control and Presentation
Cut the pie into 8 to 10 generous slices using a sharp knife dipped in warm water between cuts. This technique prevents the filling from sticking to the blade and ensures clean presentation. We recommend wiping the knife clean after each slice for professional-looking results.
Serve each portion on chilled dessert plates to maintain the pie’s temperature longer. The contrast between the cool pie and room temperature plate helps preserve the optimal serving consistency throughout the dining experience.


Recipe Variations
 7")
Our classic no-bake peanut butter pie serves as the perfect foundation for countless delicious variations. These creative twists transform the basic recipe into exciting new desserts that cater to different taste preferences and occasions.
Chocolate Peanut Butter Pie
We elevate the classic recipe by incorporating rich chocolate elements that complement the nutty peanut butter flavor. Use a chocolate cookie crust instead of graham crackers for the base to enhance the chocolate experience.
Additional Ingredients:
- 1 chocolate Oreo pie crust (9-inch)
- 2 tablespoons chocolate syrup for garnish
- 1 cup heavy cream
- 1 cup semi-sweet chocolate chips
Modified Instructions:
- Follow the basic peanut butter filling recipe using the chocolate crust
- Create chocolate ganache by heating heavy cream and pouring over chocolate chips
- Stir ganache until smooth and let cool for 15 minutes
- Spread ganache layer over the set peanut butter filling
- Refrigerate for additional 2 hours before adding whipped topping
- Drizzle chocolate syrup over final whipped cream layer before serving
Banana Peanut Butter Pie
We combine the classic pairing of bananas and peanut butter to create a tropical twist on our original recipe. Fresh banana slices add natural sweetness and creamy texture that perfectly complements the rich peanut butter filling.
Additional Ingredients:
- 2 ripe bananas, sliced into 1/4-inch rounds
- 1 tablespoon lemon juice
- 1 tablespoon honey
Modified Instructions:
- Toss banana slices with lemon juice and honey to prevent browning
- Arrange half of the banana slices in the bottom of the prepared crust
- Pour peanut butter filling over the banana layer
- Press remaining banana slices gently into the top of filling
- Chill according to basic recipe instructions
- Garnish with additional banana slices just before serving
Mini Peanut Butter Pies
We transform our full-sized dessert into individual portions perfect for parties and portion control. These adorable mini pies offer the same creamy texture and rich flavor in perfectly sized servings.
Equipment Needed:
- 12 mini pie pans or muffin tin
- 12 mini graham cracker crusts
Modified Measurements:
- Reduce all filling ingredients by half for 6 mini pies
- Use full recipe amounts for 12 mini pies
- Prepare mini crusts in individual pans or muffin cups
- Divide peanut butter filling evenly among mini crusts using ice cream scoop
- Smooth tops with offset spatula for professional appearance
- Chill for minimum 3 hours due to smaller size
- Top each mini pie with dollop of whipped cream
- Garnish individual pies with single peanut or chocolate chip
| Variation | Prep Time | Chill Time | Servings |
|---|---|---|---|
| Chocolate Peanut Butter | 25 minutes | 6 hours | 8-10 slices |
| Banana Peanut Butter | 20 minutes | 4 hours | 8-10 slices |
| Mini Peanut Butter | 30 minutes | 3 hours | 6-12 individual pies |


Troubleshooting Tips
 8")
Even with our foolproof recipe, we know that baking challenges can arise. Let us guide you through the most common issues and their answers to ensure your no-bake peanut butter pie turns out perfectly every time.
Preventing Overwhipped Filling
Peanut butter can break if overwhipped, resulting in a curdled appearance that compromises the smooth texture we’re aiming for. We recommend mixing the peanut butter and cream cheese mixture just until combined, then stopping immediately. Watch for the moment when the ingredients come together smoothly—this is your cue to move to the next step rather than continuing to beat the mixture.
Achieving the Right Texture
The secret to our pie’s perfect consistency lies in properly whipped cream. We ensure the whipped cream reaches stiff peaks before folding it into the peanut butter mixture. This creates the light and airy texture that makes each bite irresistible. If your cream won’t whip to stiff peaks, check that your bowl and beaters are completely clean and that the cream is well-chilled.
Fixing a Runny Filling
When your filling appears too thin or runny, the culprit is usually insufficient chilling time or improperly whipped cream. We solve this by returning the pie to the refrigerator for additional chilling time—sometimes an extra 2 to 4 hours makes all the difference. The filling continues to set as it chills, so patience is key to achieving that perfect slice-worthy consistency.
Crust Issues and Answers
A soggy or crumbly crust can derail even the best filling. We prevent this by ensuring our graham cracker mixture has just enough melted butter to hold together when pressed—too much creates sogginess while too little results in crumbling. Press the crust firmly into the pan using the bottom of a measuring cup, then chill it for at least 30 minutes before adding the filling.
Temperature Troubleshooting
Room temperature ingredients blend more easily and create a smoother filling. We take our cream cheese out of the refrigerator 30 minutes before starting, allowing it to soften naturally. Cold cream cheese can create lumps that are difficult to eliminate, while overly warm ingredients can prevent proper setting during the chilling process.
Conclusion
We’ve shared everything you need to create this show-stopping no-bake peanut butter pie that’ll become your go-to dessert for warm weather entertaining. With just 15 minutes of active prep time and simple pantry ingredients you transform basic components into an impressive treat that rivals any bakery creation.
The beauty of this recipe lies in its flexibility and foolproof nature. Whether you’re making it ahead for a special occasion or whipping it up for unexpected guests the results are consistently delicious. The variations we’ve covered give you endless possibilities to customize this classic dessert.
Most importantly this pie delivers on both convenience and flavor without compromising either. You’ll love how the creamy peanut butter filling pairs perfectly with the crunchy graham cracker crust creating a dessert that’s both satisfying and refreshing during those hot summer days.
Frequently Asked Questions
How long does it take to make a no-bake peanut butter pie?
The active prep time is only 15 minutes, making it incredibly quick and easy. However, the pie requires a minimum of 4 hours of chilling time in the refrigerator to set properly. For best results, overnight chilling is recommended to achieve the perfect creamy consistency and enhanced flavor.
Can I make this peanut butter pie ahead of time?
Yes, this pie is perfect for make-ahead preparation. You can prepare the graham cracker crust up to 2 days in advance and store the filling separately for up to 1 day. The best method is to fill the crust and chill the entire pie overnight. Add whipped cream toppings just before serving.
How long can I store the no-bake peanut butter pie?
The finished pie can be refrigerated tightly covered for 3-5 days, with some recipes suggesting up to a week in an airtight container. For longer storage, freeze the pie without toppings for up to 1 month, or up to 6 months under optimal conditions.
What equipment do I need to make this pie?
Essential equipment includes a deep dish pie pan, food processor or rolling pin for crushing graham crackers, and a stand or hand mixer for the filling. You’ll also need a large mixing bowl, rubber spatula, measuring cups, and access to a refrigerator for chilling.
Can I freeze the no-bake peanut butter pie?
Yes, you can freeze the pie for up to 3 months. For best results, freeze the pie without toppings and add whipped cream, nuts, and chocolate chips just before serving. This prevents the toppings from becoming soggy and maintains the pie’s texture.
What are some popular variations of this recipe?
Popular variations include Chocolate Peanut Butter Pie with a chocolate cookie crust and ganache layer, Banana Peanut Butter Pie with fresh banana slices, and Mini Peanut Butter Pies for portion control. Each variation offers unique flavors while maintaining the easy no-bake preparation method.
How do I fix a runny peanut butter filling?
If your filling is too runny, allow additional chilling time in the refrigerator. Ensure all ingredients are at room temperature before mixing for smoother consistency. Make sure the cream is properly whipped to stiff peaks and that the cream cheese and peanut butter are well incorporated.
When should I add the toppings to the pie?
Add whipped cream toppings, chopped peanuts, mini chocolate chips, and chocolate drizzle just before serving. This prevents the toppings from becoming soggy and maintains their texture and appearance. The garnishes can be prepared in advance and stored separately.


