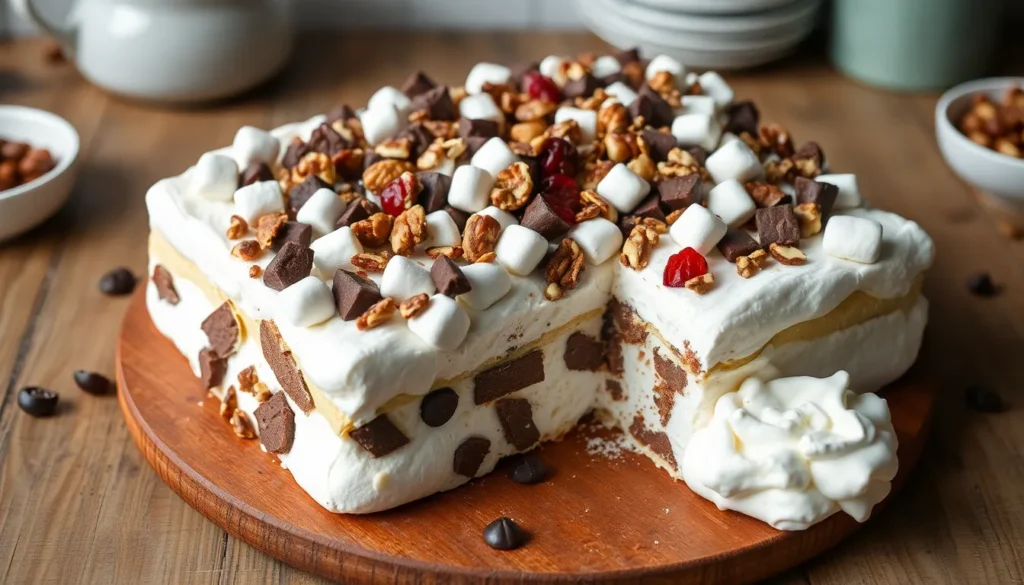
We’ve discovered the ultimate dessert mashup that’ll make your taste buds sing! Pavlova Rocky Road combines the light airy sweetness of traditional pavlova with the indulgent chocolate-packed goodness of rocky road. This show-stopping dessert takes the best of both worlds and creates something absolutely extraordinary.
The crispy meringue base provides the perfect contrast to rich chocolate chunks marshmallows and crunchy nuts. What started as a creative experiment in our kitchen has become our go-to dessert for special occasions. The combination of textures and flavors creates an unforgettable experience that’ll have everyone asking for the recipe.
Whether you’re hosting a dinner party or just want to treat yourself to something special this Pavlova Rocky Road delivers impressive results without the complexity you’d expect. We’ll walk you through each step to ensure your dessert turns out perfectly every time.
Ingredients
We’ve carefully selected each ingredient to create the perfect balance between the airy meringue base and the indulgent rocky road elements. Every component plays a crucial role in achieving that signature contrast of textures and flavors.
For the Pavlova Base
- 4 large egg whites, at room temperature
- 1 cup superfine sugar (caster sugar)
- 1 teaspoon vanilla extract
- 1 teaspoon white vinegar
- 1 tablespoon cornstarch
For the Rocky Road Topping
- 8 oz dark chocolate, roughly chopped into chunks
- 2 cups mini marshmallows
- 1 cup mixed nuts (almonds, pistachios, and hazelnuts), roughly chopped
- 1/2 cup dried cranberries or cherries
- 1/4 cup chocolate chips
- 2 tablespoons honey
- 1 tablespoon butter
For the Whipped Cream Layer
- 2 cups heavy whipping cream
- 1/4 cup powdered sugar
- 1 teaspoon vanilla extract
- 2 tablespoons mascarpone cheese (optional, for extra richness)
Equipment Needed

Creating our pavlova rocky road requires exact tools that ensure smooth preparation and professional results. We recommend gathering all equipment before starting to streamline the cooking process.
Essential Mixing Equipment:
- Large mixing bowl for combining dry and wet ingredients
- Microwave-safe bowl or double boiler for melting white chocolate safely
- Spatula or wooden spoon for thorough ingredient mixing
- Measuring cups and spoons for precise ingredient ratios
Preparation and Setting Tools:
- 19cm x 29cm (approximately 7.5 x 11 inch) slice pan or baking tray for shaping our rocky road
- Baking paper to line the pan for effortless removal
- Additional small bowls for organizing ingredients before mixing
Storage Equipment:
- Refrigerator space for the 1-2 hour chilling period required to set the dessert properly
- Airtight container for storing leftover portions
| Equipment Category | Items Needed | Purpose |
|---|---|---|
| Mixing | Large bowl, spatula, measuring tools | Ingredient preparation |
| Melting | Microwave-safe bowl or double boiler | White chocolate melting |
| Setting | Slice pan (19cm x 29cm), baking paper | Shaping and easy removal |
| Storage | Refrigerator, airtight container | Chilling and preservation |
Most home kitchens already contain these basic tools. The beauty of this no-bake recipe lies in its simplicity and minimal equipment requirements. We find that having everything ready before beginning makes the 10-minute preparation time even more manageable.
Instructions

We’ll guide you through each step to create this show-stopping dessert that combines traditional pavlova elements with indulgent rocky road flavors. Our method ensures perfect results every time with clear timing and techniques.
Preparing the Pavlova Base
Line a 19cm x 29cm slice pan with baking paper, ensuring the paper extends over the edges for easy removal. Melt 8 oz of white chocolate in a microwave-safe bowl using 30-second intervals, stirring between each burst until completely smooth. Add 1 tablespoon of coconut oil or melted butter to the chocolate and stir until well combined. Allow the mixture to cool slightly while you prepare the remaining ingredients. This chocolate base replaces traditional baked meringue and creates the foundation for our rocky road layers.
Making the Whipped Cream
Beat 2 cups of heavy whipping cream in a large mixing bowl using an electric mixer on medium speed until soft peaks form. Gradually add 1/4 cup of powdered sugar and 1 teaspoon of vanilla extract, continuing to beat until stiff peaks develop. Fold in 2 tablespoons of mascarpone cheese if using for extra richness. Set the whipped cream aside in the refrigerator until ready to assemble. The cream should hold its shape but remain spreadable.
Creating the Rocky Road Topping
Roughly chop 1 cup of mixed nuts into bite-sized pieces. Combine the chopped nuts with 2 cups of mini marshmallows, 1/2 cup of dried cranberries, and 1/4 cup of chocolate chips in a large bowl. Add the cooled white chocolate mixture to the dry ingredients and stir thoroughly until everything is evenly coated. Mix in 2 tablespoons of honey for added sweetness and binding. The mixture should hold together when pressed but remain chunky with visible pieces throughout.
Assembling the Pavlova Rocky Road
Spread half of the rocky road mixture evenly across the bottom of the prepared pan, pressing down gently with a spatula to create a firm base layer. Carefully spread the whipped cream over the chocolate base, creating an even layer that reaches all corners. Top with the remaining rocky road mixture, pressing lightly to ensure it adheres to the cream layer. Refrigerate the assembled dessert for 2 hours or until completely set. Remove from the refrigerator 5 minutes before serving to allow for easier cutting, then lift out using the baking paper overhang and slice into squares.
Directions for Serving

We recommend allowing the Pavlova Rocky Road to sit at room temperature for about 10 minutes before serving to soften slightly for easier cutting. This brief resting period ensures clean cuts without cracking the delicate texture we’ve worked so hard to achieve.
Using a sharp knife, we cut the dessert into squares or desired shapes directly in the lined pan. Clean the knife between cuts to maintain neat presentation lines. The generous portions showcase the beautiful layers of rocky road mixture and whipped cream that make this dessert so visually appealing.
For optimal presentation, we transfer individual pieces to serving plates using a wide spatula or cake server. The contrast between the white chocolate coating and colorful dried fruits creates an impressive display that guests will admire before taking their first bite.
We find that garnishing each serving with a light sprinkle of extra chopped nuts or dried cranberries adds both visual appeal and textural interest. A small dollop of additional whipped cream alongside each piece provides an elegant finishing touch for special occasions.
Storage becomes simple when we place any remaining portions in an airtight container and refrigerate immediately after serving. The dessert maintains its quality for up to three days when properly stored, making it perfect for advance preparation.
Since this no-bake creation requires no last-minute preparation, we can focus entirely on enjoying time with family and friends. The make-ahead convenience allows us to serve an impressive dessert without stress during entertaining or special celebrations.
Make-Ahead Tips

Planning ahead transforms this pavlova rocky road into the perfect dessert for busy schedules and special occasions. We recommend preparing the entire dessert up to one week in advance since it stores beautifully in an airtight container in the refrigerator without losing its delightful texture or flavor.
Storage becomes effortless when we follow proper techniques. The dessert maintains its quality for up to one week when kept refrigerated in a sealed container. For optimal serving texture we suggest removing individual pieces from the refrigerator 10 minutes before serving to allow easier slicing and better flavor release.
Customization opportunities make this dessert incredibly versatile for advance preparation. We can swap nuts according to seasonal availability or dietary preferences. Tropical fruits like mango and passionfruit create an exotic twist while pistachios add elegant color and crunch. The white chocolate base accepts various mix-ins beautifully.
Batch preparation scales effortlessly for large gatherings or gift giving occasions. We find that doubling or tripling the recipe works perfectly since the no-bake nature eliminates oven space concerns. Multiple batches can chill simultaneously in different containers.
Clean cutting requires exact techniques when working with chilled dessert. We recommend using a sharp knife that gets wiped clean between cuts. Dusting the blade with confectioners’ sugar prevents sticking when the mixture feels tacky.
| Make-Ahead Timeline | Storage Method | Duration |
|---|---|---|
| Refrigerator Storage | Airtight container | Up to 1 week |
| Freezer Storage | Airtight container | Up to 1 month |
| Room Temperature Rest | Before serving | 10 minutes |
Freezing extends storage possibilities for up to one month when we use proper airtight containers. Thawing requires transferring the dessert to the refrigerator several hours before serving to maintain the ideal texture balance between the creamy elements and crunchy meringue pieces.
Preparation timing works best when we complete the dessert at least 4 hours before serving to ensure proper setting. The gluten-free nature and absence of raw eggs make this dessert safe for extended storage periods while maintaining food safety standards.
Storage Instructions

We recommend storing your pavlova rocky road in an airtight container in the refrigerator to maintain optimal freshness and texture. This storage method prevents the meringues from softening and keeps the chocolate from melting while preserving the firmness of the marshmallows.
Our pavlova rocky road will keep well in the fridge for up to one week when properly sealed. We suggest cutting the dessert into squares or bars before storing for convenient serving portions. Make sure to seal the container tightly after each use to prevent the dessert from absorbing refrigerator odors or moisture.
| Storage Method | Duration | Temperature | Container Type |
|---|---|---|---|
| Refrigerator | Up to 1 week | 35-40°F | Airtight container |
| Room temperature | Not recommended | – | – |
| Freezer | Not advised | – | – |
We always chill our pavlova rocky road for 1 to 2 hours before cutting and serving. This chilling time allows the dessert to set properly and maintain its structure when sliced. Individual pieces can be served directly from the refrigerator for best results.
Avoid leaving the rocky road at room temperature for extended periods. The chocolate will soften and the marshmallows will lose their firm texture if exposed to warm temperatures too long. We do not recommend freezing pavlova rocky road as the texture may change significantly upon thawing.
When preparing large batches we find that refrigeration remains the most effective storage method. The no-bake nature of this dessert makes it perfect for advance preparation while maintaining quality throughout the storage period.
Variations and Substitutions

We love how versatile this Pavlova Rocky Road recipe becomes when you explore different flavor combinations and ingredient swaps. The beauty of this dessert lies in its adaptability to various tastes and dietary preferences.
Tropical Variations
Transform your dessert into a tropical paradise by incorporating mango and passionfruit into the rocky road mixture. We recommend using white chocolate as the base and adding chopped pistachios for a delightful crunch that complements the tropical flavors perfectly.
Festive Holiday Versions
Create a stunning Christmas edition by folding in dried cranberries and fresh pomegranate seeds. The tartness of these fruits pairs beautifully with white chocolate and cashews, creating a dessert that’s both visually striking and deliciously festive.
Chocolate Substitutions
We encourage you to experiment with different chocolate types based on your preference. Dark chocolate creates a rich, intense flavor profile, while milk chocolate offers a sweeter, more mellow taste. White chocolate provides a creamy backdrop that allows other flavors to shine through.
Nut Alternatives
Replace the mixed nuts with your favorites for a personalized touch. Chopped almonds deliver a classic rocky road flavor, while pistachios add a sophisticated twist. Cashews bring a buttery richness that works especially well with fruit-forward variations.
Marshmallow Options
Both white and pink marshmallows work wonderfully in this recipe. Pink marshmallows add a playful color element that makes the dessert particularly appealing for special celebrations or children’s parties.
Fruit Combinations
Swap out traditional dried cranberries for glacé cherries to create a more traditional rocky road flavor. Red licorice pieces offer an unexpected twist that adults often appreciate. Dried mango brings tropical sweetness, while dried apricots contribute a subtle tartness.
Dietary Adaptations
Make this dessert vegan-friendly by using vegan marshmallows in place of regular ones. This simple substitution allows everyone to enjoy this delightful treat without compromising on flavor or texture.
The key to successful variations lies in maintaining the balance between sweet, salty, and textural elements that make this dessert so appealing.
Troubleshooting Tips

Even the most experienced bakers encounter challenges when creating Pavlova Rocky Road. We’ve compiled answers for the most common issues to ensure your dessert turns out perfectly every time.
Pavlova Base Issues
Crumbly Meringue: Crushed meringue pieces that are too large or unevenly sized can create a crumbly texture that doesn’t bind well with the chocolate. We recommend crushing meringue into uniform pieces roughly the size of a fingernail for optimal distribution throughout the mixture. Store-bought meringue nests work beautifully when broken by hand rather than using a food processor which can create too much powder.
Stickiness Problems: Overmixing the ingredients after adding melted chocolate creates a sticky mess that’s difficult to work with. We suggest gently folding the chocolate into the dry ingredients using a rubber spatula just until everything is coated. The mixture should hold together without being overly wet or sticky to the touch.
Uneven Chocolate Distribution: White chocolate that’s too hot when added to the meringue can cause melting and create soggy spots. Allow the melted chocolate to cool for 2-3 minutes before combining it with other ingredients. This prevents the meringue from becoming too soft while ensuring proper coating.
Rocky Road Topping Problems
Chocolate Not Setting Properly: White chocolate that refuses to set often results from improper melting or temperature issues. We melt white chocolate using 30-second intervals in the microwave stirring between each interval to prevent overheating. The chocolate should be smooth and glossy before cooling slightly and adding to the mixture.
Ingredients Not Coating Evenly: Marshmallows and nuts that remain uncoated create pockets of dry ingredients in the finished dessert. We ensure all components are evenly distributed by stirring the mixture thoroughly after adding the cooled chocolate. Every piece of marshmallow and nut should have a light coating of chocolate.
Mixture Too Soft to Press: A mixture that won’t hold its shape when pressed into the pan usually contains too much melted chocolate or hasn’t been mixed properly. We add chocolate gradually and test the consistency by pressing a small amount in our hands. The mixture should hold together without being wet or falling apart when formed into a ball.
Conclusion
We’ve shared everything you need to create this show-stopping dessert that’ll have your guests asking for the recipe. Pavlova rocky road brings together the best of both worlds – the elegant lightness of traditional pavlova and the indulgent richness of rocky road treats.
The beauty of this dessert lies in its flexibility and forgiving nature. Whether you’re hosting a dinner party or preparing for a special celebration you can customize it to match your preferences and dietary needs.
With proper storage techniques and our troubleshooting tips you’re equipped to create perfect results every time. The make-ahead friendly nature means less stress on serving day and more time to enjoy your company.
This dessert proves that impressive doesn’t have to mean complicated. We’re confident you’ll find this pavlova rocky road becomes a treasured addition to your dessert repertoire.
Frequently Asked Questions
What is Pavlova Rocky Road?
Pavlova Rocky Road is a unique dessert that combines the light, airy texture of traditional pavlova meringue with the rich, indulgent flavors of rocky road candy. It features a crispy meringue base topped with chocolate chunks, marshmallows, nuts, and whipped cream, creating a perfect balance of textures and flavors for special occasions.
How long does it take to make Pavlova Rocky Road?
The preparation time for Pavlova Rocky Road is approximately 10 minutes, making it an incredibly quick and easy dessert to assemble. Since it’s a no-bake recipe, most of the time is spent on chilling the dessert in the refrigerator until it sets properly before serving.
What ingredients do I need for the pavlova base?
For the pavlova base, you’ll need 4 large egg whites, 1 cup of superfine sugar, 1 teaspoon of vanilla extract, 1 teaspoon of white vinegar, and 1 tablespoon of cornstarch. These ingredients create the light, crispy meringue foundation that makes this dessert so special.
Can I make Pavlova Rocky Road ahead of time?
Yes, Pavlova Rocky Road can be prepared up to one week in advance. Store it in an airtight container in the refrigerator, where it will maintain its delightful texture and flavor. The no-bake nature makes it perfect for stress-free entertaining and special celebrations.
How should I store leftover Pavlova Rocky Road?
Store leftover Pavlova Rocky Road in an airtight container in the refrigerator for up to one week. Cut it into squares or bars for convenient serving, and ensure the container is tightly sealed to prevent moisture and odors from affecting the dessert’s quality and taste.
What equipment do I need to make this dessert?
You’ll need basic kitchen equipment including a large mixing bowl, microwave-safe bowl or double boiler for melting chocolate, measuring cups and spoons, a 19cm x 29cm slice pan, and baking paper. Most home kitchens already contain these essential tools, making the recipe accessible to everyone.
Can I customize the rocky road toppings?
Absolutely! The recipe is highly versatile and allows for various customizations. You can substitute different nuts, add tropical fruits like mango and passionfruit, use different chocolate types, or create festive versions with dried cranberries and pomegranate seeds while maintaining the sweet-salty-textural balance.
How long should I chill the dessert before serving?
Chill the Pavlova Rocky Road in the refrigerator until it’s completely set, then let it sit at room temperature for about 10 minutes before cutting. This ensures clean slices and optimal texture. For best results, chill for 1-2 hours before serving to maintain its structure.
Can I freeze Pavlova Rocky Road?
While the dessert can be stored in the freezer for up to one month, freezing may alter its texture. Refrigeration is the recommended storage method to maintain the perfect balance of the crispy meringue base and creamy toppings that make this dessert so appealing.
What are some common troubleshooting tips?
Common issues include achieving proper meringue texture for the pavlova base and ensuring even chocolate distribution. For the rocky road topping, focus on proper chocolate melting techniques and make sure all ingredients are evenly coated. Having all ingredients ready before starting helps ensure perfect results every time.


