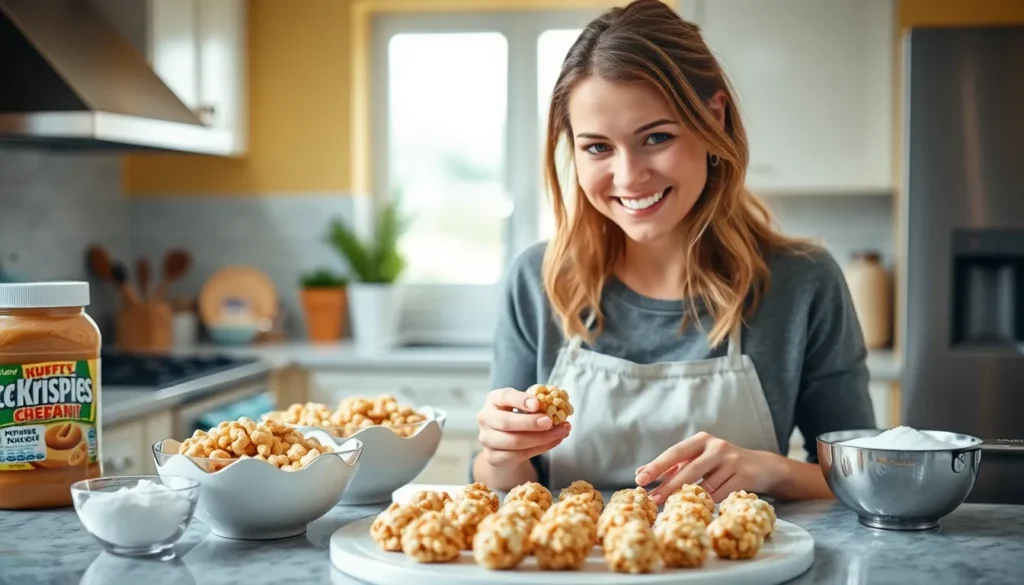
We’ve discovered the ultimate no-bake treat that combines creamy peanut butter with the satisfying crunch of Rice Krispies cereal. These peanut butter balls with Rice Krispies deliver the perfect balance of smooth and crispy textures that’ll have everyone reaching for seconds.
What makes these treats absolutely irresistible is their simplicity and versatility. We can whip up a batch in just 15 minutes using pantry staples you probably already have on hand. The addition of Rice Krispies transforms ordinary peanut butter balls into something extraordinary – adding that delightful pop and crunch that sets them apart from typical no-bake cookies.
Whether you’re planning a bake sale, need a quick dessert for unexpected guests, or want to satisfy that sweet tooth craving, these crunchy peanut butter balls are our go-to solution. They’re kid-friendly, require zero baking skills, and store beautifully for days. Let’s jump into this foolproof recipe that’s about to become your new favorite treat.
Ingredients
These simple pantry staples come together to create the perfect balance of creamy and crunchy textures. We’ve organized the ingredients into two categories to make preparation seamless.
For the Peanut Butter Balls
- 1 cup creamy peanut butter
- 3 cups Rice Krispies cereal
- 1/2 cup powdered sugar
- 3 tablespoons honey
- 1 teaspoon vanilla extract
- 1/4 teaspoon salt
For the Chocolate Coating (Optional)
- 12 ounces semi-sweet chocolate chips
- 2 tablespoons coconut oil or vegetable shortening
- 1 tablespoon butter


Equipment Needed
 1")
Creating these delicious peanut butter balls requires minimal equipment that most home kitchens already have. We recommend gathering all your tools before starting to ensure smooth preparation.
Large mixing bowl serves as our primary workspace for combining the peanut butter, honey, and powdered sugar. A spacious bowl prevents spillage and makes mixing easier when we add the Rice Krispies cereal.
Parchment paper or wax paper lines our cookie sheets and prevents the sticky mixture from adhering to surfaces. We place this on our work area and baking sheets for mess-free preparation and storage.
Electric mixer or stand mixer helps achieve a smooth, well-blended mixture when combining our wet ingredients. While not absolutely essential, this tool saves time and ensures consistent texture throughout our peanut butter base.
Cookie scoop portions our mixture evenly, creating uniform balls that look professional. This tool prevents sticky hands and maintains consistent sizing across all treats.
Disposable kitchen gloves protect our hands from the warm, sticky mixture while shaping the balls. These gloves make the rolling process cleaner and more comfortable.
Medium microwave-safe bowl melts our chocolate coating if we choose to add this optional finishing touch. We can also use a double boiler setup with a medium saucepan and heat-proof bowl for gentle melting.
Refrigerator space accommodates our cookie sheets during the chilling process. We need enough room for at least two standard cookie sheets to hold all our finished treats.


Instructions
 2")
Follow these simple steps to create perfectly textured peanut butter balls with that signature Rice Krispies crunch. We’ll guide you through each stage to ensure your treats turn out smooth and delicious every time.
Prep the Mixture
Combine the peanut butter, powdered sugar, honey, vanilla extract, and salt in a large mixing bowl. Beat the ingredients together using an electric mixer until the mixture becomes smooth and well incorporated. The stand mixer makes this process effortless and ensures even blending of all components.
Add the Rice Krispies cereal to the peanut butter mixture and stir thoroughly with a wooden spoon or spatula. Mix until every piece of cereal gets coated with the peanut butter mixture and everything appears evenly distributed throughout.
Shape the Balls
Scoop approximately 1 tablespoon of the mixture using a cookie scoop for consistent sizing. Roll each portion between your palms to form smooth, round balls. We recommend wearing disposable kitchen gloves during this step to prevent the mixture from sticking to your hands.
Place each formed ball on a parchment-lined baking sheet, leaving space between them to prevent sticking. Continue this process until you’ve used all the mixture.
Chill the Balls
Transfer the baking sheet to the refrigerator and chill the peanut butter balls for at least 20 to 30 minutes. This chilling time allows the balls to firm up and hold their shape better during the coating process.
For even firmer results, place the balls in the freezer for an additional 20 minutes after the initial refrigeration period. This extra step makes dipping in chocolate much easier and cleaner.
Prepare the Chocolate Coating
Melt the semi-sweet chocolate chips in a medium microwave-safe bowl using 30-second intervals, stirring between each heating cycle. Alternatively, use a double boiler method for more controlled melting.
Stir the coconut oil or vegetable shortening and butter into the melted chocolate until smooth. This addition creates a glossy finish and makes the chocolate easier to work with during the dipping process.
Coat the Balls
Remove the chilled peanut butter balls from the refrigerator and work with a few at a time to prevent them from warming up. Dip each ball into the melted chocolate using a fork or specialized dipping tool, allowing excess chocolate to drip off.
Return the chocolate-coated balls to the parchment-lined baking sheet immediately after dipping. Once all balls are coated, refrigerate them again until the chocolate sets completely, typically 15 to 20 minutes.


Storage Instructions
 3")
Proper storage ensures our peanut butter balls with Rice Krispies maintain their delicious texture and flavor for days or even months. We recommend several storage methods depending on how quickly you plan to enjoy these treats.
Room Temperature Storage
We can store these peanut butter balls at room temperature in an airtight container for up to 3 days. This method works perfectly when we plan to serve them within a few days and prefer them at room temperature.
Refrigerator Storage
For longer freshness, we store our peanut butter balls in the refrigerator using an airtight container for up to 2 weeks. Refrigeration becomes especially important when we’ve added chocolate coating since it prevents the chocolate from melting. The cool temperature also helps maintain the crispy texture of the Rice Krispies cereal.
Freezer Storage
We achieve the longest storage life by freezing these treats for up to 3 months. First, we flash freeze the peanut butter balls for 20 to 30 minutes on a parchment-lined baking sheet. After they become firm, we transfer them to an airtight container or freezer bag. When ready to enjoy, we thaw them in the refrigerator or at room temperature.
Storage Tips for Best Results
| Storage Method | Duration | Container Type |
|---|---|---|
| Room Temperature | Up to 3 days | Airtight container |
| Refrigerator | Up to 2 weeks | Airtight container |
| Freezer | Up to 3 months | Airtight container or freezer bag |
We use parchment paper to separate layers of peanut butter balls inside storage containers to prevent them from sticking together. For make-ahead preparation, we freeze the peanut butter balls before adding any chocolate coating to prevent melting issues during the dipping process.
Gluten-Free Storage Considerations
When storing gluten-free versions, we ensure our crispy rice cereal is labeled gluten-free and check ingredients for barley malt or malt flavor. The same storage methods apply regardless of whether we use regular or gluten-free Rice Krispies.


Serving Suggestions
 4")
We recommend serving these peanut butter balls with Rice Krispies chilled straight from the refrigerator for the best texture and firmness. The cold temperature enhances the contrast between the creamy peanut butter base and the crispy cereal pieces.
For optimal presentation at parties or potlucks, we arrange the balls on a decorative tray with small paper liners or mini cupcake papers. This approach makes them easy for guests to grab while keeping fingers clean. During holiday gatherings, we often display them alongside other bite-sized treats on tiered serving stands.
We portion each ball to approximately 1-inch or golf ball-sized pieces, which creates the perfect two-bite serving. This size allows guests to enjoy the full flavor profile without overwhelming sweetness. When serving to children, we sometimes make smaller portions for easier handling.
Room temperature serving works well for immediate consumption, but we find the chilled version maintains its shape better during extended serving periods. For outdoor events or warm weather gatherings, we keep the treats in a cooler until ready to serve.
| Serving Context | Recommended Temperature | Ideal Portion Size | Storage During Event |
|---|---|---|---|
| Indoor parties | Chilled | Golf ball-sized | Room temperature up to 2 hours |
| Outdoor events | Chilled | 1-inch rounds | Keep in cooler |
| Children’s parties | Room temperature | Smaller than golf ball | Serve within 1 hour |
| Holiday gatherings | Chilled | Standard golf ball | Refrigerate between servings |
We suggest pairing these treats with milk, coffee, or hot chocolate for adults, while children enjoy them with cold milk or fruit juice. The combination creates a satisfying contrast that balances the rich peanut butter flavor.
For special occasions, we dust plain versions with powdered sugar or roll them in chopped nuts before chilling. These variations add visual appeal and complement the existing textures beautifully.


Recipe Variations
 5")
We love experimenting with different flavors and textures to make these peanut butter balls even more exciting. These creative variations maintain the same simple no-bake process while adding unique twists that will delight your taste buds.
Coconut Peanut Butter Rice Krispie Balls
Add tropical flair to our classic recipe by incorporating 1/2 cup of shredded coconut directly into the peanut butter mixture before forming the balls. Toast the coconut in a dry skillet for 2-3 minutes until golden brown to enhance the nutty flavor and create a more aromatic treat. Roll the finished chocolate-dipped balls in additional coconut flakes while the coating is still wet for extra visual appeal and enhanced coconut taste. We recommend using unsweetened shredded coconut to balance the sweetness of the other ingredients and prevent the treats from becoming overly sweet.
Double Chocolate Version
Transform our peanut butter balls into a chocolate lover’s dream by adding 1/3 cup of unsweetened cocoa powder to the peanut butter mixture along with the butter and sugar. Mix thoroughly until the cocoa powder is completely incorporated and no streaks remain visible. Add 1/2 cup of mini chocolate chips to the Rice Krispies before folding them into the mixture for bursts of chocolate throughout each bite. Dip the chilled balls in melted dark chocolate for an intensely rich flavor profile that creates a perfect balance between the creamy peanut butter center and the decadent chocolate coating.
Honey Sweetened Option
Create a less processed version by replacing the powdered sugar with 3/4 cup of pure honey and adding 1/2 cup of oat flour to achieve the proper consistency. Stir the honey into the peanut butter and butter mixture until completely smooth and well combined. This variation produces a stickier texture that holds together beautifully while offering a more natural sweetness profile. We find this version particularly appealing for those seeking gluten-free options when using certified gluten-free Rice Krispies and oat flour. The honey adds subtle floral notes that complement the nuttiness of the peanut butter without overwhelming the delicate crunch of the cereal.


Tips for Perfect Peanut Butter Balls
 6")
Creating the perfect peanut butter balls requires attention to several key details that ensure optimal texture and flavor. We recommend starting with room temperature peanut butter for easier mixing and better ingredient incorporation.
Crush the Rice Krispies slightly before adding them to your mixture. This technique creates better texture and prevents the cereal from breaking apart during the rolling process. We suggest placing the cereal in a sealed bag and gently rolling with a rolling pin until pieces are about half their original size.
Use a cookie scoop for consistent sizing when portioning your mixture. This tool ensures uniform balls that cook evenly and look professional when served. After scooping, roll each portion between your palms to create smooth, round shapes.
Chill the balls before coating them with chocolate. We place our formed balls in the refrigerator for at least 30 minutes before dipping. This step prevents the balls from falling apart during the coating process and helps the chocolate adhere better.
Work with small batches when applying chocolate coating. Dip only 4-5 balls at a time to maintain the chocolate’s proper temperature. We use a fork to lift each ball from the melted chocolate, allowing excess to drip off before placing on parchment paper.
Keep your hands clean and cool during the rolling process. We recommend using disposable kitchen gloves or lightly dampening your hands with cold water to prevent sticking. This technique makes rolling smoother and creates more attractive finished products.
Store properly for optimal freshness by placing completed balls in airtight containers with parchment paper between layers. Room temperature storage works for 3 days, while refrigeration extends freshness up to 2 weeks. We always recommend chilling chocolate-coated versions to maintain their coating’s integrity.
Make-Ahead Instructions
 7")
We recommend preparing these peanut butter balls in advance since they actually taste better after the flavors have time to meld together. The make-ahead process allows us to enjoy fresh treats whenever we need them without the last-minute preparation stress.
Advance Preparation Timeline
| Timeline | Preparation Steps |
|---|---|
| 1-2 days ahead | Mix ingredients and form balls |
| 3-5 days ahead | Complete with chocolate coating |
| 2-3 weeks ahead | Store in refrigerator |
| 2-3 months ahead | Freeze for long-term storage |
Two Days Before Serving: Mix the peanut butter base according to our recipe instructions. Form the mixture into balls and place them on parchment-lined cookie sheets. Cover tightly with plastic wrap and refrigerate overnight. This initial chilling period helps the balls maintain their shape during the chocolate coating process.
One Day Before Serving: Apply the chocolate coating to our pre-chilled peanut butter balls. Work in small batches to prevent the balls from warming up too much. Once coated, return them to the refrigerator for at least 4 hours or overnight to allow the chocolate to set completely.
Freezing Instructions
Freeze uncoated peanut butter balls for up to 3 months by placing them in a single layer on cookie sheets until solid. Transfer the frozen balls to freezer-safe containers with parchment paper between layers. Label containers with the date and contents for easy identification.
When ready to serve frozen balls, thaw them at room temperature for 30 minutes before applying the chocolate coating. We find that previously frozen balls actually hold their shape better during the dipping process since they remain firmer longer.
Storage After Make-Ahead Preparation
Store completed make-ahead peanut butter balls in airtight containers at room temperature for up to 1 week. Refrigerated storage extends their freshness to 2 weeks, while frozen storage maintains quality for up to 3 months. Always use parchment paper between layers to prevent sticking and maintain the chocolate coating’s appearance.


Conclusion
These peanut butter balls with Rice Krispies offer the perfect balance of convenience and flavor that’ll keep everyone coming back for more. We’ve shown you how a handful of pantry staples can transform into an irresistible treat that’s ready in just 15 minutes.
Whether you’re planning ahead for a special occasion or need a last-minute dessert solution, this recipe delivers every time. The combination of creamy peanut butter and crispy cereal creates a texture that’s simply addictive.
With endless customization options and foolproof storage methods, you’ll find yourself making these treats again and again. They’re destined to become your go-to recipe for satisfying sweet cravings without the hassle of baking.
Frequently Asked Questions
How long do peanut butter Rice Krispie balls take to make?
These no-bake peanut butter balls take only 15 minutes to prepare. The hands-on time includes mixing ingredients, rolling the balls, and optional chocolate coating. However, you’ll need additional chilling time in the refrigerator – about 30 minutes for the balls to firm up and another 15-30 minutes if adding chocolate coating.
Can I make peanut butter Rice Krispie balls ahead of time?
Yes, these treats are perfect for make-ahead preparation. You can mix and form the balls 1-2 days in advance, and apply chocolate coating 3-5 days ahead. Store them in the refrigerator for up to 2 weeks or freeze for up to 3 months. They actually taste better after chilling overnight.
How should I store peanut butter Rice Krispie balls?
Store at room temperature in an airtight container for up to 3 days, or refrigerate for up to 2 weeks (especially chocolate-coated ones). For longer storage, freeze for up to 3 months. Use parchment paper between layers to prevent sticking and maintain freshness.
Do I need to refrigerate chocolate-coated peanut butter balls?
Yes, chocolate-coated peanut butter balls should be refrigerated to maintain their shape and prevent the chocolate from melting. Store them in an airtight container in the refrigerator for up to 2 weeks. Let them sit at room temperature for 5-10 minutes before serving for best texture.
What can I substitute for Rice Krispies cereal?
You can substitute Rice Krispies with other crispy cereals like Corn Flakes (lightly crushed), puffed rice cereal, or even crushed graham crackers. For gluten-free options, ensure you use certified gluten-free cereals. The key is maintaining that satisfying crunch in every bite.
Can I make these peanut butter balls without chocolate coating?
Absolutely! The peanut butter Rice Krispie balls are delicious on their own without chocolate coating. You can roll them in powdered sugar, chopped nuts, or shredded coconut for variety. The uncoated version stores well at room temperature for up to 3 days.
Why are my peanut butter balls falling apart?
If your balls are crumbling, the mixture may be too dry. Add more honey or peanut butter, one tablespoon at a time. Ensure your peanut butter is at room temperature for easier mixing. Also, chill the formed balls before coating them in chocolate to help them hold together better.
What’s the best way to melt chocolate for coating?
Melt chocolate chips with coconut oil or shortening in a microwave-safe bowl in 30-second intervals, stirring between each interval. Alternatively, use a double boiler for more control. The added fat helps create a smooth, glossy coating that sets properly when chilled.


