We’ve all experienced that moment when a peanut butter craving hits – and there’s nothing quite like a rich, moist peanut butter cake to satisfy it completely. This isn’t just any ordinary dessert; it’s a celebration of America’s favorite nut butter transformed into pure cake perfection.
Our peanut butter cake recipe delivers everything you’d expect from this beloved flavor combination: tender crumb, deep peanut butter taste, and that irresistible homemade quality that makes every bite memorable. Whether you’re planning a birthday celebration or simply want to treat your family to something special, this cake never fails to impress.
What makes this recipe truly special is how it balances the nutty richness of peanut butter with just the right amount of sweetness. We’ll show you exactly how to create a cake that’s both indulgent and perfectly textured – the kind that disappears from the plate almost as quickly as you can serve it.
Ingredients
We carefully selected each ingredient to deliver the perfect balance of peanut butter richness and moist texture. Our recipe combines pantry staples with quality peanut butter to create an unforgettable dessert experience.
For the Cake
- 2 cups all-purpose flour
- 1 cup granulated sugar
- ½ cup packed light brown sugar
- 1 cup creamy peanut butter
- ½ cup unsalted butter, softened
- 3 large eggs, room temperature
- 1 cup whole milk
- 2 teaspoons baking powder
- 1 teaspoon vanilla extract
- ½ teaspoon salt
For the Peanut Butter Frosting
- 1 cup creamy peanut butter
- ½ cup unsalted butter, softened
- 4 cups powdered sugar, sifted
- ⅓ cup heavy cream
- 2 teaspoons vanilla extract
- ¼ teaspoon salt
Equipment Needed

Creating our perfect peanut butter cake requires the right tools to achieve that signature moist texture and rich flavor we’re after. We’ll need a stand mixer or hand mixer to properly cream the butter and peanut butter together, ensuring our cake base develops the ideal light and fluffy consistency.
Large mixing bowls are essential for this recipe since we’ll be working with substantial quantities of ingredients. We recommend having at least two bowls on hand to keep wet and dry ingredients separate until the proper mixing stage.
A whisk or spatula becomes crucial for folding ingredients together without overmixing our batter. This gentle incorporation technique preserves the tender crumb structure that makes our peanut butter cake so irresistible.
8 or 9 inch cake pans provide the perfect size for even baking and proper layer height. We suggest using two pans if you’re planning to create a layered cake with our peanut butter frosting.
Parchment paper or cake release ensures our precious cake layers come out of the pans cleanly without sticking. This step prevents any heartbreaking moments when turning out our beautifully baked creation.
Having these tools ready before we start mixing guarantees a smooth baking process and helps us achieve professional results in our home kitchen.
Instructions

Now that we have our ingredients and equipment ready, let’s jump into the step-by-step process for creating this irresistible peanut butter cake. Follow these detailed instructions to achieve bakery-quality results in your own kitchen.
Prep the Pans and Oven
Preheat your oven to 350°F (180°C) before starting any mixing. For convection ovens, reduce the temperature to 320°F (160°C) to ensure even baking. Grease two 8-inch round cake pans thoroughly with butter or non-stick spray. Line the bottom of each pan with parchment paper circles for easy release. Dust the greased pans lightly with flour, tapping out any excess. This preparation prevents sticking and ensures our cake layers come out perfectly intact.
Make the Cake Batter
Combine 2 cups all-purpose flour, 1 teaspoon baking soda, 1 teaspoon baking powder, and 1/2 teaspoon salt in a medium bowl. Whisk these dry ingredients together and set aside. In your stand mixer bowl, cream together 1/2 cup softened unsalted butter, 1/4 cup vegetable oil, 3/4 cup granulated sugar, 1/2 cup packed brown sugar, and 3/4 cup creamy peanut butter on medium speed for 3-4 minutes until light and fluffy. Add 2 large eggs one at a time, beating well after each addition. Mix in 1 teaspoon vanilla extract until combined. Alternate adding the flour mixture and 1 cup buttermilk to the peanut butter mixture, beginning and ending with the flour mixture. Mix on low speed until just combined, being careful not to overmix.
Bake the Cake
Divide the batter evenly between your prepared pans, using a kitchen scale for accuracy if desired. Smooth the tops gently with an offset spatula. Bake for 30-35 minutes, rotating the pans halfway through baking for even browning. Test for doneness by inserting a toothpick into the center of each layer. The toothpick should come out clean or with just a few moist crumbs clinging to it. Allow the cakes to cool in their pans for 10 minutes before turning them out onto wire racks to cool completely.
Prepare the Peanut Butter Frosting
Beat 1 cup creamy peanut butter and 1/2 cup softened unsalted butter in your mixer bowl until smooth and well combined. Gradually add 3 cups powdered sugar, beating on low speed initially to prevent a sugar cloud. Increase speed to medium and beat until fluffy. Add 1/4 cup heavy cream and 1 teaspoon vanilla extract, continuing to beat until the frosting reaches a smooth, spreadable consistency. Add more cream if needed for the perfect texture.
Assemble and Frost the Cake
Place one completely cooled cake layer on your serving plate, positioning it upside down for a flat surface. Spread approximately 1 cup of frosting evenly across the top using an offset spatula. Position the second layer right side up on top of the frosted layer. Apply a thin crumb coat of frosting around the entire cake to seal in any loose crumbs. Refrigerate for 15 minutes to set the crumb coat. Apply the remaining frosting in smooth, even strokes, working from the sides up to the top for professional-looking results.
Storage Instructions

Proper storage keeps our peanut butter cake fresh and delicious for days after baking. We recommend different storage methods depending on how long you plan to keep the cake and the type of frosting used.
Room Temperature Storage
For short-term storage, we can keep our peanut butter cake at room temperature in an airtight container. This method works best for cakes with robust frostings that don’t require refrigeration.
| Storage Method | Duration | Best For |
|---|---|---|
| Room Temperature | 3-5 days | Cakes with stable frostings |
| Refrigeration | 5-7 days | Cakes with dairy-based frostings |
| Freezing | Up to 3 months | Long-term storage |
Our cake stays fresh at room temperature for 3 to 5 days when stored properly. We always use an airtight container to prevent the cake from drying out and absorbing odors from the surrounding environment.
Refrigeration Storage
We recommend refrigerating our peanut butter cake when it has creamy or dairy-based frostings. The cool temperature helps maintain the frosting’s texture and prevents spoilage.
Place the cake in an airtight container and store it in the refrigerator for up to 5 to 7 days. Before serving, we bring the cake to room temperature for about 30 minutes to restore its optimal texture and flavor.
Freezing for Long-Term Storage
For extended storage, we freeze our peanut butter cake without frosting to maintain the best quality. Wrap individual sponge layers in a double layer of food wrap, then add a layer of foil for extra protection against freezer burn.
Frozen cake layers can be stored for up to 3 months. We thaw the layers at room temperature before applying frosting and serving. This method preserves the cake’s moisture and prevents the frosting from becoming compromised during the freezing process.
Essential Storage Tips
We always ensure our storage containers are completely airtight to maintain freshness. When freezing, we label each wrapped layer with the date to track storage time. For best results, we frost thawed cake layers just before serving to ensure optimal flavor and texture throughout every bite.
Make-Ahead Tips

Planning ahead transforms baking this peanut butter cake from a time-consuming project into a manageable process. We recommend several strategic approaches that allow you to spread the work across multiple days while maintaining the cake’s exceptional quality.
Baking Cake Layers in Advance
Cake layers can be baked up to one day before assembly. After baking, we let the layers cool completely on wire racks before wrapping them tightly in plastic wrap. Store these wrapped layers in airtight containers at room temperature to preserve their moisture and texture.
For longer storage, individual baked and cooled cake layers freeze beautifully for up to 3 months. We wrap each layer in plastic wrap, then place them in freezer-safe bags or containers. Label each package with the date to track storage time effectively.
Preparing Frosting Ahead
Peanut butter frosting can be made in advance and stored in the refrigerator for several days. We cover the frosting tightly with plastic wrap or store it in an airtight container to prevent it from absorbing other flavors. Before using refrigerated frosting, bring it to room temperature and re-whip it briefly to restore its smooth, spreadable consistency.
Storage Guidelines for Assembled Cake
| Storage Method | Duration | Best Practices |
|---|---|---|
| Room Temperature | 1-2 days | Cover with cake dome or plastic wrap |
| Refrigerated | Up to 4 days | Wrap well to prevent drying |
| Frozen (layers only) | Up to 3 months | Wrap individually in plastic and foil |
Assembled peanut butter cakes maintain peak freshness when stored in the refrigerator for up to 4 days. We wrap the entire cake carefully to prevent the frosting from absorbing refrigerator odors and to maintain moisture levels.
Assembly Day Strategy
When working with frozen cake layers, we transfer them from the freezer to room temperature several hours before assembly. This gradual thawing process ensures the layers reach the proper texture for frosting application. Rushing this step can result in condensation forming on the cake surface, which affects frosting adhesion.
Serving Suggestions

Our peanut butter cake transforms into an impressive dessert with the right presentation and accompaniments. We recommend topping the cake with our rich peanut butter frosting to enhance the overall flavor profile and create that signature indulgent experience.
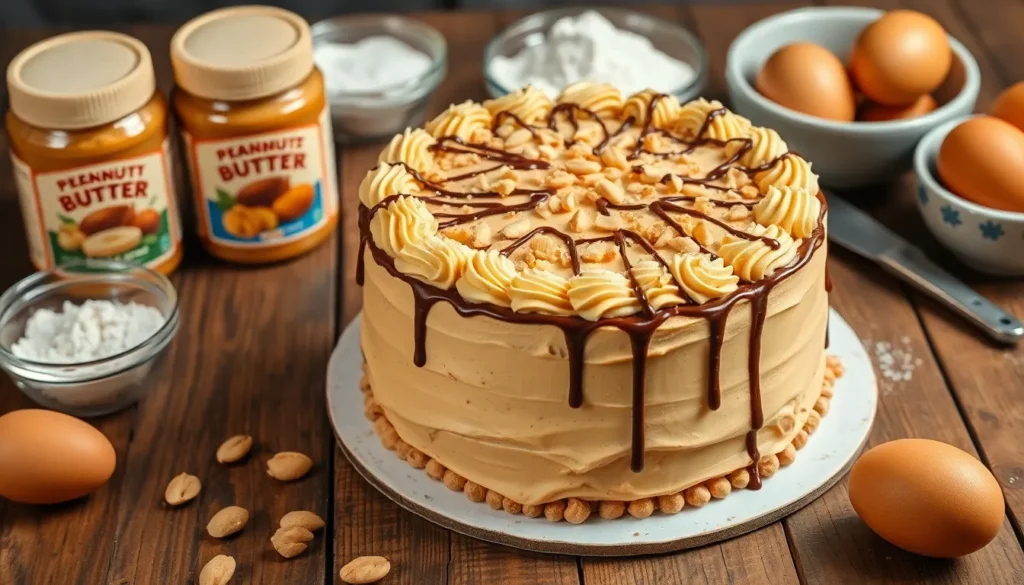
Frosting Options elevate this cake from good to extraordinary. Our classic peanut butter frosting provides the perfect complement to the moist cake layers. For those seeking variety we suggest incorporating cream cheese into the frosting mixture for a tangy twist that balances the sweetness beautifully. Dark chocolate ganache drizzled over the peanut butter frosting creates an irresistible chocolate peanut butter combination that appeals to every palate.
Visual Enhancement makes our peanut butter cake the centerpiece of any gathering. Peanut butter cups positioned around the cake’s edge add both decoration and extra flavor. Chopped roasted peanuts sprinkled on top provide texture contrast and reinforce the nutty theme. We find that a light dusting of cocoa powder creates an elegant finishing touch.
Portion Considerations ensure everyone enjoys this rich dessert appropriately. Cut generous slices for peanut butter enthusiasts but consider smaller portions due to the cake’s dense richness. Room temperature serving brings out the best flavors and creates the ideal texture for each bite.
Accompaniment Ideas round out the dessert experience perfectly. Cold milk pairs classically with peanut butter cake and helps cleanse the palate between bites. Vanilla ice cream provides a cooling contrast to the rich cake while coffee enhances the nutty flavors. Fresh strawberries offer a bright acidic note that cuts through the richness beautifully.
Special Occasion Adaptations make this cake suitable for various celebrations. Birthday presentations benefit from colorful candles placed directly into the frosted surface. Anniversary dinners call for elegant plating with individual cake portions garnished with fresh berries and a drizzle of chocolate sauce.
Variations and Substitutions

Our peanut butter cake recipe serves as a fantastic foundation for countless delicious variations and dietary adaptations. We can easily modify this recipe to accommodate different preferences and dietary needs while maintaining that irresistible peanut butter flavor.
Chocolate Peanut Butter Cake
We transform our classic recipe into a decadent chocolate peanut butter masterpiece by combining rich chocolate cake layers with our signature peanut butter frosting. This variation creates an incredibly moist dessert that balances deep chocolate notes with creamy peanut butter richness. We can enhance this combination further by finishing the cake with smooth chocolate ganache poured over the peanut butter frosting. The ganache adds an elegant glossy finish while intensifying the chocolate flavor profile. For an exciting twist, we recommend adding Nutella to our peanut butter frosting, creating a unique blend that marries chocolate and peanut butter in every bite.
Gluten-Free Option
Converting our peanut butter cake to a gluten-free version requires simple ingredient swaps that maintain the cake’s tender texture and rich flavor. We replace all-purpose flour with gluten-free alternatives such as almond flour, coconut flour, or a high-quality gluten-free flour blend designed for baking. When selecting our flour substitute, we ensure it contains xanthan gum or add it separately to provide proper structure. We also verify that our baking powder is certified gluten-free, as some brands may contain gluten-based additives. These substitutions allow us to create a cake that’s indistinguishable from the original version while accommodating gluten-sensitive guests.
Dairy-Free Alternative
We can easily adapt our peanut butter cake for dairy-free diets by making strategic ingredient substitutions throughout the recipe. For our buttermilk substitute, we combine non-dairy milk such as almond or coconut milk with one tablespoon of white vinegar or fresh lemon juice, letting it sit for five minutes to develop the necessary acidity. We replace regular butter with coconut oil or high-quality non-dairy butter alternatives to maintain the cake’s moisture and rich flavor profile. When selecting peanut butter, we choose natural unsweetened varieties for a less sweet cake or conventional brands like Jif for sweeter frosting applications. We can also experiment with sugar combinations, using both white and brown sugar to achieve deeper flavor complexity, adjusting quantities based on our chosen peanut butter type.
Conclusion
We’ve shared everything you need to create an absolutely delicious peanut butter cake that’ll become your go-to dessert recipe. From the essential ingredients and equipment to foolproof baking techniques this comprehensive guide ensures your success in the kitchen.
The versatility of this recipe means you can adapt it for any occasion or dietary need. Whether you’re making it gluten-free dairy-free or adding chocolate variations there’s a version that’ll work perfectly for your situation.
With proper storage techniques and make-ahead tips you can enjoy this incredible cake whenever the craving strikes. The rich nutty flavor and moist texture make every bite worth the effort and we’re confident this recipe will earn a permanent spot in your baking repertoire.
Frequently Asked Questions
How long does peanut butter cake stay fresh?
Peanut butter cake stays fresh for 3-5 days at room temperature in an airtight container. If your cake has dairy-based frosting, refrigerate it for 5-7 days. For longer storage, freeze unfrosted cake layers for up to 3 months wrapped tightly in plastic wrap.
Can I make peanut butter cake ahead of time?
Yes! Bake cake layers up to one day in advance and store wrapped at room temperature, or freeze for up to 3 months. Peanut butter frosting can be made ahead and refrigerated, then brought to room temperature before use. Assembled cakes keep refrigerated for up to 4 days.
What equipment do I need to make peanut butter cake?
Essential equipment includes a stand mixer or hand mixer, large mixing bowls, whisk or spatula, 8 or 9-inch cake pans, and parchment paper. These tools ensure proper mixing, even baking, and easy cake removal for professional-looking results.
What are good serving suggestions for peanut butter cake?
Serve with cold milk, vanilla ice cream, or coffee to complement the rich flavor. Garnish with peanut butter cups, chopped roasted peanuts, or drizzle with chocolate ganache. Consider smaller portions due to the cake’s richness, especially for casual gatherings.
Can I make gluten-free or dairy-free peanut butter cake?
Yes! For gluten-free versions, substitute almond or coconut flour and add xanthan gum for structure. For dairy-free options, use non-dairy milk and butter substitutes. These adaptations maintain the cake’s moisture and delicious peanut butter flavor while accommodating dietary restrictions.
How do I store peanut butter frosting?
Store peanut butter frosting in the refrigerator for up to one week in an airtight container. Before using refrigerated frosting, bring it to room temperature and re-whip to restore the proper consistency and smooth texture for easy spreading.


