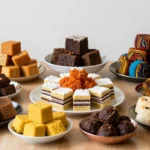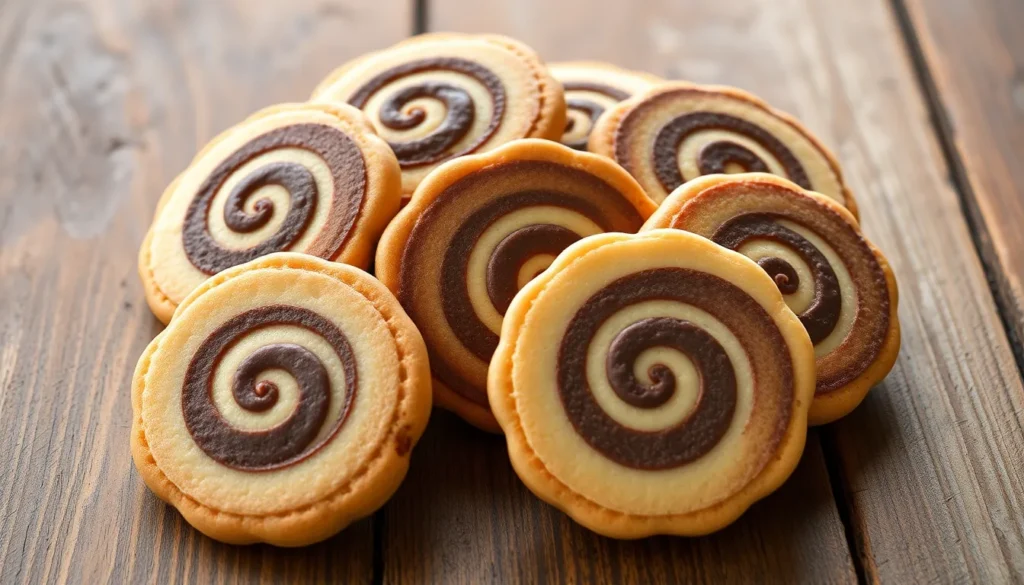
Pinwheel cookies transform any ordinary baking day into something magical with their stunning spiral patterns and irresistible flavor combinations. We’ve perfected this classic recipe that creates beautiful two-toned cookies that look as impressive as they taste.
These delightful treats originated in European bakeries where bakers would roll contrasting dough colors together to create mesmerizing swirls. The technique might look complicated but it’s surprisingly simple once you know the secrets we’re about to share.
What makes our pinwheel cookies special is their perfect balance of vanilla and chocolate flavors wrapped in a tender buttery texture. They’re ideal for holiday gift giving special occasions or whenever you want to impress friends and family with bakery-quality results. The best part? You can prepare the dough ahead of time and slice fresh cookies whenever a craving strikes.
Ingredients
Creating perfect pinwheel cookies requires two distinct doughs that complement each other beautifully. We’ve carefully selected these ingredients to ensure the vanilla and chocolate doughs roll together seamlessly while maintaining their vibrant contrast.
For the Vanilla Dough
- 1 cup (226g) unsalted butter, softened to room temperature
- ⅔ cup (133g) granulated sugar
- 1 large egg yolk
- 1 teaspoon pure vanilla extract
- 2 cups (240g) all-purpose flour
- ½ teaspoon salt
- 2-3 tablespoons whole milk, as needed
For the Chocolate Dough
- 1 cup (226g) unsalted butter, softened to room temperature
- ⅔ cup (133g) granulated sugar
- 1 large egg yolk
- 1 teaspoon pure vanilla extract
- 1¾ cups (210g) all-purpose flour
- ¼ cup (21g) unsweetened cocoa powder
- ½ teaspoon salt
- 2-3 tablespoons whole milk, as needed


Equipment Needed

Creating perfect pinwheel cookies requires the right tools to achieve those beautiful spiral patterns and precise cuts. We recommend gathering these essential pieces of equipment before starting your baking adventure.
Stand Mixer or Heavy-Duty Mixer serves as the foundation of our cookie-making process. This powerful tool efficiently combines butter, sugar, eggs, and dry ingredients to create uniform dough. While we recommend a stand mixer for consistent results, a hand mixer works perfectly well for home bakers.
Measuring Cups and Spoons ensure accurate ingredient measurement, which is crucial for achieving the proper dough consistency. Precise measurements make the difference between cookies that hold their pinwheel shape and those that spread too much during baking.
Bowl Set becomes essential when working with multiple dough colors or flavors. We use separate bowls for mixing and dividing our vanilla and chocolate doughs, keeping each portion distinct until assembly time.
Rolling Pin allows us to roll out dough sheets to the perfect thickness before layering. This tool helps create even layers that will form clean spiral patterns in our finished cookies.
Parchment Paper or Silpat Mat lines our baking sheets and prevents sticking. These non-stick surfaces ensure our delicate pinwheel cookies lift off easily without breaking their beautiful patterns.
Sharp Knife or Serrated Knife makes clean cuts through chilled dough logs. We prefer a serrated knife because it provides cleaner cuts without dragging or distorting the pinwheel design.
Rimmed Baking Sheets provide adequate space for spreading and baking our cookies evenly. The raised edges prevent cookies from sliding off during transport to and from the oven.
Cooling Racks allow proper air circulation around our freshly baked cookies. This equipment ensures even cooling and prevents soggy bottoms that can ruin the crisp texture we desire.
Having these tools ready before we begin streamlines the entire baking process and helps us achieve professional-looking results at home.


Instructions

Follow these detailed steps to create beautiful pinwheel cookies with perfect spiral patterns. We’ll guide you through each stage from preparing both doughs to assembling the final product.
Making the Vanilla Dough
Combine butter and sugar in your stand mixer bowl and beat until the mixture becomes light and fluffy. Add the egg yolk and vanilla extract to the bowl and mix thoroughly until well incorporated.
Scrape down the sides of the bowl with a rubber spatula to ensure even mixing. Mix in the flour, baking powder, and salt until the dough reaches a soft and uniform texture. The vanilla dough should feel smooth and pliable when properly combined.
Divide the prepared vanilla dough in half and set one portion aside for the next step. Reserve the remaining portion for creating the chocolate variation.
Making the Chocolate Dough
Return one portion of the vanilla dough to your mixing bowl. Add the cocoa powder and milk to the vanilla dough base. For enhanced depth of flavor, include a pinch of espresso powder if desired.
Mix the ingredients until they become fully incorporated and the dough transforms into a rich chocolate color. The chocolate dough will typically feel stickier than the vanilla portion due to the cocoa powder content. Continue mixing until the color appears uniform throughout.
Assembling the Pinwheel Cookies
Roll out the vanilla dough into a rectangle shape on a floured surface or parchment paper. Create a similar sized rectangle with the chocolate dough using the same technique.
Place the chocolate dough sheet directly on top of the vanilla dough layer. Trim the edges with a sharp knife to create neat, even borders for a professional appearance.
Starting from the long side, carefully roll the stacked doughs into a tight log shape. Use parchment paper or your hands to assist with the rolling process. Ensure no air pockets remain between the layers as you roll. Position the vanilla dough so it slightly overlaps on the outside to help maintain the log’s shape.
Chilling the Dough
Wrap the assembled dough log tightly in plastic wrap or parchment paper to prevent air exposure. Place the wrapped log in the refrigerator for 60 to 90 minutes until it becomes firm but remains pliable for slicing.
Check the dough’s firmness before proceeding to the next step. If the log feels too stiff after chilling, allow it to rest at room temperature for a few minutes before slicing. Use a sharp knife to cut the chilled log into slices ranging from 1/4 inch to 1/2 inch thick for optimal baking results.


Directions for Baking

Now that we have our chilled pinwheel cookie log ready, we’ll transform it into perfectly baked spiral cookies. The key to success lies in proper preparation and precise timing.
Prep for Baking
We begin by preheating our oven to 350°F (175°C) to ensure even baking temperature. Using a sharp knife or serrated blade, we slice the chilled dough log into cookies approximately 1/2 inch thick for optimal baking results. Each cut should be clean and deliberate to maintain the beautiful spiral pattern we’ve created.
We line our rimmed baking sheets with parchment paper to prevent sticking and ensure easy removal. The cookies need adequate space to bake evenly, so we place them about 2 inches apart on the prepared baking sheet. For best results, we refrigerate the sliced cookies for an additional 10 minutes before baking to prevent over-spreading and maintain their crisp edges.
Baking Instructions
We place the prepared baking sheets in our preheated 350°F oven and bake for 10 to 12 minutes. The cookies are perfectly done when their edges appear lightly golden while the centers remain tender. Watch carefully during the final minutes to prevent overbaking, as this can compromise the delicate texture we’re aiming for.
Once baking is complete, we remove the sheets from the oven and allow the cookies to cool on the baking sheet for 3 to 5 minutes. This brief cooling period helps them set properly before handling. We then carefully transfer each cookie to wire cooling racks using a thin spatula, ensuring proper air circulation around each piece for complete cooling and optimal texture retention.


Make-Ahead Instructions

One of the greatest advantages of pinwheel cookies lies in their flexibility for advance preparation. We can prepare the dough logs days ahead of time and slice fresh cookies whenever needed.
Refrigeration Storage
Our cookie dough logs require proper chilling to maintain their shape and achieve clean slices. The dough needs at least 1 to 4 hours of refrigeration time before we can slice and bake the cookies. For extended storage, we can wrap the logs tightly and keep them in the refrigerator for up to five days.
Freezing Options
Freezing offers even more flexibility for our baking schedules. We can freeze the entire dough log or pre-sliced cookies for up to three months. When we’re ready to bake frozen logs, we should thaw them slightly at room temperature before slicing. Pre-sliced frozen cookies can go directly from freezer to oven with minimal adjustment to baking time.
Slicing and Pre-Bake Preparation
We slice our chilled logs into cookies measuring 1/4 to 1/2 inch thick for optimal baking results. Each cookie should be placed 1 to 2 inches apart on our prepared baking sheets. Before baking, we refrigerate the baking sheet with sliced cookies for about 10 minutes to prevent excessive spreading during the baking process.
Essential Storage Tips
| Storage Method | Duration | Temperature Requirements |
|---|---|---|
| Refrigerated dough logs | Up to 5 days | Keep wrapped and chilled |
| Frozen dough logs | Up to 3 months | Thaw slightly before slicing |
| Pre-sliced frozen cookies | Up to 3 months | Bake directly from frozen |
Keeping our dough consistently cold ensures the best results. If cookies appear misshapen after slicing, we can gently reshape them into perfect circles before placing them on the baking sheet. This attention to temperature control and handling produces professional-looking pinwheel cookies every time.


Storage Tips

We understand the importance of proper storage to maintain the fresh taste and crisp texture of our pinwheel cookies. Room temperature storage works perfectly for cookies we plan to enjoy within the next few days. An airtight container keeps them fresh for up to 4 to 5 days at room temperature.
| Storage Method | Duration | Container Type |
|---|---|---|
| Room Temperature | 4-5 days | Airtight container |
| Refrigeration | Up to 1 week | Sealed container |
| Frozen (baked) | 2-3 months | Freezer-safe container |
| Frozen (unbaked) | Up to 3 months | Airtight container |
| Frozen (dough logs) | Up to 3 months | Well-wrapped |
Refrigeration extends our storage options significantly. Baked cookies stay fresh in the refrigerator for up to one week when stored in a sealed container. This method proves especially useful during warmer months when room temperature storage might compromise cookie quality.
Freezing offers our most flexible storage solution. Baked pinwheel cookies freeze beautifully when wrapped tightly and placed in freezer-safe containers for 2 to 3 months. We simply thaw them at room temperature before serving to restore their original texture.
Unbaked cookie slices provide incredible convenience for fresh-baked treats anytime. We slice the chilled dough logs and freeze the individual pieces on a sheet pan before transferring them to airtight containers. These unbaked cookies store for up to 3 months and bake directly from frozen with just a few extra minutes in the oven.
Our dough logs themselves freeze exceptionally well when rolled tightly and wrapped properly. These logs maintain quality for up to 3 months in the freezer and require defrosting in the refrigerator before slicing and baking.
Make-Ahead Advantages
Planning ahead maximizes our baking efficiency. Dough preparation works beautifully up to 3 days in advance when refrigerated or up to 2 months when frozen. Date pinwheel fillings can be prepared even further ahead – up to 2 weeks in the refrigerator or 2 months frozen.
Complete cookie assembly offers another time-saving option. We can assemble our pinwheel cookies up to 1 week in advance for refrigerated storage or up to 2 months for frozen storage. This flexibility allows us to prepare for holidays and special occasions without last-minute stress.
Serving Suggestions

These beautifully spiraled cookies shine in countless serving scenarios. We love presenting pinwheel cookies as standalone treats that pair perfectly with hot coffee, tea, or a cold glass of milk. The contrasting chocolate and vanilla flavors create a balanced sweetness that complements these classic beverages.
Special occasions call for the festive appearance of pinwheel cookies. We recommend them for holiday gatherings, birthday parties, and cookie exchanges where their striking visual appeal makes a memorable impression. The color combinations can be customized with food coloring and flavor extracts to match holiday themes—think orange and green spirals for Halloween or red and green swirls for Christmas celebrations.
Gift giving becomes more meaningful when we arrange these cookies in decorative boxes or clear bags tied with ribbons. Their professional appearance and homemade quality make them ideal presents for neighbors, teachers, or colleagues during the holiday season.
We suggest creating dipped variations by coating half of each cookie in melted chocolate for an added layer of flavor and visual appeal. While the cookies taste delicious plain, this chocolate coating adds an elegant touch for more formal occasions.
Dessert platters benefit from the addition of crumbled pinwheel cookies sprinkled over ice cream or served alongside frozen treats. We find that their crisp texture provides a delightful contrast to creamy desserts.
Always remember to label cookies clearly when serving at gatherings to accommodate guests with potential allergies. These versatile treats work equally well for casual afternoon snacks or dressed-up dessert presentations.


Recipe Variations

Our classic vanilla and chocolate pinwheel cookies serve as the perfect foundation for countless flavor combinations. We can easily transform these beloved treats by incorporating different extracts, colors, and mix-ins to create exciting new variations.
Strawberry Vanilla Pinwheels
We start with our basic vanilla cookie dough and divide it into two equal portions for this delightful fruit-inspired variation. The first portion remains plain vanilla, while we enhance the second half with strawberry extract or a tablespoon of high-quality strawberry jam for authentic berry flavor.
To achieve the signature pink color, we add a few drops of red or pink food coloring to the strawberry portion until we reach our desired shade. The contrast between the pale vanilla and rosy strawberry creates an elegant spiral pattern that’s perfect for spring celebrations or Valentine’s Day.
We roll both doughs into rectangles following our standard technique, then layer and roll them into a log. After chilling for 60 to 90 minutes, we slice and bake these cookies at 350°F for 10 to 12 minutes until the edges are lightly set.
Peanut Butter Chocolate Pinwheels
Our chocolate cookie dough becomes the perfect canvas for rich peanut butter flavor in this indulgent variation. We prepare our standard chocolate dough recipe, then split it into two portions to create distinct flavor profiles.
For the peanut butter component, we blend 2 tablespoons of creamy peanut butter into one half of the chocolate dough until completely incorporated. The other half remains as our classic chocolate base, creating a beautiful contrast between the deep cocoa color and the lighter peanut butter shade.
We can enhance the peanut butter flavor further by folding in 1/4 cup of mini peanut butter chips before rolling. This combination delivers the beloved chocolate and peanut butter pairing that appeals to all ages.
Orange Chocolate Pinwheels
Bright citrus notes transform our chocolate pinwheel cookies into a sophisticated treat with this zesty variation. We begin with our chocolate cookie dough recipe and add 1 tablespoon of fresh orange zest to one portion, creating an aromatic and flavorful contrast.
The orange-infused dough pairs beautifully with plain chocolate dough, or we can add orange food coloring to create a vibrant visual contrast. A few drops of orange extract intensify the citrus flavor without affecting the dough’s texture.
For an extra burst of orange flavor, we can incorporate 1/4 cup of mini orange chocolate chips or candied orange peel pieces into the orange portion before assembly. The combination of rich chocolate and bright citrus creates a refined cookie that’s perfect for afternoon tea or elegant gatherings.


Troubleshooting Tips

Even experienced bakers encounter challenges when making pinwheel cookies. We’ve compiled answers for the most common issues to help you achieve perfect spiral cookies every time.
Dough Handling and Rolling Problems
Sticky Dough Answers
When your dough sticks to parchment paper, refrigerate it for about 10 minutes. Use flour-dusted fingers to gently patch and smooth any tears or sticky areas. This brief chilling period makes the dough more manageable without compromising its texture.
Chocolate Dough Tears
Chocolate dough tends to be more delicate than vanilla dough. If tearing occurs, refrigerate the dough for 10 minutes. Use cocoa powder or flour-dusted hands to patch together any cracks. The cocoa powder prevents additional sticking while maintaining the chocolate color.
Uneven Dough Alignment
We often find doughs don’t line up perfectly during assembly. Tear off any overhanging pieces and use them to patch areas needing coverage. This technique ensures complete coverage without waste.
Creating Even Rectangles
Use a pizza cutter to slice off uneven edges when your dough shapes aren’t uniform. This tool creates clean lines and ensures both dough layers match in size for perfect spirals.
Swirl and Layering Issues
Preventing Layer Separation
Pat down air bubbles between the layers before rolling to prevent chocolate and vanilla swirls from separating. Avoid using too much flour, as it prevents layers from sticking together properly. For extra adhesion, brush vanilla dough with an egg wash made from 1 egg white plus 1 tablespoon water before adding chocolate dough.
Eliminating Air Bubbles
Firmly press layers together during assembly to remove air pockets. These bubbles can cause uneven spirals and structural weakness in the finished cookies.
Handling Cracking During Shaping
When dough starts to crack while forming the log, carefully patch it back together with your fingers. Gently roll the log to seal cracks and maintain the spiral pattern.
Baking and Texture Problems
Flat or Overly Brown Cookies
Add more flour to subsequent batches if cookies turn out flat, brown, or overly crisp. Overmixing or using melted butter instead of softened butter can cause excessive spreading during baking.
| Cookie Problem | Likely Cause | Solution |
|---|---|---|
| Too tough | Too much flour or high-protein flour | Use less flour or switch to all-purpose flour |
| Too crumbly | Excess sugar, shortening, or leavening | Add more eggs or reduce sugar |
| Too hard | Overbaked or insufficient fat | Reduce baking time or add more butter |
Professional Rolling Techniques
Roll dough between parchment sheets for even thickness. This method prevents cracking and helps maintain uniform shape throughout the process. Use an A4 paper template or rolling pin guides to ensure correct dough dimensions.
Essential Chilling Strategy
Always refrigerate dough as needed to make handling easier and ensure swirls stay distinct during baking. We recommend chilling assembled logs for at least 60 minutes before slicing to prevent distortion of the spiral pattern.
These troubleshooting answers address the most common pinwheel cookie challenges. Remember that slight imperfections add homemade charm, and practice makes perfect when mastering these beautiful spiral treats.
Conclusion
These delightful pinwheel cookies prove that beautiful desserts don’t have to be complicated. We’ve shown you every step from mixing the dough to achieving those perfect spirals that’ll impress everyone at your next gathering.
The versatility of this recipe means you’ll never get bored – whether you stick with classic vanilla-chocolate or experiment with our suggested variations. Plus the make-ahead convenience fits perfectly into busy schedules.
Now it’s time to roll up your sleeves and create these stunning cookies in your own kitchen. We’re confident you’ll love both the baking process and the delicious results that await you and your loved ones.
Frequently Asked Questions
What are pinwheel cookies and where do they come from?
Pinwheel cookies are beautiful spiral-patterned cookies featuring contrasting flavors, typically vanilla and chocolate. They originated in European bakeries where skilled bakers would roll together different colored doughs to create eye-catching swirls. These cookies are known for their tender, buttery texture and perfect balance of flavors.
Can I make pinwheel cookie dough ahead of time?
Yes! Pinwheel cookies are perfect for advance preparation. You can make the dough logs and store them in the refrigerator for up to 5 days or freeze them for up to 3 months. This allows you to slice and bake fresh cookies whenever needed, making them ideal for holiday gifts and special occasions.
What equipment do I need to make pinwheel cookies?
Essential equipment includes a stand mixer or heavy-duty mixer, measuring cups and spoons, mixing bowls, a rolling pin, parchment paper or Silpat mat, a sharp knife for clean cuts, rimmed baking sheets, and cooling racks. Having the right tools ensures professional-looking results and beautiful spiral patterns.
How long should I chill the dough before slicing?
Chill the assembled dough log in the refrigerator for 60 to 90 minutes before slicing. This firming process is crucial for maintaining clean cuts and distinct spiral patterns. For best results, refrigerate sliced cookies for an additional 10 minutes before baking to help them hold their shape.
What temperature and timing should I use for baking?
Preheat your oven to 350°F (175°C). Bake the cookies for 10 to 12 minutes until the edges are lightly golden. Space cookies about 2 inches apart on parchment-lined baking sheets. Allow them to cool briefly on the baking sheet before transferring to wire racks.
How should I store baked pinwheel cookies?
Store baked pinwheel cookies in a sealed container at room temperature for up to one week, or in the refrigerator for extended freshness. For longer storage, freeze baked cookies for up to three months. Proper storage maintains their crisp texture and delicious flavor.
Can I customize pinwheel cookies with different flavors?
Absolutely! You can create variations like Strawberry Vanilla Pinwheels with strawberry extract, Peanut Butter Chocolate Pinwheels, or Orange Chocolate Pinwheels with fresh orange zest. Food coloring can also be added for themed occasions while maintaining the same assembly and baking process.
What should I do if my dough is too sticky to work with?
If your dough becomes sticky, refrigerate it for 15-30 minutes to firm up. Use lightly floured hands and work surfaces when rolling. If the chocolate dough tears, gently press it back together and ensure both doughs are at similar temperatures for easier handling.
How can I serve pinwheel cookies?
Pinwheel cookies are versatile and pair well with coffee, tea, or milk. They’re perfect for holiday gatherings, birthday parties, and as thoughtful gifts. For an elegant touch, dip half of each cookie in melted chocolate, or crumble them over dessert platters for added texture.