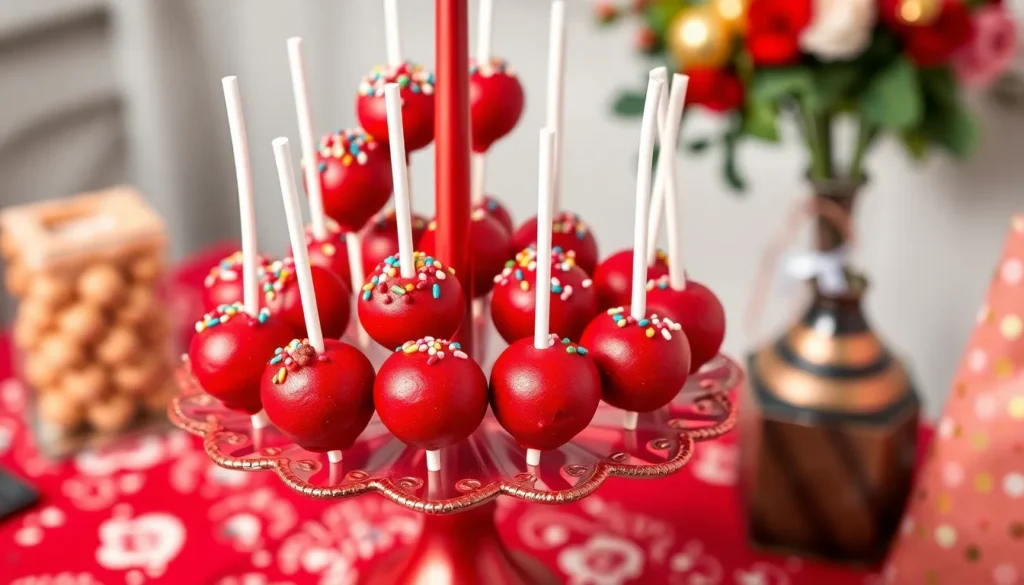
There’s something absolutely magical about transforming classic red velvet cake into perfectly bite-sized treats that are as stunning as they are delicious. Red velvet cake pops combine the beloved flavors of traditional red velvet – that subtle cocoa richness paired with tangy cream cheese – into portable party-perfect spheres that’ll have everyone asking for your secret.
We’ve perfected this recipe to deliver that signature velvety texture and vibrant crimson color in every single bite. These aren’t just ordinary cake pops – they’re conversation starters that bring elegance to any celebration while satisfying those intense red velvet cravings.
Whether you’re planning a romantic Valentine’s dinner, celebrating a special birthday, or simply want to impress your friends with Instagram-worthy treats, these red velvet cake pops deliver both visual impact and incredible taste. They’re surprisingly simple to make at home and freeze beautifully for make-ahead convenience.
Ingredients
These red velvet cake pops require three main components that work together to create the perfect balance of flavor and texture. We’ve organized the ingredients by category to make your preparation process smooth and efficient.

Package Contents: You will get a sphere round cake pop mold and a cake pop tray. Cake pop molds press with tray are made from food-grade PLA plastic. The cake pop cutter and pusher are thick and long time use

2-in-1 Dual Function: Make 2 Perfect Cake Pops at Once Say goodbye to slow, uneven shaping! Our innovative mold combines both a spherical and a round circle cutter in one handy tool. Simply press into your cake dough, and you'll instantly create two perfectly matched, professional-looking cake pops every time. It's the ultimate efficiency upgrade for your baking.

Durable Food-grade PLA Plastic: our cake pop mold set includes both spherical and disc molds, all made from safe, non-toxic food-grade PLA plastic; This material is sturdy and durable, ensuring the molds won't deform or break even with repeated use; For health-conscious baking enthusiasts, it guarantees that the treats made each time are both safe and delicious
For the Red Velvet Cake
- 2½ cups all-purpose flour
- 1½ cups granulated sugar
- 1 teaspoon baking soda
- 1 teaspoon salt
- 1 teaspoon cocoa powder
- 1½ cups vegetable oil
- 1 cup buttermilk at room temperature
- 2 large eggs at room temperature
- 2 tablespoons red food coloring
- 1 teaspoon white vinegar
- 1 teaspoon vanilla extract
For the Cream Cheese Frosting
- 8 oz cream cheese softened to room temperature
- ½ cup unsalted butter softened to room temperature
- 4 cups powdered sugar sifted
- 1 teaspoon vanilla extract
- Pinch of salt
For the Coating and Decoration
- 2 lbs white chocolate melting wafers or candy coating
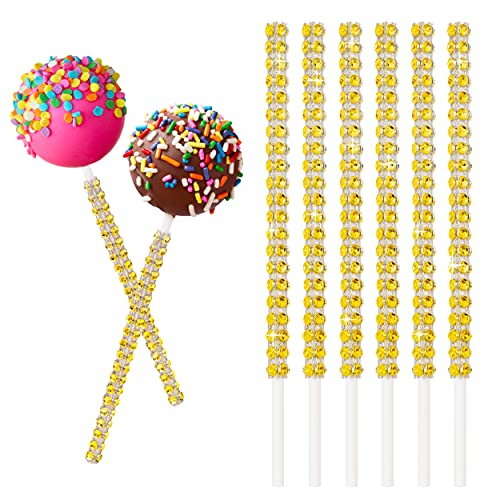
- 48 cake pop sticks
- Red food coloring gel or liquid (optional)
- 2 tablespoons coconut oil or vegetable shortening
- Red velvet cake crumbs for sprinkling
- White chocolate drizzle (optional)
- Heart-shaped sprinkles (optional)
Equipment Needed

Creating perfect red velvet cake pops requires exact tools that ensure professional results every time. We’ve carefully selected equipment that streamlines the process and helps achieve those beautifully shaped treats.
Essential Tools for Shaping
Cake pop sticks form the foundation of our dessert presentation. These sturdy wooden or plastic sticks hold the cake balls securely while providing an easy grip for dipping and eating. A cake pop former helps create uniform spheres though this tool remains optional for experienced bakers who prefer hand rolling.
Mixing and Portioning Equipment
A small cookie scoop becomes invaluable for portioning consistent cake mixture amounts. This tool eliminates guesswork and ensures each pop maintains the same size for even coating coverage. We recommend using a microwave safe bowl specifically for melting candy melts or white chocolate since temperature control matters significantly during the coating process.
Baking Essentials
The 9×13 cake pan serves as our primary baking vessel when preparing red velvet cake from scratch or using cake mix. Parchment paper lines this pan to prevent sticking and makes cake removal effortless after cooling.
Drying and Display Answers
Styrofoam blocks or dedicated cake pop stands provide essential support during the drying phase. These tools hold the coated pops upright while the candy coating sets completely. Without proper drying support our cake pops risk developing flat spots or coating imperfections.
Each piece of equipment contributes to the overall success of our red velvet cake pops. Investing in quality tools ensures consistent results and makes the entire process more enjoyable from start to finish.

One 15.25 oz box of Duncan Hines Signature Perfectly Moist Red Velvet Cake Mix

VELVETY RED DELIGHT: There's pudding in the mix to give the cake a rich, velvety flavor and texture; It's easy to create this indulgent red velvet treat

VELVETY RED DELIGHT: There's pudding in the mix to give the cake a rich, velvety flavor and texture; It's easy to create this indulgent red velvet treat
Instructions

Let’s transform our classic red velvet cake into irresistible bite-sized treats that everyone will love. Follow these detailed steps to create perfectly shaped and beautifully coated cake pops.

Professional Results Made Simple: Kidu Pantry Melting Wafers feature a high-quality, smooth-melting formula that provides a silky finish for all your confectionery projects without the need for tempering.
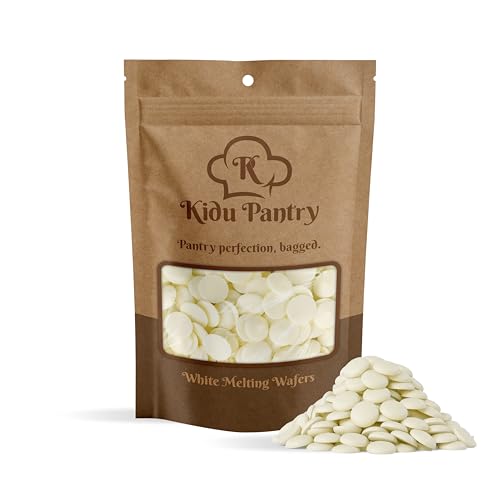
Professional Results Made Simple: Kidu Pantry Melting Wafers feature a high-quality, smooth-melting formula that provides a silky finish for all your confectionery projects without the need for tempering.

Merckens White Chocolate Coating Melting Wafers
Making the Red Velvet Cake
We begin by whisking together the red velvet cake mix with eggs, oil, and water until the mixture becomes completely smooth. Pour this vibrant batter into our prepared 9×13 baking dish and bake according to the package instructions. Allow the cake to cool completely to room temperature before proceeding to the next step.
Preparing the Cream Cheese Frosting
Beat the softened cream cheese and powdered sugar together until the mixture reaches a smooth consistency. This cream cheese frosting serves as our binding agent for the cake mixture. Store any leftover frosting in the refrigerator for future use.
Creating the Cake Pop Mixture
Crumble our cooled red velvet cake into fine pieces using clean hands or a fork. Add approximately ¼ to ½ cup of the cream cheese frosting to the crumbled cake. Mix these ingredients together until the combination holds together when formed into a ball shape. The mixture should be moist enough to bind but not overly wet.
Shaping the Cake Pops
Use a small cookie scoop to portion the cake mixture into uniform balls. Roll each portion between your palms to create smooth, round shapes. Place the formed cake balls on a parchment-lined baking sheet for easy handling.
Chilling the Cake Pops
Transfer the shaped cake balls to the refrigerator and chill for 20 to 30 minutes. This initial chilling firms up the mixture and makes the coating process much easier. After dipping, we’ll chill them again for another 20 to 30 minutes to ensure they maintain their shape.
Melting the Coating
Melt the white candy melts in short intervals to prevent overheating and maintain smooth consistency. Add dipping aid chips to the melted candy for easier coating application. Stir the mixture gently until completely smooth and ready for dipping.
Dipping and Decorating
Dip the end of each cake pop stick into the melted candy coating before inserting it into each chilled cake ball. This technique ensures the stick stays securely in place. Dip each cake pop into the melted coating and gently tap off any excess candy. Decorate immediately with sprinkles or drizzle with melted red candy melts for an elegant finishing touch.
Tips for Perfect Red Velvet Cake Pops

Creating flawless red velvet cake pops requires attention to crucial details that separate amateur attempts from bakery-quality results. We’ve gathered essential techniques to ensure your cake pops achieve the perfect texture, appearance, and flavor every time.

Package Includes:100 count Paper cake pop sticks, Food safe than plastic lollipop sticks and environment protection than plastic Sucker Stick; taste and odor free
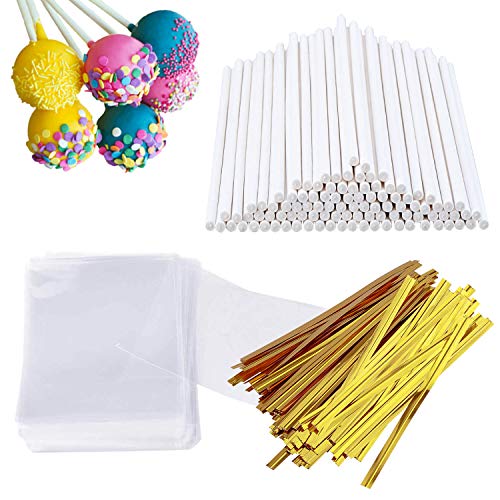
Food-Grade & Sturdy Paper: These paper cookies sticks are made of premium food-grade paper, tasteless. Sturdy sticks won't rub off, fall apart, shred or disintegrate easily, easy-melting candy melts
PROFEESIONAL STANDARD: Made of food-grade paper, which is rolled by the sideways and it is smooth with high hardness, and can be biodegradable. Safe for serving to your family, friends and guests; The cake and candy adheres to the paper more readily than other materials such as plastic.
Proper Cooling Techniques
Temperature control forms the foundation of successful cake pop preparation. We always allow our red velvet cake to cool completely before proceeding with the frosting mixture. Warm cake causes frosting to melt and creates a sticky, unworkable consistency that prevents proper shaping. Room temperature cake ensures the frosting maintains its binding properties while creating the ideal texture for rolling.
Strategic Chilling Methods
Refrigeration plays a vital role in maintaining structural integrity throughout the process. We chill the cake and frosting mixture for at least 4 hours before shaping to achieve firm, stable cake pops. This extended chilling period allows the ingredients to bond properly and prevents cracking during the coating phase. After shaping the balls, we freeze them for 15 minutes before dipping to create a solid base that won’t fall off the stick.
Achieving Uniform Size
Consistency in size creates professional-looking results that impress guests and customers alike. We use a cookie scoop to portion each cake pop, ensuring identical sizes that cook and coat evenly. This technique eliminates guesswork and produces cake pops with uniform appearance and texture. Measuring tools create better results than hand-rolling, which often leads to irregular shapes and uneven coating coverage.
Selecting Quality Coating Materials
Candy coating selection directly impacts the final product’s appearance and taste. We prefer melting wafers or high-quality white chocolate for smooth, quick-hardening coats that create professional finishes. These materials provide better flow characteristics than regular chocolate chips, which often result in thick, clunky coatings. Quality candy melts also offer superior color options and flavor profiles that complement the red velvet base.
| Technique | Time Required | Temperature | Result |
|---|---|---|---|
| Cake Cooling | 30-45 minutes | Room temperature | Prevents frosting melt |
| Mixture Chilling | 4+ hours | Refrigerated | Firm shaping consistency |
| Pre-dip Freezing | 15 minutes | Frozen | Secure stick attachment |
| Coating Temperature | N/A | 100-110°F | Smooth application |
Mastering the Dipping Process
Proper dipping technique ensures smooth, even coating coverage without drips or bare spots. We dip the stick into melted candy coating before inserting it into the cake ball, creating a strong bond that prevents separation. The coating should flow smoothly off the cake pop when lifted, indicating proper temperature and consistency. Gentle tapping removes excess coating while maintaining the desired thickness for optimal appearance and taste.
Storage Instructions

Proper storage ensures our red velvet cake pops maintain their fresh taste and perfect texture for days or even months. We need to cool our cake pops completely before placing them in any storage container to prevent condensation from ruining their smooth coating.
Room Temperature Storage
Our dipped cake pops stay fresh at room temperature for up to 1 week when stored in an airtight container. We recommend using containers with tight-fitting lids or glass containers equipped with rubber seals for optimal freshness. Place the cake pops in a single layer whenever possible to maintain their shape and coating integrity.
Refrigerator Storage
We can extend freshness by storing our cake pops in the refrigerator for 3 to 5 days using an airtight container. This method works particularly well during warmer months when room temperature storage might cause the coating to soften. Layer separation becomes crucial when stacking multiple cake pops – we always place wax paper between each layer to prevent sticking.
Freezer Storage for Long-Term Preservation
For extended storage, we freeze our red velvet cake pops in freezer-safe airtight containers or freezer bags for up to 2 to 3 months. Some storage methods allow freezing for up to 6 weeks in quality freezer bags. This option proves invaluable for make-ahead preparation or preserving leftover cake pops.
Thawing Process
When we’re ready to serve frozen cake pops, proper thawing ensures optimal taste and texture. We let them thaw in the refrigerator overnight for gradual temperature adjustment. For quicker serving, room temperature thawing takes 15 to 20 minutes to bring our cake pops to ideal serving temperature.
| Storage Method | Duration | Container Type | Special Notes |
|---|---|---|---|
| Room Temperature | Up to 1 week | Airtight container | Cool completely first |
| Refrigerator | 3-5 days | Airtight container | Use wax paper between layers |
| Freezer | 2-3 months | Freezer-safe container/bag | Some methods allow 6 weeks |
| Thawing Time | 15-20 minutes | Room temperature | Overnight in refrigerator preferred |

INCLUDE 3 DIFFERENT SIZES, MULTIPLE USES - The cookie scoop set includes Small cookie scoop, #60 scoop (1 Tbsp/15ml/0.5 oz), medium cookie scoop, #40 scoop, (2 Tbsp/30ml/1 oz), large cookie scoop, #20 scoop, (3 Tbsp/45ml/1.5 oz). Perfect size for cookie, cupcake, muffin, ice cream, pancake.

AMAZING LEFT HANDED ICE CREAM SCOOP LARGE SIZE ERGONOMICALLY DESIGN FOR LEFTIES - It is the greatest Premium Left Handed Ice Cream Scoop on the market and a great gift for left-handers. Use it for scooping, portioning or serving food and much more.This Ice Cream Scoop is made with a strong stainless steel alloy and will hold everything. The Ice Cream Scoop is designed with a soft grip handle that makes it more comfortable when used in the left hand.

【MULTI USES】 #40 cookie scooper for baking, is about 2 Tbsp / 30ml / 1 oz. Diameter is 1.72 inch/44 mm. You can use it as ice cream scooper, cookie scooper, cookie dough scoop, cupcake scoop, meatball scoop, melon baller scoop, food ball maker, sorbet scoop, even as measure spoon to satisfy kinds of different needs.
Serving Suggestions

We love presenting red velvet cake pops in ways that maximize their visual appeal and delicious flavor. These elegant treats deserve presentation methods that match their bakery-quality appearance.

【Complete Mold Set】This cake pop mold set includes four distinct shapes - heart, round, disc, and cupcake molds, providing versatile options for creating various cake pop designs. The comprehensive selection allows users to make different themed treats for occasions like birthdays, holidays, and special events without needing additional accessories.

5 Unique Shapes in One Set: Includes heart, square, cloud, oval, and round cake pop molds—all 1.7 inches in size. Perfect for creating varied and attractive cake pops for birthdays, weddings, and special events.

Package Contents: You will get 2 cake pop molds and 2 cake pop trays. Round sphere cake pop molds press with tray are made from food-grade PLA plastic. The cake pop cutter and pusher are thick and long time use
Festive Decoration Ideas
Adding colorful sprinkles transforms ordinary cake pops into celebration-ready desserts. We recommend rolling freshly dipped cake pops in Valentine’s Day themed sprinkles for romantic occasions or pastel sprinkles for baby showers. Pearl dust creates an elegant shimmer effect when lightly brushed over the chocolate coating.
Creative Display Options
Standing cake pops in decorative containers creates stunning dessert displays. We insert completed pops into foam blocks covered with attractive fabric or place them in tall vases filled with decorative stones. Cake pop stands with multiple tiers showcase different coating variations beautifully.
Gift Packaging Answers
Individual cellophane bags tied with ribbon make perfect party favors or sweet gifts. We place each cake pop in clear bags and seal them with decorative twist ties or colorful ribbons. Small gift boxes lined with tissue paper accommodate 2-3 cake pops for more substantial presents.
Coating Variations to Try
Experimenting with different chocolate coatings creates diverse flavor profiles and visual interest. We alternate between white chocolate, dark chocolate, and milk chocolate coatings within the same batch. Drizzling contrasting chocolate colors over the base coating adds professional bakery appeal.
| Coating Type | Best Occasions | Visual Appeal |
|---|---|---|
| White Chocolate | Weddings, Baby Showers | Elegant, Clean |
| Dark Chocolate | Adult Parties, Formal Events | Sophisticated, Rich |
| Milk Chocolate | Children’s Parties, Casual Events | Classic, Familiar |
Temperature Serving Tips
Room temperature serving provides the best texture and flavor experience. We remove refrigerated cake pops 15-20 minutes before serving to allow the coating to soften slightly. This timing ensures the chocolate coating has the perfect bite without being too hard or too soft.
Conclusion
We’ve covered everything you need to create stunning red velvet cake pops that’ll impress at any gathering. These bite-sized treats combine the beloved flavors of classic red velvet cake with the convenience of handheld desserts.
With proper technique and attention to detail your cake pops will rival those from professional bakeries. The key lies in following our step-by-step process and applying the expert tips we’ve shared.
Whether you’re planning a special celebration or looking for the perfect homemade gift these red velvet cake pops deliver both visual appeal and incredible taste. Start experimenting with different coatings and decorations to make them uniquely yours.

CAKE MIX: Bake a delicious, moist red velvet cake dessert

3 PACK MIX: Try our rich, decadent Red Velvet Dessert mix and be astounded by the creamy, smooth texture of this magnificent dessert that satisfies dessert cravings

Velvety & Indulgent Treat – Mom’s Place Gluten-Free Red Velvet Cake Mix delivers a rich, moist, and indulgent dessert perfect for any occasion. No one will guess it’s gluten-free!
Frequently Asked Questions

SMOOTH & EVEN MELT Crafted for consistent performance, these white chocolate melting wafers melt smoothly and evenly, creating a glossy, professional-quality finish perfect for dipping, coating, and molding.

SMOOTH & EVEN MELT Crafted for consistent performance, these white chocolate melting wafers melt smoothly and evenly, creating a glossy, professional-quality finish perfect for dipping, coating, and molding.

This product has been repackaged by KIDU. It is not sold in its original packaging. Merckens is a registered trademark of Cargill, Incorporated, and is used only to identify the genuine Merckens ingredient.
What makes red velvet cake pops different from regular cake pops?
Red velvet cake pops feature the signature velvety texture and vibrant red color of classic red velvet cake. They’re made with red velvet cake mix combined with cream cheese frosting, creating a distinctive tangy-sweet flavor profile that sets them apart from other cake pop varieties.
How long do red velvet cake pops stay fresh?
Red velvet cake pops stay fresh at room temperature for up to 1 week when stored in an airtight container. For longer storage, keep them refrigerated for 3-5 days or freeze for 2-3 months in freezer-safe containers with wax paper between layers.
What equipment do I need to make cake pops?
Essential equipment includes cake pop sticks, a cake pop former or small cookie scoop, a 9×13 cake pan for baking, and Styrofoam blocks or cake pop stands for drying. These tools ensure uniform shapes and professional-looking results.
Can I make red velvet cake pops ahead of time?
Yes, red velvet cake pops are perfect for make-ahead preparation. You can prepare them up to a week in advance and store at room temperature, or freeze them for up to 3 months for longer-term planning.
What’s the best coating for red velvet cake pops?
Melting wafers or high-quality white chocolate work best for coating cake pops. These provide smooth, even coverage without drips or bare spots. You can also experiment with different colored coatings to match your event theme.
How do I prevent cake pops from cracking or falling off sticks?
Ensure proper cooling and chilling at each step. Chill the formed balls before dipping, dip stick tips in melted coating before inserting, and allow each layer to set completely. Uniform sizing also helps prevent structural issues.
What’s the best way to display cake pops for parties?
Use decorative containers, tiered stands, or individual cellophane bags for attractive presentation. Styrofoam blocks covered with decorative paper work well for upright display, while small gift boxes are perfect for party favors.
How should I thaw frozen cake pops?
Thaw frozen cake pops overnight in the refrigerator for best results, or at room temperature for 15-20 minutes if you need them quickly. This gradual thawing process maintains the texture and prevents condensation from affecting the coating.