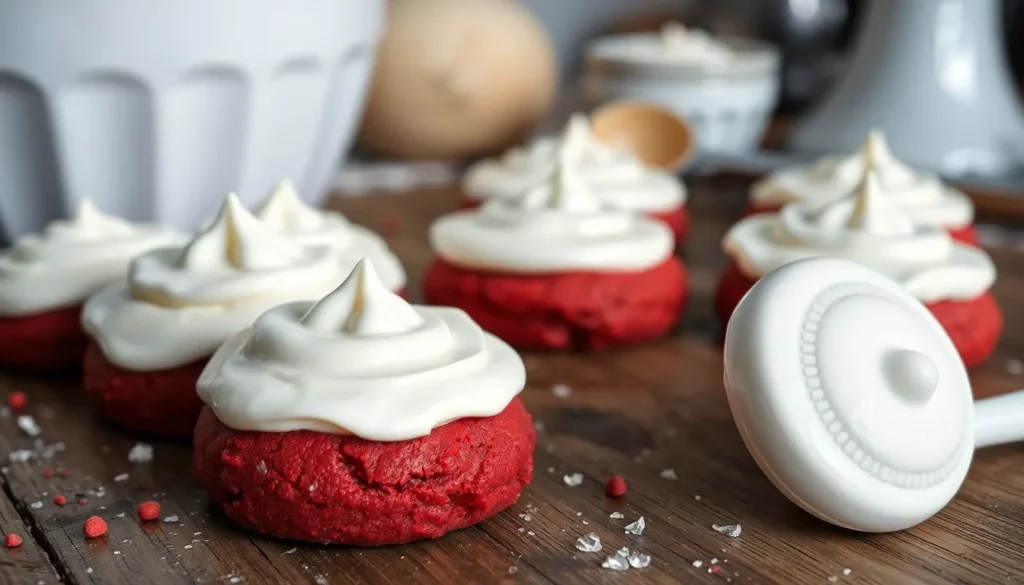
We’ve transformed the beloved red velvet cake into irresistible soft-baked cookies that deliver all the classic flavors you crave. These stunning crimson treats combine the signature cocoa richness with tangy cream cheese frosting swirled right into every bite.
Red velvet cookies offer the perfect solution when you’re craving that iconic red velvet taste but want something more portable and shareable. We’ve perfected this recipe to create cookies with tender centers and slightly crisp edges that practically melt in your mouth.
Ingredients
We’ve carefully selected each ingredient to deliver that signature red velvet flavor while ensuring our cookies maintain their perfect soft-baked texture. Our ingredient list creates the ideal balance between rich cocoa notes and the classic tangy cream cheese complement.
For the Cookies
- 2¼ cups all-purpose flour
- 2 tablespoons unsweetened cocoa powder
- 1 teaspoon baking soda
- 1 teaspoon salt
- 1 cup unsalted butter, softened to room temperature
- ¾ cup granulated sugar
- ¾ cup packed light brown sugar
- 2 large eggs, room temperature
- 2 teaspoons vanilla extract
- 1 tablespoon red food coloring (liquid or gel)
- 1 teaspoon white vinegar
- 1 cup buttermilk, room temperature
For the Cream Cheese Frosting
- 8 ounces cream cheese, softened to room temperature
- ½ cup unsalted butter, softened to room temperature
- 3 cups powdered sugar, sifted
- 1 teaspoon vanilla extract
- ¼ teaspoon salt
Equipment Needed
 1")
We’ll need exact tools to create these perfect red velvet cookies with their signature soft texture and vibrant color. Our equipment list ensures smooth preparation and consistent results every time we bake.
Large mixing bowl serves as our primary workspace for combining ingredients. We recommend using a bowl with high sides to prevent flour from spilling during mixing.
Stand mixer or hand mixer makes the creaming process effortless and ensures our butter and sugar blend to the perfect consistency. While optional, this tool saves time and delivers superior results compared to manual mixing.
Wooden spoon becomes essential when we prefer manual mixing or need to fold in delicate ingredients without overmixing the dough.
Silicone spatula helps us scrape down bowl sides efficiently, ensuring every bit of our precious red velvet mixture gets incorporated properly.
Small bowl allows us to pre-mix our wet ingredients like buttermilk, vanilla extract, and red food coloring before adding them to the main mixture.
Cookie scoop guarantees uniform cookie sizes, which means even baking and professional-looking results. We recommend using a medium-sized scoop for optimal portion control.
Baking sheets lined with parchment paper or silicone mats prevent sticking and ensure easy removal of our finished cookies. We suggest having at least two sheets ready for efficient batch baking.
Wire rack provides proper cooling space that allows air circulation around our cookies, preventing soggy bottoms while maintaining that perfect soft texture we’re after.
Instructions
 2")
We’ll guide you through each step to create these irresistible red velvet cookies with their signature cream cheese frosting. The process involves four main phases that build upon each other for perfect results.
Prep the Dough
We begin by whisking together our dry ingredients in a large bowl. Combine the all-purpose flour, unsweetened cocoa powder, baking soda, and salt until evenly distributed. Set this mixture aside while we prepare the wet ingredients.
Using our stand mixer or hand mixer, we cream the softened butter with both granulated and light brown sugars until the mixture becomes light and fluffy. This typically takes 3-4 minutes of beating at medium speed. Add the room temperature egg and beat until fully incorporated into the mixture.
Next, we mix in the red food coloring and vanilla extract, beating until the dough achieves a uniform red color throughout. The vibrant color should be consistent without any streaks or patches.
Slowly incorporate the dry ingredient mixture into the wet ingredients, mixing on low speed to avoid overworking the dough. We want to mix just until the ingredients come together to maintain our desired soft texture rather than creating a cakey consistency.
Shape and Bake the Cookies
Preheat your oven to 350°F (175°C) while we portion the cookie dough. Using a cookie scoop or spoon, we divide the dough into uniform portions and roll them into balls between our palms.
Place each dough ball onto baking sheets lined with parchment paper or silicone mats, spacing them about 2 inches apart. We can gently flatten each ball with our hands or the back of a spoon if we prefer a more traditional cookie shape.
Bake the cookies for 10-12 minutes, watching carefully as they set but remain soft in the center. The cookies should look set around the edges but still appear slightly underbaked in the middle for that perfect chewy texture.
Allow the cookies to cool on the baking sheet for 5 minutes before transferring them to a wire rack. This cooling period prevents breaking while ensuring they maintain their soft centers.
Make the Cream Cheese Frosting
While our cookies cool completely, we prepare the signature cream cheese frosting. Beat the softened cream cheese and butter together using our mixer until the mixture becomes completely smooth and free of lumps.
Gradually add the confectioners’ sugar, mixing on low speed initially to prevent a powdery mess, then increasing to medium speed. Continue beating until the frosting reaches a creamy, spreadable consistency.
Mix in the vanilla extract and a pinch of salt to balance the sweetness and enhance the overall flavor profile. The frosting should be smooth enough to pipe or spread easily but thick enough to hold its shape on top of the cookies.
Assemble the Cookies
Once our cookies have cooled to room temperature, we’re ready for the final assembly. Using a spoon or piping bag, place a generous dollop of cream cheese frosting on top of each cookie.
We can create decorative swirls with the back of a spoon or pipe rosettes for a more elegant presentation. Additional toppings like sprinkles or mini chocolate chips can be added while the frosting is still soft if desired.
Store the assembled cookies in the refrigerator due to the cream cheese frosting, but allow them to come to room temperature before serving for the best taste and texture experience.
Baking Tips for Perfect Red Velvet Cookies
 3")
Achieving bakery-quality red velvet cookies requires attention to detail and proper technique. We’ve gathered essential tips to help you create cookies with the perfect texture, vibrant color, and balanced flavor.
Accurate Ingredient Measurement
Using a kitchen scale provides the most consistent results for these delicate cookies. We recommend weighing your flour rather than using measuring cups, which can lead to overpacking and result in dry or dense cookies. Precise measurements ensure your cookies maintain their signature soft texture with each batch.
Proper Mixing Technique
Cream softened butter with granulated and brown sugars for 2-3 minutes until the mixture becomes light and fluffy. This technique creates the foundation for tender cookies by incorporating air into the mixture. Avoid using a whisk during this process, as it can trap butter instead of properly aerating it. Add eggs and food coloring only after achieving the proper creaming consistency.
Food Coloring Selection and Application
High-quality red food coloring produces the most vibrant and uniform color in your cookies. We suggest adding the coloring gradually until you reach your desired shade, as different brands vary in intensity. This approach prevents over-coloring and ensures consistent results across all your cookies.
Chilling the Dough
Refrigerate your cookie dough for 30-60 minutes before baking to prevent excessive spreading during the baking process. Short on time? Freeze the dough for 15-20 minutes for similar results. This chilling step also enhances the overall flavor development in your cookies.
Optimal Baking Conditions
Preheat your oven to 350°F (175°C) and position cookie dough on lined baking sheets with at least 2 inches between each cookie. Bake for 11-15 minutes, watching for cookies that appear set at the edges while remaining soft in the center. This timing ensures the perfect balance between structure and tenderness.
Proper Cooling Process
Allow baked cookies to rest on the baking tray for 10 minutes before transferring them to a wire rack. This cooling period helps the cookies set properly and prevents breakage during handling. The cookies continue to firm up during this resting time while maintaining their soft centers.
Storage for Freshness
Store completely cooled cookies in an airtight container at room temperature to maintain their optimal texture and flavor. Proper storage prevents the cookies from becoming stale and preserves their distinctive red velvet characteristics for several days.
Storage Instructions
 4")
Proper storage ensures our red velvet cookies maintain their soft texture and delicious flavor for days to come. We’ve tested various storage methods to determine the best approaches for both frosted and unfrosted cookies.
Room Temperature Storage
We recommend storing unfrosted red velvet cookies in an airtight container at room temperature for up to 4-5 days. This method works perfectly when our cookies don’t contain cream cheese frosting or other perishable toppings.
For frosted red velvet cookies with buttercream or cream cheese frosting, we limit room temperature storage to no more than 3 days. Food safety becomes a concern beyond this timeframe, especially with cream cheese based frostings that require refrigeration.
Refrigerator Storage
When our cookies contain cream cheese or feature frosting, we store them in an airtight container in the refrigerator for 5-7 days. This extended storage time makes refrigeration ideal for frosted red velvet cookies.
We always allow refrigerated cookies to sit at room temperature for 10-15 minutes before serving. This brief warming period restores the cookies’ optimal texture and brings out their full flavor profile.
| Storage Method | Cookie Type | Duration | Temperature Guidelines |
|---|---|---|---|
| Room Temperature | Unfrosted | 4-5 days | Airtight container |
| Room Temperature | Frosted | 3 days max | Airtight container |
| Refrigerator | Cream cheese/frosted | 5-7 days | Airtight container |
| Freezer | Unfrosted | 2-3 months | Wrapped then containerized |
Freezer Storage
Unfrosted red velvet cookies freeze beautifully for up to 2-3 months when properly wrapped. We wrap cooled cookies individually in aluminum foil or plastic wrap, then place them in a freezer safe bag or container.
For best results, we freeze cookies completely before wrapping to prevent them from sticking together. Frosted cookies can be frozen, but we note that freezing and thawing may affect the frosting’s texture and appearance.
When ready to serve frozen cookies, we thaw them at room temperature while still in their packaging. This method prevents condensation from affecting the cookie texture.
Essential Storage Tips
We emphasize using airtight containers to retain moisture and maintain freshness in all storage scenarios. Proper sealing prevents our cookies from becoming stale or absorbing unwanted flavors.
Red velvet cookies with cream cheese should never remain at room temperature for more than 4 hours after serving due to food safety concerns. We always label our storage containers with the date to track freshness and ensure optimal quality.
Make-Ahead Tips
 5")
We love how convenient red velvet cookies become when we plan ahead. These delicious treats offer multiple make-ahead options that save time while delivering the same incredible taste and texture.
Preparing Cookie Dough in Advance
Our red velvet cookie dough holds beautifully when prepared ahead of time. We can prepare the dough and store it in the refrigerator for up to 3 days when properly covered with plastic wrap or placed in an airtight container. This method works perfectly for weekend baking or preparing for special occasions.
For longer storage we recommend freezing the dough. After mixing our ingredients we portion the dough into individual cookie balls and place them in a zip-top bag or airtight container. The frozen dough stays fresh for up to 2 months in the freezer.
Baking Schedule Planning
When working with chilled dough we find it helpful to let it sit at room temperature for about 10 minutes before scooping. Frozen dough balls can go directly from freezer to baking sheet without thawing. We line our baking sheets with parchment paper and arrange the dough balls with proper spacing.
| Storage Method | Duration | Temperature |
|---|---|---|
| Refrigerated dough | 1-3 days | 35-40°F |
| Frozen dough balls | Up to 2 months | 0°F |
| Room temperature baked cookies | 3-4 days | 68-72°F |
Optimal Baking Conditions
We bake our make-ahead cookie dough at 180°C (355°F) for 12-15 minutes depending on our desired texture. Cookies from chilled dough typically need the standard baking time while frozen dough may require an additional 1-2 minutes. We always allow cookies to cool on the baking tray for 10 minutes before transferring them to a wire cooling rack.
Storing Baked Cookies
Baked unfrosted red velvet cookies maintain their quality when stored in an airtight container at room temperature. We can prepare these cookies several days before an event and add the cream cheese frosting just before serving. This approach ensures maximum freshness and prevents the frosting from becoming too soft or compromising food safety guidelines.
Variations and Substitutions
 6")
Red velvet cookies provide endless opportunities for customization while maintaining their signature appeal. We’ve compiled our favorite variations and practical substitutions to help you create the perfect cookie for any occasion or dietary need.
Creative Flavor Variations
We love experimenting with chocolate elements to enhance the rich cocoa base. White chocolate chips work beautifully in the original recipe but we often substitute them with milk chocolate chips, semi-sweet chocolate chips, or dark chocolate for deeper flavor complexity. Ruby chocolate creates an elegant pink-hued variation that complements the red velvet theme perfectly. For those who enjoy drizzled presentations, we recommend finishing the cookies with a chocolate sauce drizzle after the frosting sets.
Flavor enhancements transform these cookies into seasonal specialties. We add almond extract for a subtle nutty undertone or coconut extract for tropical flair. During Christmas baking, we incorporate peppermint or mint extract for festive appeal. Warm spices like cinnamon, nutmeg, cloves, and allspice create depth and complexity that pairs wonderfully with the cocoa flavor.
Texture additions provide delightful surprises in every bite. We fold in chopped walnuts, almonds, or pecans during the final mixing stage for added crunch and richness.
Essential Substitutions
Our testing reveals several successful substitutions that maintain cookie quality while accommodating different needs.
| Ingredient | Original | Substitution | Notes |
|---|---|---|---|
| Flour | All-purpose flour | Gluten-free flour blend | Use 1:1 ratio for gluten-free version |
| Sugar | Granulated sugar | Monkfruit sweetener | Replace up to half without texture changes |
| Oil | Vegetable oil | Neutral oils | Sunflower, safflower, light olive, or canola work well |
| Food Coloring | Gel coloring | Natural food coloring | Creates pastel hue, suitable for vegan diets |
Flour substitutions work seamlessly when dietary restrictions require gluten-free options. We use all-purpose flour in our standard recipe but find that quality gluten-free flour blends substitute easily without recipe adjustments.
Sugar modifications allow for reduced-sugar versions. We successfully replace half the granulated sugar with Monkfruit sweetener without noticeable differences in texture or spread.
Oil alternatives provide flexibility based on pantry availability. Neutral oils like sunflower, safflower, light olive, or canola oil work equally well without affecting flavor.
Coloring options accommodate different preferences and dietary needs. While gel food coloring delivers vibrant results, natural food coloring creates a softer pastel appearance and ensures vegan compliance.
Frosting and Finishing Options
We recommend pairing these cookies with various frosting styles based on preference and occasion. Cream cheese frosting remains our classic choice, but sugar cookie frosting offers a sweeter alternative. Simple icing provides a lighter finish that allows the cookie flavor to shine through.
For vegan adaptations, we use dairy-free red velvet cake mix as a base and substitute appropriate fats like non-dairy milk and vegan butter alternatives. These modifications maintain the signature taste while meeting dietary requirements.
Storage Optimization
Proper storage techniques preserve cookie quality regardless of chosen variations. We store cookies in airtight containers at room temperature for up to 3 days or refrigerate them for extended freshness. Freezing capabilities extend storage up to 3 months, with cookies thawing perfectly at room temperature or warming gently in the oven for served-warm appeal.
Conclusion
These red velvet cookies truly bring together the best of both worlds – the beloved flavors of classic red velvet cake in a perfectly portable format. We’ve shown you how to achieve that signature soft texture and rich cocoa taste that makes these treats absolutely irresistible.
With our detailed recipe and professional tips you’re equipped to create bakery-quality cookies right in your own kitchen. The cream cheese frosting adds that perfect tangy finish that elevates these cookies from good to extraordinary.
Whether you’re baking for a special occasion or simply craving something sweet these red velvet cookies are sure to impress. They’re versatile enough to customize with your favorite variations and make-ahead friendly for busy schedules.
Now it’s time to preheat that oven and start creating these delicious red velvet masterpieces. Your family and friends will be asking for the recipe after just one bite!
Frequently Asked Questions
What makes red velvet cookies different from regular chocolate cookies?
Red velvet cookies have a unique flavor profile that combines cocoa with tangy buttermilk and vinegar, creating a subtle chocolate taste with distinctive tang. The signature red color from food coloring and the cream cheese frosting also set them apart from traditional chocolate cookies.
How long do red velvet cookies stay fresh?
Unfrosted cookies stay fresh for 4-5 days at room temperature in an airtight container. Frosted cookies should be consumed within 3 days at room temperature or can be refrigerated for 5-7 days. Unfrosted cookies can be frozen for 2-3 months.
Can I make the cookie dough ahead of time?
Yes, cookie dough can be prepared in advance and refrigerated for up to 3 days or frozen for up to 2 months. Portion the dough into cookie balls before storing. Frozen dough can be baked directly from the freezer.
What’s the secret to keeping these cookies soft?
The key to soft cookies is not overbaking them. Bake at 350°F for 10-12 minutes until edges are set but centers remain soft. Cool on baking sheets briefly before transferring to wire racks, and store in airtight containers.
Can I substitute ingredients for dietary restrictions?
Yes, you can use gluten-free flour for celiac diets, reduce sugar content, or use natural food coloring like beet juice. For vegan options, substitute dairy ingredients with plant-based alternatives while maintaining the recipe’s moisture balance.
How much red food coloring should I use?
Start with 1-2 teaspoons of liquid red food coloring or adjust to achieve your desired vibrant red color. Gel food coloring is more concentrated and may require less. Add gradually until you reach the classic red velvet appearance.
Should frosted cookies be refrigerated?
Frosted cookies with cream cheese frosting should not be left at room temperature for more than 4 hours due to food safety concerns. Store them in the refrigerator and bring to room temperature before serving for best taste and texture.


