
Perfect cookies shouldn’t require an army of ingredients or feed a crowd. Our small batch chocolate chip cookies deliver all the warm comfort you crave in just the right portion for two to four people. We’ve crafted this recipe for those moments when cookie cravings strike but you don’t want dozens left over tempting you from the counter.
This downsized version maintains all the classic elements that make chocolate chip cookies irresistible – crispy edges that give way to chewy centers and pools of melted chocolate in every bite. We use simple pantry staples and techniques that guarantee consistent results without any fuss.
Whether you’re baking for a cozy night in or satisfying an urgent sweet tooth we’ve got you covered. These cookies come together in under 30 minutes and deliver the same satisfaction as traditional large-batch recipes. Get ready to fall in love with perfectly portioned baking that never leaves you with cookie overload.
Ingredients
Our small batch chocolate chip cookies require just a handful of pantry staples that create the perfect balance of texture and flavor. We’ve organized the ingredients by category to make measuring and mixing effortless.
Dry Ingredients
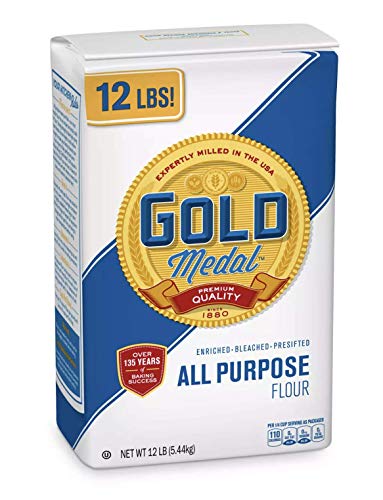
- 1 cup all-purpose flour
- 1/2 teaspoon baking soda
- 1/2 teaspoon salt
Wet Ingredients
- 1/4 cup unsalted butter, melted and cooled slightly
- 1/4 cup packed light brown sugar
- 2 tablespoons granulated sugar
- 1 large egg yolk
- 1 teaspoon vanilla extract
Mix-Ins
- 1/3 cup semi-sweet chocolate chips
- 2 tablespoons chopped walnuts (optional)


Equipment Needed
 1")
The beauty of small batch baking lies in its simplicity, and you likely already have most of these essential tools in your kitchen. We recommend gathering these items before starting to ensure a smooth baking process.
Mixing Equipment
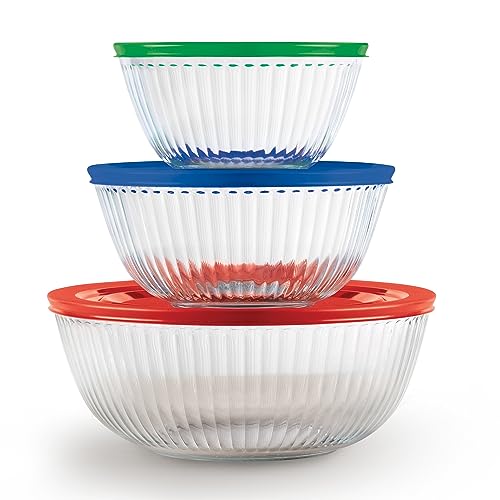
A large mixing bowl serves as our primary workspace for combining ingredients. While a stand mixer makes the job easier, a hand mixer works perfectly for creaming butter and sugar in smaller quantities. We find that a silicone spatula becomes indispensable for scraping down bowl sides and folding in chocolate chips without overmixing the dough.
Measuring Tools
Accurate measurements make the difference between good cookies and great ones. Dry measuring cups or a kitchen scale ensure precise flour measurements, while measuring spoons handle smaller ingredients like vanilla extract and baking soda. We prefer using a kitchen scale when possible, as it eliminates the guesswork and delivers consistent results every time.
Preparation Tools
A sifter or fine mesh sieve helps combine dry ingredients evenly, preventing pockets of baking soda in our finished cookies. Cookie scoops create uniform portions, though two regular spoons work just as well for shaping dough balls.
Baking Essentials
Our baking sheet needs parchment paper for easy cookie removal and even browning. A metal spatula lifts warm cookies without breaking them, while cooling racks allow air circulation around cookies for proper cooling. These cooling racks prevent soggy bottoms and maintain that perfect texture we’re after.
| Equipment Category | Essential Items | Optional Upgrades |
|---|---|---|
| Mixing | Large bowl, hand mixer, silicone spatula | Stand mixer |
| Measuring | Dry measuring cups, measuring spoons | Kitchen scale |
| Baking | Baking sheet, parchment paper, metal spatula | Cookie scoops |
| Cooling | Cooling racks | Multiple racks |


Instructions
 2")
We’ll walk through each step to create perfect small batch chocolate chip cookies that deliver crispy edges and chewy centers. These detailed instructions ensure consistent results every time.
Step 1: Prepare Your Workspace
Clear a clean area on your counter for mixing and baking. Gather all necessary equipment including your mixing bowl, measuring cups and spoons, baking sheet, and oven mitts. Having everything organized before starting prevents any rushed moments during the baking process.
Step 2: Mix Dry Ingredients
Combine 1 cup all-purpose flour, 1/2 teaspoon baking soda, and 1/2 teaspoon salt in a medium bowl. Whisk the ingredients together thoroughly to ensure uniform distribution throughout the mixture. This step creates the foundation for our cookie structure and prevents pockets of concentrated leavening agents.
Step 3: Cream Butter and Sugars
Beat the melted unsalted butter with both brown sugar and granulated sugar in a large mixing bowl until the mixture becomes light and fluffy. This creaming process typically takes 2-3 minutes with a hand mixer or stand mixer. The incorporation of air during this step contributes to the tender texture we want in our finished cookies.
Step 4: Add Wet Ingredients
Mix the egg yolk and vanilla extract into the butter-sugar mixture until fully combined. Beat the mixture for another 30 seconds to ensure the yolk is completely incorporated. Using only the yolk rather than a whole egg creates a richer flavor and chewier texture in our small batch.
Step 5: Combine Wet and Dry Ingredients
Gradually add the flour mixture to the wet ingredients, mixing just until the dough comes together. Avoid overmixing at this stage as it can result in tough cookies. The dough should look slightly shaggy but hold together when pressed.
Step 6: Fold in Chocolate Chips
Stir in the semi-sweet chocolate chips and optional chopped walnuts using a silicone spatula until evenly distributed throughout the dough. Gentle folding ensures the add-ins are well incorporated without overworking the dough. We want chocolate chips in every bite while maintaining the proper cookie texture.
Step 7: Shape and Chill Dough
Scoop the dough into portions using a cookie scoop or tablespoon, creating balls approximately 1.5 tablespoons each. Place the shaped dough balls on your parchment-lined baking sheet. Chill the dough in the freezer for 10 minutes or refrigerate for 30 minutes to prevent excessive spreading during baking.
Step 8: Bake the Cookies
Preheat your oven to 350°F while the dough chills. Bake the cookies for 10-12 minutes until the edges appear lightly golden brown. The centers may look slightly underdone, but they will continue cooking from residual heat and set properly as they cool.
Step 9: Cool and Serve
Allow the cookies to cool on the baking sheet for 5-10 minutes before transferring them to a wire rack. This resting period prevents the cookies from breaking apart while still warm. Serve the cookies warm for melted chocolate chips or at room temperature for the perfect chewy texture.


Tips for Perfect Small Batch Chocolate Chip Cookies
 3")
Master Your Ingredients
We recommend using unsalted butter as your foundation – either softened to room temperature or browned for enhanced nutty flavor. The combination of granulated sugar and brown sugar creates the perfect balance of texture and sweetness. Dark brown sugar increases chewiness while granulated sugar provides structure.
Semi-sweet or dark chocolate chips offer the best flavor depth for small batch cookies. We prefer using just the egg yolk rather than a whole egg to maintain proper moisture without making the dough too wet. Fresh vanilla extract elevates the overall flavor profile significantly.
Perfect Your Preparation Techniques
Accurate measurement stands as the cornerstone of consistent results. We strongly recommend using a kitchen scale rather than cup measurements for precision. This practice ensures your cookies turn out exactly as intended every time.
Proper mixing technique prevents tough cookies. Combine your wet ingredients first, then gently fold in the dry ingredients until just incorporated. Overmixing develops gluten and creates dense cookies rather than tender ones.
Optimize Your Baking Process
Chilling the dough for 10 to 30 minutes before baking enhances both texture and flavor development. This step prevents excessive spreading and creates thicker cookies with better structure.
Uniform sizing ensures even baking. Use a cookie scoop to portion your dough consistently – this prevents some cookies from burning while others remain underbaked.
| Baking Parameters | Recommended Settings |
|---|---|
| Temperature | 350°F |
| Baking Time | 9-12 minutes |
| Cookie Appearance | Lightly golden edges |
| Texture Goal | Slightly underbaked centers |
Slight underbaking maintains the coveted chewy texture. Remove cookies when edges appear lightly golden but centers still look soft. The residual heat continues cooking them on the hot baking sheet.
Advanced Flavor Techniques
Brown butter transforms ordinary cookies into extraordinary treats. Melt butter in a saucepan over medium heat until it turns golden brown and develops a nutty aroma. Allow it to cool slightly before incorporating into your dough.
Temperature control affects final texture dramatically. Room temperature ingredients blend more easily and create better emulsification. Cold ingredients can cause butter to seize and create uneven mixing.
Storage Instructions
 4")
Proper storage ensures our small batch chocolate chip cookies maintain their perfect texture and flavor for days to come. We’ve tested various storage methods to help you enjoy these treats at their absolute best.
Room Temperature Storage
We recommend storing completely cooled cookies in an airtight container at room temperature for optimal freshness. Our testing shows cookies maintain their ideal texture for 3-5 days when stored this way. The key lies in ensuring cookies cool completely before sealing them away, preventing condensation that could make them soggy.
| Storage Method | Duration | Container Type |
|---|---|---|
| Room Temperature | 3-5 days | Airtight container |
| Room Temperature (extended) | Up to 1 week | Sealed container |
Refrigerating Cookie Dough
We often prepare extra dough for later baking, and refrigeration works perfectly for this purpose. Fresh cookie dough stays fresh in the refrigerator for up to 2 days when wrapped tightly in plastic wrap. For longer storage, we can keep prepared dough refrigerated for up to one week in a sealed container.
Freezing Options
Freezing extends storage significantly while preserving quality. We freeze baked cookies for up to 3 months in freezer-safe containers or bags. Cookie dough balls freeze beautifully for up to 2 months, allowing us to bake fresh cookies whenever cravings strike.
| Freezing Method | Duration | Best Practice |
|---|---|---|
| Baked Cookies | 3 months | Airtight freezer bags |
| Cookie Dough Balls | 2 months | Flash freeze on trays first |
Essential Storage Tips
We always ensure chocolate chips and any toppings have completely set before storing cookies. This prevents sticking and maintains the cookies’ appearance. Using airtight containers or resealable bags creates the barrier needed to keep moisture out and freshness in. We label containers with dates to track storage time and maintain peak quality.


Recipe Variations
 5")
Once you’ve mastered our basic small batch chocolate chip cookie recipe, we can explore exciting variations that transform these treats into entirely new experiences. These modifications allow us to customize flavors and textures while maintaining the perfect small batch size.
Different Chocolate Options
We recommend starting with semi-sweet chocolate chips as our foundation, but milk chocolate or dark chocolate chips can be substituted directly to create different flavor profiles. Dark chocolate chips deliver a more intense cocoa flavor that pairs beautifully with the brown sugar base, while milk chocolate creates a sweeter and creamier bite.
For enhanced texture, we suggest using chocolate chunks or chopped chocolate bars instead of standard chips. These irregular pieces create pockets of melted chocolate that add visual appeal and varied texture throughout each cookie. The larger chocolate pieces also tend to hold their shape better during baking.
When we want to elevate the chocolate experience further, combining different types works exceptionally well. Try mixing 2 tablespoons of dark chocolate chips with 2 tablespoons of milk chocolate chips for a complex flavor profile that satisfies multiple preferences.
Add-In Suggestions
Beyond chocolate, we can incorporate various mix-ins to create signature cookie variations. Nuts like walnuts, pecans, or macadamia nuts add satisfying crunch and rich flavor. We recommend using 2 tablespoons of chopped nuts to maintain the proper dough consistency.
| Variation | Chocolate Component | Additional Mix-In |
|---|---|---|
| White Chocolate Macadamia | 1/3 cup white chocolate chips | 1/4 cup chopped macadamia nuts |
| Chocolate M&M | 1/4 cup semi-sweet chocolate chips | 1/4 cup mini M&M’s |
| Funfetti | 1/2 cup white chocolate chips | 1 tablespoon sprinkles |
For those who enjoy sweet and salty combinations, we sprinkle sea salt flakes on top of the shaped dough before baking. This contrast enhances the chocolate flavor while adding an unexpected gourmet touch.
Toffee bits, caramel chips, or coconut flakes provide additional texture and flavor complexity. We limit add-ins to approximately 1/4 to 1/3 cup total to prevent the dough from becoming too dense or affecting the baking time.


Troubleshooting Common Issues
 6")
Even with our foolproof small batch recipe, we sometimes encounter baking challenges that can affect our cookies’ final texture and appearance. Understanding these common issues helps us achieve consistent results every time we bake.
Fixing Excessive Cookie Spread
When our cookies spread too much during baking, several factors could be at play. Warm dough stands as the primary culprit for excessive spreading. We must chill our small batch dough even for just 15-20 minutes to prevent cookies from flattening too much in the oven.
Oven temperature plays a crucial role in cookie structure. An oven running too cool allows cookies to spread before they set properly. We recommend maintaining our standard 350°F temperature and using an oven thermometer to verify accuracy.
Warm baking sheets cause immediate dough melting upon contact. We should always use cool baking sheets lined with parchment paper between batches. Allow sheets to cool completely or rotate between multiple pans.
Ingredient ratios become especially critical in small batches. Too much butter or sugar relative to flour creates excessive spread. We achieve best results by weighing our ingredients rather than using volume measurements for precise ratios.
| Issue | Causes | Answers |
|---|---|---|
| Excessive Spread | Warm dough, low temp, unbalanced ratios | Chill dough, use cooler sheets, weigh ingredients |
| Dry/Crumbly Dough | Too much flour, small egg | Measure flour correctly, use proper egg size |
| Uneven Baking | Inconsistent dough, hot spots | Use scoop, rotate pans, center rack |
| Burnt Bottoms | Dark pans, heat source | Use light pans, middle rack |
Preventing Dry or Crumbly Dough
Over-measuring flour creates the most common cause of dry, crumbly cookie dough. We should measure flour by weight when possible or use the spoon and sweep method for volume measurements. Avoid scooping directly from the flour container.
Small batch recipes require careful attention to egg proportions. Using too small an egg or omitting the yolk reduces essential moisture content. We must ensure our large egg yolk provides adequate binding and moisture for our dough consistency.
Solving Baking Inconsistencies
Uneven dough portions lead to inconsistent baking results. We recommend using a cookie scoop to create uniform dough balls that bake at the same rate. This tool becomes especially valuable for small batches where every cookie matters.
Oven hot spots affect even our carefully portioned cookies. We should rotate our baking sheet halfway through the baking time and avoid overcrowding to promote proper air circulation around each cookie.
Burnt cookie bottoms often result from dark-colored baking sheets or incorrect oven rack positioning. We achieve better results using light-colored or aluminum baking sheets positioned on the middle rack. Dark pans absorb more heat and can cause premature browning on cookie bottoms.
Expired leavening agents prevent proper cookie rise and structure. We should check our baking soda expiration date and replace it every six months for optimal results. Fresh baking soda helps cookies achieve their ideal texture and prevents flat, dense results.


Make-Ahead Instructions
 7")
Our small batch chocolate chip cookie dough offers incredible flexibility for those who want to plan ahead or satisfy sudden cookie cravings. Preparation in advance actually improves the final texture and flavor of these cookies while giving us complete control over when we bake them.
Preparing Dough for Storage
We start by mixing all ingredients according to our recipe instructions until the dough comes together perfectly. Once formed, we cover the dough tightly with plastic wrap or transfer it to an airtight container to prevent moisture loss and maintain freshness.
Refrigeration Timeline
The prepared dough stores beautifully in the refrigerator for up to 3 days before baking. This extended chilling period allows the flour to fully hydrate while the flavors meld together, creating cookies with improved taste and texture. We can portion the dough into individual balls before refrigerating or keep it as one mass and divide it later.
Freezing for Extended Storage
For longer storage needs, we portion the dough into individual cookie balls and place them on a baking sheet lined with parchment paper. After freezing the portions solid, we transfer them to freezer-safe bags or containers where they maintain quality for up to 2 months. This method prevents the dough balls from sticking together and allows us to bake exactly the number of cookies we want.
Baking from Storage
When ready to bake refrigerated dough, we simply preheat our oven to the specified temperature and bake according to our original recipe timing. Frozen dough balls require no thawing time and can go directly onto our prepared baking sheet. We add just 1 to 2 minutes to the original baking time to account for the frozen temperature, monitoring the edges for our desired golden color.
| Storage Method | Duration | Special Instructions |
|---|---|---|
| Refrigerated dough | Up to 3 days | Cover tightly with plastic wrap |
| Frozen dough balls | Up to 2 months | Freeze on baking sheet first |
| Baking frozen dough | Standard time + 1-2 minutes | No thawing required |
The make-ahead approach transforms our small batch recipe into an even more convenient solution. We eliminate waste while ensuring fresh cookies are always within reach whenever the craving strikes.


Conclusion
Small batch chocolate chip cookies have revolutionized the way we approach homemade treats. We’ve discovered that baking for two to four people eliminates waste while delivering the same incredible taste and texture we crave.
The beauty of this recipe lies in its simplicity and flexibility. Whether we’re experimenting with different chocolate varieties or adding our favorite mix-ins we can create personalized cookies without committing to enormous batches.
With proper storage techniques and make-ahead options we’re never more than minutes away from warm freshly baked cookies. This approach perfectly balances our desire for homemade goodness with practical portion control making every cookie moment special.
Frequently Asked Questions
How long does it take to make small batch chocolate chip cookies?
This small batch chocolate chip cookie recipe can be completed in under 30 minutes, making it perfect for quick sweet cravings. The active preparation time is about 15 minutes, with 10-12 minutes of baking time. If you include chilling the dough for better texture, add an extra 15-30 minutes to the total time.
How many cookies does this small batch recipe make?
This small batch recipe is designed to make approximately 8-12 cookies, perfect for 2-4 people. The exact number depends on the size of your cookie portions, but it’s intentionally scaled down to avoid the temptation of having too many leftover cookies while still satisfying your cookie cravings.
Can I store the cookie dough for later baking?
Yes! The cookie dough can be refrigerated for up to 3 days when tightly covered, or frozen for up to 2 months. For freezing, portion the dough into individual cookie balls first. Refrigerated dough can be baked as-is, while frozen dough can go straight into the oven with just 1-2 minutes added to the baking time.
What’s the secret to getting crispy edges and chewy centers?
The key is using a combination of granulated and brown sugar, slightly underbaking the cookies (9-12 minutes at 350°F), and chilling the dough before baking. Remove cookies when edges are lightly golden but centers still look slightly underbaked. They’ll continue cooking on the hot pan after removal from the oven.
Can I substitute different types of chocolate chips?
Absolutely! You can substitute semi-sweet chocolate chips with milk chocolate, dark chocolate, or white chocolate chips. Chocolate chunks also work well and create interesting texture variations. You can even mix different types together, but keep the total amount to about 1/3 cup to maintain proper dough consistency.
How should I store the baked cookies?
Store completely cooled cookies in an airtight container at room temperature for 3-5 days. For longer storage, freeze baked cookies for up to 3 months in a sealed container. Make sure cookies are completely cool before storing to prevent condensation, and allow chocolate chips to set properly before sealing the container.
What equipment do I need for small batch cookie baking?
Essential equipment includes a large mixing bowl, measuring cups or kitchen scale, silicone spatula, baking sheet, and parchment paper. A hand mixer or stand mixer helps cream butter and sugars effectively. Optional upgrades include a cookie scoop for uniform portions and cooling racks for proper air circulation after baking.
Why do my cookies spread too much during baking?
Excessive spreading usually occurs due to warm dough, incorrect ingredient ratios, or using warm baking sheets. To prevent this, chill your dough for 15-30 minutes before baking, ensure accurate measurements (preferably by weight), and use cool baking sheets. Also, make sure your butter isn’t too warm when mixing.
Can I add nuts or other mix-ins to this recipe?
Yes! You can add up to 2 tablespoons of chopped walnuts, pecans, toffee bits, or coconut flakes. Popular variations include White Chocolate Macadamia, M&M cookies, or adding sea salt flakes on top. Just keep total add-ins to about 1/3 cup to maintain proper dough consistency and texture.
What’s the best way to measure ingredients for consistent results?
For the most consistent results, use a kitchen scale to weigh ingredients, especially flour. If using measuring cups, spoon flour into the cup and level with a knife rather than scooping directly. This prevents packing too much flour, which can lead to dry, crumbly cookies.


