We’ve all been there – craving that perfect slice of red velvet cake but not wanting to commit to a full-sized dessert. That’s exactly why we fell in love with small red velvet cakes. These individual-sized treats pack all the velvety chocolate flavor and tangy cream cheese frosting you adore into perfectly portioned servings.
There’s something magical about red velvet’s signature crimson hue and tender crumb that makes every bite feel special. Originally popularized in the South during the 1920s, this beloved cake gets its distinctive color from a reaction between cocoa powder and acidic ingredients. Our small version captures that same classic taste while giving you complete portion control.
Whether you’re planning an intimate dinner party or simply want to treat yourself without leftovers tempting you all week, these mini red velvet cakes deliver maximum indulgence in a perfectly sized package. They’re surprisingly simple to make and absolutely irresistible to eat.
Ingredients
Creating these delightful small red velvet cakes requires simple pantry staples that work together to produce the signature flavor and texture. We’ve organized our ingredients by component to make preparation seamless and efficient.
For the Cake
- 1 cup all-purpose flour
- 1/2 cup granulated sugar
- 1/4 cup unsweetened cocoa powder
- 1/2 teaspoon baking soda
- 1/2 teaspoon salt
- 1/2 cup buttermilk at room temperature
- 1/4 cup vegetable oil
- 1 large egg at room temperature
- 1 tablespoon red food coloring
- 1 teaspoon vanilla extract
- 1/2 teaspoon white vinegar
For the Cream Cheese Frosting
- 4 ounces cream cheese softened to room temperature
- 2 tablespoons unsalted butter softened
- 1 cup powdered sugar sifted
- 1/2 teaspoon vanilla extract
- Pinch of salt
Equipment Needed
 1")
Creating our small red velvet cakes requires exact equipment to ensure perfect results every time. We’ve organized these essential tools based on our extensive testing to help you prepare efficiently.
Essential Baking Pans
Our small red velvet cakes work best with either 6-inch or 4-inch round cake pans. We recommend having three 4-inch pans or two 6-inch pans available depending on your desired layer count. These smaller pan sizes create the perfect portion while maintaining the classic red velvet texture we love.
Pan Preparation Tools
Parchment paper or wax paper becomes crucial for lining the bottom of our cake pans. This simple step prevents sticking and ensures clean cake release every time. We also need cooking spray or butter for greasing the sides of our pans.
Mixing Equipment
A stand mixer or handheld electric mixer handles the creaming process for butter and sugar while ensuring smooth batter consistency. Multiple mixing bowls help us separate dry and wet ingredients for better organization. A rubber spatula allows us to scrape down bowl sides and fold ingredients without overmixing.
Measuring and Sifting Tools
Accurate measuring cups and spoons guarantee consistent results batch after batch. We recommend using a whisk or fine-mesh strainer for blending dry ingredients and removing lumps from cocoa powder.
Testing and Alternative Options
A toothpick or cake tester helps us determine doneness by checking the center of each cake layer. When 4-inch pans aren’t available we can substitute 8-ounce ramekins or cake rings placed on silicone mats for similar results.
| Pan Size | Baking Time | Recommended Use |
|---|---|---|
| 4-inch round | 20-25 minutes | Individual servings |
| 6-inch round | 24-28 minutes | Small gatherings |
| 8 oz ramekins | 20-25 minutes | Alternative option |
Instructions
 2")
Follow these straightforward steps to create your perfect small red velvet cake. We’ll guide you through each stage to ensure delicious results every time.
Prep the Cake Batter
Preheat your oven to 350°F and prepare your 6-inch cake pan by greasing it with butter and lining with parchment paper.
In a medium bowl, whisk together 1 cup all-purpose flour, 2 tablespoons unsweetened cocoa powder, 1/2 teaspoon baking soda, and 1/4 teaspoon salt. Set this dry mixture aside.
Using your stand mixer or handheld electric mixer, cream together 1/4 cup softened butter and 3/4 cup granulated sugar until the mixture becomes light and fluffy, about 3-4 minutes. Add 2 tablespoons vegetable oil and mix until well combined.
Beat in 1 large egg at room temperature until fully incorporated. Mix in 1 teaspoon vanilla extract and enough red food coloring to achieve your desired vibrant red color.
Create the buttermilk mixture by combining 1/2 cup buttermilk with 1 teaspoon white vinegar in a small bowl. Alternate adding the flour mixture and buttermilk mixture to your butter mixture, beginning and ending with the flour mixture. Mix until just combined and the batter appears uniform.
Bake the Cake
Pour the prepared batter into your greased 6-inch cake pan, spreading it evenly with a spatula.
Bake for 24-28 minutes, or until a toothpick inserted into the center comes out clean or with just a few moist crumbs. The cake should spring back lightly when touched.
Remove from the oven and allow the cake to cool in the pan for 10 minutes before turning it out onto a wire rack to cool completely.
Make the Cream Cheese Frosting
Beat 4 tablespoons softened unsalted butter in a clean mixing bowl until smooth and creamy, about 2 minutes.
Add 4 ounces softened cream cheese to the butter and beat until the mixture is well combined and free of lumps.
Gradually add 1 1/2 cups powdered sugar, beating on low speed initially to prevent a sugar cloud, then increasing to medium speed until the frosting becomes smooth and fluffy.
Mix in 1/2 teaspoon vanilla extract and a pinch of salt until the frosting reaches the perfect consistency for spreading.
Assemble and Frost the Cake
Ensure your cake has cooled completely before frosting to prevent the cream cheese frosting from melting.
Place the cooled cake on your serving plate or cake stand. Using an offset spatula or butter knife, spread a generous layer of cream cheese frosting over the top of the cake.
Apply frosting to the sides of the cake, working from bottom to top with smooth, even strokes. Create decorative swirls or keep it simple with a smooth finish according to your preference.
Refrigerate the frosted cake for at least 30 minutes before serving to allow the frosting to set properly.
Tips for the Perfect Small Red Velvet Cake
 3")
Achieving bakery-quality results with our small red velvet cake requires attention to several key details. Room temperature ingredients create the foundation for success. We recommend removing butter, eggs, and cream cheese from the refrigerator 1-2 hours before baking to ensure optimal mixing and texture.
Temperature Control and Ingredient Preparation
Our oven should reach exactly 350°F (175°C) before placing the cake inside. Temperature consistency affects both rise and texture. We suggest using an oven thermometer to verify accuracy since many home ovens run hot or cold.
Buttermilk quality significantly impacts the final result. Fresh buttermilk provides the tangy flavor that balances the sweetness while creating the tender crumb we desire. We avoid substituting with milk and vinegar when possible for authentic taste.
Color and Cocoa Balance
Red food coloring intensity determines the final appearance. We use 1-2 teaspoons depending on desired vibrancy. Less cocoa powder produces a more brilliant red color since chocolate naturally darkens the batter.
| Pan Size | Cocoa Powder | Food Coloring | Bake Time |
|---|---|---|---|
| 4-inch | 1 tablespoon | 1 teaspoon | 20-25 minutes |
| 6-inch | 2 tablespoons | 2 teaspoons | 25-28 minutes |
Proper Pan Preparation
Cooking spray combined with parchment paper prevents sticking without affecting flavor. We line the bottom of our 4-inch or 6-inch pans with parchment circles and lightly grease the sides. This method ensures clean release every time.
Cooling and Storage Techniques
Cooling requires patience for optimal results. We allow cakes to rest in pans for 10-15 minutes before transferring to wire racks. Complete cooling prevents frosting from melting and sliding off the surface.
Refrigeration should be avoided unless frosting stability demands it. Room temperature storage maintains moisture and prevents the cake from drying out. We cover finished cakes with a cake dome or loose plastic wrap for freshness.
Frosting Application Strategy
Cream cheese frosting performs best when applied to completely cooled cake layers. We ensure our frosting reaches room temperature for smooth spreading. Cold frosting creates tears in the delicate cake surface while warm frosting becomes too soft to hold its shape.
Storage Instructions
 4")
Our small red velvet cake requires proper storage to maintain its signature moist texture and rich flavor. We recommend following exact guidelines based on whether your cake is frosted or unfrosted.
Room Temperature Storage
Unfrosted cake layers stay fresh when wrapped tightly in plastic wrap and stored in an airtight container at room temperature for 1-4 days. The storage duration depends on your exact recipe and kitchen environment. We find that keeping cakes at room temperature preserves their natural moisture and soft texture better than refrigeration.
Frosted cakes with cream cheese frosting present different requirements. We advise keeping them at room temperature for no more than 6 hours for food safety. Some small batch or mini cakes may last up to 2 days at room temperature when covered tightly, but cream cheese frosting performs safest when refrigerated after several hours.
Refrigeration Guidelines
Move your covered or frosted cake to the refrigerator after the initial room temperature period for extended storage up to 3 days. We always remove refrigerated cakes from the fridge 2-3 hours before serving to restore their optimal texture and temperature.
Freezing Instructions
Unfrosted cake layers freeze beautifully when wrapped tightly in plastic wrap and placed in freezer bags or airtight containers. We recommend freezing for up to 2-3 months for best quality. Individual slices or mini cakes can also be wrapped and frozen for convenient single servings.
Always ensure your cake layers cool completely before wrapping or freezing. Thaw frozen cakes in the refrigerator or at room temperature before frosting or serving.
Frosting Storage Tips
Our cream cheese buttercream can be prepared ahead and stored in an airtight container in the refrigerator for up to two weeks. We bring it to room temperature and rewhip before use to restore its smooth consistency. Frosting also freezes well when properly stored and can be thawed and rewhipped as needed.
Storage Best Practices
We achieve optimal results by frosting cakes as close to serving time as possible. Store cakes away from direct sunlight and heat sources when keeping at room temperature. These practices ensure your small red velvet cake maintains its bakery quality taste and texture.
Make-Ahead Instructions
 5")
Planning a special occasion becomes significantly easier when we prepare components of our small red velvet cake in advance. Both cake layers and cream cheese frosting can be made ahead of time without compromising quality or flavor.
Preparing Cake Layers in Advance
We can bake our cake layers up to two days before serving when stored properly at room temperature. Wrap each cooled layer tightly in plastic wrap to prevent moisture loss and maintain the cake’s signature tender crumb. For longer storage periods we recommend freezing the unfrosted layers for up to 2-3 months wrapped in plastic wrap and aluminum foil.
Thaw frozen cake layers overnight in the refrigerator before assembly. This gradual thawing process preserves the cake’s delicate texture and prevents condensation from forming on the surface.
Make-Ahead Cream Cheese Frosting
Our cream cheese frosting stores beautifully in the refrigerator for up to one week when kept in an airtight container. Bring the frosting to room temperature before using and beat it briefly with an electric mixer to restore its smooth consistency.
| Component | Storage Method | Duration |
|---|---|---|
| Unfrosted cake layers | Room temperature (wrapped) | 2 days |
| Unfrosted cake layers | Freezer (wrapped) | 2-3 months |
| Cream cheese frosting | Refrigerator (airtight) | 1 week |
| Assembled cake | Refrigerator | 3 days |
Assembly Timeline Strategy
We recommend assembling the cake no more than 24 hours before serving for optimal presentation. The cream cheese frosting maintains its stability when applied to completely cooled cake layers and refrigerated properly. This timing allows flavors to meld beautifully while preserving the frosting’s smooth appearance and the cake’s moist texture.
Serving Suggestions
 6")
We recommend serving our small red velvet cakes at room temperature for the best flavor and texture experience. The 4-inch size makes these cakes perfect for intimate date nights or Valentine’s Day celebrations where you want something special but not overwhelming.
Individual Presentation Options
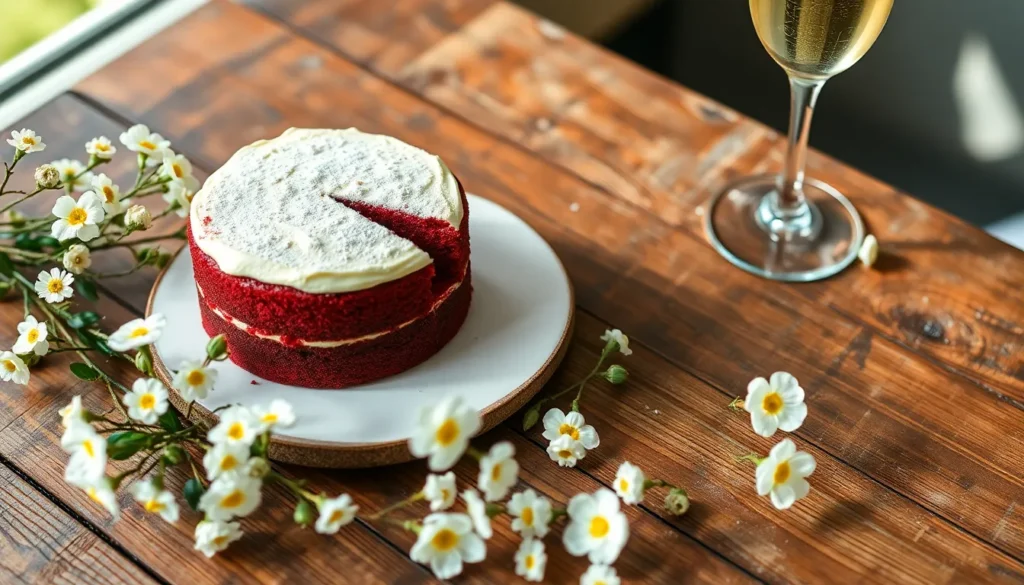
For single-serve portions, we suggest placing each small cake on dessert plates with a light dusting of powdered sugar around the edge. Fresh berries like strawberries or raspberries complement the subtle chocolate notes beautifully while adding visual appeal. A small dollop of whipped cream alongside the slice enhances the indulgent experience without competing with the cream cheese frosting.
Special Occasion Pairings
Our 6-inch cakes work wonderfully for small gatherings of 2-4 people, making them ideal for anniversary dinners or birthday celebrations. We pair these with vanilla ice cream or a warm berry compote to create an elegant dessert course. The rich cream cheese frosting provides excellent contrast when served with lighter accompaniments.
Beverage Recommendations
Coffee lovers will appreciate how well these cakes pair with espresso or cappuccino, as the coffee’s boldness balances the cake’s sweetness. For evening occasions, we suggest serving with dessert wines or champagne to elevate the romantic atmosphere. Milk remains a classic choice that never disappoints with red velvet’s traditional flavors.
Presentation Tips
| Serving Size | Guest Count | Ideal Occasions | Recommended Accompaniments |
|---|---|---|---|
| 4-inch cake | 1-2 people | Date nights, Valentine’s Day | Fresh berries, powdered sugar |
| 6-inch cake | 2-4 people | Small celebrations, anniversaries | Ice cream, berry compote |
We find that garnishing with a few chocolate shavings or a single fresh mint leaf adds professional polish to the presentation. The natural red color from cocoa powder and food coloring creates stunning visual impact that requires minimal additional decoration to impress guests.
Conclusion
Small red velvet cakes deliver all the beloved flavors of the classic dessert in perfectly portioned packages. Whether you’re planning an intimate celebration or simply treating yourself these mini masterpieces offer the ideal balance of indulgence and restraint.
The beauty of these cakes lies in their versatility and convenience. You can prepare components ahead of time store them properly and assemble when needed making them perfect for busy schedules or spontaneous gatherings.
With the right techniques and attention to detail you’ll create bakery-quality results that impress every time. These delightful treats prove that sometimes the best things truly do come in small packages.
Frequently Asked Questions
What makes red velvet cake different from regular chocolate cake?
Red velvet cake has a unique flavor profile that combines subtle chocolate notes with tangy buttermilk and a hint of vanilla. The distinctive red color comes from food coloring, and the texture is more tender and velvety due to the acid-base reaction between buttermilk, cocoa powder, and baking soda. This creates a cake that’s less intensely chocolatey than traditional chocolate cake.
How long do small red velvet cakes stay fresh?
Unfrosted small red velvet cakes stay fresh at room temperature for 1-4 days when properly wrapped. Frosted cakes should only be kept at room temperature for up to 6 hours, but can be refrigerated for up to 3 days. For longer storage, unfrosted cake layers can be frozen for 2-3 months.
Can I make red velvet cakes ahead of time?
Yes! Cake layers can be baked up to two days in advance and stored at room temperature, or frozen for longer periods. Cream cheese frosting can be made up to a week ahead and refrigerated. However, assemble the cake no more than 24 hours before serving for optimal presentation and flavor.
What size pans work best for small red velvet cakes?
4-inch or 6-inch round cake pans are ideal for small red velvet cakes. 4-inch pans create intimate single-serving cakes perfect for date nights, while 6-inch pans are great for small gatherings. You can also use ramekins as an alternative. Always line pans with parchment paper and grease the sides to prevent sticking.
Why is buttermilk important in red velvet cake?
Buttermilk is crucial for red velvet cake’s signature texture and flavor. Its acidity reacts with baking soda to create a tender, moist crumb and helps activate the cocoa powder’s natural red tones. Fresh buttermilk provides the best tangy flavor that balances the sweetness and enhances the cake’s distinctive taste profile.
How should I store cream cheese frosting?
Cream cheese frosting should be stored in the refrigerator and can last up to one week when properly covered. Bring it to room temperature before using and re-whip if needed for smooth consistency. Always frost cakes close to serving time, and keep frosted cakes refrigerated until ready to serve.
What’s the best way to serve small red velvet cakes?
Serve small red velvet cakes at room temperature for optimal flavor and texture. 4-inch cakes are perfect for intimate occasions, while 6-inch cakes suit small gatherings. Enhance presentation with powdered sugar dusting, fresh berries, or whipped cream. Pair with coffee, dessert wine, or champagne for a complete dessert experience.


