We’ve discovered the perfect dessert that combines childhood nostalgia with fresh fruit flavors – strawberry banana pudding that’ll make your taste buds dance with joy. This creamy, dreamy treat transforms the classic Southern pudding into something extraordinary by layering sweet strawberries and ripe bananas with rich vanilla custard and fluffy whipped cream.
What makes our strawberry banana pudding absolutely irresistible is how it balances textures and flavors effortlessly. The tartness of fresh strawberries cuts through the rich custard while bananas add natural sweetness and that familiar comfort food appeal we all crave. It’s like summer in a bowl – refreshing yet indulgent.
Whether you’re planning a family gathering or just want to treat yourself to something special, this no-bake dessert comes together in minutes but tastes like you’ve spent hours in the kitchen. We guarantee this will become your go-to recipe when you need a crowd-pleasing dessert that looks as impressive as it tastes.
Ingredients
We’ll gather fresh ingredients to create each delicious layer of this strawberry banana pudding. Our recipe breaks down into three essential components that come together beautifully.
For the Pudding Base
- 1 package (3.4 oz) instant vanilla pudding mix
- 2 cups whole milk
- 1 cup heavy cream
- 1/4 cup granulated sugar
- 1 teaspoon vanilla extract
- 1 package (11 oz) vanilla wafers
For the Fruit Layers
- 2 pounds fresh strawberries, hulled and sliced
- 4 large ripe bananas, sliced into rounds
- 1/4 cup granulated sugar
- 2 tablespoons fresh lemon juice
- 1 tablespoon cornstarch
For the Whipped Cream Topping
- 1 1/2 cups heavy whipping cream
- 1/3 cup powdered sugar
- 1 teaspoon vanilla extract
- Fresh strawberry slices for garnish
- Crushed vanilla wafers for garnish
Equipment Needed

We recommend gathering these essential tools before starting our strawberry banana pudding recipe to ensure smooth preparation and professional results.
Basic Mixing Equipment
- Large mixing bowl for combining pudding ingredients
- Whisk or rubber spatula for smooth blending
- Electric mixer or hand mixer for optimal texture (optional but recommended)
Measuring Tools
- Measuring cups for accurate liquid portions
- Measuring spoons for precise ingredient ratios
Serving and Storage
- Individual serving cups or bowls for elegant presentation
- Refrigerator space for proper chilling and setting
Assembly Essentials
- Clean cutting board for fruit preparation
- Sharp knife for slicing strawberries and bananas
- Small spoon for layering ingredients evenly
We find that having all equipment ready before beginning creates a more efficient cooking experience. The mixing bowl should be large enough to accommodate vigorous whisking without spillage. Our serving cups can range from clear glass containers that showcase the beautiful layers to decorative bowls that match your table setting.
Cold milk requires proper mixing tools to achieve the smooth consistency that makes our pudding set correctly. We suggest using either a whisk for manual mixing or an electric mixer for those who prefer effortless preparation. The refrigerator becomes crucial for the final setting process that transforms our layered ingredients into the perfect dessert consistency.
Prep Work

Proper preparation ensures our strawberry banana pudding layers beautifully and develops the best flavor profile. Taking time to prep our fruit correctly creates the foundation for this stunning dessert.
Preparing the Strawberries
We start by washing our fresh strawberries under cool running water to remove any dirt or residue. After patting them dry with paper towels, we remove the green stems and leaves using a sharp paring knife or strawberry huller.
Slicing the strawberries into even pieces creates uniform layers throughout our pudding. We cut each berry lengthwise into ¼ inch thick slices, ensuring consistent cooking and presentation. The even thickness allows the strawberries to release their natural juices gradually while maintaining their shape during assembly.
Fresh strawberries work best for this recipe, providing optimal flavor and texture that frozen berries cannot match. We avoid overripe or mushy berries that might break apart during layering and affect the pudding’s structure.
Slicing the Bananas
Selecting ripe but firm bananas prevents them from becoming mushy in our pudding layers. We peel the bananas just before slicing to maintain their fresh appearance and prevent browning.
Using a sharp knife, we slice the bananas into rounds approximately ¼ inch thick for optimal layering. This preferred thickness ensures the banana pieces hold their shape while creating distinct layers between the pudding and cookies.
We slice our bananas immediately before assembly to maintain their color and texture. The natural sugars in properly ripened bananas complement the vanilla pudding base while adding essential moisture to each bite.
Keeping our banana slices uniform in size creates professional looking layers and ensures every serving contains the perfect fruit to pudding ratio.
Instructions

Now we’ll guide you through creating this delicious strawberry banana pudding using our step-by-step approach. These instructions will help you achieve perfect layers and optimal flavor in every bite.
Making the Pudding Base
We start by choosing between two excellent pudding base options depending on our preferred texture and richness. For a lighter version, we combine 1.5 cups milk with 1 cup plain Greek yogurt and 3.4 oz instant vanilla pudding mix in a large bowl. Mix these ingredients thoroughly until smooth and let the mixture set for 5 minutes to achieve proper consistency.
For a richer variation, we combine 2 cups whole milk with a 3 oz box of banana cream instant pudding mix. In a separate bowl, we blend cream cheese with a 14 oz can of condensed milk until completely smooth. The banana cream option creates a more indulgent base that complements our fruit layers beautifully.
Preparing the Whipped Cream
We fold 1/2 cup of whipped topping such as Tru Whip or Cool Whip into our yogurt-based pudding mixture for the lighter version. This creates a fluffy texture that balances perfectly with our fresh fruit layers.
For the richer pudding base, we use 1 1/4 cups of Cool Whip or freshly whipped heavy cream. We gently fold this whipped cream into our cream cheese mixture to maintain the airy consistency. The key is folding rather than stirring to preserve the light texture that makes our pudding so appealing.
Assembling the Layers
We begin layering by placing a portion of our prepared vanilla pudding in the bottom of our serving bowl or pan. Next, we add a layer of our evenly sliced strawberries and bananas over the pudding base. We sprinkle crushed vanilla wafer cookies over the fruit to add delightful crunch and traditional pudding flavor.
We repeat this layering process until all ingredients are used, ensuring each layer is evenly distributed. For enhanced presentation, we add sprinkles and edible glitter on the top layer to create a vibrant, festive appearance. We gently bang the pan on a hard surface to help the pudding mixture settle evenly between all layers.
Finally, we refrigerate our assembled pudding for at least 2-3 hours to allow proper setting. This chilling time ensures our layers maintain their structure and flavors meld together perfectly for the ultimate dessert experience.
Directions for Chilling and Setting

Proper chilling ensures our strawberry banana pudding develops the perfect texture and allows all flavors to meld beautifully. We need to refrigerate the assembled dessert for adequate time to achieve optimal results.
Initial Chilling Requirements
We must chill our pudding for at least 2 to 3 hours after assembly. For best results we recommend extending the chilling time to 4 to 6 hours or refrigerating overnight. This extended timeframe allows the layers to set properly and creates the ideal consistency throughout.
| Chilling Time | Result Quality |
|---|---|
| 2-3 hours | Minimum setting time |
| 4-6 hours | Recommended for optimal texture |
| Overnight | Best flavor development |
Proper Storage Technique
We cover the assembled pudding tightly with plastic wrap to maintain freshness and prevent surface issues. The plastic wrap should touch the top layer directly to prevent a skin from forming on the surface. This method preserves moisture and ensures consistent texture throughout the dessert.
Storage Duration Guidelines
Our strawberry banana pudding can be prepared up to one day ahead for convenience. We store the covered dessert in the refrigerator for up to two days maximum. Peak freshness occurs within the first day after preparation.
Setting Best Practices
We allow the pudding to rest undisturbed during the entire chilling period. This undisturbed time helps maintain distinct layers and prevents mixing between components. Using clear serving dishes or individual cups showcases the beautiful layered appearance we’ve created.
Serving Temperature
We serve the pudding directly from the refrigerator while thoroughly chilled. This cold temperature ensures the pudding remains firm and the vanilla wafers maintain their perfect texture balance of crisp yet softened. The chilled serving temperature also enhances the overall presentation and eating experience.
Make-Ahead Instructions

Planning ahead transforms our strawberry banana pudding into a stress-free dessert option for busy schedules or special occasions. We can prepare several components in advance to streamline the final assembly process.
Pudding Base Preparation
We recommend preparing the pudding mixture and cream cheese components separately up to 24 hours before serving. The vanilla pudding base maintains its smooth consistency when stored properly in the refrigerator. Our cream cheese mixture benefits from advance preparation as it allows the flavors to meld beautifully overnight.
Store each component in separate covered containers to prevent cross-contamination of flavors. The pudding base should be whisked thoroughly before combining with other ingredients to eliminate any separation that may occur during storage.
Component Storage Strategy
| Component | Storage Time | Storage Method | Temperature |
|---|---|---|---|
| Pudding mixture | 1-2 days | Covered bowl | 35-40°F |
| Cream cheese blend | 1-2 days | Airtight container | 35-40°F |
| Whipped cream | 1 day | Sealed container | 35-40°F |
| Sliced fruit | 4-6 hours | Covered bowl | 35-40°F |
Assembly Timing
Fruit preparation requires careful timing to maintain optimal texture and appearance. We slice strawberries and bananas no more than 4 to 6 hours before final assembly to prevent browning and mushiness. Banana slices benefit from a light coating of lemon juice when prepared in advance.
Final assembly should occur 2 to 4 hours before serving to allow proper setting while preventing cookie softening. We layer the prepared components just before the final refrigeration period to maintain distinct textures throughout each layer.
Storage Best Practices
Cover the fully assembled pudding tightly with plastic wrap pressed directly against the surface to prevent skin formation. Our make-ahead approach ensures the vanilla wafers maintain their ideal texture balance between crisp and tender. The assembled dessert reaches peak flavor after chilling overnight but maintains quality for up to 2 days in the refrigerator.
Serving Suggestions

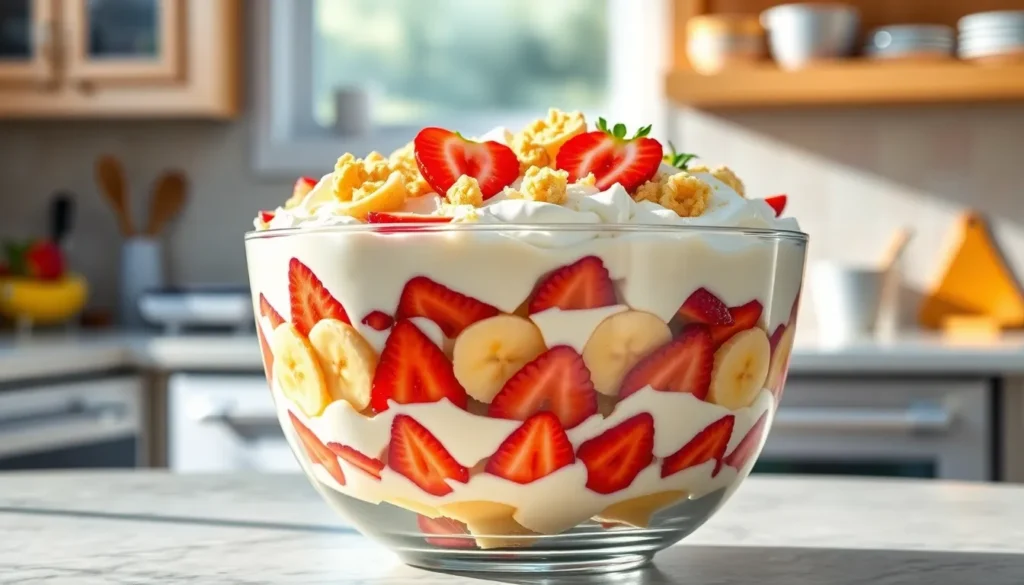
We recommend using a clear trifle bowl to showcase the colorful layers of pudding, fruit, and cookies that make this dessert so visually appealing. The transparent glass allows guests to appreciate the beautiful contrast between the creamy vanilla pudding, vibrant red strawberries, and golden banana slices. Start with a layer of vanilla pudding at the bottom, followed by sliced strawberries, sliced bananas, and crushed vanilla wafer cookies. Repeat this sequence until your bowl reaches capacity, finishing with either crushed cookies or a dollop of whipped topping as the final garnish.
Individual serving cups work wonderfully for portion control and elegant presentation at dinner parties or gatherings. We suggest slicing both strawberries and bananas thinly to ensure even distribution throughout each layer and create that perfect fruit to pudding ratio in every spoonful. The thin slices also help maintain the structural integrity of your layers while providing optimal flavor balance.
Timing plays a crucial role in achieving the perfect texture contrast. We always add the vanilla wafer cookies right before serving to maintain their delightful crunch against the smooth pudding and soft fruit. This technique prevents the cookies from becoming soggy while preserving their signature texture that makes banana pudding so beloved.
Consider improving your presentation with creative toppings that add both visual appeal and textural interest. Crushed Chessman cookies, Nilla wafers, or Golden Oreos provide excellent alternatives to traditional vanilla wafers. We often add shaved chocolate or chopped nuts as decorative elements that contribute an extra layer of flavor and crunch to each serving.
Store any leftover pudding in an airtight container in the refrigerator for up to 3 days, though we recommend serving on the same day for optimal freshness. Bananas and cookies tend to lose their ideal texture over time, so immediate enjoyment yields the best results.
For dietary considerations, we suggest using sugar-free pudding and whipped topping to create a lighter version that accommodates diabetes-friendly requirements without sacrificing taste. Cold milk ensures your pudding sets smoothly and maintains that creamy consistency throughout the chilling process.
This dessert shines at summer gatherings, family reunions, and casual dinner parties where its refreshing quality and nostalgic appeal create memorable moments for guests of all ages.
Storage Tips

Our strawberry banana pudding maintains its delicious taste and appealing texture when stored properly using the right techniques and timing.
Refrigeration Guidelines
We recommend storing leftover pudding in an airtight container in the refrigerator for up to 3 days maximum. The pudding should remain covered tightly throughout storage to maintain freshness and prevent the surface from drying out.
| Storage Factor | Recommendation |
|---|---|
| Maximum Storage Time | 3 days |
| Storage Temperature | Refrigerated |
| Container Type | Airtight |
Preventing Fruit Deterioration
We suggest drizzling lemon juice on banana slices before adding them to the pudding to prevent browning during storage. This simple step keeps our bananas looking fresh and appetizing even after a day or two in the refrigerator.
Maintaining Cookie Texture
Our vanilla wafer cookies maintain their ideal texture when layered just before serving rather than during initial assembly. We recommend storing the cookie layers separately from the pudding base when preparing ahead to prevent sogginess.
Assembly Strategy for Make-Ahead Preparation
We find the best results come from storing pudding and whipped topping components separately when preparing in advance. This approach allows us to assemble the dessert just before serving while keeping each layer properly set and maintaining optimal texture throughout.
Pre-Serving Preparation
We always chill our assembled strawberry banana pudding for at least 4 hours before serving to allow flavors to meld completely and layers to set properly. A trifle bowl showcases the beautiful layers while the chilling time ensures each spoonful delivers the perfect combination of textures and tastes.
Conclusion
We’ve shared everything you need to create this spectacular strawberry banana pudding that’ll become your go-to dessert. From proper prep techniques to storage tips this recipe delivers consistent results every time.
The beauty of this dessert lies in its simplicity and stunning presentation. Whether you’re hosting a summer gathering or treating your family to something special the combination of fresh fruit creamy pudding and crunchy wafers never disappoints.
Remember that timing is everything with this recipe. Allow adequate chilling time and assemble just before serving for the perfect texture balance. Your guests will be impressed by the beautiful layers and incredible flavor that make this pudding truly unforgettable.
Frequently Asked Questions
What is strawberry banana pudding?
Strawberry banana pudding is a no-bake layered dessert that combines sweet strawberries, ripe bananas, rich vanilla custard, and fluffy whipped cream with vanilla wafers. This refreshing yet indulgent treat offers a perfect balance of textures and flavors, making it ideal for family gatherings, summer events, or personal indulgence.
How long does strawberry banana pudding need to chill?
The pudding should be refrigerated for at least 2-3 hours, with an ideal chilling time of 4-6 hours or overnight. This allows the flavors to meld together and the layers to set properly. The longer chilling time ensures optimal texture and flavor development for the best results.
Can I make strawberry banana pudding ahead of time?
Yes, you can prepare components up to 24 hours in advance. Store the pudding mixture and cream cheese components separately in covered containers. Slice fruits no more than 4-6 hours before assembly to prevent browning. Assemble the final dessert 2-4 hours before serving for best texture.
How should I store leftover strawberry banana pudding?
Store leftover pudding in an airtight container in the refrigerator for up to 3 days. To maintain quality, drizzle lemon juice on banana slices to prevent browning and keep cookie layers separate from the pudding base. Cover tightly with plastic wrap to maintain freshness.
What equipment do I need to make this pudding?
Essential equipment includes a large mixing bowl, whisk or rubber spatula, electric mixer, measuring cups and spoons, and individual serving cups or a trifle bowl. You’ll also need a clean cutting board for fruit preparation and plastic wrap for storage. Having all equipment ready ensures smooth preparation.
How do I prevent bananas from browning in the pudding?
Choose ripe but firm bananas and slice them just before assembly. Drizzle fresh lemon juice on banana slices to prevent browning. For make-ahead preparation, slice bananas no more than 4-6 hours before assembly and store them with a light coating of lemon juice.
Can I use different types of cookies instead of vanilla wafers?
Yes, you can substitute vanilla wafers with other cookies like Chessman cookies, graham crackers, or even chocolate wafers. Crush them into similar-sized pieces and add them just before serving to maintain their crunch. This allows for creative flavor variations while maintaining the dessert’s structure.
What’s the best way to serve strawberry banana pudding?
Serve directly from the refrigerator in individual cups or a clear trifle bowl to showcase the colorful layers. Add vanilla wafer cookies just before serving to maintain their crunch. Garnish with fresh strawberry slices, crushed cookies, or whipped cream for an elegant presentation.


