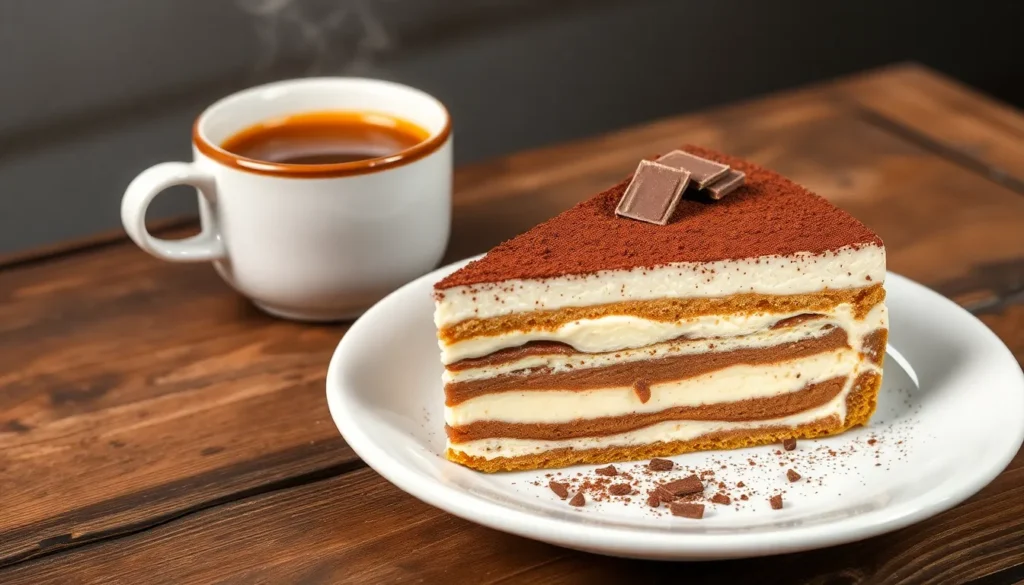
Tiramisu cheesecake combines two of the industry’s most beloved desserts into one show-stopping creation that’ll have everyone asking for seconds. We’ve taken the classic Italian coffee-flavored dessert and merged it with the rich creamy texture of New York-style cheesecake to create something truly extraordinary.
This indulgent hybrid dessert captures all the signature flavors you love about traditional tiramisu – espresso-soaked ladyfingers mascarpone and a dusting of cocoa – while delivering the dense satisfying richness that makes cheesecake irresistible. The result is a dessert that’s both familiar and surprisingly sophisticated.
Whether you’re hosting a dinner party or simply craving something special we guarantee this tiramisu cheesecake recipe will become your new go-to impressive dessert. It’s easier to make than you might think and the combination of coffee chocolate and creamy cheese creates flavor layers that’ll transport you straight to an Italian café.
Ingredients
We’ve carefully selected each ingredient to create the perfect balance of coffee-infused richness and creamy indulgence. Our tiramisu cheesecake combines traditional Italian flavors with classic cheesecake elements for an unforgettable dessert experience.
For the Crust
- 1½ cups graham cracker crumbs
- ¼ cup granulated sugar
- 6 tablespoons unsalted butter, melted
- Pinch of salt
For the Cheesecake Filling
- 24 ounces cream cheese, softened to room temperature
- 8 ounces mascarpone cheese, softened to room temperature
- ¾ cup granulated sugar
- 3 large eggs, room temperature
- 2 tablespoons all-purpose flour
- 1 teaspoon vanilla extract
- ½ cup sour cream, room temperature
- 2 tablespoons coffee liqueur (optional)
For the Coffee Mixture
- 1 cup strong espresso or coffee, cooled completely
- 3 tablespoons coffee liqueur or rum (optional)
- 2 tablespoons granulated sugar
- 24 ladyfinger cookies
For the Topping
- 1 cup heavy whipping cream, chilled
- 3 tablespoons powdered sugar
- 1 teaspoon vanilla extract
- Unsweetened cocoa powder for dusting
- Dark chocolate shavings for garnish (optional)


Equipment Needed

Creating this showstopping tiramisu cheesecake requires exact tools that ensure perfect results every time. We’ve carefully selected each piece of equipment based on its essential role in achieving the ideal texture and presentation.
Food Processor or Blender takes center stage for crushing graham crackers into fine crumbs for our crust base. This powerful tool creates the uniform texture needed for a sturdy foundation that holds up beautifully when sliced.
Electric Mixer or Stand Mixer becomes indispensable for whipping our cream cheese mixture to silky perfection. We rely on this equipment to eliminate lumps and create the smooth consistency that defines exceptional cheesecake.
Multiple Mixing Bowls in various sizes accommodate different preparation stages. Large bowls work perfectly for combining our cream cheese and mascarpone while smaller ones handle the coffee mixture and whipped cream topping.
Coffee Maker or Espresso Machine produces the strong coffee essential for authentic tiramisu flavor. We need this equipment to brew the robust espresso that will soak our ladyfingers and infuse the entire dessert with that signature coffee taste.
Springform Pan serves as our baking vessel of choice. A quality pan like the Zenker brand (17 cm x 6 cm) provides the ideal compact size while the removable bottom ensures clean removal without damaging our delicate cheesecake.
Wire Whisk handles tasks requiring gentle incorporation, particularly when folding whipped cream into our mascarpone mixture. This tool prevents overmixing while maintaining the light, airy texture we desire.
Fine Mesh Sieve becomes crucial for dusting cocoa powder evenly across the finished dessert. We use this tool to achieve that classic tiramisu appearance with a smooth, professional finish.
Measuring Cups and Spoons ensure precision in our ingredient ratios. Accurate measurements make the difference between a good cheesecake and an extraordinary one that captures authentic tiramisu flavors.


Instructions

Now we’ll walk through the step-by-step process to create this stunning tiramisu cheesecake. Each stage builds upon the last to achieve the perfect balance of textures and flavors.
Prep the Crust
We start by crushing our graham crackers into fine crumbs using a food processor or blender. Combine these crumbs with melted butter until the mixture resembles wet sand and holds together when pressed. Press this mixture firmly into the bottom of our springform pan using the bottom of a measuring cup or your fingers. The crust should be compact and even across the entire surface. Place the pan in the refrigerator to chill for at least 30 minutes or freeze for 15 minutes until the crust becomes firm and solid.
Make the Coffee Mixture
Brew strong espresso or coffee using your coffee maker or espresso machine. Allow the coffee to cool to room temperature before proceeding. Pour the cooled coffee into a shallow dish wide enough to accommodate the ladyfingers. Add coffee liqueur if using for enhanced flavor depth. We want the coffee mixture strong enough to penetrate the ladyfingers without making them soggy or causing them to fall apart.
Prepare the Cheesecake Filling
Remove cream cheese and mascarpone from the refrigerator 30 minutes before mixing to ensure they soften properly. Beat the cream cheese with an electric mixer until smooth and creamy with no lumps remaining. Add mascarpone cheese and continue beating until well combined. Beat eggs and granulated sugar in a separate bowl until the mixture becomes fluffy and pale. Gently fold the egg mixture into the cheese combination using a wire whisk to maintain the airy texture. Add vanilla extract and mix until just incorporated.
Assemble the Tiramisu Cheesecake
Working quickly dip each ladyfinger into the coffee mixture for 2-3 seconds per side. Arrange the coffee-soaked ladyfingers in a single layer over our prepared crust. Pour half of the cheesecake filling over the ladyfingers and spread evenly with a spatula. Create a second layer by dipping more ladyfingers and arranging them over the filling. Top with the remaining cheesecake filling and smooth the surface completely. Gently tap the pan on the counter to release any air bubbles trapped in the layers.
Bake the Cheesecake
Preheat the oven to 325°F (163°C) before beginning assembly. Wrap the bottom of our springform pan with aluminum foil to prevent water from seeping in during baking. Place the assembled cheesecake in a larger roasting pan and add hot water until it reaches halfway up the sides of the springform pan. Bake for 55-65 minutes until the center is almost set but still slightly jiggly. The edges should be firm while the center remains soft to prevent overbaking and maintain moisture.
Cool and Chill
Turn off the oven and crack the door open slightly allowing the cheesecake to cool gradually in the oven for 1 hour. Remove from the water bath and place on a wire rack to cool completely to room temperature. Cover the cheesecake with plastic wrap and refrigerate for at least 4 hours or preferably overnight. This chilling time allows the flavors to meld together and the texture to set properly for clean slicing.
Add the Final Topping
Whip heavy cream with powdered sugar using an electric mixer until soft peaks form. Be careful not to overwhip as the cream can become grainy. Using a piping bag or spoon spread the whipped cream evenly over the chilled cheesecake surface. Dust generously with unsweetened cocoa powder using a fine mesh sieve for even distribution. Add dark chocolate shavings if desired for an elegant finishing touch that enhances both appearance and flavor.


Make-Ahead Instructions

One of the greatest advantages of our tiramisu cheesecake is its make-ahead friendly nature. This dessert actually improves with time as the flavors meld together beautifully in the refrigerator.
Baked Tiramisu Cheesecake Timeline
After removing your cheesecake from the oven, we recommend allowing it to cool completely at room temperature before refrigerating. The cooling process typically takes 2-3 hours depending on your kitchen temperature. Once cooled, transfer the cheesecake to the refrigerator and chill for at least 2 hours to properly set the filling.
For optimal results, we suggest making your baked tiramisu cheesecake a full day ahead of serving. This extended chilling time allows the coffee flavors to penetrate throughout the dessert while ensuring the texture reaches its perfect creamy consistency.
No-Bake Tiramisu Cheesecake Schedule
No-bake versions require more patience but offer incredible convenience for busy schedules. We strongly advise chilling your no-bake tiramisu cheesecake for a minimum of 6 hours before serving. Overnight chilling produces the best results as it gives the mascarpone and cream cheese mixture time to firm up properly.
The extended refrigeration period also allows the espresso-soaked ladyfingers to soften and integrate seamlessly with the creamy layers above and below.
Storage Guidelines
| Storage Method | Duration | Best Practices |
|---|---|---|
| Refrigerated | Up to 2 days | Cover tightly with plastic wrap |
| Freezer | Up to 1 month | Wrap in aluminum foil after plastic wrap |
| Room Temperature | Not recommended | Keep refrigerated at all times |
We recommend storing your completed tiramisu cheesecake in the refrigerator for up to two days maximum. Cover the dessert tightly with plastic wrap to prevent it from absorbing other refrigerator odors and to maintain its moisture.
Topping Considerations
Save the whipped cream topping for just before serving to maintain its light and airy texture. We find that preparing the topping in advance often results in deflation and a less appealing presentation. The cocoa powder dusting should also be applied at the last moment to prevent it from dissolving into the cream.
Store any leftover whipped cream separately in the refrigerator and rewhip briefly before applying to individual slices if needed.


Storage Tips

Proper storage ensures our tiramisu cheesecake maintains its perfect texture and rich flavors for days to come. We recommend keeping the cheesecake in its springform pan or transferring it to an airtight container to prevent it from absorbing any unwanted refrigerator odors.
Refrigeration Guidelines
Our tiramisu cheesecake stays fresh in the refrigerator for up to 5 days when stored correctly. We always cover the cheesecake tightly with plastic wrap or aluminum foil to maintain its moisture and prevent the surface from drying out.
| Storage Method | Duration | Best Practice |
|---|---|---|
| Refrigerated | Up to 5 days | Cover tightly with plastic wrap |
| Frozen | Up to 2 months | Double wrap and use airtight container |
| Initial Chilling | 6 hours minimum | Overnight preferred for best texture |
The cheesecake actually improves during storage as the coffee and mascarpone flavors continue to meld together. We find that allowing at least 6 hours of chilling time creates the ideal texture, though overnight storage produces even better results.
Long Term Freezing Options
Freezing extends our tiramisu cheesecake’s life to up to 2 months without important quality loss. We recommend chilling the cheesecake completely in the refrigerator before placing it in the freezer to maintain structural integrity.
Double wrapping proves essential for frozen storage. We first wrap the cheesecake tightly in plastic wrap, then place it in an airtight container or wrap it again in aluminum foil to prevent freezer burn.
Thawing requires patience for the best results. We transfer the frozen cheesecake to the refrigerator and allow it to thaw overnight rather than using room temperature or microwave methods. This gradual thawing process may slightly affect the texture, but the flavor remains exceptional.
Serving Preparation
We always ensure our cheesecake base stays properly chilled before adding any fresh toppings or serving. This stability prevents the layers from shifting and maintains the dessert’s elegant presentation.
Fresh whipped cream and cocoa powder should be added just before serving to preserve their appearance and texture. We store any leftover portions using the same refrigeration guidelines to maintain quality for future enjoyment.
Serving Suggestions

We recommend serving our tiramisu cheesecake chilled for the best flavor and texture experience. The dessert truly shines when it has been adequately refrigerated for at least 3 hours, though overnight chilling delivers optimal taste and structural integrity.
Proper Cutting Technique
Clean slices require the right approach. We achieve professional-looking portions by using a sharp, hot knife that cuts through the layers smoothly. Between each cut, we wipe the blade clean to maintain neat presentation and prevent the creamy filling from sticking.
Temperature and Timing
Temperature matters significantly for this dessert. We serve our tiramisu cheesecake straight from the refrigerator to maintain its firm texture and allow the coffee flavors to remain bright and pronounced.
Essential Toppings
Cocoa powder dusting transforms the dessert’s appearance. We generously dust the top with cocoa powder just before serving to create that traditional tiramisu look while adding a hint of chocolate flavor that complements the coffee notes.
Optional garnishes elevate the presentation further. We often add grated semisweet chocolate or chocolate curls for extra texture and visual appeal that guests love.
Perfect Pairings
Coffee accompaniments enhance the dessert experience. We pair our tiramisu cheesecake with freshly brewed espresso or strong coffee to echo the dessert’s coffee theme. A small drizzle of coffee liqueur adds sophisticated flavor depth for adult gatherings.
Final Touches
Fresh whipped cream should be added at the last moment. We apply this topping just before serving to maintain its light, airy texture and prevent it from deflating or becoming soggy.
Storage Guidelines
| Storage Method | Duration | Temperature |
|---|---|---|
| Refrigerated | 2-3 days | 35-40°F |
| Covered with foil/plastic wrap | Maintains moisture | Refrigerated |
Leftover portions store well when covered lightly with foil or plastic wrap in the refrigerator. We recommend consuming the dessert within 2 to 3 days for the best taste and texture quality.
The dessert tastes best when enjoyed fresh or within a day of preparation, as this timing allows all flavors to meld perfectly while maintaining the ideal texture balance.


Conclusion
We’ve shown you how to create this spectacular dessert that brings together the best of both worlds. This tiramisu cheesecake isn’t just another dessert—it’s a conversation starter that’ll have your guests asking for the recipe.
The beauty lies in its make-ahead convenience and how the flavors develop over time. Whether you’re planning a dinner party or treating yourself to something special this fusion dessert delivers every time.
With proper storage techniques and serving tips you’ll master this impressive creation. We’re confident this tiramisu cheesecake will become your go-to dessert when you want to wow everyone at the table.
Frequently Asked Questions
What is tiramisu cheesecake?
Tiramisu cheesecake is a delicious fusion dessert that combines the classic Italian tiramisu with rich New York-style cheesecake. It features the signature flavors of espresso-soaked ladyfingers, creamy mascarpone, and cocoa powder, creating a sophisticated treat that captures the essence of an Italian café while delivering the satisfying richness of traditional cheesecake.
What ingredients do I need to make tiramisu cheesecake?
The key ingredients include graham crackers for the crust, cream cheese and mascarpone for the filling, espresso or strong coffee, ladyfingers, heavy cream, sugar, eggs, and cocoa powder for dusting. Optional ingredients like coffee liqueur and dark chocolate shavings can enhance the flavor and presentation of this indulgent dessert.
What equipment is essential for making tiramisu cheesecake?
You’ll need a food processor for crushing graham crackers, an electric mixer for the cream cheese mixture, multiple mixing bowls, a coffee maker or espresso machine, and a springform pan for easy removal. Additional helpful tools include a wire whisk, fine mesh sieve for cocoa dusting, and precise measuring cups and spoons.
How long does tiramisu cheesecake need to chill?
For baked versions, cool at room temperature for 2-3 hours, then refrigerate for at least 2 hours, ideally overnight for best results. No-bake versions require a minimum of 6 hours chilling, with overnight being optimal. The dessert actually improves with time as the flavors meld together in the refrigerator.
How should I store tiramisu cheesecake?
Store the cheesecake covered tightly with plastic wrap or aluminum foil in the refrigerator for up to 5 days. For longer storage, freeze for up to 2 months. Keep it in the springform pan or transfer to an airtight container. Save whipped cream topping and cocoa dusting until just before serving.
What’s the best way to serve tiramisu cheesecake?
Serve the cheesecake chilled straight from the refrigerator for optimal texture and flavor. Use a sharp, hot knife for clean slices. Dust with cocoa powder just before serving and consider pairing with freshly brewed espresso or coffee liqueur. Consume within 2-3 days for the best taste and texture quality.


