When we’re craving something sweet but don’t want to bake an entire cake, this vanilla mug cake becomes our ultimate lifesaver. In just 90 seconds, we can transform basic pantry ingredients into a warm, fluffy dessert that rivals any bakery creation.
This single-serving wonder has revolutionized our late-night dessert game. We love how it delivers that perfect vanilla flavor with a tender crumb that’s neither too dense nor too airy. The best part? There’s no mixer required, no preheating ovens, and absolutely no dishes piling up in the sink.
Whether we’re treating ourselves after a long day or need a quick dessert for unexpected guests, this microwave mug cake never disappoints. It’s become our go-to recipe for those moments when only homemade cake will satisfy our sweet tooth, but we want it now.
Ingredients
Our vanilla mug cake recipe calls for simple pantry staples that most home bakers already have on hand. We’ve crafted this list to deliver maximum flavor with minimal fuss.
For the Mug Cake:
- 4 tablespoons all-purpose flour
- 3 tablespoons granulated sugar
- 1/4 teaspoon baking powder
- Pinch of salt
- 3 tablespoons whole milk
- 2 tablespoons melted butter
- 1/2 teaspoon pure vanilla extract
- 1 large egg yolk
Optional Toppings:
- 1 tablespoon powdered sugar for dusting
- 1 tablespoon chocolate chips
- Fresh berries
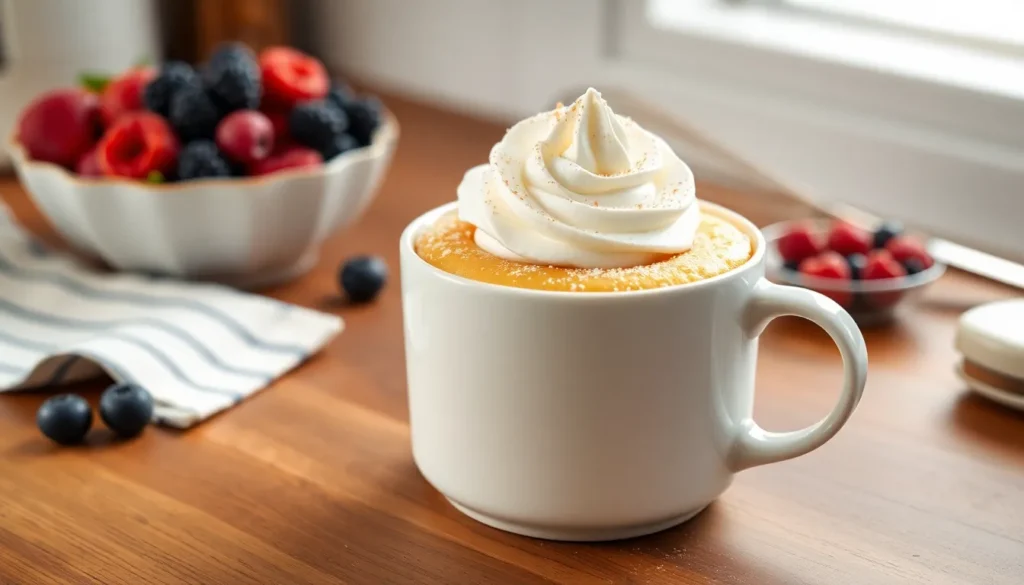
- Whipped cream
- Caramel sauce drizzle
We recommend using a microwave-safe mug that holds at least 12 ounces to prevent overflow during cooking. Room temperature ingredients blend more easily and create a smoother batter texture. The egg yolk provides richness without making the cake too dense, while the vanilla extract delivers that classic flavor we all crave.
Measure ingredients accurately for the best results since this single-serving recipe leaves little room for adjustments. Keep your butter melted but not hot to avoid cooking the egg yolk prematurely when mixing.
Equipment Needed

Creating our vanilla mug cake requires minimal equipment that most kitchens already have on hand. We need just a few basic tools to transform simple ingredients into a delicious single-serving dessert.
Microwave-Safe Mug serves as both our mixing bowl and baking dish. We recommend using a standard coffee mug with at least 12 oz capacity to accommodate the rising batter without overflow. The mug must be labeled microwave-safe to ensure safe cooking and prevent cracking from heat exposure.
Measuring Tools ensure accuracy in our recipe proportions. We need measuring spoons for smaller quantities like baking powder and vanilla extract. Measuring cups help us portion the flour and milk correctly for consistent results every time.
Fork or Small Whisk becomes our primary mixing tool for combining ingredients directly in the mug. A fork works perfectly for this task and eliminates the need for additional bowls or electric mixers. We can easily blend wet and dry ingredients until smooth using gentle stirring motions.
Microwave provides the cooking power to transform our batter into a fluffy cake. Most microwaves will cook our mug cake in 70 to 90 seconds on high power. The compact cooking time makes this method incredibly efficient compared to traditional oven baking.
| Equipment | Purpose | Specifications |
|---|---|---|
| Microwave-safe mug | Mixing and baking vessel | Minimum 12 oz capacity |
| Measuring spoons | Portion small ingredients | Standard set |
| Measuring cups | Portion larger ingredients | 1/4 cup minimum |
| Fork or small whisk | Mix ingredients | Any size |
| Microwave | Cook the cake | 70-90 seconds cooking time |
This streamlined equipment list eliminates complicated cleanup while delivering professional results. We avoid using multiple bowls or specialized baking pans that require extensive washing afterward.
Instructions

Creating your vanilla mug cake involves a simple five-step process that takes just minutes from start to finish. We’ll guide you through each step to ensure perfect results every time.
Prep the Mug
Select a microwave-safe coffee mug with at least 12 ounces capacity to allow proper rising space. We recommend choosing a wide mug rather than a tall narrow one for even cooking and overflow prevention. The wider surface area helps distribute heat more effectively throughout the batter.
Mix Dry Ingredients
Combine all dry ingredients directly in your prepared mug using these precise measurements:
| Ingredient | Amount |
|---|---|
| All-purpose flour | 4 tablespoons |
| Granulated sugar | 2-3 tablespoons |
| Baking powder | 1/2 teaspoon |
| Salt | Pinch |
Stir the dry mixture thoroughly with a fork until evenly distributed and no clumps remain. This foundation ensures your cake rises properly and maintains consistent texture throughout.
Add Wet Ingredients
Prepare your wet ingredients separately before adding them to the mug. Measure out these components:
| Ingredient | Amount |
|---|---|
| Milk | 3 tablespoons |
| Melted butter | 1/2-1 tablespoon |
| Vanilla extract | 1/4-1/2 teaspoon |
| Egg yolk (optional) | 1 |
Mix the melted butter, milk, vanilla extract, and egg yolk (if using) in a small bowl first. The butter should be melted but not hot to prevent cooking the egg yolk prematurely.
Combine and Mix
Pour the wet ingredient mixture over the dry ingredients in your mug. Stir thoroughly with a fork or spoon until the batter becomes smooth and completely lump-free. Scrape the sides and bottom of the mug to ensure all flour is incorporated into the mixture.
Microwave the Cake
Place the mug in your microwave and cook on medium power for 50-60 seconds initially. Start with 50 seconds, then check for doneness by gently pressing the center of the cake. The surface should feel firm and spring back lightly when touched. Add 10-second intervals if additional cooking time is needed, with larger or denser cakes potentially requiring up to 90 seconds total. Allow the mug to cool for 30 seconds before enjoying your warm vanilla mug cake.
Cooking Tips and Tricks

Mastering the vanilla mug cake requires attention to a few key details that make the difference between success and disappointment. These essential techniques ensure consistent results every time we prepare this quick dessert.
Choosing the Right Mug
We recommend selecting a microwave-safe mug that is wide rather than tall and skinny for optimal results. A wide mug allows the cake batter to cook more evenly and helps prevent overflow as the batter expands during microwaving. The mug should accommodate at least 1½ times the volume of our batter since mug cakes rise significantly during cooking.
| Mug Specification | Requirement |
|---|---|
| Material | Microwave-safe |
| Shape | Wide rather than tall |
| Capacity | At least 1½ times batter volume |
Preventing Overflow
Never fill our mug more than halfway with batter to avoid messy spills in the microwave. The cake rises substantially during cooking and excess batter will overflow if we use too small a container. When working with a narrow mug we should consider mixing the ingredients in a separate bowl and transferring only half the batter into the mug before cooking a second batch.
Testing for Doneness
Microwave times vary by wattage and mug size so we start with the minimum recommended time of 50 to 70 seconds. The cake is ready when the top appears set but may still look slightly glossy or moist. Insert a toothpick or fork into the center and check that it comes out clean or with just a few crumbs attached. We let the cake rest in the microwave for about one minute before eating as residual heat continues to cook it during this resting period.
| Cooking Parameter | Guideline |
|---|---|
| Initial cook time | 50-70 seconds |
| Doneness test | Clean toothpick or few crumbs |
| Resting time | 1 minute in microwave |
Variations and Add-Ins

We can transform our basic vanilla mug cake into exciting new flavors with simple additions. These creative variations use ingredients we likely have in our pantry to create completely different dessert experiences.
Chocolate Chip Vanilla Mug Cake
Adding chocolate chips creates the perfect balance between vanilla and chocolate flavors in our mug cake. We fold 1 to 2 tablespoons of chocolate chips directly into our prepared batter before microwaving. The chips melt slightly during cooking while maintaining their shape and providing bursts of rich chocolate throughout each bite.
We recommend using mini chocolate chips for more even distribution throughout the cake. Standard sized chips work equally well and create larger pockets of melted chocolate. The chocolate adds depth to our vanilla base without overwhelming the delicate flavor profile we’ve created.
Funfetti Vanilla Mug Cake
Colorful sprinkles transform our vanilla mug cake into a celebration worthy treat. We mix 2 tablespoons of rainbow sprinkles into our batter to create vibrant pops of color and texture. The sprinkles maintain their bright appearance even after microwaving and add a subtle crunch to contrast the fluffy cake texture.
This variation brings instant joy and festive appeal to our dessert. We can use any type of colorful sprinkles including jimmies or nonpareils. The funfetti version works perfectly for birthdays or whenever we want to add extra cheer to our sweet treat.
Glazed Vanilla Mug Cake
A simple glaze elevates our vanilla mug cake to bakery quality dessert status. We prepare the glaze by whisking powdered sugar with a small amount of milk until we achieve a smooth pourable consistency. Drizzling this mixture over our warm cake creates a sweet sticky coating that soaks slightly into the surface.
The glaze adds visual appeal and an extra layer of sweetness to complement our vanilla flavors. We can adjust the thickness by adding more powdered sugar for a thicker glaze or more milk for a thinner drizzle. This variation transforms our simple mug cake into an elegant individual dessert.
Storage and Reheating

Our vanilla mug cake delivers the best taste and texture when enjoyed fresh from the microwave. But, we understand that sometimes you might want to prepare ahead or save leftovers for later enjoyment.
Room Temperature Storage
We can store our cooled mug cake at room temperature for short periods. After the cake cools completely, cover it tightly with plastic wrap to maintain moisture. This method works well for 1 to 2 days when stored in a cool, dry place away from direct sunlight.
Refrigerator Storage
Refrigeration extends our mug cake’s freshness for longer storage periods. Wrap the cooled cake securely with plastic wrap to prevent it from absorbing other flavors or drying out. Our refrigerated mug cake stays fresh for up to 48 hours when properly covered.
| Storage Method | Duration | Temperature |
|---|---|---|
| Room Temperature | 1-2 days | Cool, dry place |
| Refrigerator | Up to 48 hours | 35-40°F |
| Freezer | Several weeks | 0°F or below |
Freezer Storage
We can freeze our vanilla mug cake for extended storage when needed. Wrap the completely cooled cake in plastic wrap and place it in a freezer-safe container. Before reheating, allow the frozen cake to thaw at room temperature for 20 to 30 minutes.
Make-Ahead Preparation
Our dry ingredient mixture stores beautifully for future use. Combine flour, sugar, baking powder, and salt in advance and store the mixture in a sealed container or bag. This preparation mix stays fresh in our pantry for up to three months, making quick mug cake preparation even easier.
Reheating Instructions
Reheating requires gentle warming to restore our mug cake’s soft texture. Microwave refrigerated cake for 10 to 15 seconds using medium power to avoid overcooking. Frozen cake needs about 10 seconds of microwave time after thawing. Always use a microwave-safe mug during reheating and check frequently to prevent the cake from becoming dry or rubbery.
Temperature monitoring prevents overheating during the reheating process. Start with shorter intervals and add more time if needed rather than risking overcooking our delicate mug cake.
Troubleshooting Common Issues

Even though vanilla mug cakes are remarkably simple to make, we occasionally encounter problems that can affect the final result. Understanding these common issues and their answers ensures our mug cake turns out perfectly every time.
Dry or Overcooked Cake
When our mug cake emerges from the microwave feeling tough, dry, or unnaturally spongy, we’ve likely overcooked it. Microwave wattage variations cause this problem more frequently than we might expect. We should start with 60 to 75 seconds of cooking time, then add additional time in 10-second increments if needed.
Testing doneness with a toothpick helps us achieve the perfect texture. We’re looking for moist crumbs rather than completely clean results. Adding a tablespoon of milk or sour cream to our batter provides extra moisture that prevents this dryness issue.
Undercooked Center
Sometimes our mug cake appears finished on top while the center remains raw or uncomfortably wet. Dense batter and uneven microwave heating typically cause this frustrating problem. We must stir our batter thoroughly before cooking to eliminate any lumps that could create cooking inconsistencies.
Using a standard 12 to 14-ounce mug promotes even cooking throughout the cake. We recommend microwaving in two shorter intervals rather than one long session. Cook for 45 seconds, rest for 10 seconds, then continue with another 30 seconds if necessary.
Uneven Cooking
Microwaves naturally heat unevenly, which can leave parts of our cake perfectly done while other areas remain undercooked. We can pause halfway through our cooking time and gently stir the batter to redistribute heat more effectively.
Selecting a wider mug rather than a tall, narrow one helps distribute heat more evenly throughout our cake. This simple equipment choice significantly improves our cooking results.
Cake Not Rising
Our vanilla mug cake should rise beautifully during cooking, creating that fluffy texture we love. When the cake stays flat or dense, we need to check the freshness of our baking powder. Old or ineffective leavening agents prevent proper rising and leave us with disappointing results.
We should test our baking powder by adding a small amount to hot water. Fresh baking powder will bubble vigorously, while old powder barely reacts. Replacing expired baking powder solves this rising issue immediately.
Serving Suggestions

Our vanilla mug cake offers incredible versatility when it comes to serving options. We recommend allowing the cake to cool for 1-2 minutes after microwaving to achieve the perfect eating temperature and texture.
Direct from the Mug
The most popular way to enjoy our mug cake is eating it straight from the mug itself. This approach maintains all the warmth and prevents any risk of the delicate cake falling apart during transfer. We find this method particularly satisfying for a cozy personal treat.
Elegant Plated Presentation
For a more refined serving style, we can gently scoop the cake onto a small dessert plate. This presentation works wonderfully when entertaining guests or when we want to elevate our dessert experience beyond the casual mug approach.
Essential Toppings and Enhancements
We enhance our mug cake with various delicious toppings to create restaurant-quality results. Popular options include vanilla ice cream, fluffy whipped cream, colorful sprinkles, fresh berries, or a light dusting of powdered sugar. For chocolate lovers, we drizzle melted white chocolate over the warm cake for an indulgent touch.
Hot frosting creates a particularly decadent experience since it melts slightly into the warm cake, adding extra moisture and richness. We apply light frosting while the cake remains hot to achieve this effect.
Seasonal Flavor Variations
Our basic vanilla mug cake transforms easily with simple spice additions. We add 1/4 teaspoon of ground cinnamon for a warm autumn flavor or dried ground ginger for a festive holiday twist.
Optimal Timing and Storage
We serve our mug cake immediately after preparation for the best texture and temperature. But, leftovers store well in the refrigerator covered with plastic wrap for up to one day. For longer storage, we freeze the cake and reheat it when ready to enjoy.
| Storage Method | Duration | Reheating Instructions |
|---|---|---|
| Refrigerator | Up to 1 day | Microwave 10-15 seconds |
| Freezer | Several weeks | Defrost 20-30 minutes, microwave 10 seconds |
These serving suggestions ensure our vanilla mug cake delivers maximum enjoyment whether we choose a simple presentation or an elaborate dessert experience.
Conclusion
This vanilla mug cake recipe proves that you don’t need complicated baking techniques to satisfy your sweet tooth. We’ve shown you how simple ingredients and a microwave can create a perfectly fluffy dessert in under two minutes.
The beauty of this recipe lies in its flexibility and convenience. Whether you’re craving a midnight snack or need to impress unexpected guests you now have the tools to whip up something special instantly.
We encourage you to experiment with the variations and toppings we’ve shared. From chocolate chips to seasonal spices each addition creates a new experience while maintaining the simplicity that makes this recipe so appealing.
Your next dessert craving is just 90 seconds away. Give this vanilla mug cake a try and discover why it’s become our go-to solution for quick homemade satisfaction.
Frequently Asked Questions
How long does it take to make a vanilla mug cake?
A vanilla mug cake takes just 90 seconds to prepare from start to finish. The actual microwave cooking time is only 70-90 seconds, with minimal prep time needed to mix the ingredients directly in the mug. This makes it the perfect solution for satisfying late-night sweet cravings quickly.
What ingredients do I need for a vanilla mug cake?
You’ll need basic pantry staples: all-purpose flour, granulated sugar, baking powder, salt, milk, melted butter, vanilla extract, and an egg yolk. Optional toppings include powdered sugar, chocolate chips, fresh berries, whipped cream, or caramel sauce to enhance your dessert.
What size mug should I use for a mug cake?
Use a microwave-safe mug with at least 12 oz capacity, preferably wide rather than tall. The mug should hold at least 1½ times the batter volume to prevent overflow. Never fill the mug more than halfway with batter to ensure proper cooking and prevent spills.
Can I store leftover mug cake?
While best enjoyed fresh, mug cake can be stored at room temperature for 1-2 days or refrigerated for up to 48 hours when properly wrapped. For longer storage, freeze for several weeks. Reheat gently in the microwave to restore the soft texture.
Why is my mug cake dry or overcooked?
Dry mug cakes usually result from overcooking. Start with 50-70 seconds of microwave time and check for doneness using a toothpick test. Microwave power varies, so adjust cooking time accordingly. Let the cake rest in the microwave for one minute after cooking for residual heat cooking.
What variations can I make with vanilla mug cake?
Popular variations include Chocolate Chip Vanilla Mug Cake, Funfetti Vanilla Mug Cake, and Glazed Vanilla Mug Cake. You can also add seasonal spices like cinnamon or ginger. Mix-ins like berries, nuts, or different extracts can create exciting new flavors using ingredients you already have.
How do I know when my mug cake is done?
Insert a toothpick into the center of the cake. It should come out with just a few moist crumbs, not wet batter. The top should look set but still slightly moist. Remember that cooking times vary by microwave power, so start with less time and add more if needed.
What equipment do I need besides a microwave?
You only need a microwave-safe mug (12+ oz capacity), measuring spoons/cups for accuracy, and a fork or small whisk for mixing. This minimal equipment list eliminates complicated cleanup while delivering professional results without multiple bowls or specialized baking pans.


