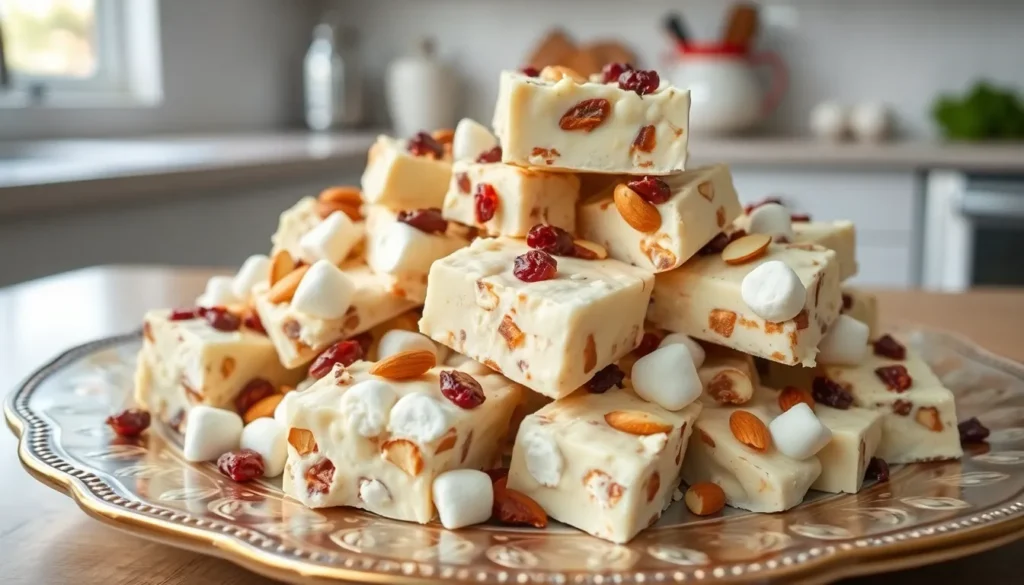
We’ve taken the beloved classic rocky road and given it a luxurious white chocolate makeover that’ll make your taste buds sing. While traditional rocky road relies on dark chocolate’s bold flavor, our white chocolate version brings a creamy sweetness that perfectly balances the crunchy nuts and fluffy marshmallows.
This irresistible treat combines smooth white chocolate with toasted almonds, mini marshmallows, and dried cranberries for a delightful texture contrast in every bite. The best part? You don’t need any special equipment or complicated techniques to create this showstopping dessert.
Ingredients
We’ve carefully selected each ingredient to create the perfect balance of creamy sweetness and delightful texture in our white chocolate rocky road. This simple ingredient list ensures you can create this indulgent treat with items easily found at your local grocery store.
For the White Chocolate Base
- 1 pound high-quality white chocolate chips or chopped white chocolate
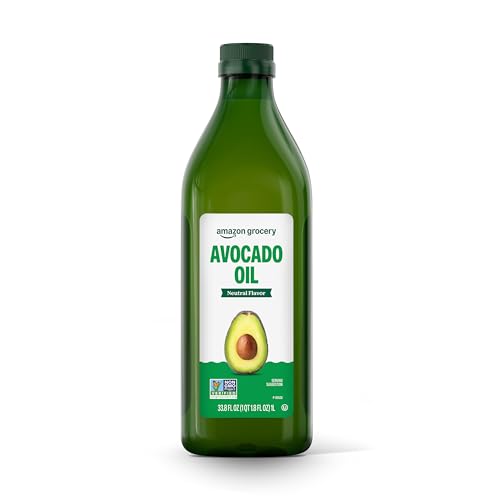
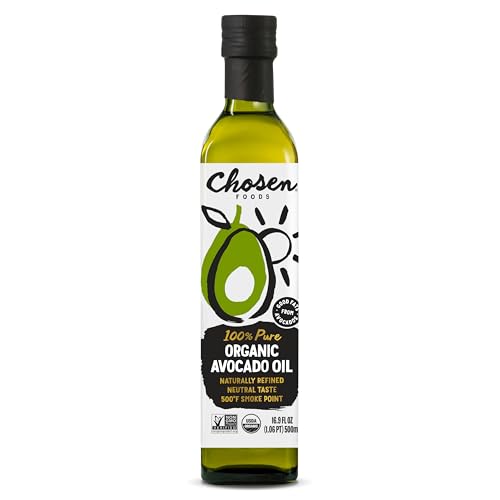
- 2 tablespoons coconut oil or vegetable shortening
- 1 teaspoon pure vanilla extract
- 1/4 teaspoon sea salt
For the Mix-Ins
- 2 cups mini marshmallows
- 1 cup sliced almonds, lightly toasted
- 3/4 cup dried cranberries
- 1/2 cup chopped pistachios (optional)
- 1/3 cup white chocolate chips for extra chunks


Equipment Needed

Making this decadent white chocolate rocky road requires minimal kitchen equipment that you likely already own. We’ve streamlined our process to use only essential tools that ensure perfect results every time.
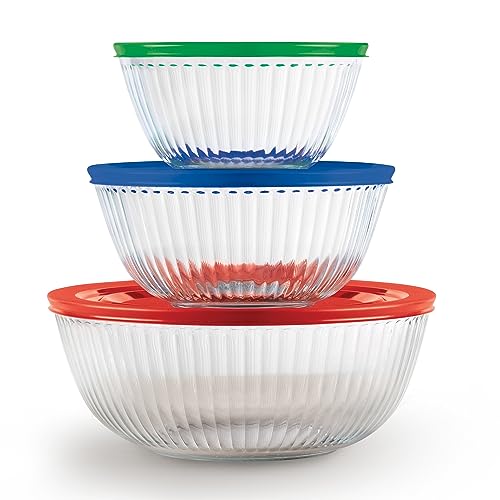
Microwave-Safe Bowl – We recommend using a large glass or ceramic bowl that can safely handle the heat generated during chocolate melting. The bowl should be completely dry to prevent the white chocolate from seizing during the melting process.
Large Mixing Bowl – A spacious mixing bowl allows us to properly combine all ingredients without overcrowding. We prefer stainless steel or glass bowls that provide adequate room for folding in the marshmallows and other mix-ins without crushing them.
Metal Spatula or Large Spoon – These tools help us fold ingredients together gently while maintaining the integrity of our delicate components. A rubber spatula works equally well for scraping down bowl sides and ensuring even distribution.
8×8 or 9×9 Inch Square Pan – We line this pan with parchment paper to create easy removal and clean cutting lines. The size provides the perfect thickness for our rocky road pieces.
Parchment Paper – This prevents sticking and creates effortless removal from the pan. We extend the paper slightly over the edges to form handles for lifting the entire batch out once set.
Sharp Knife – A clean sharp knife ensures smooth cuts through the set chocolate without cracking or breaking the delicate texture we’ve worked to achieve.
Most home kitchens already contain these basic tools, making this recipe accessible to everyone regardless of baking experience or equipment investment.


Instructions

Creating this indulgent white chocolate rocky road is straightforward and requires just a few simple steps. Let’s walk through each stage to ensure perfect results every time.
Prep the Pan and Ingredients
We begin by lining our 8×8 inch square pan with parchment paper, leaving some overhang for easy removal later. This preparation step prevents sticking and makes slicing much cleaner.
Next, we gather all our ingredients on the counter. Having everything measured and ready streamlines the process since we’ll need to work quickly once the chocolate is melted. Room temperature ingredients blend more easily, so we let our mix-ins sit out for about 15 minutes before starting.
Melt the White Chocolate
We place the white chocolate chips in our microwave-safe bowl and heat them in 30-second intervals. Between each interval, we stir the chocolate thoroughly to prevent overheating and ensure even melting.
The chocolate typically takes 2-3 intervals to melt completely. We continue this process until the chocolate is smooth and glossy. If using the double boiler method, we place the chocolate in the top bowl over simmering water, stirring constantly until melted.
Prepare the Mix-Ins
While the chocolate cools slightly, we prepare our mix-ins for optimal texture. We roughly chop the mini marshmallows into smaller pieces to distribute more evenly throughout the rocky road.
Our sliced almonds get a quick toast in a dry skillet for 2-3 minutes to enhance their nutty flavor. We crush any larger pieces of dried cranberries to bite-sized portions. If using pistachios, we chop them coarsely to maintain some crunch.
Combine and Mix
We pour the slightly cooled melted chocolate into our large mixing bowl. Working quickly, we add the coconut oil and vanilla extract, stirring until smooth.
Next, we fold in the prepared marshmallows, toasted almonds, and dried cranberries using our metal spatula. We use gentle folding motions to preserve the marshmallow pieces and maintain texture. The mixture should coat all ingredients evenly without overmixing.
Set and Chill
We transfer the mixture to our prepared pan, spreading it evenly with our spatula. The surface doesn’t need to be perfectly smooth since rustic texture adds to the appeal.
We refrigerate the rocky road for 1-2 hours until completely set. Once firm, we lift it out using the parchment paper overhang and place it on a cutting board. Using a sharp knife, we cut it into squares or rectangles, wiping the blade clean between cuts for neat edges.


Directions for Cutting and Serving

Now that our white chocolate rocky road has chilled completely, we need to transform it into perfect serving pieces. The cutting process requires patience and the right technique to achieve clean, professional-looking squares that showcase all the beautiful mix-ins.
Preparing for Clean Cuts
We recommend removing the rocky road from the refrigerator and letting it sit at room temperature for 5-10 minutes before cutting. This brief warming period prevents the white chocolate from cracking or shattering when we slice through it. Using the parchment paper overhang, we carefully lift the entire slab from the pan and place it on a cutting board.
The Cutting Technique
A sharp, thin-bladed knife works best for creating uniform squares. We wipe the blade clean with a damp cloth between each cut to prevent white chocolate buildup that could tear the surface. Starting from one edge, we make decisive cuts straight down through the rocky road, applying gentle pressure to slice through the marshmallows and nuts without crushing them.
Optimal Serving Sizes
We typically cut our white chocolate rocky road into 16 squares from an 8×8 inch pan, creating approximately 2-inch portions. For larger gatherings, we can cut smaller 1.5-inch squares to yield 25 pieces. Each serving provides the perfect balance of rich white chocolate and crunchy mix-ins without being overwhelming.
Serving Suggestions
Our white chocolate rocky road tastes exceptional when served at room temperature, allowing the flavors to fully develop. We often arrange the squares on a decorative platter, leaving small gaps between pieces for easy selection. For special occasions, we dust the tops lightly with powdered sugar or place each square in individual paper cups for elegant presentation.
Storage After Cutting
Once cut, we store the rocky road squares in an airtight container with parchment paper between layers to prevent sticking. Properly stored pieces maintain their texture and flavor for up to one week in the refrigerator or can be frozen for up to three months for longer storage.


Storage Instructions

Your freshly made white chocolate rocky road deserves proper storage to maintain its perfect texture and delicious flavor. We’ll guide you through the best storage methods to keep your homemade treat at its peak quality.
Room Temperature Storage
We recommend storing your white chocolate rocky road at room temperature once it has completely set. This storage method works perfectly unless you’re dealing with particularly hot summer days when temperatures exceed 75°F. The white chocolate maintains its ideal consistency at moderate room temperatures without becoming too soft or losing its appealing texture.
Refrigerator Storage
For longer lasting freshness, we suggest storing your rocky road in an airtight container in the refrigerator. Your white chocolate creation will stay fresh and delicious for up to 2 weeks when properly refrigerated. We find that refrigeration helps maintain the perfect balance between the creamy white chocolate and the crunchy mix-ins.
| Storage Method | Duration | Temperature |
|---|---|---|
| Room Temperature | Until consumed | Below 75°F |
| Refrigerator | Up to 2 weeks | 35-40°F |
| Freezer | Up to 3 months | 0°F |
Freezer Storage
We love that you can freeze your white chocolate rocky road for extended storage. Place individual pieces in an airtight container with baking paper between each layer to prevent sticking. Your frozen rocky road will maintain its quality for up to 3 months when stored properly.
Essential Storage Tips
We always place kitchen paper or grease-proof paper in our storage containers to absorb excess moisture and prevent the pieces from sticking together. This simple step makes a important difference in maintaining the rocky road’s texture.
Before cutting your chilled rocky road, we heat our knife under hot water and dry it completely. This technique ensures clean cuts through the white chocolate without cracking or creating messy edges.
When serving frozen rocky road, we allow it to thaw at room temperature for about 15 minutes. This brief thawing period brings the chocolate back to its optimal serving temperature while maintaining the delightful contrast between the smooth chocolate and crunchy elements.


Make-Ahead Tips

Planning ahead becomes effortless with white chocolate rocky road since this no-bake dessert stores beautifully for extended periods. We recommend preparing this treat up to 2-3 weeks in advance when stored properly in the refrigerator.
Refrigeration Storage
The refrigerator offers the most convenient storage method for our white chocolate rocky road. We store cut squares in an airtight container where they maintain their perfect texture and flavor for up to 3 weeks. Layer parchment paper between rows of squares to prevent sticking and preserve their beautiful appearance.
Freezing for Extended Storage
Freezing extends the storage life significantly when you need to prepare well in advance. Our white chocolate rocky road freezes beautifully for up to 3 months without losing quality. We wrap individual squares in plastic wrap before placing them in freezer-safe containers with baking paper between layers.
| Storage Method | Duration | Container Type | Special Notes |
|---|---|---|---|
| Refrigerator | 2-3 weeks | Airtight container | Use parchment paper between layers |
| Freezer | 3 months | Freezer-safe container | Wrap squares individually |
| Room Temperature | 3-5 days | Covered container | Keep below 75°F |
Advance Preparation Strategy
We suggest making the entire batch during weekend meal prep sessions. Cut the rocky road into serving-sized squares immediately after the initial chilling period. This approach saves time during busy weekdays and ensures you always have a delicious treat ready for unexpected guests.
Thawing frozen pieces requires minimal effort. We remove the desired number of squares from the freezer and let them sit at room temperature for 10-15 minutes before serving. This brief thawing period restores the optimal creamy texture while maintaining the satisfying crunch of the nuts and marshmallows.
Variations and Substitutions

We love how versatile white chocolate rocky road can be with simple ingredient swaps and creative additions. These modifications allow you to customize the recipe based on your preferences or dietary needs.
Different Chocolate Options
White chocolate serves as our traditional base for this luxurious treat. We recommend using good quality white chocolate for the best flavor and texture results.
You can substitute milk chocolate or dark chocolate if you prefer a different flavor profile. Milk chocolate creates a sweeter version while dark chocolate offers a more sophisticated taste with less sweetness.
Some recipes replace part of the chocolate mixture with condensed milk or a combination of butter and golden syrup. This substitution creates a softer texture and adds extra richness to the final product.
We suggest blending different chocolate types for unique flavor combinations. Try mixing white chocolate with a small amount of milk chocolate for depth without overwhelming the delicate white chocolate taste.
Alternative Mix-In Ideas
Traditional mix-ins include marshmallows in large or mini sizes alongside pistachios, dried cranberries, macadamia nuts, and coconut flakes. We also love adding freeze-dried or fresh berries for bursts of natural fruit flavor.
Nut Alternatives:
- Swap pistachios for almonds, hazelnuts, or walnuts
- Try macadamia nuts for a buttery richness
- Use toasted pecans for a Southern twist
Fruit Variations:
- Replace dried cranberries with cherries or apricots
- Add freeze-dried strawberries or raspberries
- Include dried mango pieces for tropical flavor
Texture Enhancers:
- Mix in butterscotch chips or toffee pieces
- Add crushed cookies like digestive biscuits or graham crackers
- Include party rings, white chocolate malt balls, or custard creams
For gluten-free versions, we use gluten-free graham crackers or digestive biscuits instead of standard cookies. Omit nuts entirely for nut-free versions that accommodate allergies.
Creative candy additions work wonderfully too. Try different colored or flavored marshmallows, gummy candies, or mini cookies for visual appeal and varied textures.
We recommend adding a pinch of sea salt to enhance all the flavors and create a more complex taste profile. Sprinkles also add extra color and a fun crunch that appeals to both kids and adults.


Troubleshooting Common Issues

Even with our straightforward recipe, we occasionally encounter challenges when making white chocolate rocky road. These common issues have simple answers that will help you achieve perfect results every time.
Preventing Chocolate Seizing and Burning
White chocolate requires gentle handling during the melting process. We recommend melting chocolate in 20 to 30 second intervals in the microwave, stirring thoroughly between each heating cycle. Using 80% power instead of full power gives us better control over the melting process. Overheated white chocolate becomes grainy and unusable, so we stop heating as soon as the chocolate reaches a smooth, melted consistency.
Managing Marshmallow Texture
Hot chocolate will melt our marshmallows and create a sticky mess instead of maintaining their fluffy texture. We allow the melted white chocolate to cool for 2 to 3 minutes before folding in the marshmallows and other mix-ins. This cooling period preserves the integrity of our ingredients while ensuring they coat properly with chocolate.
Achieving Proper Setting
Rocky road that refuses to set indicates an improper ratio of chocolate to mix-ins. We maintain the recommended proportions in our recipe to ensure adequate chocolate binds all ingredients together. Too many dry ingredients will prevent the mixture from setting into firm, sliceable bars. Following our measured ingredient list prevents this binding issue.
Preventing Cracking During Cutting
Chocolate that cracks when we slice it is too cold and brittle. We remove the rocky road from the refrigerator 10 to 15 minutes before cutting to bring it closer to room temperature. Using a sharp knife warmed under hot water and wiped clean between cuts produces smooth, professional-looking squares without unsightly cracks.
Ensuring Even Ingredient Distribution
Pockets of uncoated ingredients occur when we don’t mix thoroughly enough. We stir the mixture completely until every marshmallow, nut, and dried fruit piece is well-coated with white chocolate. This thorough mixing prevents separation and ensures each bite contains a balanced combination of flavors and textures.
Avoiding Pan Sticking Issues
Rocky road that sticks to the pan creates a frustrating removal process. We line our baking tin with parchment paper or non-stick foil, leaving overhang on two sides for easy lifting. This simple preparation step allows us to remove the entire slab cleanly and cut it on a cutting board instead of struggling with stuck pieces in the pan.


Conclusion
We’ve shared everything you need to create this irresistible white chocolate rocky road that’ll become your go-to dessert for any occasion. With our straightforward approach and helpful tips you’ll confidently make this treat without any stress or complicated techniques.
The beauty of this recipe lies in its flexibility – whether you’re serving a crowd or preparing individual portions for the week ahead our white chocolate rocky road delivers consistent results every time. We’ve equipped you with storage answers troubleshooting advice and creative variations to make this dessert truly your own.
Now it’s time to gather those simple ingredients and create something magical in your kitchen. Trust us – once you taste this creamy dreamy combination of white chocolate marshmallows and crunchy mix-ins you’ll understand why we’re so excited to share this recipe with you.
Frequently Asked Questions
What makes this white chocolate rocky road different from traditional rocky road?
This version uses white chocolate instead of dark chocolate, creating a sweeter, creamier base. It’s complemented by toasted almonds, mini marshmallows, and tangy dried cranberries for a perfect balance of flavors and textures.
What ingredients do I need to make white chocolate rocky road?
You’ll need high-quality white chocolate, coconut oil, vanilla extract, sea salt, mini marshmallows, sliced almonds, dried cranberries, and optional pistachios. All ingredients are easily found at your local grocery store.
What kitchen equipment is required for this recipe?
Essential tools include a microwave-safe bowl, large mixing bowl, metal spatula or spoon, 8×8 or 9×9 inch square pan, parchment paper, and a sharp knife. Most home kitchens already have these basic items.
How long does white chocolate rocky road last?
Store at room temperature below 75°F for immediate consumption, or refrigerate in an airtight container for up to two weeks. For longer storage, freeze for up to three months with proper wrapping.
Can I make this dessert ahead of time?
Yes! White chocolate rocky road can be prepared 2-3 weeks in advance when stored properly in the refrigerator. For longer storage, freeze individual squares wrapped in plastic wrap for up to three months.
What are some variations I can try?
You can substitute different chocolates (milk or dark), change the nuts (walnuts, pecans), use different dried fruits, add gluten-free graham crackers, or include creative candy additions like chocolate chips or cookie pieces.
How do I prevent the chocolate from seizing or burning?
Melt chocolate gradually using short microwave intervals or a double boiler. Avoid getting water in the chocolate, and stir gently. If using a microwave, heat in 30-second intervals, stirring between each.
What’s the best way to cut clean squares?
Let the rocky road warm slightly at room temperature before cutting to prevent cracking. Use a sharp knife, wiping the blade clean between cuts. Heating the knife briefly also helps achieve cleaner edges.