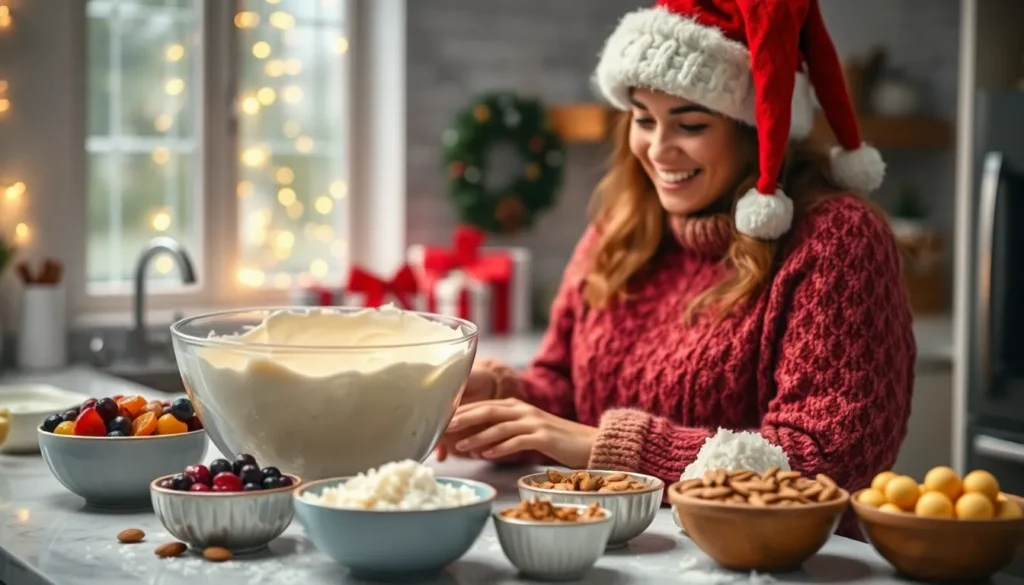
When we think of White Christmas, most of us picture snow-covered landscapes and Bing Crosby’s timeless melody. But in the dessert industry, White Christmas refers to Australia’s beloved no-bake holiday treat that’s become a festive tradition across the globe. This delightful confection combines crunchy rice cereal, tropical coconut, and colorful dried fruits in a sweet white chocolate base.
We love how this recipe transforms simple pantry ingredients into an irresistible holiday dessert that requires zero baking skills. Originally created in Australia during the 1970s, White Christmas quickly became a Christmas staple because it’s incredibly easy to make and perfect for hot summer holidays Down Under.
The beauty of White Christmas lies in its simplicity and versatility. We can customize it with our favorite mix-ins, from pistachios to cranberries, making each batch uniquely ours. It’s the perfect treat for cookie exchanges, holiday parties, or when we need a quick dessert that looks impressive but takes minimal effort.
Ingredients
We’ve carefully selected ingredients that create the perfect balance of sweetness, crunch, and texture in our White Christmas recipe. Each component plays a crucial role in delivering that authentic Australian holiday treat experience.
For the Base
- 375g (13 oz) white chocolate, chopped into small pieces
- 90g (3 oz) unsalted butter, cubed
- 1 cup (95g) desiccated coconut
- 2 cups (60g) rice cereal (such as Rice Bubbles or Rice Krispies)
- 1/2 cup (75g) powdered milk
For the Mix-ins
- 1/2 cup (75g) mixed dried fruit, chopped (sultanas, cranberries, and apricots work well)
- 1/2 cup (60g) glacé cherries, halved
- 1/2 cup (50g) toasted almonds, roughly chopped
- 1/4 cup (35g) pistachios, roughly chopped
- 2 tablespoons honey or golden syrup
For the Topping
- 1/4 cup (25g) extra desiccated coconut for sprinkling
- 2 tablespoons powdered sugar for dusting
- Extra glacé cherries for decoration (optional)


Equipment Needed
 1")
Making White Christmas requires minimal equipment, which aligns perfectly with its reputation as a simple no-bake treat. We’ll need a few essential tools to create this beloved Australian holiday confection successfully.
Large mixing bowl serves as our primary workspace for combining all ingredients. The bowl should accommodate at least 3 liters to provide ample room for folding together the white chocolate mixture with our dry ingredients without spillage.
Medium saucepan becomes crucial for melting the white chocolate and butter base. We recommend using a heavy-bottomed pan to ensure even heat distribution and prevent the chocolate from scorching during the melting process.
Wooden spoon or silicone spatula works best for stirring the chocolate mixture and folding in our mix-ins. These tools won’t conduct heat like metal utensils and provide better control when combining delicate ingredients.
20cm x 30cm rectangular baking pan creates the perfect dimensions for our White Christmas slab. Line this pan with baking paper, leaving overhang on the sides for easy removal once the mixture sets.
Sharp knife ensures clean cuts when slicing our finished White Christmas into serving pieces. We recommend chilling the knife between cuts for the neatest presentation.
Measuring cups and spoons guarantee accurate proportions for our coconut, rice cereal, dried fruits, and other mix-ins. Precision matters when balancing the textures and flavors in this no-bake treat.
Refrigerator space provides the essential cooling environment needed for our White Christmas to set properly. We’ll need enough room to accommodate our lined baking pan for at least 2 hours of chilling time.


Instructions
 2")
Making White Christmas requires just five simple steps that transform basic ingredients into a festive holiday treat. We’ll guide you through each stage to ensure perfect results every time.
Prep the Pan
Line our 20cm x 30cm rectangular baking pan with parchment paper, ensuring the paper extends up the sides and overhangs by about 2cm. This overhang acts as handles for easy removal once the White Christmas has set. Lightly grease the parchment paper with butter or cooking spray to prevent any sticking. Set the prepared pan aside in a cool area away from direct heat.
Melt the Chocolate
Place the 375g of chopped white chocolate and 90g of cubed unsalted butter in our medium saucepan over low heat. Stir the mixture continuously with a wooden spoon until completely smooth and glossy, which typically takes 3-4 minutes. Remove the saucepan from heat immediately once melted to prevent the chocolate from seizing. Allow the mixture to cool for 2-3 minutes while we prepare the dry ingredients.
Combine Dry Ingredients
Add the 2 cups of rice cereal, 1 cup of desiccated coconut, and 1/2 cup of powdered milk to our large mixing bowl. Toss in the 1/2 cup each of mixed dried fruit, glacé cherries, and toasted almonds along with the 1/4 cup of pistachios. Gently stir these dry ingredients together with a silicone spatula until evenly distributed throughout the bowl.
Mix Everything Together
Pour the warm melted chocolate mixture over our combined dry ingredients, adding the 2 tablespoons of honey or golden syrup at the same time. Fold everything together using firm but gentle movements until every piece is thoroughly coated with the white chocolate mixture. The mixture should hold together when pressed but not appear overly wet or greasy.
Set and Chill
Transfer the mixture into our prepared pan and press it down firmly using the back of a spoon or our clean hands. Sprinkle the extra 1/4 cup of desiccated coconut evenly over the surface, pressing gently to help it adhere. Refrigerate the pan for at least 2 hours until the White Christmas feels firm to the touch. Remove from the refrigerator and lift out using the parchment paper handles before slicing into squares with a sharp knife.


Directions for Perfect Results
 3")
Achieving the perfect White Christmas requires attention to detail and proper technique. We’ve compiled essential tips to ensure your no-bake treat turns out beautifully every time.
Temperature Tips
Temperature control plays a crucial role in creating the ideal White Christmas texture. We recommend ensuring all your mix-in ingredients reach room temperature before combining them with the melted chocolate mixture. This prevents the chocolate from seizing and creates a smoother final product.
When melting your white chocolate and butter together, maintain gentle heat to avoid overheating. We suggest using low to medium heat and stirring constantly until the mixture reaches a smooth consistency. The melted chocolate should feel warm to the touch but not hot, as excessive heat can cause the mixture to become grainy.
Once you’ve pressed the mixture into your prepared pan, refrigerate it immediately. We find that maintaining a consistent refrigerator temperature of 35°F to 38°F (2°C to 3°C) ensures proper setting within the recommended 2-hour chilling period.
Cutting Technique
Proper cutting technique transforms your White Christmas from a homemade treat into professional-looking squares. We always allow the chilled mixture to sit at room temperature for 5 minutes before cutting, which prevents cracking and ensures clean edges.
Use a sharp knife that you’ve warmed slightly under hot running water, then dried completely. We recommend making gentle sawing motions rather than pressing straight down, which can compress the delicate mixture and create uneven pieces.
For consistently sized portions, we suggest scoring the surface lightly first to mark your cutting lines. Clean your knife blade between cuts to maintain neat edges and prevent the coconut and dried fruit from dragging across the surface.
Store cut pieces in an airtight container in the refrigerator, where they’ll maintain their shape and texture for up to one week.


Storage Instructions
 4")
Proper storage ensures our White Christmas maintains its perfect texture and delicious flavor for weeks. We always recommend refrigeration as the primary storage method since the white chocolate base needs consistent cool temperatures to stay firm.
Refrigerator Storage
We store our White Christmas slices in an airtight container in the refrigerator for optimal freshness. The slice stays fresh for 1 to 4 weeks when properly stored this way. Most recipes we follow allow storage for up to 3 weeks, though some ingredients may affect this timeline.
Temperature consistency matters greatly for maintaining the slice’s structure. We keep our refrigerator between 35°F to 38°F to prevent the white chocolate from becoming too soft or developing a grainy texture. The airtight container prevents moisture absorption and protects the slice from absorbing other food odors.
Freezer Storage
Freezing extends our White Christmas’s shelf life significantly when we need longer storage. We slice the White Christmas into individual pieces before freezing in an airtight container. The frozen slices maintain their quality for up to 2 months in the freezer.
When we’re ready to serve frozen pieces, we transfer them to the refrigerator for gradual thawing. This prevents condensation from forming on the chocolate surface and maintains the slice’s original texture. Room temperature thawing causes the chocolate to sweat and creates an unappetizing appearance.
Storage Guidelines Table
| Storage Method | Shelf Life | Temperature | Container Type |
|---|---|---|---|
| Refrigerator | 1-4 weeks | 35°F-38°F | Airtight container |
| Freezer | Up to 2 months | 0°F | Airtight container |
| Room Temperature | Not recommended | N/A | Risk of spoilage |
Room Temperature Considerations
We never recommend storing White Christmas at room temperature due to several risks. The white chocolate base melts easily in warm conditions, causing the slice to lose its shape and become messy. Also, dairy ingredients like butter and powdered milk can spoil quickly without refrigeration.
During gift-giving season, we wrap individual pieces in colored cellophane but keep them refrigerated until the moment we’re ready to give them. This presentation method looks festive while maintaining food safety standards.
Cutting and Serving from Storage
We remove our White Christmas from the refrigerator 5 minutes before cutting to make slicing easier. A sharp serrated knife works best for clean cuts through the chilled mixture. Between cuts, we clean the knife blade to maintain neat edges and prevent ingredients from sticking.
For consistent serving sizes, we score the surface lightly before making full cuts. This technique helps us achieve uniform squares that look professionally made and portion-controlled for serving guests.


Make-Ahead Tips
 5")
Our favorite aspect of White Christmas is how beautifully it adapts to advance preparation. We can prepare this festive treat up to two weeks before our holiday gatherings without compromising quality or flavor.
Optimal Timing for Preparation
We recommend making White Christmas 3 to 5 days before serving for the best texture and flavor development. This timeframe allows the ingredients to meld together while maintaining the perfect firmness. The mixture actually improves with time as the flavors settle and the texture becomes more cohesive.
Extended Storage Planning
| Storage Method | Duration | Temperature |
|---|---|---|
| Refrigerator | Up to 2 weeks | 35°F to 38°F |
| Freezer | Up to 2 months | Below 0°F |
We can safely store our prepared White Christmas in an airtight container in the refrigerator for up to two weeks. For longer advance preparation we freeze individual portions wrapped in plastic wrap then stored in freezer bags. This method prevents freezer burn and maintains the treat’s signature texture.
Assembly Strategy for Events
Our proven approach involves preparing the mixture and pressing it into the lined pan several days ahead. We keep the uncut slab covered tightly with plastic wrap in the refrigerator until the day of serving. Cutting on the serving day ensures clean edges and prevents the pieces from drying out.
Last Minute Finishing Touches
We save decorative elements like extra glacé cherries or powdered sugar dusting for the final presentation. These finishing touches maintain their visual appeal when added just before serving rather than during the initial preparation phase.
Transportation Tips
Our White Christmas travels exceptionally well when kept chilled. We pack cut pieces in a cooler with ice packs for gatherings away from home. The firm texture holds up beautifully during transport making it an ideal contribution to holiday potlucks and cookie exchanges.
Serving Suggestions
 6")
We love presenting White Christmas as the centerpiece of our holiday dessert table alongside other white-themed treats. Creating a cohesive snowy aesthetic works beautifully when we arrange these squares with white chocolate truffles, coconut-dusted cookies, and meringue kisses. The visual impact becomes even more striking when we add silver or crystal accents to complement the white color scheme.
Our favorite approach involves cutting White Christmas into bite-sized squares for easy sharing at holiday gatherings. These smaller portions allow guests to sample multiple treats without feeling overwhelmed. We typically aim for 1-inch squares when serving at parties, which yields approximately 48 pieces from our standard recipe.
White Christmas pairs exceptionally well with holiday ham as a sweet counterpoint to savory main courses. We often serve it alongside other light desserts like pineapple and marshmallow salads to maintain the festive white theme throughout our menu. The contrast between the rich, chocolatey squares and lighter accompaniments creates a balanced dessert experience.
For special occasions, we enhance the presentation by dusting our White Christmas squares with powdered sugar just before serving. This simple technique creates a beautiful “snowy” effect that reinforces the holiday theme. We also garnish individual pieces with extra glacé cherries or chopped pistachios for added color and visual appeal.
Temperature plays a crucial role in our serving strategy. We remove White Christmas from the refrigerator 10-15 minutes before serving to allow it to soften slightly, making it easier to bite into while maintaining its structure. During warmer weather, we keep the squares chilled until the last possible moment to prevent melting.
Our dessert table arrangements feature White Christmas prominently displayed on tiered stands or elegant platters. We surround the squares with other white desserts like coconut cake, white chocolate bark, and vanilla meringues to create a stunning winter wonderland effect that captures the true spirit of a White Christmas celebration.


Variations
 7")
The classic White Christmas recipe serves as an excellent foundation for countless creative adaptations. We can easily customize this beloved treat by incorporating different flavors and textures to match various preferences and dietary needs.
Tropical White Christmas
Transform your traditional White Christmas into a sunny holiday escape by incorporating dried tropical fruits. We recommend adding chopped dried pineapple, mango, or papaya to create a sweet and exotic flavor profile that complements the coconut base beautifully. Replace half of the traditional mixed dried fruit with these tropical alternatives for optimal balance.
The natural sweetness and chewy texture of tropical fruits adds an unexpected twist that brings brightness to winter celebrations. We find that dried pineapple works particularly well because its tartness balances the rich white chocolate perfectly.
Nutty White Christmas
Elevate the texture and nutritional value of your White Christmas by incorporating premium nuts into the mixture. We suggest using chopped macadamia nuts, almonds, or cashews to create satisfying crunch and depth of flavor. Toast the nuts lightly before adding them to enhance their natural oils and intensify their taste.
For the best results, we recommend using about 1/2 cup of mixed nuts in place of some traditional mix-ins. Macadamia nuts offer buttery richness while almonds provide classic holiday appeal and cashews contribute subtle sweetness.
Festive White Christmas
Create an extra special holiday version by adding seasonal flavors that capture the spirit of Christmas. We love incorporating crushed candy canes for a refreshing peppermint twist that adds both flavor and visual appeal with red and white stripes throughout each square.
Other festive additions include crystallized ginger for warming spice, dried cranberries for tart bursts of flavor, and even a touch of orange zest for citrus brightness. We find that combining white chocolate with lemon zest, cranberries, pistachios, and ginger creates a sophisticated flavor profile that appeals to adult palates while maintaining the treat’s beloved simplicity.


Troubleshooting Tips
 8")
Even with the simplest no-bake recipes, we sometimes encounter challenges when making White Christmas. These common issues can affect both the texture and appearance of our final squares.
When Your White Christmas Won’t Set Properly
Temperature control plays a crucial role in achieving the perfect consistency. We recommend checking that your chocolate and butter mixture has cooled slightly before adding the dry ingredients. Adding cold ingredients to hot chocolate can cause the mixture to seize or remain too soft to set properly.
Insufficient chilling time often causes setting problems. Our mixture needs at least 2 hours in the refrigerator to firm up completely. We suggest extending the chilling time to 4 hours or overnight if your kitchen runs particularly warm.
Fixing Texture Issues
Grainy or lumpy textures typically result from overheating the chocolate base. We always melt our chocolate and butter over low heat or using a double boiler method. Stirring constantly prevents scorching and ensures a smooth foundation for our White Christmas.
Overmixing the final combination can break down the rice cereal and create a dense texture. We fold the ingredients together gently until just combined to maintain the characteristic crunch.
Solving Cutting and Storage Problems
Crumbling squares indicate the mixture may be too cold when cutting. We let our White Christmas sit at room temperature for 5 to 10 minutes before slicing. Warming the knife blade under hot water and wiping it clean between cuts creates clean edges.
Storage issues arise when moisture enters the container. We ensure our squares are completely set before storing them in an airtight container. Placing parchment paper between layers prevents sticking and maintains individual square integrity.
Managing Ingredient Substitutions
Substituting ingredients can alter the setting properties of our White Christmas. We maintain the ratio of wet to dry ingredients when making changes. If using fresh fruit instead of dried, we reduce the liquid content accordingly to prevent a soggy texture.
White chocolate quality affects both flavor and setting ability. We choose high-quality white chocolate with cocoa butter as the primary fat for best results. Compound chocolate or chips may not set as firmly as premium white chocolate.
Conclusion
White Christmas represents everything we love about holiday baking – it’s simple accessible and absolutely delicious. This no-bake Australian treat has earned its place in our holiday repertoire because it delivers maximum festive impact with minimal effort.
We’ve shown you how to master the basic recipe troubleshoot common issues and create stunning variations that’ll impress your guests. Whether you’re making it for cookie exchanges potluck dinners or family gatherings White Christmas adapts beautifully to any occasion.
The best part? You can prepare it days ahead of time making your holiday season less stressful and more enjoyable. With these techniques and tips you’re ready to create perfect White Christmas squares that’ll become a cherished tradition in your home.
Frequently Asked Questions
What is White Christmas?
White Christmas is a popular Australian no-bake holiday treat that originated in the 1970s. It’s made with white chocolate, butter, rice cereal, coconut, and dried fruits. The dessert is perfect for Australia’s warm summer holidays since it requires no baking and can be easily prepared in advance.
How long does White Christmas need to chill?
White Christmas needs to chill in the refrigerator for at least 2 hours to set properly. For best results, allow it to chill for 3-4 hours or overnight. This ensures the mixture firms up enough to cut into clean, neat squares.
Can I make White Christmas ahead of time?
Yes, White Christmas is perfect for making ahead. You can prepare it 3-5 days in advance for optimal flavor and texture. It stores well in the refrigerator for up to two weeks or can be frozen for up to two months in an airtight container.
What are the essential ingredients for White Christmas?
The basic ingredients include 375g chopped white chocolate, 90g cubed butter, 1 cup desiccated coconut, 2 cups rice cereal, and 1/2 cup powdered milk. Popular mix-ins are dried fruit, glacé cherries, toasted almonds, and pistachios, plus honey or golden syrup for binding.
How do I cut White Christmas into perfect squares?
Let the chilled White Christmas sit at room temperature for 10-15 minutes before cutting. Use a sharp knife warmed under hot water and wiped clean between cuts. This prevents the chocolate from cracking and ensures clean, professional-looking squares.
What equipment do I need to make White Christmas?
You’ll need minimal equipment: a large mixing bowl, medium saucepan, wooden spoon or silicone spatula, rectangular baking pan, baking paper, sharp knife, measuring cups and spoons, and refrigerator space for chilling. No special baking equipment required.
Can I customize the White Christmas recipe?
Absolutely! You can create variations like Tropical (with dried pineapple and mango), Nutty (with macadamia nuts or cashews), or Festive (with candy canes and cranberries). The base recipe is very adaptable to different mix-ins and flavor preferences.
How should I store White Christmas?
Store cut White Christmas pieces in an airtight container in the refrigerator for up to one week. For longer storage, wrap well and freeze for up to two months. Keep chilled, especially in warm weather, to maintain proper texture.
Why won’t my White Christmas set properly?
Setting issues usually stem from temperature problems. Make sure the chocolate-butter mixture cools slightly before adding dry ingredients, and ensure adequate chilling time. Using low heat when melting chocolate and proper ingredient ratios are also crucial for proper setting.
How do I serve White Christmas at parties?
Cut into bite-sized squares for easy sharing and arrange on a festive platter. Let squares soften slightly at room temperature before serving, but keep them chilled in warm weather. Dust with powdered sugar and garnish with glacé cherries for elegant presentation.


