We’ve all been there – craving something sweet but not wanting to spend hours in the kitchen. That’s exactly why we fell in love with these easy peanut butter balls. They’re the perfect no-bake treat that delivers maximum flavor with minimal effort.
These bite-sized delights combine creamy peanut butter with powdered sugar and a hint of vanilla to create an irresistibly smooth center. What makes them even better? You can whip up a batch in just 20 minutes using ingredients you probably already have in your pantry.
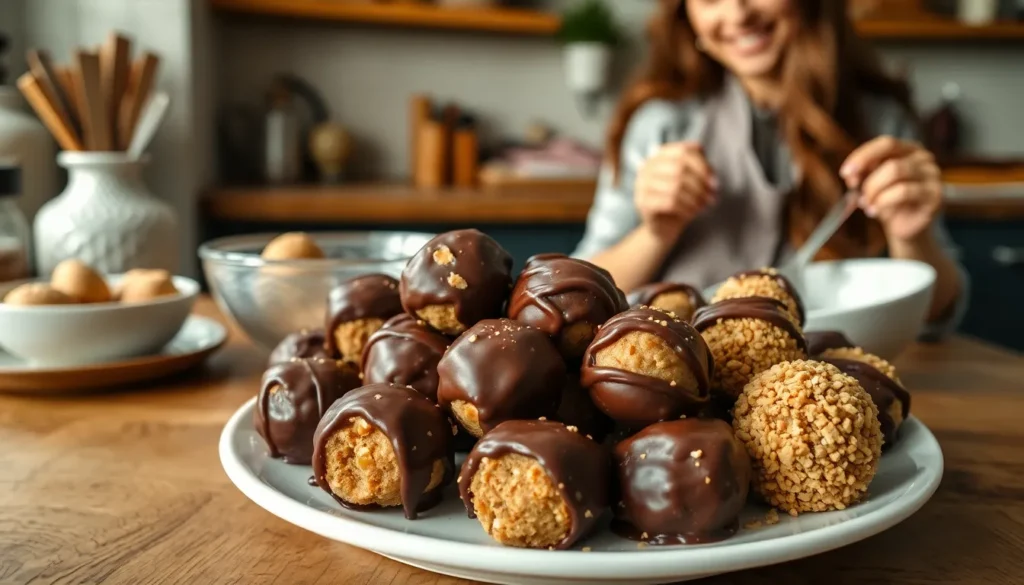
Whether you’re planning a last-minute dessert for guests or need a quick sweet fix for the family these peanut butter balls never disappoint. We love how versatile they are too – roll them in chocolate chips crushed graham crackers or leave them plain for that classic peanut butter taste that reminds us of childhood treats.
Ingredients
We keep our peanut butter ball recipe simple with just a handful of pantry staples. These basic ingredients combine to create the perfect sweet and creamy texture that makes these no-bake treats irresistible.
Main Ingredients
- 1 cup creamy peanut butter
- 1/4 cup unsalted butter, softened
- 1 teaspoon vanilla extract
- 1/4 teaspoon salt
- 1 1/2 cups powdered sugar
- 1/4 cup graham cracker crumbs
Optional Coating Ingredients
- 1 cup semi-sweet chocolate chips
- 1 tablespoon coconut oil
- 1/2 cup chopped peanuts
- 1/4 cup shredded coconut
- Additional graham cracker crumbs
We recommend using creamy peanut butter rather than crunchy for the smoothest texture. Room temperature butter blends more easily with the other ingredients. Fresh powdered sugar ensures our balls hold together properly without becoming too sticky or dry.
The graham cracker crumbs add a subtle sweetness and help bind the mixture. We find that store-bought crumbs work perfectly, though you can crush your own crackers if preferred.
For coating options, we suggest melting chocolate chips with coconut oil for a glossy finish. The chopped peanuts provide extra crunch while shredded coconut offers tropical flavor variation.
Equipment Needed
 2")
Before we jump into making these delicious peanut butter balls, let’s gather all the essential equipment to ensure our process runs smoothly. Having the right tools on hand makes this recipe even easier and more enjoyable to prepare.
We’ll need a mixing bowl large enough to comfortably combine all our ingredients without overflow. Measuring cups and spoons are crucial for accurate ingredient proportions that guarantee consistent results every time we make these treats.
A baking sheet or tray serves as our workspace for shaping and chilling the peanut butter balls. Parchment paper or silicone mat provides a non-stick surface, though this addition remains optional for easy cleanup and prevents sticking.
Our refrigerator plays a vital role in the chilling process, firming up the mixture so we can shape perfect balls. Fork or dipping tool becomes essential when we coat our peanut butter balls in chocolate, allowing us to dip each ball while maintaining its round shape.
For chocolate coating preparation, we’ll use either a double boiler or microwave to melt our chocolate chips smoothly. A shallow dish for chocolate dipping makes the coating process much more manageable and less messy.
| Equipment | Purpose | Essential Level |
|---|---|---|
| Mixing bowl | Combining ingredients | Essential |
| Measuring tools | Accurate proportions | Essential |
| Baking sheet | Shaping and chilling | Essential |
| Refrigerator | Firming mixture | Essential |
| Fork/dipping tool | Chocolate coating | Essential |
| Parchment paper | Non-stick surface | Optional |
| Double boiler/microwave | Melting chocolate | Essential |
| Shallow dipping dish | Easier coating | Recommended |
Most home kitchens already contain these basic tools, making this recipe accessible without requiring specialized equipment purchases. The beauty of this no-bake recipe lies in its simplicity, requiring only standard kitchen essentials that we likely use for everyday cooking and baking tasks.
Instructions
 4")
Creating perfect peanut butter balls requires just a few simple steps that take minutes to complete. We’ll walk you through each stage to ensure your treats turn out smooth and delicious every time.
Prep the Mixture
We start by combining our creamy peanut butter and softened butter together in a large mixing bowl. Using a hand mixer makes this process much easier and ensures thorough blending. Next we gradually mix in the powdered sugar until everything is well combined. Adding vanilla extract at this stage enhances the overall flavor profile.
The mixture should form a smooth dough that holds together well. If our mixture appears too crumbly we recommend chilling it for a few minutes before proceeding to the next step.
Shape the Balls
Using clean hands we roll the dough into uniform 1-inch balls. This size works perfectly for bite-sized treats that are easy to handle and coat. We place each shaped ball on a baking sheet lined with parchment or wax paper to prevent sticking.
Keeping the balls evenly sized ensures they chill and set at the same rate. We space them slightly apart on the baking sheet to make removal easier later.
Chill the Balls
We refrigerate our shaped peanut butter balls for at least 20 minutes to allow them to firm up properly. This chilling step is crucial for maintaining their shape during any additional coating process.
For better stability during chocolate dipping we extend the chilling time up to one hour. The longer chill time creates firmer balls that are much easier to handle when applying coatings or decorations.
Coating Options
 6")
Once our peanut butter balls have chilled and firmed up, we can transform them with delicious coatings that add flavor and visual appeal. These coating options allow us to customize our treats for different preferences and occasions.
Chocolate Coating
Chocolate remains the most popular coating choice for peanut butter balls. We can use semisweet, dark, or milk chocolate depending on our taste preferences. Melting chocolate chips, baking chocolate, or candy melts in a double boiler or microwave creates our dipping mixture.
For smoother coating results, we add a small amount of vegetable shortening or coconut oil to the melted chocolate. This technique makes the chocolate easier to work with and creates a glossy finish. We dip each chilled ball using a fork or toothpick, allowing excess chocolate to drip off before placing them on parchment paper.
After coating all our balls, we refrigerate them again to set the chocolate completely. The contrast between the creamy peanut butter center and rich chocolate exterior creates an irresistible combination.
Powdered Sugar Coating
Rolling our peanut butter balls in powdered sugar offers a simpler alternative that skips the chocolate melting process. This coating method provides a sweet, delicate finish with minimal effort required.
We simply roll each chilled ball in powdered sugar until completely covered. The soft, white coating creates an elegant appearance while adding extra sweetness. This option works particularly well when we want a lighter coating that won’t overpower the peanut butter flavor.
For best coverage, we can roll the balls twice in powdered sugar, allowing them to sit briefly between coatings for better adherence.
Coconut Coating
Shredded coconut creates a tropical twist on traditional peanut butter balls. We can roll our shaped balls in regular sweetened coconut or use toasted coconut for enhanced flavor depth.
The coconut coating adds chewy texture that complements the smooth peanut butter center. We apply this coating by rolling each ball thoroughly in shredded coconut, pressing gently to ensure good adherence.
Toasted coconut provides richer flavor and golden color that makes our treats especially appealing. We can toast coconut in a dry skillet over medium heat for 2-3 minutes until golden brown, stirring frequently to prevent burning.
Storage Instructions
 8")
Proper storage ensures our peanut butter balls maintain their delicious taste and texture for weeks to come. We recommend keeping these sweet treats in an airtight container to preserve freshness and prevent them from absorbing unwanted odors from the refrigerator.
Refrigerator Storage
We store our peanut butter balls in the refrigerator for optimal freshness. Place them in an airtight container where they maintain quality for 4-6 weeks depending on storage conditions. Some storage situations may reduce this timeframe to up to one week or five days based on environmental factors.
Freezer Storage
Freezing provides the longest storage option for our peanut butter balls. We place them in a freezer-safe bag or container with wax paper between layers to prevent sticking together. Frozen peanut butter balls retain quality for 2-4 months in the freezer.
When we’re ready to enjoy frozen balls, we thaw them in the refrigerator or at room temperature. This gradual thawing process helps maintain their original texture and prevents condensation from forming on the surface.
Room Temperature Storage
Our peanut butter balls can sit at room temperature in an airtight container for up to two weeks. We find this method convenient for immediate consumption or when serving at parties where refrigeration isn’t readily available.
Storage Best Practices
| Storage Method | Duration | Container Type |
|---|---|---|
| Refrigerator | 4-6 weeks | Airtight container |
| Freezer | 2-4 months | Freezer-safe bag/container with wax paper |
| Room Temperature | Up to 2 weeks | Airtight container |
We keep our peanut butter balls away from moisture and heat sources to maintain their freshness. Regular checking for spoilage becomes important when storing at room temperature. Freezing remains our recommended method for longer storage since it helps maintain both texture and flavor integrity over extended periods.
Make-Ahead Tips
 10")
These delicious peanut butter balls become even more convenient when we prepare them ahead of time. We can shape the mixture into balls and store them in the refrigerator for up to one day before coating with chocolate. This approach allows us to break up the preparation process and makes hosting easier.
Freezing offers us the best long-term storage solution for both stages of preparation. We can freeze the shaped peanut butter balls before coating by placing them on a parchment-lined tray first. Once frozen solid we transfer them to a freezer-safe container or zip-top bag where they maintain their quality for extended periods.
After coating the balls with chocolate we can also freeze the finished treats. We arrange them in a single layer on a tray to prevent sticking then transfer to containers once frozen. The chocolate coating holds up beautifully in the freezer making these perfect for holiday preparation or large batch cooking.
| Storage Method | Timeline | Best Practice |
|---|---|---|
| Refrigerator (before coating) | Up to 1 day | Store on parchment-lined tray |
| Freezer (before coating) | Several months | Freeze on tray then transfer to container |
| Freezer (after coating) | Several months | Single layer freeze then store in container |
When we’re ready to serve frozen peanut butter balls we simply thaw them overnight in the refrigerator. This gentle thawing process preserves the texture and prevents condensation from forming on the chocolate coating. Room temperature thawing works too but refrigerator thawing gives us better results.
We recommend using a cookie scoop or tablespoon measure when shaping the balls initially. This ensures uniform size which helps with consistent freezing and thawing times. Parchment paper becomes essential for our make-ahead success as it prevents sticking during both initial chilling and long-term storage.
Planning ahead transforms this simple recipe into an even more practical treat for busy schedules and special occasions.
Serving Suggestions
 12")
Our easy peanut butter balls shine as versatile treats that work beautifully across various serving occasions. We love pairing them with fresh berries like blueberries and strawberries to create an elegant dessert platter that balances the rich sweetness with bright acidity.
For everyday snacking, we arrange these treats on simple serving plates alongside other bite-sized desserts. The combination creates an inviting spread that guests can enjoy throughout gatherings. We often serve them as the perfect ending to dinner parties or casual family meals.
Holiday presentations become extra special when we incorporate these peanut butter balls into seasonal displays. Their compact size makes them ideal for gift boxes, dessert tables, and potluck contributions. We place them in decorative tins or on tiered serving stands for maximum visual impact.
Health-conscious hosts appreciate how we pair plain Greek yogurt with these treats for a more balanced dessert option. The creamy yogurt provides protein while complementing the rich peanut butter flavors. This combination works particularly well for brunch gatherings or afternoon snacks.
Special occasions call for creative presentations where we arrange the balls on marble boards with nuts, dried fruits, and small chocolates. The variety creates an impressive dessert charcuterie that encourages sampling and conversation. We find this approach works exceptionally well for celebrations and entertaining larger groups.
Room temperature serving brings out the best flavors, so we remove them from refrigeration about 15 minutes before guests arrive. This timing ensures the perfect texture while maintaining their shape and coating integrity.
Recipe Variations
 14")
These simple variations transform our basic peanut butter balls into exciting new treats that suit different tastes and dietary needs. Each option maintains the core recipe structure while adding unique elements for variety.
No-Bake Chocolate Chip Version
We enhance our classic peanut butter balls by folding in 1 cup of semi-sweet chocolate chips directly into the peanut butter mixture before shaping. The mini chocolate chips work best as they distribute more evenly throughout each ball. After combining the peanut butter, butter, and powdered sugar as directed in our base recipe, we gently stir in the chocolate chips until they’re evenly dispersed. These chocolate studded balls can be enjoyed plain or dipped in melted chocolate for a double chocolate experience. The added chips create delightful pockets of sweetness and provide extra texture with every bite.
Protein-Packed Version
Our protein enhanced version incorporates 1/2 cup of your favorite protein powder into the peanut butter mixture for an energy boosting treat. Vanilla or chocolate protein powder works exceptionally well with the peanut butter base. We recommend adding the protein powder gradually after mixing the peanut butter and butter to prevent clumping. For additional texture and nutrition, we fold in chopped almonds, walnuts, or sunflower seeds before rolling into balls. This variation may require an extra tablespoon of peanut butter if the mixture becomes too dry from the protein powder addition.
Holiday Themed Balls
We transform our peanut butter balls into festive treats using colorful decorations and seasonal themes. After dipping the chilled balls in melted chocolate, we immediately roll them in holiday exact sprinkles or colored sugar before the chocolate sets. Red and green sprinkles create perfect Christmas treats, while pink decorations make lovely Valentine’s Day desserts. For Halloween, we use orange and black sprinkles or roll the balls in crushed chocolate cookies. Easter calls for pastel colored coconut or mini chocolate eggs pressed gently into the chocolate coating. These themed variations make excellent additions to holiday gift boxes and seasonal dessert tables.
Troubleshooting Tips
 16")
Making perfect peanut butter balls requires understanding common challenges that can arise during preparation. We’ve compiled the most frequent issues home bakers encounter and their proven answers to ensure your treats turn out perfectly every time.
Mixture Too Sticky to Handle
When your peanut butter mixture clings to everything it touches, refrigeration becomes your best friend. We recommend chilling the mixture for 30 minutes to firm it up before attempting to roll the balls. This cooling period allows the fats to solidify slightly, making the dough much more manageable.
Crumbly Mixture That Won’t Hold Together
A mixture that falls apart indicates an imbalance in wet to dry ingredients. Adding more peanut butter gradually will help bind the ingredients together. We also suggest avoiding over-packing the powdered sugar during measuring, as this can throw off the ratio and create a dry mixture.
Dough Sticking to Your Hands
Rolling becomes frustrating when the mixture constantly sticks to your palms and fingers. Rubbing a small amount of butter on your hands creates a barrier that prevents sticking. This simple trick allows you to work more efficiently without constantly washing your hands.
Balls Becoming Soft During Chocolate Dipping
Temperature control plays a crucial role in successful chocolate coating. We recommend chilling the shaped peanut butter balls in the refrigerator or freezer for a few minutes before dipping them in melted chocolate. This firming step prevents the balls from losing their shape or becoming too soft to handle during the coating process.
Chocolate Coating Issues
Quality chocolate makes a important difference in achieving smooth, leak-free coatings. Using high-quality chocolate ensures better coverage and prevents cracking or separation. We also suggest ensuring the peanut butter balls are well-coated by giving them a light roll before dipping, which helps create an even surface for the chocolate to adhere to properly.
Handling Difficulties During Coating
Managing the balls during the chocolate dipping process requires the right tools and technique. We recommend using a fork or toothpick to handle the balls, which provides better control and prevents fingerprints on the finished coating. If the balls become too soft and stick to your utensils, placing them back in the freezer for a few minutes will firm them up again.
Conclusion
These easy peanut butter balls prove that you don’t need complicated techniques or hours in the kitchen to create something truly delicious. With just a handful of pantry staples and 20 minutes of your time you’ll have a crowd-pleasing treat that rivals any store-bought dessert.
What we love most about this recipe is how it adapts to your schedule and preferences. Whether you’re rushing to prepare for unexpected guests or planning ahead for a special celebration these versatile treats deliver every time.
The beauty lies in their simplicity – mix chill roll and enjoy. From chocolate-dipped elegance to coconut-rolled tropical vibes you’ve got endless options to make them uniquely yours. So grab that peanut butter and get ready to become everyone’s favorite dessert hero.
Frequently Asked Questions
How long do peanut butter balls take to make?
Peanut butter balls can be made in just 20 minutes of active preparation time. The mixture takes about 10 minutes to prepare, rolling into balls takes another 5-10 minutes, and they need at least 20 minutes of chilling time in the refrigerator to firm up before serving.
What are the main ingredients needed for peanut butter balls?
The essential ingredients include creamy peanut butter, unsalted butter, vanilla extract, salt, powdered sugar, and graham cracker crumbs. For best results, use room temperature butter and creamy peanut butter for the smoothest texture. Optional coating ingredients include chocolate chips, chopped peanuts, or shredded coconut.
Do I need special equipment to make peanut butter balls?
No special equipment is required. You’ll need basic kitchen tools like a mixing bowl, measuring cups and spoons, a baking sheet, and access to a refrigerator. A hand mixer helps with blending, and parchment paper makes cleanup easier. Most home kitchens already have these common tools.
How should I store peanut butter balls?
Store peanut butter balls in an airtight container in the refrigerator for 4-6 weeks, or freeze them for 2-4 months. They can also be kept at room temperature for up to two weeks. Keep them away from moisture and heat sources for best quality.
What coating options are available for peanut butter balls?
Popular coating options include melted chocolate (semisweet, dark, or milk), powdered sugar for a simple finish, or shredded coconut for a tropical twist. Adding coconut oil to melted chocolate creates a smoother coating. Each option allows for customization based on preferences and occasions.
Can I make peanut butter balls ahead of time?
Yes, peanut butter balls are perfect for make-ahead preparation. You can shape them and refrigerate for up to one day before coating, or freeze them for longer storage. Frozen balls should be thawed overnight in the refrigerator before serving for best texture.
What should I do if my peanut butter mixture is too sticky or crumbly?
If the mixture is too sticky, chill it for 15-20 minutes to firm up, or add more powdered sugar gradually. If it’s too crumbly, add a small amount of softened butter or peanut butter. Lightly butter your hands when rolling to prevent sticking.
How can I customize peanut butter balls for different occasions?
You can create variations like adding mini chocolate chips for extra sweetness, incorporating protein powder for a healthier option, or using festive sprinkles for holiday themes. They can be arranged on dessert platters, paired with fresh berries, or packaged in gift boxes.