There’s something magical about the moment you bite into a perfectly flaky buttermilk scone – that tender crumb gives way to reveal pockets of buttery goodness that practically melt in your mouth. We’ve perfected this classic British teatime treat to deliver scones that are neither too dense nor too crumbly but strike that perfect balance every baker dreams of achieving.
The secret lies in using tangy buttermilk instead of regular milk which creates an incredibly tender texture while adding a subtle complexity that pairs beautifully with jam and clotted cream. Unlike heavy cream scones that can sometimes feel overly rich these buttermilk versions offer a lighter more refined eating experience.
Whether you’re hosting an elegant afternoon tea or simply craving a homemade treat with your morning coffee these scones come together in just 30 minutes from start to finish. We’ll show you the foolproof technique that guarantees bakery-quality results every single time.
What You’ll Need
Success with buttermilk scones depends on having the right tools at hand. We’ve streamlined the equipment list to help you achieve bakery-quality results every time.
Essential Equipment
We recommend gathering these key pieces before starting your buttermilk scone preparation:
- Large mixing bowl – Provides ample space for combining ingredients without overworking the dough
- Pastry cutter or two knives – Essential for cutting cold butter into flour while maintaining proper texture
- Clean kitchen towel – Keeps ingredients at optimal temperature during preparation
- Baking sheet – Choose a heavy-duty sheet that distributes heat evenly
- Parchment paper – Prevents sticking and ensures easy removal from the pan
- Sharp knife – Creates clean cuts through the dough without compressing edges
- Wire cooling rack – Allows proper air circulation around freshly baked scones
Measuring Tools
- Digital kitchen scale – Weighs flour and butter for consistent results across batches
- Liquid measuring cup – Glass or clear plastic cup specifically designed for wet ingredients
- Dry measuring cups – Nested set for flour and other dry ingredients
- Measuring spoons – Complete set for baking powder and salt measurements
- Bench scraper – Helps transfer measured ingredients and shapes dough portions
Ingredients
 1")
We carefully selected each ingredient to create scones with the perfect balance of tender crumb and rich flavor. Our ingredient list ensures you achieve bakery quality results with simple pantry staples.
For the Scones
- 3 cups all-purpose flour (or self-raising flour with 3 teaspoons baking powder if using all-purpose)
- 2 to 3 tablespoons granulated sugar
- 1/4 to 3/4 teaspoon fine salt (adjust to taste preference)
- 2 to 3 teaspoons baking powder
- 6 tablespoons unsalted butter (cool but not cold for easy incorporation)
- 1 1/2 cups buttermilk (the star ingredient that creates our signature tangy flavor)
- 1 large egg (optional, adds extra moisture and richness)
For the Glaze (Optional)
- 1 to 2 tablespoons heavy cream or buttermilk
- 1 to 2 tablespoons powdered sugar
Instructions
 2")
Follow these straightforward steps to create bakery-quality buttermilk scones with a tender crumb and rich flavor. Our method ensures consistent results every time you bake.
Prep the Dry Ingredients
Combine 3 cups all-purpose flour, 2½ teaspoons baking powder, 1 teaspoon salt, and 2-3 tablespoons granulated sugar in a large mixing bowl. Whisk these dry ingredients together until evenly distributed. This thorough mixing prevents pockets of baking powder or salt from creating uneven texture in our finished scones.
Prepare the Wet Ingredients
Beat 1 egg lightly in a separate bowl until smooth. Pour ¾ cup buttermilk into the beaten egg and mix gently to combine. If buttermilk isn’t available, create a substitute by mixing regular milk with 1 teaspoon lemon juice or white vinegar and letting it sit for 5 minutes until slightly thickened.
Mix the Dough
Add 6 tablespoons cold butter to the flour mixture and work it in using your hands or a pastry blender. Break down the butter until pieces reach the size of small peas throughout the flour. Pour the wet ingredients into the butter-flour mixture and stir just until the dough comes together. Overmixing develops gluten and creates tough scones instead of our desired tender texture.
Shape the Scones
Transfer the dough onto a lightly floured surface and gently pat it into a round or rectangular shape. Use a round cookie cutter to cut straight down through the dough without twisting. Clean cuts allow the scones to rise evenly during baking. Place cut scones on a parchment-lined baking sheet with sides barely touching.
Bake the Scones
Preheat your oven to 400°F (200°C) while shaping the scones. Bake for 15-20 minutes until the tops turn golden brown and the scones spring back lightly when touched. The internal temperature should reach 190°F for fully baked scones. Cool on the baking sheet for 5 minutes before transferring to a wire rack.
Directions for Perfect Results
 3")
We understand that achieving bakery-quality buttermilk scones requires attention to exact details that make the difference between good and extraordinary results. Following these expert guidelines ensures our scones develop the perfect flaky texture and golden appearance every time.
Temperature Tips
Cold ingredients form the foundation of exceptional scone texture. We always use butter straight from the refrigerator and keep our buttermilk chilled until the moment we add it to the flour mixture. Room temperature ingredients create dense heavy scones that lack the desired flaky layers.
Our oven must reach exactly 375°F (190°C) before we place the scones inside. We recommend using an oven thermometer to verify accuracy since temperature variations affect rising and browning. Preheating takes approximately 15 minutes in most ovens.
| Temperature Component | Recommended Setting | Purpose |
|---|---|---|
| Butter | Cold from refrigerator | Creates flaky texture |
| Buttermilk | Chilled | Maintains dough structure |
| Oven Temperature | 375°F (190°C) | Proper rise and browning |
| Baking Time | 15-20 minutes | Golden exterior development |
Texture Guidelines
Gentle handling preserves the tender crumb structure that makes buttermilk scones irresistible. We mix the dough only until ingredients just come together since overworking develops gluten and creates tough chewy scones. The mixture should look slightly shaggy rather than smooth.
Cold butter pieces should resemble coarse crumbs or small peas when properly incorporated. We achieve this texture using a pastry blender or our fingertips to cut the butter into the flour mixture. Large butter chunks create uneven texture while overmixed butter produces dense results.
Flour dusting prevents sticking during the shaping process without adding excess flour to the dough. We use minimal flour on our work surface and rolling pin. Too much additional flour changes the dough ratio and affects the final texture.
Sharp cuts through the dough promote even rising during baking. We press our cookie cutter straight down without twisting motions that seal the edges and prevent proper rising. Clean cuts allow the scones to develop their characteristic height and flaky layers.
Make-Ahead Instructions
 4")
We understand that busy schedules often require flexible baking options. These buttermilk scones can be prepared entirely ahead of time to fit seamlessly into our morning routines.
Freezing Unbaked Scones
Our preferred method for make-ahead scones involves freezing the shaped dough before baking. After cutting the scones into wedges or rounds, we place them on a baking sheet and freeze until completely solid, which typically takes about 30 minutes. Once frozen, we transfer the scones to resealable freezer bags for long-term storage.
Frozen unbaked scones maintain their quality for up to one month when stored properly in airtight freezer bags. We can bake these scones straight from the freezer without thawing, though we need to add a few extra minutes to the original baking time. The extended freezing time actually helps create an even flakier texture as the cold butter creates more distinct layers during baking.
For overnight preparation, we shape the dough into wedges and place them on a baking sheet. We cover the shaped scones with plastic wrap and refrigerate for up to 24 hours before baking as needed in the morning.
Storage Tips
Fresh buttermilk scones stay at their peak quality when stored at room temperature for 2-3 days in an airtight container. We recommend placing a paper towel in the container to absorb excess moisture and maintain the ideal texture.
| Storage Method | Duration | Temperature | Container Type |
|---|---|---|---|
| Room Temperature | 2-3 days | 68-72°F | Airtight container |
| Refrigerator | Up to 1 week | 35-38°F | Sealed container |
| Freezer (baked) | Up to 3 months | 0°F | Freezer bags |
| Freezer (unbaked) | Up to 1 month | 0°F | Airtight freezer bags |
For longer storage, we freeze baked scones in freezer-safe bags for up to three months. When ready to serve, we thaw frozen baked scones at room temperature or warm them briefly in a 300°F oven for 5-7 minutes to restore their original texture.
Serving Suggestions
 5")
The beauty of buttermilk scones lies in their versatility and ability to complement both sweet and savory pairings. We’ve gathered our favorite ways to serve these tender baked treats that enhance their delicate buttermilk flavor.
Traditional Accompaniments
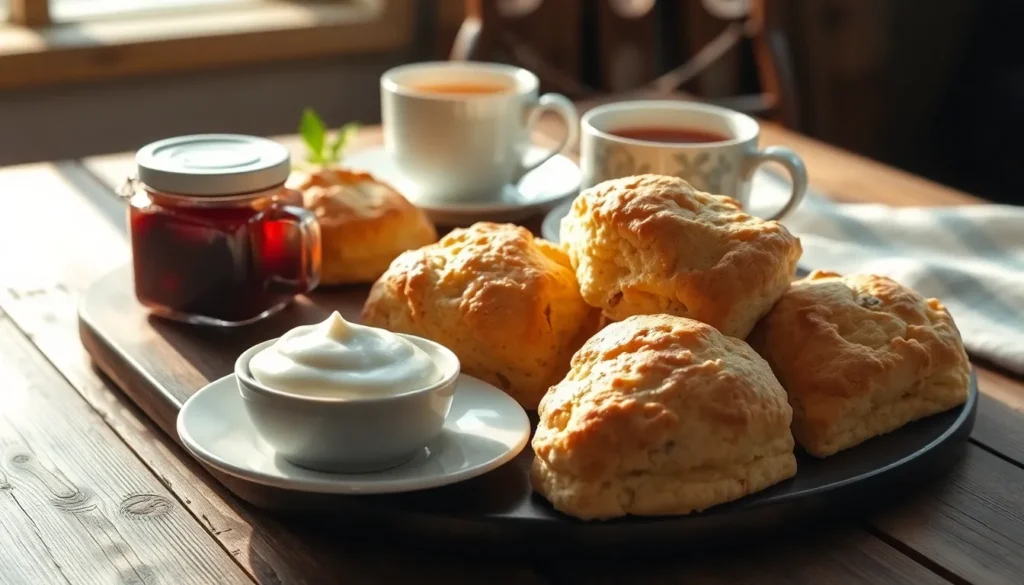
Butter and jam create the quintessential breakfast combination that showcases the scone’s tender crumb perfectly. We recommend spreading room temperature butter generously before adding your favorite fruit preserves for the ideal sweet and creamy contrast.
Clotted cream elevates afternoon tea service to elegant heights when paired with fruit preserves or tangy lemon curd. The rich texture of clotted cream provides a luxurious complement to the scone’s delicate buttermilk flavor.
Tea or coffee makes the perfect beverage pairing for a relaxing morning or afternoon treat. We find that black tea enhances the traditional British experience while coffee offers a robust contrast to the scone’s subtle sweetness.
Creative Variations
Fresh blueberries or cranberries folded into the dough create a delightful fruity twist that adds natural sweetness and vibrant color. These additions work particularly well for breakfast service or special occasions.
Chocolate chips transform ordinary scones into an indulgent sweet treat that appeals to all ages. We suggest using mini chocolate chips to ensure even distribution throughout the tender crumb.
Cheddar cheese and herbs like thyme or rosemary offer a sophisticated savory option that pairs beautifully with soups or salads. Sharp cheddar provides the best flavor contrast while fresh herbs add aromatic complexity.
Spiced dates combined with warm spices like cinnamon and nutmeg create a unique flavor profile reminiscent of coffee shop favorites. Chopped dates add natural sweetness and chewy texture that complements the scone’s tender crumb structure.
Troubleshooting Common Issues
 6")
Even with our proven technique, buttermilk scones can sometimes present challenges that affect their final texture and taste. We’ve identified the most common problems home bakers encounter and their straightforward answers.
Dense or Heavy Scones
Overmixing stands as the primary culprit behind dense scones. When we work the dough too vigorously after adding buttermilk or during shaping, we develop gluten strands that create a tough, heavy texture. Mix ingredients just until the dough comes together, accepting its slightly shaggy and crumbly appearance.
Insufficient leavening prevents proper rising and creates disappointingly flat results. We always check our baking powder’s expiration date before starting, as old leavening agents lose their effectiveness over time. Use the exact amount specified in our recipe for optimal lift.
Butter temperature plays a crucial role in achieving light, flaky scones. Room temperature or melted butter eliminates the air pockets that create our desired texture. We cube cold butter before incorporating it into the flour mixture, allowing it to create steam pockets during baking.
Excessive liquid transforms our carefully balanced dough into a wet mess that spreads during baking. Add buttermilk gradually, stopping when the dough just holds together rather than pouring in the full amount at once.
Dry or Crumbly Texture
Inadequate liquid leaves our dough too dry to form proper scones. The mixture should feel crumbly yet moist enough to shape without falling apart completely. We add buttermilk in small increments until achieving the right consistency.
Over-baking sucks moisture from our scones, leaving them disappointingly dry. Remove scones from the oven as soon as they achieve a light golden color rather than waiting for deep browning.
Improper measurements throw off the delicate balance between flour and liquid ingredients. We use standard measuring cups for consistency, though weighing flour provides the most accurate results for professional-quality scones.
Excessive handling during shaping breaks down the dough structure and creates crumbly results. Handle the dough minimally after adding buttermilk, using gentle motions to preserve the tender texture we’re seeking.
| Issue | Main Cause(s) | Solution(s) |
|---|---|---|
| Dense/Heavy Scones | Overmixing, old leavening, warm butter, too much liquid | Mix gently, use fresh leavening, keep butter cold, add liquid gradually |
| Dry/Crumbly Scones | Not enough liquid, over-baking, improper measurements, over-handling | Add more liquid, bake until just golden, measure carefully, handle minimally |
Recipe Variations
 7")
Building on our classic buttermilk scone foundation we can transform these tender treats into countless delicious variations. The beauty of buttermilk scones lies in their adaptability for both sweet and savory applications.
Sweet Add-Ins
Fresh and dried fruits make exceptional additions to our buttermilk scones. We recommend folding in 3/4 cup of blueberries cranberries or chopped dates after incorporating the wet ingredients. Currants offer a traditional British touch and distribute beautifully throughout the dough.
Nuts bring wonderful texture and richness to sweet scones. Chopped almonds pecans or walnuts work particularly well when we add them alongside dried fruits. We suggest using 1/2 cup of nuts to maintain the proper dough consistency.
Chocolate chips create an indulgent variation that appeals to all ages. We fold in 2/3 cup of mini chocolate chips or chopped dark chocolate for the best distribution. The buttermilk’s slight tang balances the sweetness perfectly.
Warm spices elevate our scones with aromatic complexity. We add 1 teaspoon of cinnamon 1/4 teaspoon of nutmeg or 1 teaspoon of vanilla extract to the dry ingredients. Brown sugar can replace granulated sugar for deeper flavor when using spices.
Savory Options
Cheese transforms our buttermilk scones into savory delights perfect for breakfast or dinner. We reduce the sugar to 1 tablespoon and add 3/4 cup of shredded sharp cheddar or aged Gruyère. The cold cheese integrates beautifully with our cold butter technique.
Fresh herbs bring garden freshness to savory scones. We incorporate 2 tablespoons of finely chopped thyme rosemary or parsley into the flour mixture. Chives work especially well with cheese variations.
Sun-dried tomatoes and cooked bacon bits create Mediterranean or hearty breakfast inspired scones. We use 1/3 cup of chopped sun-dried tomatoes or 1/2 cup of crumbled cooked bacon. These additions require reducing other liquid ingredients slightly to maintain proper dough texture.
The key to successful variations involves adding ingredients after mixing wet and dry components but before final shaping. This technique ensures even distribution without overworking our delicate buttermilk dough.
Conclusion
We’ve shown you everything you need to create exceptional buttermilk scones from scratch. With our foolproof technique cold ingredients and gentle handling you’ll achieve that perfect tender crumb every time. Whether you’re hosting an elegant afternoon tea or simply craving a warm breakfast treat these scones deliver consistent bakery-quality results.
The beauty of this recipe lies in its versatility. From sweet blueberry variations to savory cheese and herb combinations there’s a buttermilk scone for every palate and occasion. Remember to keep your ingredients cold work the dough minimally and trust the process.
Now it’s time to preheat your oven and experience the joy of fresh homemade scones. Your kitchen will smell incredible and your family will be impressed with your baking skills.
Frequently Asked Questions
What makes buttermilk scones different from regular scones?
Buttermilk scones have a lighter, more tender texture compared to traditional heavy cream scones. The buttermilk adds complexity to the flavor while creating a delicate crumb structure. The acidity in buttermilk also reacts with the leavening agents, contributing to better rise and fluffiness.
How long does it take to make buttermilk scones?
You can make buttermilk scones in just 30 minutes using a foolproof technique. This includes preparation time for mixing ingredients, shaping the dough, and baking. The streamlined process makes them perfect for both elegant afternoon teas and casual morning treats.
What equipment do I need to make buttermilk scones?
Essential equipment includes a large mixing bowl, pastry cutter, baking sheet, digital kitchen scale, and measuring cups. Having the right tools ensures you achieve bakery-quality results every time. A cookie cutter is also helpful for shaping uniform scones.
Can I make buttermilk scones ahead of time?
Yes, you can prepare buttermilk scones in advance. Freeze unbaked shaped scones for up to one month, or refrigerate them for up to 24 hours before baking. Frozen scones can be baked directly from the freezer with slightly increased baking time.
Why is it important to use cold ingredients?
Cold ingredients, especially butter and buttermilk, are crucial for creating flaky, tender scones. Cold butter creates steam pockets during baking, resulting in the desired layered texture. Room temperature ingredients can lead to dense, heavy scones.
What temperature should I bake buttermilk scones?
Bake buttermilk scones at exactly 375°F (190°C). Use an oven thermometer to ensure accuracy, as proper temperature is essential for achieving golden brown scones with the perfect tender texture. Incorrect temperature can result in uneven baking.
How do I prevent my scones from becoming tough?
Avoid overmixing the dough and handle it gently throughout the process. Mix just until ingredients are combined, and use sharp cuts when shaping to promote even rising. Overworking the dough develops gluten, resulting in tough, dense scones.
What are some popular buttermilk scone variations?
Sweet variations include fresh blueberries, cranberries, chocolate chips, or spiced dates. Savory options feature cheddar cheese with herbs, sun-dried tomatoes, or bacon. Add these ingredients after mixing wet and dry components but before final shaping for even distribution.
How should I store leftover buttermilk scones?
Store fresh scones at room temperature for 2-3 days in an airtight container. For longer storage, refrigerate for up to one week or freeze for up to three months. Wrap individually or store in freezer bags to maintain quality.
What are the best serving suggestions for buttermilk scones?
Traditional pairings include butter and jam, clotted cream with fruit preserves, or lemon curd. Serve with tea or coffee for classic afternoon tea. Sweet scones pair well with honey or maple syrup, while savory versions complement soups or salads.


