We’ve all been there – craving something sweet and buttery but not wanting to spend hours in the kitchen. That’s where these easy shortbread cookies come to the rescue! With just three simple ingredients and minimal prep time, you’ll have a batch of melt-in-your-mouth cookies that taste like they came from a fancy bakery.
Shortbread originated in Scotland centuries ago and has remained a beloved treat for good reason. These cookies deliver that perfect balance of rich butter flavor and delicate crumbly texture that makes them absolutely irresistible. Whether you’re hosting a tea party or need a quick dessert for unexpected guests, they’re always a crowd-pleaser.
Ingredients
Our easy shortbread cookies require just three simple ingredients that you likely already have in your kitchen. We keep this recipe minimal yet incredibly effective for achieving that classic buttery shortbread flavor.
For the Basic Shortbread Cookies:
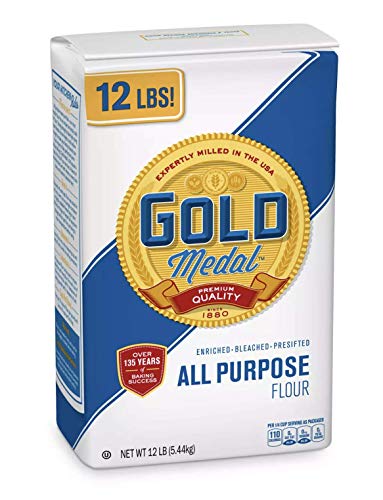
- 2 cups all-purpose flour
- 1 cup unsalted butter, softened at room temperature
- 1/2 cup powdered sugar
Optional Flavor Enhancements:
- 1 teaspoon vanilla extract
- 1/4 teaspoon salt
- 2 tablespoons cornstarch (for extra tender texture)
We recommend using high-quality unsalted butter since it serves as the star ingredient in these cookies. The butter should be soft enough to cream easily but not melted. Powdered sugar creates a more delicate texture than granulated sugar would provide. All-purpose flour gives us the perfect structure without making the cookies tough.
Room temperature butter is crucial for proper mixing. We suggest taking your butter out of the refrigerator about 30 minutes before baking. The vanilla extract adds subtle depth to the flavor profile while remaining optional for purists who prefer traditional shortbread taste.


Equipment Needed

Creating perfect shortbread cookies becomes effortless when we have the right tools at our disposal. We recommend gathering these essential items before beginning our baking adventure.
Stand Mixer or Electric Mixer serves as our primary mixing tool for achieving the ideal butter and sugar consistency. While a stand mixer offers the most convenience, an electric hand mixer works equally well for this recipe. Manual mixing remains an option though it requires more effort to achieve the proper texture.
Baking Sheet forms the foundation for our cookie baking process. We need at least one quality baking sheet to accommodate our shortbread portions during the baking phase.
Wire Rack provides the perfect cooling surface for our finished cookies. This essential tool allows proper air circulation around each cookie, preventing soggy bottoms and ensuring optimal texture.
Measuring Cups and Spoons ensure accuracy in our ingredient proportions. Precise measurements make the difference between good shortbread and exceptional shortbread cookies.
Rolling Pin helps us achieve uniform thickness when we choose to roll out our dough. This tool becomes particularly valuable when creating traditional rectangular shortbread shapes.
Several optional tools can enhance our shortbread making experience. Silicone Mat offers easy cookie removal and cleanup. Cookie Cutters or Cookie Stamps allow us to create decorative shapes and patterns. Embossed Rolling Pin adds beautiful textures to our cookie surfaces. Parchment Paper prevents sticking when rolling dough and can line our baking sheets. Bench Scraper assists with dough handling and workspace cleanup.
These tools work together to streamline our shortbread cookie process and deliver professional results in our home kitchen.


Instructions

Now that we have our ingredients and equipment ready, let’s walk through the simple process of making these delectable shortbread cookies. We’ll break down each step to ensure perfect results every time.
Prep the Dough
We begin by creaming together 1 cup of softened unsalted butter and ¾ cup of powdered sugar using an electric mixer until the mixture becomes smooth and light. This process typically takes 3 to 4 minutes and creates the foundation for our tender cookies.
Next, we whisk together 2 cups of all-purpose flour and 2 tablespoons of cornstarch in a separate bowl. We gradually add these dry ingredients to our butter mixture, mixing until everything is well combined and forms a cohesive dough.
Once our dough comes together, we shape it into a flat disc and wrap it tightly in plastic wrap. We then chill the dough in the refrigerator for at least one hour, which helps firm up the butter and makes the dough easier to handle.
Shape the Cookies
We remove our chilled dough from the refrigerator and place it on a lightly floured surface. Using a rolling pin, we roll the dough to approximately ⅛ to ¼ inch thick, maintaining even thickness throughout.
We use cookie cutters to cut our desired shapes, positioning the cuts as close together as possible to minimize waste. The dough should cut cleanly without sticking to our cutters.
After cutting our initial batch, we gather the remaining dough scraps and re-roll them to create additional cookies. We can repeat this process until we’ve used all our dough.
Bake the Cookies
We preheat our oven to 350°F (175°C) while we prepare our baking sheets. We line our baking sheets with parchment paper to prevent sticking and ensure easy removal.
We carefully transfer our cut cookies to the prepared baking sheets, spacing them about 2 inches apart to allow for slight spreading during baking. Each cookie should have adequate room around it for even heat circulation.
We bake our shortbread cookies for 9 to 11 minutes, watching for the edges to turn lightly golden brown. The centers should remain pale while the edges develop that telltale golden color that indicates they’re perfectly done.


Directions for Different Shortbread Variations

Now that we’ve covered the basic shortbread technique, let’s explore three popular methods to shape and bake these delicious cookies. Each variation offers its own unique presentation while maintaining that classic buttery flavor.
Classic Round Shortbread
We begin by preparing our dough using the traditional method of creaming room-temperature butter with granulated or confectioners’ sugar until the mixture becomes light and fluffy. Add vanilla extract or other desired extracts at this stage for enhanced flavor. Gradually incorporate the flour and salt (if using) until the dough just comes together without overmixing.
| Temperature | Time | Result |
|---|---|---|
| 325-350°F (160-175°C) | 12-15 minutes | Lightly golden edges |
Chill the dough if it feels too soft for easier handling. Roll portions of dough into uniform balls and place them on your prepared baking sheet. Gently flatten each ball with your fingers or the bottom of a glass to create the classic round shape. Bake at 325-350°F until the edges turn lightly golden while keeping the centers pale.
Shortbread Bars
Prepare the shortbread dough following our established method. Line your baking pan with parchment paper for easy removal later. Press the dough evenly into the prepared pan, creating a uniform layer approximately 1/2 inch thick throughout.
| Temperature | Time | Thickness |
|---|---|---|
| 325-350°F (160-175°C) | 25-30 minutes | 1/2 inch |
Bake the pressed dough for 25-30 minutes until the edges begin to brown nicely. Score the partially baked shortbread about halfway through the baking time to create clean cutting lines. Allow the bars to cool completely in the pan before cutting along the scored lines into squares or rectangular bars.
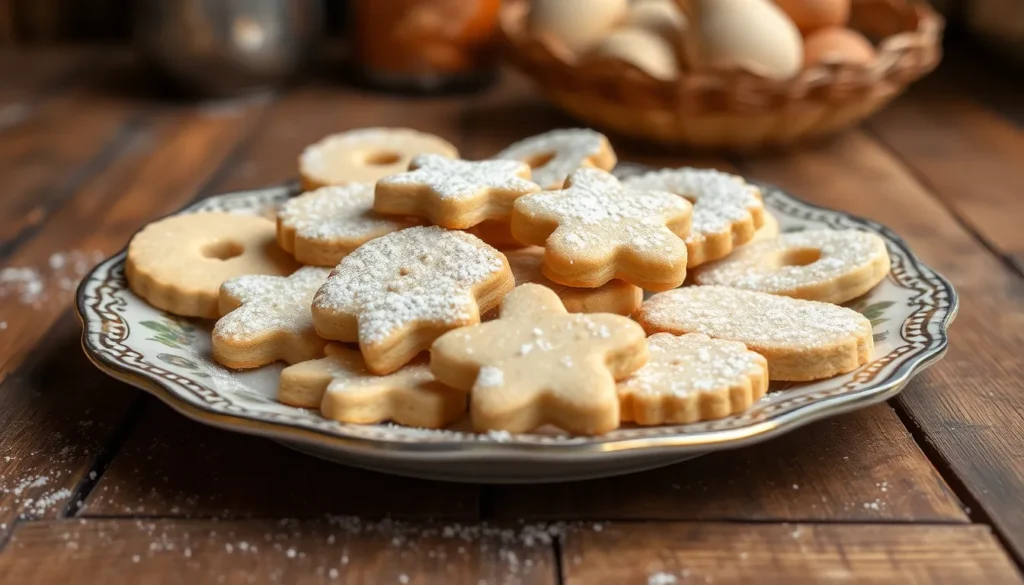
Cut-Out Shortbread Shapes
Create the dough using our standard technique and chill it until firm enough to roll without sticking. Lightly flour your work surface and rolling pin to prevent adhesion. Roll the chilled dough to approximately 1/4-inch thickness for optimal baking results.
| Thickness | Temperature | Time |
|---|---|---|
| 1/4 inch | 325-350°F (160-175°C) | 10-15 minutes |
Use cookie cutters to create your desired shapes, pressing firmly through the dough. Transfer the cut shapes to your prepared baking sheets, leaving space between each cookie. Bake for 10-15 minutes depending on the thickness, watching for lightly golden edges that indicate doneness.
We can enhance any of these variations with flavor additions like citrus zest, chopped nuts, dried fruit, chocolate chips, or warming spices such as cinnamon or cardamom. Consider finishing touches like brushing with melted chocolate, sprinkling with coarse sugar, or adding a pinch of flaky salt after baking for extra sophistication.


Storage Tips

Once we’ve baked our perfect shortbread cookies, proper storage ensures they maintain their delicious buttery flavor and crisp texture. These simple storage methods will keep our homemade treats fresh for days or even months.
Airtight Container Storage
We recommend storing shortbread cookies in airtight containers to preserve their freshness and prevent them from becoming stale. Our cookies will stay fresh on the counter for 5 to 7 days when stored properly in sealed containers. For extended freshness, we can refrigerate the containers, extending the shelf life up to 10 days.
Layer Separation Method
To prevent our cookies from sticking together or breaking, we should place waxed paper between each layer of cookies in the storage container. This simple step protects the delicate texture and prevents damage during storage.
Freezer Storage Options
We have two excellent freezing options for our shortbread cookies. After baking, we can freeze finished cookies for up to 3 months by placing them in freezer-safe containers at room temperature before transferring to the freezer. Alternatively, we can freeze the unbaked dough after rolling and cutting it into shapes. We recommend flash freezing the cut dough pieces on a cookie sheet first, then transferring them to an airtight container for long-term storage.
| Storage Method | Duration | Temperature |
|---|---|---|
| Counter (airtight container) | 5-7 days | Room temperature |
| Refrigerator (airtight container) | Up to 10 days | 35-40°F |
| Freezer (baked cookies) | Up to 3 months | 0°F |
| Freezer (unbaked dough) | Up to 3 months | 0°F |
These storage techniques ensure we can enjoy our homemade shortbread cookies whenever the craving strikes, whether we’re preparing them fresh or pulling them from our freezer stash.
Make-Ahead Instructions

Planning ahead transforms shortbread baking from a last minute scramble into a stress free experience. We recommend preparing the dough in advance to make entertaining or daily treats more manageable.
Chilling Dough Options
Our shortbread dough stores beautifully in the refrigerator for convenient baking throughout the week. Wrap the shaped dough disc tightly in plastic wrap and refrigerate for up to five days. The cold dough actually becomes easier to roll and cut after extended chilling time.
For longer storage we freeze the prepared dough for up to two months. Double wrap the dough in plastic wrap followed by aluminum foil to prevent freezer burn. When ready to bake thaw the frozen dough completely in the refrigerator overnight before rolling and cutting.
Pre-Cut Cookie Storage
We find that cutting cookies ahead of time saves precious minutes during busy baking sessions. Roll the chilled dough and cut into desired shapes then place the unbaked cookies on parchment lined baking sheets. Freeze the cut cookies for 30 minutes until firm then transfer to freezer bags for storage up to three months.
Bake frozen cut cookies directly from the freezer without thawing. Add an extra 1 to 2 minutes to the original baking time to ensure proper doneness.
Baked Cookie Storage
Completely cooled shortbread cookies maintain their crisp texture when stored properly at room temperature. We store our baked cookies in airtight containers for up to one week placing waxed paper between layers to prevent sticking.
| Storage Method | Duration | Temperature |
|---|---|---|
| Refrigerated dough | Up to 5 days | 35-40°F |
| Frozen dough | Up to 2 months | 0°F |
| Frozen cut cookies | Up to 3 months | 0°F |
| Baked cookies | Up to 1 week | Room temperature |
These make ahead strategies allow us to enjoy fresh homemade shortbread whenever cravings strike without the full preparation time commitment.


Troubleshooting Common Issues

Even with our simple three-ingredient recipe, occasional baking challenges can arise. We’ve identified the most common issues and their answers to help you achieve perfect shortbread every time.
Dough Too Crumbly
Shortbread dough naturally appears dry and crumbly initially, but working it with your hands often helps bind the ingredients together. When the dough still refuses to hold after gentle kneading, the water content in your butter or flour may be insufficient. We recommend adding a few teaspoons of water gradually until the mixture forms a cohesive dough.
Always ensure you’re using solid, cold butter rather than spreadable varieties, as these contain different fat ratios that affect dough consistency. Room temperature unsalted butter works best for our recipe, providing the proper texture without excess moisture that can alter the final product.
Cookies Spreading Too Much
Excessive spreading typically indicates your dough wasn’t sufficiently chilled before baking or contains too much butter relative to flour. We always chill our shaped dough for at least 30 minutes to an hour before placing it in the oven, which helps cookies maintain their intended shape during baking.
If spreading continues even though proper chilling, incorporate a little extra flour into your dough mixture. This additional flour helps absorb excess butter and provides more structure to prevent unwanted spreading during the baking process.
Cookies Not Golden Enough
Perfect shortbread displays a light golden color when properly baked, particularly around the edges. Pale cookies usually result from insufficient baking time or inadequate oven temperature. We ensure our oven reaches the full 350°F (175°C) before baking and continue until edges just begin turning golden.
Rotating the baking sheet halfway through the cooking process helps achieve even coloring, especially if your oven has hot spots. Stop baking immediately once the edges turn golden to prevent overbaking, which creates dry, crumbly shortbread rather than the desired tender texture.
| Issue | Cause | Solution |
|---|---|---|
| Dough too crumbly | Low water content, wrong butter type | Add water gradually, use solid cold butter |
| Cookies spread too much | Insufficient chilling, excess butter | Chill dough 30-60 minutes, add more flour |
| Not golden enough | Underbaking, low oven temperature | Bake longer, verify oven temperature |


Serving Suggestions

Our buttery shortbread cookies shine when paired thoughtfully with complementary flavors and beverages. We recommend serving these golden treats warm from the oven alongside a steaming cup of tea or freshly brewed coffee. The rich butter flavor creates a perfect harmony with both Earl Grey and robust dark roasts.
Fresh fruit transforms our simple cookies into an elegant dessert experience. We love arranging strawberries, raspberries, or sliced peaches on a platter with the shortbread for a delightful contrast of textures. The natural sweetness of seasonal fruit balances the buttery richness beautifully.
Chocolate enthusiasts will appreciate our favorite pairing suggestions. We often serve shortbread cookies with dark chocolate squares or drizzle melted chocolate over cooled cookies for an indulgent twist. White chocolate also creates a stunning visual presentation when contrasted against the golden cookie surface.
Creating sandwich cookies opens up endless flavor possibilities for special occasions. We fill two shortbread rounds with lemon curd for a tangy surprise or spread raspberry jam between cookies for a classic combination. Chocolate ganache or cream cheese frosting also work wonderfully as filling options.
Presentation elevates these humble cookies into something truly special. We arrange them on vintage cake stands or wooden serving boards for casual gatherings. Dusting with powdered sugar before serving adds an elegant finishing touch that guests always notice.
Holiday entertaining becomes effortless when we incorporate shortbread into dessert platters. These cookies pair beautifully with other traditional treats like sugar cookies and gingerbread. Their neutral flavor profile makes them versatile enough to complement any seasonal dessert spread without overwhelming other flavors.


Conclusion
These easy shortbread cookies prove that the best treats don’t require complicated techniques or endless ingredients. With just three basic components and simple steps we’ve shared you’ll create bakery-quality cookies that impress every time.
Whether you’re baking for a special occasion or satisfying a weeknight craving this foolproof recipe delivers consistent results. The make-ahead options and storage tips we’ve outlined ensure you can always have fresh shortbread ready when the mood strikes.
We’re confident that once you try this straightforward approach you’ll understand why shortbread has remained a beloved classic for centuries. The rich buttery flavor and melt-in-your-mouth texture make every bite worth the minimal effort required.
Frequently Asked Questions
What are the basic ingredients needed for shortbread cookies?
You only need three main ingredients: 2 cups all-purpose flour, 1 cup softened unsalted butter, and 1/2 cup powdered sugar. Optional ingredients include 1 teaspoon vanilla extract, 1/4 teaspoon salt, and 2 tablespoons cornstarch for extra tenderness. The key is using high-quality unsalted butter at room temperature for best results.
How long do shortbread cookies take to bake?
Shortbread cookies bake at 350°F (175°C) for 9 to 11 minutes. The edges should turn lightly golden while the centers remain pale. Avoid overbaking as this can make the cookies hard rather than maintaining their signature tender, crumbly texture.
How should I store shortbread cookies?
Store shortbread cookies in airtight containers at room temperature for 5-7 days or refrigerate for up to 10 days. Place waxed paper between layers to prevent sticking. For longer storage, freeze baked cookies for up to 3 months or freeze unbaked dough after cutting into shapes.
Can I make shortbread dough ahead of time?
Yes! Prepared dough can be refrigerated for up to 5 days or frozen for up to 2 months. Pre-cut cookies can be stored in the freezer for up to 3 months and baked directly without thawing, making it perfect for quick treats whenever you crave them.
What are the different ways to shape shortbread cookies?
There are three popular methods: Classic Round Shortbread (roll into balls and flatten), Shortbread Bars (press into pan and score), and Cut-Out Shortbread Shapes (roll dough and use cookie cutters). Each method maintains the buttery flavor while offering different presentations for various occasions.
Why is my shortbread dough too crumbly?
Crumbly dough usually means the butter wasn’t properly softened or there’s insufficient moisture. Ensure your butter is at room temperature before mixing. If the dough is still too dry, add a teaspoon of cold water gradually until it holds together without being sticky.
What equipment do I need to make shortbread cookies?
Essential equipment includes a stand mixer or electric mixer, baking sheets, wire rack, measuring cups and spoons, and a rolling pin. Optional tools like silicone mats, cookie cutters, and parchment paper can enhance your baking experience and improve results.
How can I enhance the flavor of basic shortbread?
Add 1 teaspoon vanilla extract to the basic recipe for depth. Other flavor enhancements include citrus zest, chopped nuts, or mini chocolate chips. You can also finish baked cookies with melted chocolate drizzle, coarse sugar, or powdered sugar dusting for extra appeal.


