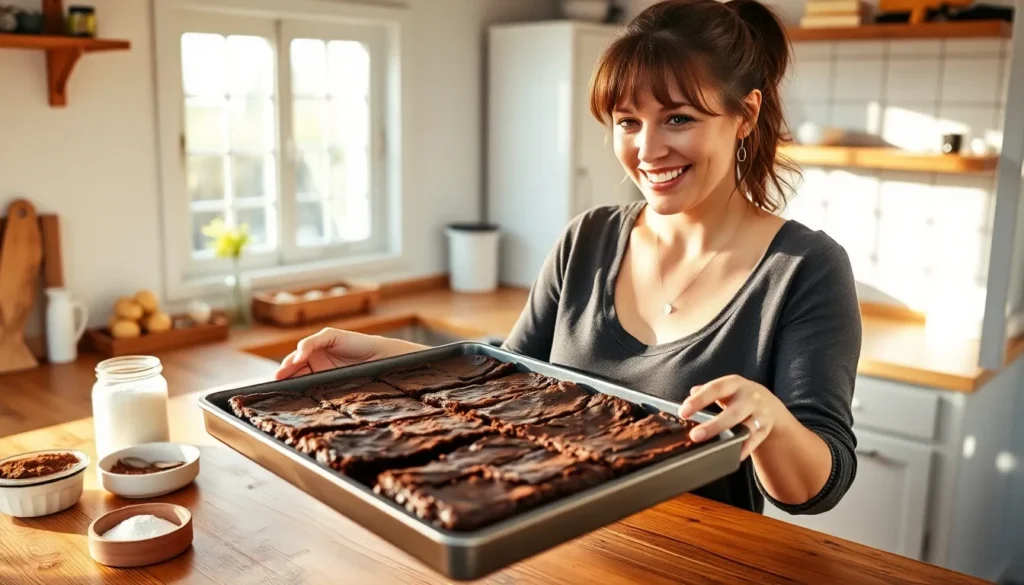
We’ve all been there – craving that perfect fudgy brownie but not wanting to make an entire 9×13 pan that’ll tempt us for days. That’s where these small batch brownies become your new best friend. These decadent squares deliver all the rich chocolate satisfaction you’re craving in a perfectly portioned recipe.
Our small batch brownie recipe creates just six generous squares that are ideal for couples, small families, or anyone practicing portion control without sacrificing flavor. We’ve perfected the balance of ingredients to ensure you get that coveted crispy top and gooey center that makes brownies irresistible.
What makes these brownies special isn’t just their size – it’s how quickly they come together. You’ll have warm, fresh-from-the-oven brownies ready in under an hour using ingredients you likely already have in your pantry. No mixer required and minimal cleanup means more time enjoying these chocolatey treats.
Equipment and Tools Needed
Creating these small batch brownies requires minimal equipment, making them accessible for any home baker. We recommend gathering all your tools before starting to ensure a smooth baking process.
Essential Baking Equipment:
- 8×8 inch square baking pan or 9×5 inch loaf pan
- Medium mixing bowl
- Wooden spoon or rubber spatula
- Measuring cups and spoons
- Wire cooling rack
Preparation Tools:
- Small saucepan for melting butter and chocolate
- Sharp knife for chopping chocolate (if using chocolate bars)
- Parchment paper or cooking spray for pan preparation
Optional but Helpful Items:
- Kitchen scale for precise measurements
- Offset spatula for spreading batter evenly
- Toothpick for testing doneness
We find that using a smaller pan creates the perfect thickness for these six generous squares. The 8×8 inch pan delivers our ideal brownie height while the 9×5 inch loaf pan works beautifully as an alternative. Either option ensures proper heat distribution for that coveted crispy top and fudgy center.
Most home kitchens already contain these basic tools. We intentionally designed this recipe to avoid mixers or specialized equipment, keeping the process simple and cleanup minimal. Your standard measuring tools and mixing bowl will handle this small batch perfectly, allowing you to focus on enjoying the baking experience rather than managing complicated equipment.


Ingredients

We keep our small batch brownie recipe simple with pantry staples that deliver maximum flavor. Our carefully tested ingredient list creates the perfect balance between fudgy centers and crispy tops in every batch.
Dry Ingredients:
- ¼ cup all-purpose flour
- ¼ cup unsweetened cocoa powder
- ¼ teaspoon salt
Wet Ingredients:
- 4 tablespoons unsalted butter, melted
- ½ cup granulated sugar
- ¼ cup packed light brown sugar
- 1 large egg
- ½ teaspoon vanilla extract
Mix-ins:
- ⅓ cup semisweet chocolate chips
We start with melted butter as our fat base, which creates that dense, fudgy texture we love in brownies. The combination of granulated and brown sugar adds sweetness while the brown sugar contributes extra moisture and chewiness. Our single egg binds everything together without making the brownies too cakey.
The flour to cocoa ratio is crucial for achieving the right consistency. We use equal parts flour and cocoa powder to maintain structure while maximizing chocolate flavor. A pinch of salt enhances all the other flavors and prevents the brownies from tasting flat.
Vanilla extract rounds out the flavor profile, while chocolate chips provide bursts of melted chocolate throughout each square. We prefer semisweet chips because they complement the cocoa powder without making the brownies overly sweet.
| Ingredient | Purpose | Key Benefit |
|---|---|---|
| Melted Butter | Moisture and richness | Creates fudgy texture |
| Sugar Blend | Sweetness and structure | Brown sugar adds chewiness |
| Single Egg | Binding agent | Prevents cake-like texture |
| Cocoa Powder | Chocolate flavor | Intense chocolate taste |
| Chocolate Chips | Texture contrast | Pockets of melted chocolate |


Instructions

Follow these simple steps to create perfectly fudgy small batch brownies with minimal effort and maximum flavor. We’ve designed this process to be straightforward and foolproof for bakers of all skill levels.
Prep the Pan and Oven
Position your oven rack in the center and preheat to 325°F for extra fudgy brownies or 350°F for a slightly firmer texture with more defined edges. Take your 8×4 inch or 9×5 inch loaf pan and line it completely with parchment paper, making sure the paper extends about 2 inches beyond the edges on all sides. This overhang creates convenient handles for lifting the finished brownies out of the pan without breaking them.
Mix the Wet Ingredients
Place the melted butter in a microwave-safe mixing bowl and add both granulated sugar and brown sugar. Whisk the mixture vigorously until the sugars are completely incorporated and the mixture appears smooth and glossy. Crack the egg directly into the bowl and add the vanilla extract, then whisk everything together until the mixture is uniform and no streaks remain.
Combine Dry Ingredients
Measure the all-purpose flour, cocoa powder, and salt into a separate small bowl. Use a whisk to blend these dry ingredients together thoroughly, breaking up any cocoa powder clumps and ensuring even distribution. This step prevents pockets of flour or cocoa from appearing in your finished brownies.
Create the Brownie Batter
Pour the dry ingredient mixture into the bowl containing your wet ingredients. Stir gently with a wooden spoon or rubber spatula until the flour mixture is just incorporated and no dry streaks remain visible. Avoid overmixing at this stage to maintain the tender texture. Fold in the chocolate chips or chunks evenly throughout the batter using gentle folding motions.
Bake the Brownies
Transfer the batter to your prepared pan and spread it evenly to the corners using your spatula. Place the pan in the preheated oven and bake for 23 to 36 minutes, checking for doneness by inserting a toothpick into the center. The toothpick should come out with a few moist crumbs clinging to it but no wet batter. Start checking at the 23-minute mark to prevent overbaking.
Cool and Cut
Remove the pan from the oven and place it on a wire cooling rack. Allow the brownies to cool completely in the pan for at least 1 hour before attempting to remove them. Use the parchment paper handles to lift the entire brownie block from the pan, then place it on a cutting board. Cut into 6 generous squares using a sharp knife, wiping the blade clean between cuts for neat edges.


Make-Ahead Instructions

Planning ahead for these small batch brownies offers excellent flexibility for busy schedules or spontaneous cravings. We can prepare these treats using two distinct methods that accommodate different timing needs.
Prepare Batter in Advance
Mixing the brownie batter up to one day before baking provides incredible convenience for time-pressed situations. We recommend combining all ingredients according to our standard recipe steps, then covering the bowl tightly with plastic wrap. The prepared batter stays fresh in the refrigerator for 24 hours, maintaining its optimal texture and flavor profile.
When ready to bake, we simply remove the chilled batter from the refrigerator and let it sit at room temperature for 10-15 minutes. This brief warming period ensures even baking and prevents temperature shock. The batter may appear slightly thicker after refrigeration, which actually helps create an even fudgier final product.
Bake and Store Method
Fully baked brownies store exceptionally well using proper techniques. We bake the brownies according to our recipe instructions, then allow them to cool completely in the pan before cutting. Complete cooling prevents the brownies from becoming soggy during storage and maintains their perfect texture.
| Storage Method | Duration | Container Type |
|---|---|---|
| Room Temperature | Up to 3 days | Airtight container |
| Refrigerated | Up to 1 week | Sealed container |
| Frozen | Up to 3 months | Freezer-safe container |
For optimal freshness, we cut the cooled brownies into individual squares before storing. Each square can be wrapped individually in plastic wrap for grab-and-go convenience. Room temperature storage works best for maintaining the ideal fudgy texture, while refrigeration extends shelf life for longer storage needs.
Frozen brownies thaw beautifully at room temperature within 30-60 minutes, returning to their original moist and chewy consistency. We find that wrapping individual squares in parchment paper before freezing prevents sticking and makes portioning effortless.


Storage Tips

We recommend keeping your small batch brownies fresh with these proven storage methods that maintain their fudgy texture and rich flavor.
Room Temperature Storage
Store uncut brownies directly in the pan for optimal freshness lasting up to 4 days. Cut brownies maintain their quality for 2 to 3 days when placed in an airtight container at room temperature. We find this method works best for immediate enjoyment while preserving the brownies’ signature texture.
Refrigeration Method
Refrigerate your brownies when you prefer an extra fudgy consistency or need storage for up to one week. This approach works particularly well if your brownies include toppings or mix-ins that require cold storage. The cooler temperature enhances the dense, chewy quality that makes these treats irresistible.
Freezing for Long Term Storage
Freeze sliced brownies in airtight bags or containers for storage lasting up to 3 months. We’ve discovered that freezing actually improves the brownie texture, creating an ultra-rich and chewy consistency that rivals freshly baked squares.
Essential Storage Guidelines
| Storage Method | Duration | Best For |
|---|---|---|
| Room Temperature (uncut) | Up to 4 days | Immediate consumption |
| Room Temperature (cut) | 2-3 days | Short-term storage |
| Refrigerated | Up to 1 week | Fudgier texture preference |
| Frozen | Up to 3 months | Long-term storage |
Avoid cutting brownies before storage whenever possible since uncut brownies stay fresh significantly longer than sliced ones. When you must store cut pieces, wrap individual slices or arrange them in a tight block formation to minimize air exposure.
Allow brownies to cool completely before storing to prevent moisture accumulation that leads to soggy textures. We always wait until our brownies reach room temperature before sealing them in containers or wrapping them for storage.
Serving Suggestions

These small batch brownies offer incredible versatility when it comes to presentation and pairing options. We love serving them as classic squares cut directly from the pan for a simple yet satisfying dessert that showcases their fudgy texture perfectly.
Classic Presentation
Cut your cooled brownies into generous squares or rectangles for the most traditional approach. This method highlights the beautiful contrast between the slightly crispy top and gooey center that makes these treats so irresistible.
Hot Beverage Pairings
Pair these rich brownies with your favorite hot beverages for an elevated dessert experience. Coffee creates a perfect balance with the chocolate’s intensity while hot chocolate doubles down on the cocoa flavor for ultimate indulgence.
Ice Cream Combinations
Transform your brownies into restaurant-quality desserts by adding ice cream. A scoop of vanilla ice cream provides a creamy contrast to the dense brownie texture while chocolate ice cream amplifies the chocolate experience for serious cocoa lovers.
Creative Ice Cream Sandwiches
Create brownie ice cream sandwiches by placing your favorite ice cream flavor between two brownie squares. Roll the edges in chopped nuts or colorful sprinkles to add extra texture and visual appeal that makes these treats perfect for special occasions.
Finishing Touches
Enhance your brownies with simple finishing touches that add both flavor and presentation value. A light dusting of powdered sugar creates an elegant appearance while a sprinkle of sea salt flakes provides a sophisticated flavor contrast that highlights the chocolate’s richness.
These serving suggestions work particularly well with our small batch recipe since the six generous squares provide just the right amount for intimate gatherings without overwhelming your guests with too many leftovers.


Recipe Variations

Our small batch brownie recipe serves as a perfect foundation for creating different textures and flavors to suit your preferences. Each variation maintains the same convenient small batch size while delivering distinct results.
Fudgy Small Batch Brownies
Fudgy brownies deliver a dense, moist, and intensely chocolaty texture that melts in your mouth. We achieve this rich consistency by increasing the fat content through melted butter and sometimes adding a touch of oil to the batter. The key lies in using less flour than traditional recipes and incorporating a blend of granulated and brown sugars for optimal moisture retention.
For the ultimate fudgy experience, we recommend melting chocolate directly into the batter rather than relying solely on cocoa powder. Dutch process cocoa powder works exceptionally well in this variation, creating a deeper chocolate flavor and darker color. The higher fat to flour ratio produces brownies with a super rich, almost truffle-like center that satisfies even the most intense chocolate cravings.
Chewy Small Batch Brownies
Chewy brownies offer a slightly cake-like structure while maintaining a soft, tender bite throughout. We create this texture by using more flour in the recipe and balancing the butter, sugar, and egg proportions carefully. This variation produces brownies that have more structure than fudgy versions without becoming overly dense or heavy.
The addition of chocolate chips or chunks enhances the chewy texture while providing bursts of melted chocolate in every bite. We find that the combination of ingredients creates a satisfying chew that holds together beautifully when cut into squares. These brownies maintain their texture well over several days, making them ideal for meal prep or gifting.
Add-In Options
Chocolate chips or chunks remain the most popular addition, folding seamlessly into our base recipe while creating pockets of melted chocolate throughout each square. We recommend using semisweet or dark chocolate varieties for the best flavor balance.
Nuts such as walnuts or pecans add delightful crunch and complement the rich chocolate base perfectly. Toast the nuts lightly before folding them into the batter for enhanced flavor and texture contrast.
Sea salt flakes sprinkled on top before or after baking create an irresistible salty-sweet combination that elevates the entire dessert. We suggest using flaky sea salt rather than table salt for the best flavor impact.
Espresso powder enhances the chocolate flavor without adding coffee taste when used in small amounts. Start with just 1/2 teaspoon for our small batch recipe.
Peanut butter or caramel swirls transform ordinary brownies into gourmet treats. Warm either ingredient slightly for easier swirling, then use a knife to create marble patterns through the batter before baking.


Troubleshooting Tips

Even with our foolproof small batch brownie recipe, we occasionally encounter issues that can affect the final result. Understanding common problems and their answers helps ensure perfect brownies every time.
Preventing Brownies from Sinking
Over-mixing ranks as the most frequent culprit behind sunken brownies. We recommend whisking eggs with an electric beater but mixing all other ingredients by hand using a spatula. Hand blenders should never be used for the entire batter as they create too much agitation.
Excessive flour or leavening agents also cause brownies to collapse. We measure our ingredients precisely and avoid adding extra flour even if the batter seems thin. Our recipe balances ingredients specifically for proper rise and texture.
Achieving Perfect Doneness
Determining when brownies are perfectly baked requires attention to visual and tactile cues. The top should appear dry without any wet spots or excessive shine. We insert a toothpick into the center and look for moist crumbs rather than wet batter or completely clean results.
| Temperature | Baking Time | Doneness Test |
|---|---|---|
| 325°F | 23 minutes | Toothpick with moist crumbs |
| Overcooked | Beyond 25 minutes | Dry and crumbly texture |
| Undercooked | Less than 20 minutes | Wet batter on toothpick |
Temperature Control Answers
Overheating the butter and sugar mixture can scramble eggs when added too quickly. We allow the melted mixture to cool slightly before incorporating eggs to maintain smooth texture.
Baking at moderate temperatures around 325°F produces the most consistent results. Higher temperatures cook the edges too quickly while leaving centers underdone.
Mixing Technique Corrections
Proper mixing technique prevents tough or dense brownies. We fold flour into the wet ingredients using gentle motions until just combined. Streaks of flour should disappear without aggressive stirring.
Salt and vanilla get whisked into the warm butter mixture first to distribute evenly throughout the batter. This method prevents pockets of concentrated flavoring that can create uneven taste.
Quick Fixes for Common Problems
Dry brownies often result from overbaking or too much flour. We check doneness two minutes before the recommended time and adjust accordingly. Adding an extra tablespoon of melted butter to the batter can compensate for slightly dry conditions.
Brownies that stick to the pan indicate insufficient greasing or premature removal. We line our pans with parchment paper and allow complete cooling before lifting out the brownies using the paper overhang.
Conclusion
We’ve shown you how to create the perfect small batch brownies that satisfy your chocolate cravings without the commitment of a full pan. These six-square treats offer the ideal solution for portion control while delivering that coveted fudgy texture we all love.
The beauty of this recipe lies in its simplicity and flexibility. Whether you’re making them for a cozy night in or preparing them ahead for unexpected guests these brownies adapt to your schedule and preferences.
With minimal cleanup and maximum flavor these small batch brownies prove that good things really do come in smaller packages. Now you can enjoy fresh homemade brownies whenever the craving strikes without any guilt or waste.
Frequently Asked Questions
How many brownies does this small batch recipe make?
This small batch brownie recipe yields 6 generous squares, making it perfect for couples or small families. The recipe is specifically designed to provide just the right amount of brownies without the temptation of having a large pan sitting around.
What pan size should I use for these small batch brownies?
Use an 8×8 inch square baking pan or a 9×5 inch loaf pan. The smaller pan size is essential for achieving the perfect thickness and proper heat distribution, which creates the ideal texture with a crispy top and gooey center.
Do I need any special equipment to make these brownies?
No special equipment is required. You only need basic items: an 8×8 inch baking pan, a medium mixing bowl, and standard measuring tools. No mixer is needed, making this recipe accessible for any home baker with minimal cleanup required.
How long does it take to make these brownies?
These brownies can be prepared and baked in under an hour. The recipe is designed for quick preparation using common pantry ingredients, allowing you to satisfy your brownie craving without a lengthy time commitment.
Can I make the brownie batter ahead of time?
Yes, you can mix the batter up to a day ahead and store it in the refrigerator. Alternatively, you can bake the brownies and store them afterward. This flexibility makes it convenient for planned occasions or spontaneous cravings.
How should I store leftover brownies?
Store uncut brownies directly in the pan for up to 4 days at room temperature. Cut brownies last 2-3 days in an airtight container. For fudgier texture, refrigerate for up to a week. For long-term storage, freeze sliced brownies for up to 3 months.
What ingredients do I need for this recipe?
You’ll need pantry staples: all-purpose flour, cocoa powder, salt, melted butter, granulated sugar, brown sugar, one egg, vanilla extract, and semisweet chocolate chips. The recipe uses common ingredients that deliver maximum flavor and the perfect fudgy texture.
How do I know when the brownies are done baking?
Check for doneness by inserting a toothpick into the center. It should come out with a few moist crumbs attached, not completely clean. The top should look set and slightly cracked, indicating the perfect balance between fudgy center and crispy top.
Can I customize this brownie recipe?
Absolutely! You can create fudgier brownies by increasing fat content, or chewier versions by adjusting flour ratios. Add-ins like nuts, sea salt flakes, espresso powder, or swirls of peanut butter and caramel work well while maintaining the small batch size.
What are the best ways to serve these brownies?
Cut cooled brownies into squares for classic presentation. Pair with hot coffee or chocolate, add ice cream for a restaurant-quality dessert, or create brownie ice cream sandwiches. Simple touches like powdered sugar or sea salt flakes enhance flavor and presentation.


