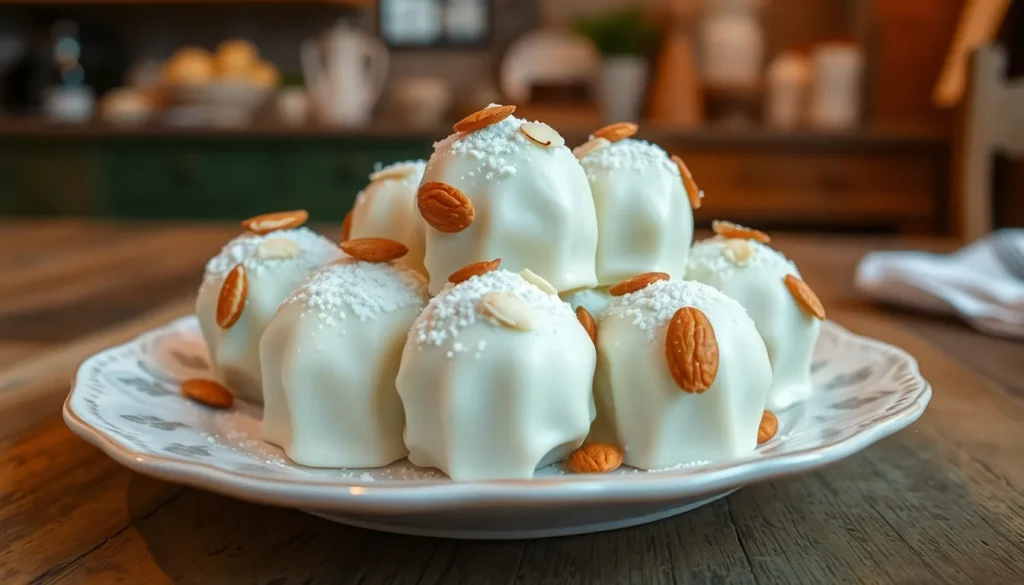
We’ve all experienced that moment when we bite into a perfectly crafted white chocolate truffle – the smooth exterior gives way to a luxuriously creamy center that melts on our tongue. These elegant confections aren’t just desserts; they’re little spheres of pure indulgence that transform any occasion into something special.
White chocolate truffles have captivated dessert lovers for generations with their delicate sweetness and velvety texture. Unlike their dark chocolate counterparts, these pale beauties offer a subtle vanilla-forward flavor that’s both sophisticated and comforting. We love how they strike the perfect balance between rich and light.
The best part? Creating these bakery-quality treats at home is surprisingly simple. With just a handful of premium ingredients and our foolproof technique, you’ll be rolling out professional-looking truffles that rival those from high-end chocolatiers. Let’s jump into making these irresistible white chocolate gems that’ll have everyone asking for your secret recipe.
Ingredients
Our white chocolate truffles require just a handful of premium ingredients to create these luxurious confections. We carefully selected each component to ensure the perfect balance of flavor and texture.
For the Truffle Centers
- 8 ounces high-quality white chocolate, finely chopped
- 1/3 cup heavy cream (35% fat content)
- 2 tablespoons unsalted butter, room temperature
- 1 teaspoon pure vanilla extract
- 1/8 teaspoon fine sea salt
For the White Chocolate Coating
- 12 ounces white chocolate chips or chopped white chocolate
- 2 tablespoons coconut oil or vegetable shortening
- Food-grade white chocolate coloring (optional for extra brightness)
Optional Toppings and Decorations
- 1/2 cup powdered sugar for dusting
- 1/4 cup unsweetened cocoa powder
- 1/3 cup finely chopped toasted almonds
- 2 tablespoons freeze-dried raspberry powder
- Edible gold leaf flakes
- White chocolate shavings
- Colored sprinkles or nonpareils
- Crushed freeze-dried strawberries


Equipment Needed

Making white chocolate truffles requires exact tools that ensure smooth preparation and professional-looking results. We recommend gathering all equipment before starting to streamline the truffle-making process.
Essential Mixing Equipment
- Medium mixing bowl for combining white chocolate and cream
- Microwave-safe bowl or double boiler setup for melting chocolate safely
- Whisk or silicone spatula for achieving smooth ganache consistency
Shaping and Portioning Tools
- Mini ice cream scoop or melon baller for uniform truffle sizes
- Small spoon as an alternative portioning tool
- Clean kitchen towel for wiping hands during rolling
Preparation and Storage Surfaces
- Large cookie sheet lined with parchment paper
- Additional parchment paper sheets for coating stations
- Airtight containers for proper truffle storage
Temperature Control Equipment
- Refrigerator space for chilling ganache and finished truffles
- Digital thermometer for monitoring chocolate temperature (optional but helpful)
| Equipment Category | Essential Items | Optional Upgrades |
|---|---|---|
| Mixing | Medium bowl, whisk | Stand mixer with paddle |
| Shaping | Mini scoop, spoon | Professional truffle scoop |
| Storage | Parchment paper, containers | Silicone molds, gift boxes |
Our equipment list focuses on accessibility while maintaining professional results. Most home kitchens already contain these basic tools. The mini ice cream scoop creates consistently sized truffles that look professionally crafted. Parchment paper prevents sticking and makes cleanup effortless. Quality storage containers preserve the truffles’ texture and flavor for up to two weeks in the refrigerator.


Instructions

We’ll create these luxurious white chocolate truffles through a straightforward process that transforms simple ingredients into elegant confections. Our step-by-step approach ensures professional results every time.
Prep the Workspace
We begin by gathering all necessary ingredients and tools on our clean work surface. Our medium mixing bowl, microwave-safe bowl, whisk, and mini ice cream scoop should be within easy reach. We line a large baking sheet with parchment paper for the truffle shaping and setting stages. Room temperature ingredients work best, so we remove our heavy cream and butter from the refrigerator about 30 minutes before starting.
Make the Ganache Center
Stovetop Method
We heat the heavy cream in a medium saucepan over medium heat until small bubbles form around the edges and it begins to simmer. Next, we pour the hot cream over our chopped white chocolate in the mixing bowl. We let the mixture sit for 2 minutes, then stir gently from the center outward until the chocolate melts completely and the ganache becomes smooth and creamy. If any chocolate pieces remain, we microwave the mixture in 15-second intervals, stirring between each heating.
Microwave Method
We combine the white chocolate and heavy cream in our microwave-safe bowl. Our microwave heats the mixture at 30-second intervals on medium power. We stir thoroughly between each heating session to prevent burning and ensure even melting. The ganache reaches perfect consistency when it appears glossy and smooth.
We whisk in the softened butter, vanilla extract, and fine sea salt until the mixture becomes silky and well combined.
Chill the Ganache
We cover the ganache with plastic wrap, pressing it directly onto the surface to prevent a skin from forming. Our refrigerator chills the mixture for exactly 2 hours until it firms to a scoopable consistency. The ganache should hold its shape when stirred but remain pliable enough to roll into balls.
Shape the Truffles
We use our mini ice cream scoop or melon baller to portion the chilled ganache into uniform pieces. Each truffle should measure approximately 1 tablespoon of ganache. Our hands roll each portion into smooth, round balls, working quickly to prevent melting from body heat. We place the shaped truffles on our parchment-lined baking sheet, spacing them about 1 inch apart. The refrigerator firms the truffles for an additional 20 minutes while we prepare the coating.
Melt the White Chocolate
We chop our coating white chocolate into small, uniform pieces for even melting. Our double boiler method involves simmering water in the bottom pan while the chocolate melts gently in the top bowl, stirring frequently. Alternatively, we microwave the chocolate in 30-second intervals at 50% power, stirring between each session until completely smooth. The chocolate should feel warm but not hot when we test it on our wrist.
Coat the Truffles
We work with one truffle at a time, dropping it into the melted white chocolate. Our fork lifts the coated truffle, allowing excess chocolate to drip back into the bowl. We gently tap the fork against the bowl’s edge to remove additional coating before transferring the truffle to our parchment paper. Each coated truffle needs space to set without touching its neighbors.
Add Finishing Touches
We apply our chosen toppings while the chocolate coating remains wet for proper adhesion. Sprinkles, chopped nuts, or cocoa powder dust create beautiful presentations when applied immediately after coating. Our finished truffles set at room temperature for 15 minutes before we transfer them to an airtight container. Refrigerated storage maintains their texture and flavor for up to two weeks.


Make-Ahead Instructions

Planning ahead transforms truffle making into a stress-free experience that delivers professional results. We recommend preparing these luxurious treats in stages to maximize flavor development and ensure optimal texture.
Prepare the Ganache Base
Start by making the ganache mixture up to 3 days before you plan to serve the truffles. Follow our standard preparation method for melting the white chocolate with heavy cream and incorporating the butter, vanilla extract, and sea salt. Allow the ganache to cool completely at room temperature before transferring it to an airtight container.
Refrigerate the ganache for at least 2 hours or overnight to achieve the perfect consistency for shaping. The extended chilling time actually improves the flavor as the ingredients meld together beautifully.
Shape and Store Uncoated Truffles
We find that shaping the truffles a day ahead creates the most uniform results. Use your mini ice cream scoop or melon baller to form the ganache into balls and place them on parchment-lined baking sheets. Cover the shaped truffles with plastic wrap and refrigerate for up to 2 days before coating.
Freezing for Extended Storage
Truffles freeze exceptionally well for longer storage periods. Place the shaped uncoated truffles in a single layer on baking sheets and freeze until solid. Transfer the frozen truffles to freezer-safe containers with parchment paper between layers.
| Storage Method | Duration | Best Practices |
|---|---|---|
| Refrigerated ganache | Up to 3 days | Airtight container |
| Shaped uncoated truffles | Up to 2 days | Covered with plastic wrap |
| Frozen uncoated truffles | Up to 3 months | Single layer freezing first |
| Completed truffles | Up to 2 weeks | Airtight container in refrigerator |
Final Assembly Timeline
Plan to coat and finish your truffles on the day you intend to serve them for the best appearance and texture. Remove frozen truffles from the freezer 30 minutes before coating to allow them to reach the ideal temperature for dipping. The white chocolate coating adheres better to slightly chilled rather than frozen centers.
Store completed truffles in airtight containers in the refrigerator where they maintain their quality for up to 2 weeks. The make-ahead approach ensures we can enjoy these elegant confections whenever the occasion calls for something truly special.


Storage Tips

We need to store our white chocolate truffles properly to maintain their delicate texture and rich flavor. Airtight containers serve as our first line of defense against moisture and unwanted odors that can compromise the quality of our handcrafted treats.
Temperature Considerations
Room temperature storage works well when ambient temperatures stay below 68°F (20°C). We should refrigerate our truffles in airtight containers once temperatures rise above this threshold. Refrigerated white chocolate truffles maintain their peak quality for up to 3 weeks.
Long-Term Storage Options
Freezing extends storage life significantly for our white chocolate creations. We can freeze truffles for up to 3 months while preserving their taste and texture. This method proves especially valuable when we make large batches ahead of special occasions.
| Storage Method | Duration | Temperature |
|---|---|---|
| Room Temperature | 1-2 weeks | Below 68°F |
| Refrigerated | 3 weeks | 35-40°F |
| Frozen | 3 months | 0°F |
Moisture Control Techniques
We must wrap containers tightly to prevent condensation from forming on our truffles. Slow defrosting in the refrigerator helps us avoid moisture damage when transitioning from frozen storage. Temperature transitions require patience for optimal results.
Proper Thawing Process
Moving truffles from freezer to refrigerator requires a 24-hour settling period. We should then allow them to reach room temperature before unwrapping to prevent texture issues. This gradual process protects the delicate structure of our white chocolate coating.
Odor Protection
White chocolate absorbs surrounding odors easily, so we store our truffles away from strong-smelling foods. Sealed containers create a barrier that preserves the pure vanilla notes and creamy sweetness we worked to achieve.
Serving Preparation
We always bring refrigerated or frozen truffles to room temperature before serving. This final step ensures our guests experience the smooth texture and full flavor profile that makes these confections truly special.


Serving Suggestions

White chocolate truffles shine brightest when paired thoughtfully with complementary flavors and textures. We recommend serving these elegant confections alongside a steaming cup of coffee for the perfect afternoon indulgence. The rich bitterness of coffee creates a beautiful contrast against the sweet vanilla notes of white chocolate.
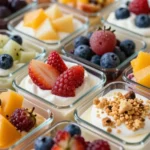
Fresh berries make an exceptional accompaniment to our homemade truffles. Strawberries, raspberries, and blueberries provide a bright burst of acidity that balances the creamy richness. We love arranging colorful berries around a platter of truffles for both visual appeal and flavor contrast.
A light dusting of powdered sugar adds a classic finishing touch that enhances presentation. This simple garnish creates an elegant appearance while providing a subtle textural element. We find that powdered sugar works particularly well when serving truffles at formal gatherings or special occasions.
For those seeking extra indulgence, a dollop of freshly whipped cream transforms these treats into a restaurant-quality dessert. The airy texture of whipped cream complements the dense ganache center perfectly. Vanilla-infused whipped cream works especially well with white chocolate’s delicate flavor profile.
Other fruits beyond berries create delightful pairings with white chocolate truffles. Fresh figs offer a sophisticated Mediterranean touch, while physalis adds an exotic element that offsets the sweetness beautifully. We recommend selecting seasonal fruits that provide natural acidity to balance the rich chocolate coating.
| Pairing Option | Flavor Profile | Best Occasion |
|---|---|---|
| Hot Coffee | Bitter contrast | Afternoon treat |
| Fresh Berries | Bright acidity | Casual entertaining |
| Powdered Sugar | Classic elegance | Formal events |
| Whipped Cream | Extra richness | Special desserts |
| Seasonal Fruits | Natural balance | Sophisticated gatherings |
These serving suggestions ensure your white chocolate truffles become the centerpiece of any dessert presentation. Each pairing enhances different aspects of the truffle’s complex flavor while creating memorable taste experiences for your guests.


Troubleshooting Common Issues

Even experienced home chocolatiers encounter challenges when making white chocolate truffles. We’ve identified the most common problems and their answers to help you achieve perfect results every time.
Ganache Too Soft
Problem: Your ganache mixture feels too liquid or won’t hold its shape when scooped.
Primary Cause: Excessive cream or liquid in the ganache mixture creates a soft texture that prevents proper truffle formation.
Answers:
- Add more white chocolate to the ganache gradually while stirring to thicken the consistency
- Heat the mixture gently over low heat while stirring continuously to evaporate excess moisture
- Refrigerate the ganache for an additional 30-60 minutes to firm up the texture
White Chocolate Seizing
Problem: Your white chocolate becomes grainy thick and unusable instead of smooth and melted.
Primary Cause: White chocolate seizes when it overheats or comes into contact with moisture during the melting process.
Prevention & Answers:
- Keep the temperature below 110°F when melting white chocolate
- Ensure all bowls and utensils are completely dry before use
- Avoid getting any water or steam into the chocolate during heating
- If seizing occurs add a small amount of neutral oil (like vegetable oil) and stir gently to restore smoothness
Uneven Coating
Problem: Your truffle coating appears streaky blotchy or doesn’t adhere properly to the ganache centers.
Primary Causes: Inadequate tempering of the coating chocolate or improper cooling of the truffles before coating creates adhesion issues.
Answers:
- Chill your shaped truffles in the refrigerator for at least 2 hours before coating
- Use a thermometer to achieve proper tempering temperature for the coating chocolate
- Work quickly when dipping truffles to prevent the coating from cooling too rapidly
- Ensure the coating chocolate maintains a consistent temperature throughout the process
| Storage Method | Temperature | Duration |
|---|---|---|
| Room Temperature | Below 68°F | 1-2 weeks |
| Refrigerated | 35-40°F | Up to 3 weeks |
| Frozen | 0°F | Up to 3 months |
White chocolate requires more careful handling due to its delicate composition compared to dark chocolate. Allow your ganache to set in the refrigerator for at least 2 hours before shaping to ensure the proper consistency for successful truffle making.


Flavor Variations

We can transform our basic white chocolate truffle recipe into exciting flavor combinations that elevate these elegant confections. These variations add depth and complexity while maintaining the luxurious texture we love.
Vanilla Bean White Chocolate Truffles
We enhance our truffles by incorporating vanilla bean extract or scraping fresh vanilla bean seeds directly into the white chocolate mixture. The vanilla bean paste provides a subtle sweet flavor that complements the natural vanilla notes in white chocolate. We add 1 teaspoon of vanilla bean extract or the seeds from half a vanilla bean to our ganache base while it’s still warm. These truffles develop a more sophisticated flavor profile with tiny black specks throughout the creamy center. Rolling the finished truffles in vanilla powder creates an elegant appearance that hints at the luxurious flavor within.
Lemon White Chocolate Truffles
We create a refreshing and tangy taste by adding fresh lemon zest and pure lemon extract to our mixture. The bright citrus notes provide a delightful contrast to the rich white chocolate base. We incorporate 2 tablespoons of fresh lemon zest and 1 teaspoon of lemon extract into our warm ganache for optimal flavor distribution. These truffles offer a perfect balance between sweet and tart that awakens the palate. We finish these truffles with a light dusting of powdered sugar or roll them in finely chopped candied lemon peel for an extra burst of citrus flavor.
Coconut White Chocolate Truffles
We incorporate unsweetened shredded coconut into our mixture to create truffles with tropical flavor and texture. The coconut adds natural sweetness and a pleasant chewiness that contrasts beautifully with the smooth ganache. We fold 1/2 cup of finely shredded unsweetened coconut into our cooled ganache before shaping. These truffles get their finishing touch when we coat them with additional coconut flakes after the white chocolate coating sets. The double layer of coconut creates both visual appeal and intensified tropical flavor. Toasting the coconut coating lightly beforehand adds a subtle nutty depth that enhances the overall taste experience.


Conclusion
White chocolate truffles offer the perfect balance of elegance and indulgence that we can all achieve in our own kitchens. With just a few quality ingredients and simple techniques we’ve outlined you’ll create professional-quality confections that rival any chocolatier.
Whether you’re preparing them for a special celebration or treating yourself to something luxurious these truffles deliver every time. The versatility in flavors and make-ahead options means we can customize them to suit any occasion or dietary preference.
Start with our basic recipe then experiment with the exciting variations we’ve shared. Your friends and family will be amazed by these restaurant-quality treats that showcase your culinary skills and attention to detail.
Frequently Asked Questions
What makes white chocolate truffles different from dark chocolate ones?
White chocolate truffles offer a delicate sweetness and sophisticated vanilla flavor that sets them apart from dark chocolate varieties. They have a smooth, creamy texture with a luxurious mouthfeel. The absence of cocoa solids gives them a milder, more subtle taste profile that appeals to those who prefer less intense chocolate flavors.
How difficult is it to make white chocolate truffles at home?
Making white chocolate truffles at home is surprisingly easy and requires only a few premium ingredients and basic kitchen tools. The process involves simple techniques like melting chocolate, making ganache, and shaping. With proper guidance, home cooks can achieve professional-quality results that rival those from chocolatiers.
What ingredients do I need to make white chocolate truffles?
Essential ingredients include high-quality white chocolate, heavy cream, unsalted butter, vanilla extract, and fine sea salt for the centers. For coating, you’ll need additional white chocolate. Optional toppings include powdered sugar, cocoa powder, toasted almonds, and edible decorations to enhance flavor and presentation.
What equipment is necessary for making white chocolate truffles?
Basic equipment includes a medium mixing bowl, microwave-safe bowl or double boiler, whisk or silicone spatula, mini ice cream scoop, and parchment paper. Optional upgrades include a stand mixer and professional truffle scoop. Most home kitchens already contain the necessary tools for successful truffle making.
How long do homemade white chocolate truffles last?
When stored properly in airtight containers, white chocolate truffles last 1-2 weeks at room temperature (below 68°F), up to 3 weeks refrigerated, and up to 3 months frozen. Proper storage protects against moisture and odors while maintaining their delicate texture and rich flavor.
Can I make white chocolate truffles ahead of time?
Yes, truffles are perfect for make-ahead preparation. Ganache can be prepared up to three days in advance, and shaped truffles can be made a day ahead. Store uncoated truffles in the refrigerator or freezer, then coat and finish on the day of serving for best appearance and texture.
How should I store white chocolate truffles?
Store truffles in airtight containers to protect against moisture and odors. Keep them at room temperature below 68°F, refrigerated, or frozen depending on your timeline. Allow refrigerated or frozen truffles to come to room temperature before serving for optimal taste and texture.
What are the best serving suggestions for white chocolate truffles?
Pair white chocolate truffles with hot coffee for delightful contrast, fresh berries for acidity balance, or dust with powdered sugar for elegance. Consider serving with whipped cream for indulgence or seasonal fruits like figs and physalis to balance sweetness and create memorable dessert experiences.
What should I do if my ganache is too soft?
If ganache is too soft, chill it longer in the refrigerator until it reaches a scoopable consistency. Alternatively, you can add more melted white chocolate to thicken it. Ensure proper ratios of cream to chocolate, and avoid overheating during preparation to maintain the right texture.
What flavor variations can I make with white chocolate truffles?
Popular variations include Vanilla Bean (using vanilla bean extract), Lemon (adding fresh lemon zest), and Coconut (incorporating shredded coconut). These variations enhance the truffles’ flavor profile while maintaining their luxurious texture, providing creative options for different occasions and taste preferences.